Build your own home media center: Get started with Kodi
Want to build one PC to rule all your living room media needs? Meet Kodi! In part one of this series we show you how to set up the media player software formerly known as XBMC.


Craig Simms Special to CNET News
Craig was sucked into the endless vortex of tech at an early age, only to be spat back out babbling things like "phase-locked-loop crystal oscillators!". Mostly this receives a pat on the head from the listener, followed closely by a question about what laptop they should buy.
6 min read

Setting up your own media center PC is a highly personal, quite in-depth task. For this How To, we'll give a basic introduction to Kodi, and talk about how the software provides a simple solution for your media center PC's player needs.
Kodi (formerly known as XBMC) is media player software that can play most video and music file types and other digital media both saved locally and found on the Internet. It's a one-stop-shop for all your entertainment needs once you get it set up right. It takes a little tinkering to get it running, but once you do it'll be smarter than any smart TV on the market.
The software is highly customisable to suit your particular media center needs, and it works with Windows, Linux, OS X, Android, iOS, Raspberry Pi and more, making it flexible no matter what computer you're basing your media center on.
We'll be using the Windows version of the install in this article, although much of the advice is universal once the Kodi software itself is loaded.
Hardware Choices
What's a media center without hardware? Kodi scales surprisingly well, and what you intend to do with it will greatly influence what hardware you'll need.
You're free to use pretty much any computer you choose, from an old, re-purposed beige tower to an off-the-shelf Mac Mini.
No matter what base you build up from, you should keep an eye out for the following:
- HDMI port
- A hard drive (or NAS or external drive if your computer doesn't have a hard drive
- Optical drives (for DVD and Blu-ray)
- USB tuners
- USB optical drives
- High-end graphics card and sound card
Regardless of which path you choose, try to run your operating system off a Solid State Drive. It makes a world of difference in making your media center feel like a responsive appliance rather than a PC pretending to be something else.
Preparing your media center for power
Most remotes, mice and keyboards will start up a media center that's hibernated or suspended with a single keypress. If you want to start a PC that's in a completely off state though, that generally requires extra hardware. With this in mind, you may wish to set your PC to hibernate instead of shut down when you press the power button.
To do this in Windows 7, open the start menu, type Power Options and open the program of the same name. For Windows 8.1, right click on the Windows button at the bottom left and choose Power Options.
In the window that appears, under your current power plan click Change plan settings, then Change advanced power settings to bring up a new dialog box. Head to the Power buttons and lid option, expand it, expand Power button action and change it to hibernate or sleep.
Before you close the dialog, there's one other change you can make -- upon resuming from any form of suspension, Windows is set by default to show a lock screen, whether you have a password or not for the current account. To turn this off and maintain the illusion of a media appliance, we'll first need to activate the option by clicking on Change settings that are currently unavailable, then change Require a password on wake-up to no.

Watch this: The universal remote for a select few
Installing and Configuring Kodi
To the software itself! Download Kodi, install it and run it for the first time. First, we'll want to set up our hardware to make sure everything is running as it should.
- Step 1: Navigate to System, then select System again from the options on the left.
- Step 2: At the bottom of the screen you'll see something that says Settings level; set it to Expert so everything is exposed.
- Step 3: Head to the Video output menu and select Video calibration. Here you can ensure your video is being displayed on your TV in the intended way, adjusting for distortion, overscan, and setting the height of your subtitles.
- Step 4: If you've connected over HDMI and haven't got any audio, Kodi may have the wrong audio device set. Head to Audio output, and change your Audio output device from Directsound: Default to an entry containing HDMI, and hopefully it should resolve the problem. Here you can also set how many speakers you have from the Number of channels option.
- Step 5: If you'd like the latest weather, head to the Weather option and select Service for weather information. Hit the Get More button, then select your weather plugin of choice. We find Yahoo works particularly well. Once the plugin is installed, return to the weather page, select your chosen weather service, then go into Settings and select Location 1. From here you'll be able to enter your nearest town for localized weather updates.
- Step 6: Head to back to the main settings menu, then to Appearance. Under the Internationalsection, set your Region for localized time, temperature and date formatting.
- Step 7: Note there's a Screensaver setting here too. Kodi has its own set of screensavers, so if it will be the main application you're running, you may wish to turn the Windows screensaver off and customize here instead
The rest of the settings are highly dependent on your personal needs, and we recommend you spend quite some time exploring what's available.
Banishing Windows
You can launch your machine directly into Kodi using the excellent KodiLauncher. Setting it as the Windows Shell ensures you never so much as hear the Windows startup sound, Explorer not loading until you exit Kodi.
Take in mind if you choose this path, you will have specify helper applications like AnyDVD HD or Virtual CloneDrive to load separately through the External applications settings in KodiLauncher, and select Start First/Second/Third Group Applications with KodiLauncher -- they will no longer autostart otherwise.
Controlling your media center
Here the options are legion, and much like the type of computer you're using, it comes down to preference and needs.
Basics
We'd suggest at least a good wireless, backlit keyboard (like the Logitech K810 ), for when you really need to troubleshoot or do Windows work.
You'll also want a wireless pointing device: A trackpad is fine if you only intend to be briefly in Windows to do maintenance tasks, but you'll need a mouse if you intend to game.
There are handheld devices that combine a keyboard and touchpad, like Rii's Mini N7 and N8 -- they're better than you'd expect, but the size means they're only intended for use in short bursts.
Remote Controls
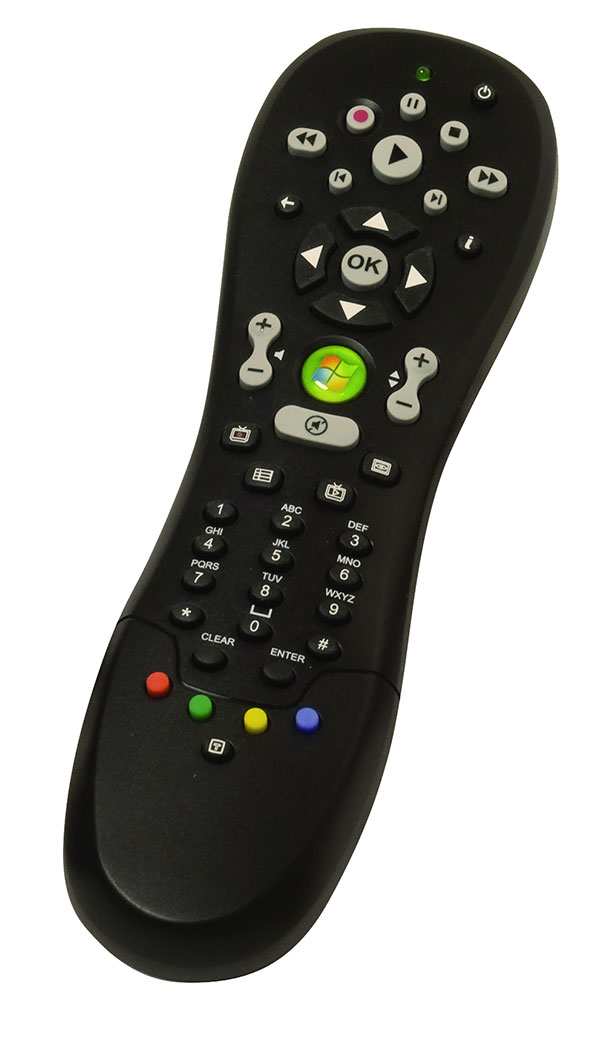
For non tech-savvy users and ease of use, a regular remote goes a long way. For something new, simple and in the one box, about the last company standing is Hauppauge. Its Media Center Remote Control Kit includes both basic RC6 remote and receiver.
Optional extras
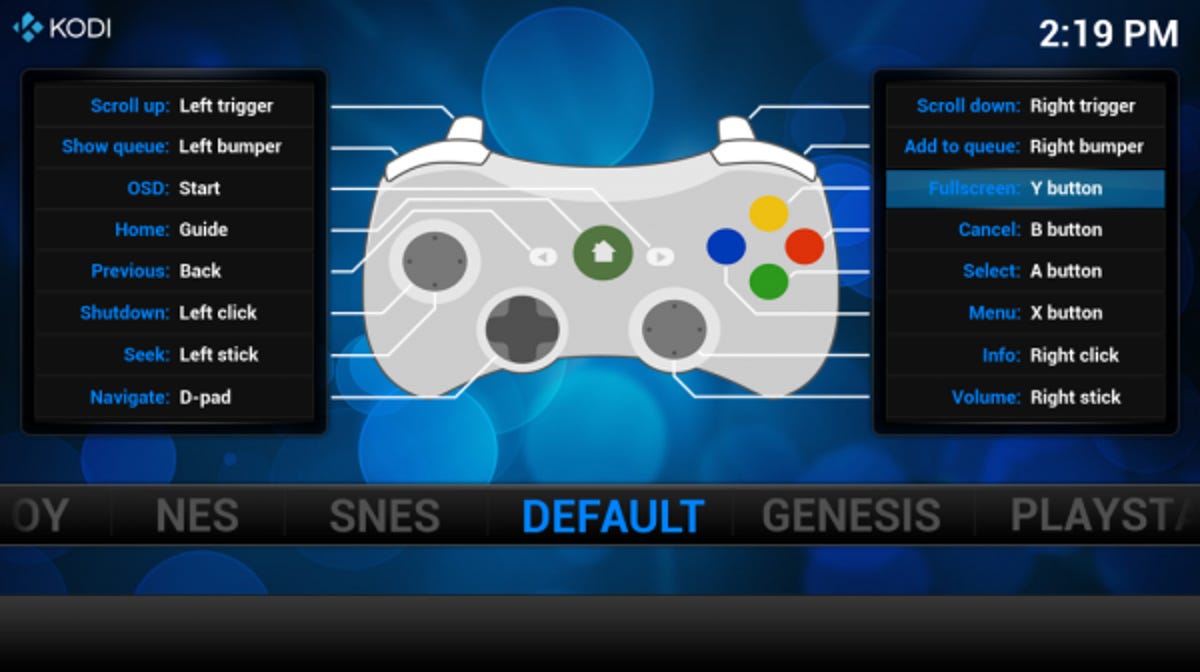
For the gamer, the Xbox 360 controller is one of the strongest options, working out of the box with Kodi. To take it wireless, you'll need to purchase the Xbox 360 Wireless Gaming Receiver, which may be difficult to find these days outside of eBay. As a plus, the Xbox 360 controller can be used to control basic Kodi functions.
Kodi can also be controlled using your smartphone, although you will have to enable Kodi's webserver through the Services settings first. For Android users we'd suggest Yatse [Play Store link], while on iOS the XBMC official remote [iTunes link] is the way to go.
Closing up
By now, your Kodi install should be up and running. Join us next time for the finer points of using Kodi, getting Blu-ray functionality down and starting to tap in to the myriad customisation options offered by the software.
Home Entertainment Guides
TVs
Streaming & TV Accessories
Speakers
Projectors
Other Home Entertainment
Home Entertainment Coupons