How to securely erase an SSD drive
Erasing an SSD drive not only sanitizes the drive, but recovers lost performance on systems with inefficient garbage collection. We'll show you how to securely erase your SSD drive.


Erasing an SSD (solid-state drive) not only sanitizes the drive, but recovers lost performance on systems with inefficient garbage collection. Utilities like CCleaner or DBAN are made for magnetic disk drives and won't work on SSDs. Fortunately, there are two free secure-erase utilities that do work with SSD drives.
The first utility is named Secure Erase (HDDErase.exe), and was developed by the Center for Magnetic Recording Research at the University of California, San Diego. It's free and effective, but requires DOS boot media. The biggest problem with Secure Erase, however, is that development ended in 2008, thus posing compatibility challenges.
The second secure-erase utility is actually included in the Parted Magic suite of tools. Parted Magic is easy to use and compatible with most modern SSD drives. Here's how to use Parted Magic to securely erase SSD drives:
Step 1: Create the Parted Magic bootable media. If you need step-by-step instructions, refer to the article, "What to do with your USB flash drive: Maintain Windows".
Step 2: After booting into Parted Magic, go to System Tools, then select Erase Disk.

Step 3: Select "Internal:Secure Erase command writes zeroes to entire data area" then click Continue.

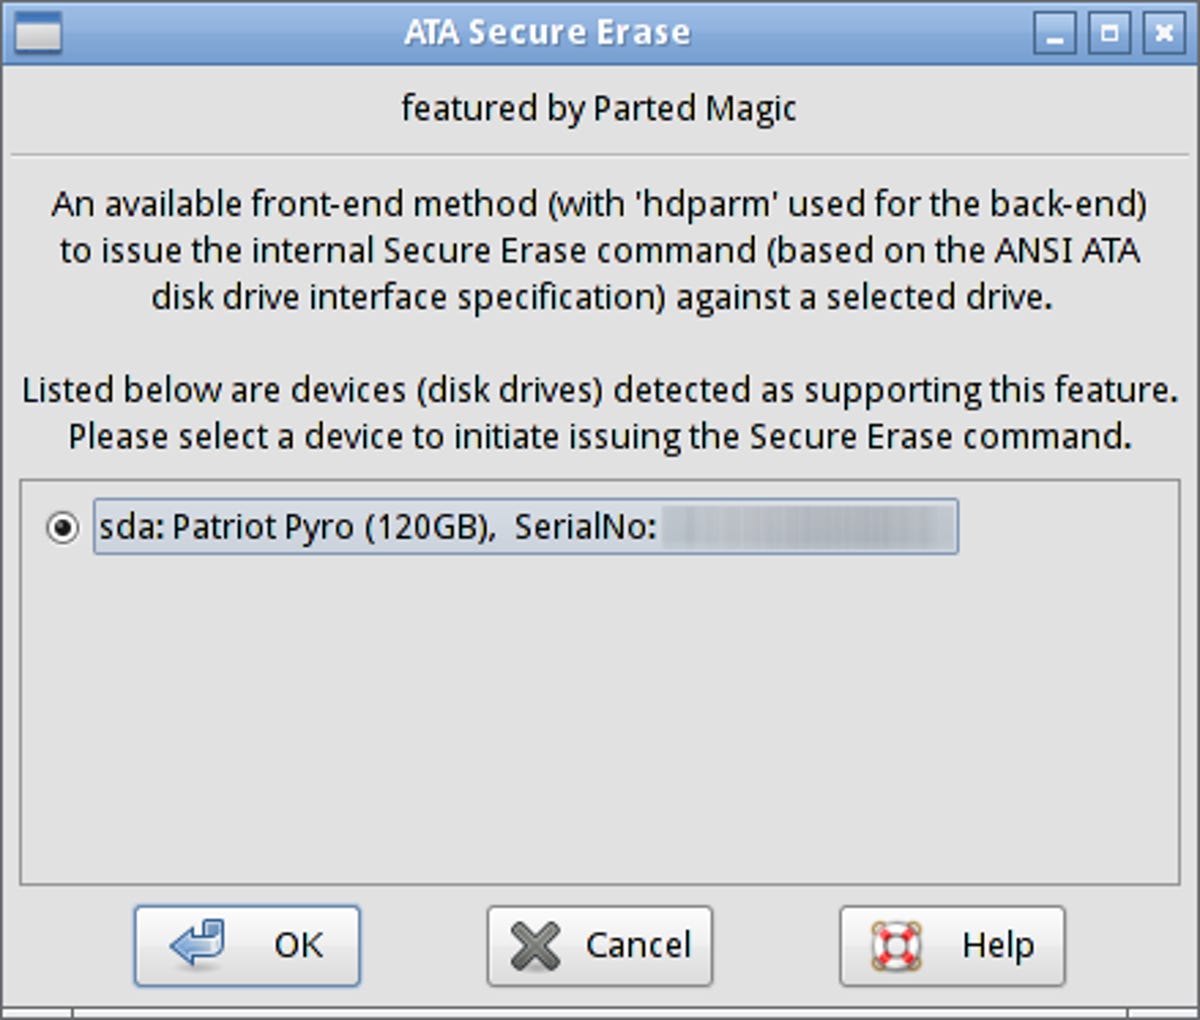
Step 4: Select the SSD you want to erase, then click the OK button.
Step 5: If you get a message stating that your SSD drive is "frozen," click the Sleep button to put your PC to sleep, then wake up your system and start over from Step 2. If you don't get this message, move on to Step 6.

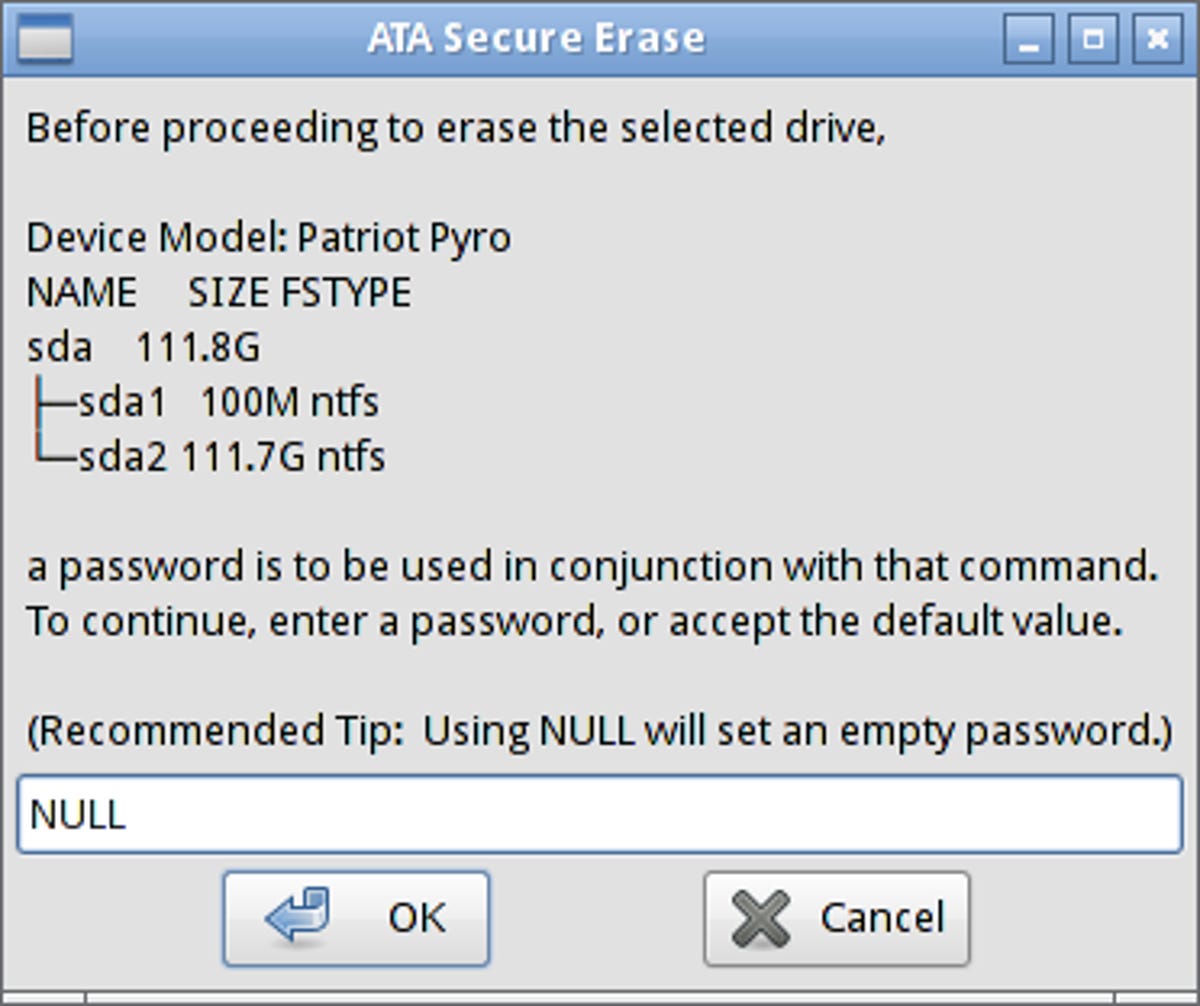
Step 6: Leave the password as "NULL" and click OK.
Step 7: Read the caution message and if you're sure you want to continue, click YES.

Step 8: Once the secure-erase operation is complete, click Close.

That's it. Now you know how to quickly, easily, and securely erase your SSD drive. Keep the Parted Magic boot media handy for when you need to sanitize your SSD drive or to recover performance.