How to get started with the Raspberry Pi
If the Raspberry Pi has set your coding passions alight, but you need a little advice on setting it up, you've come to the right place.
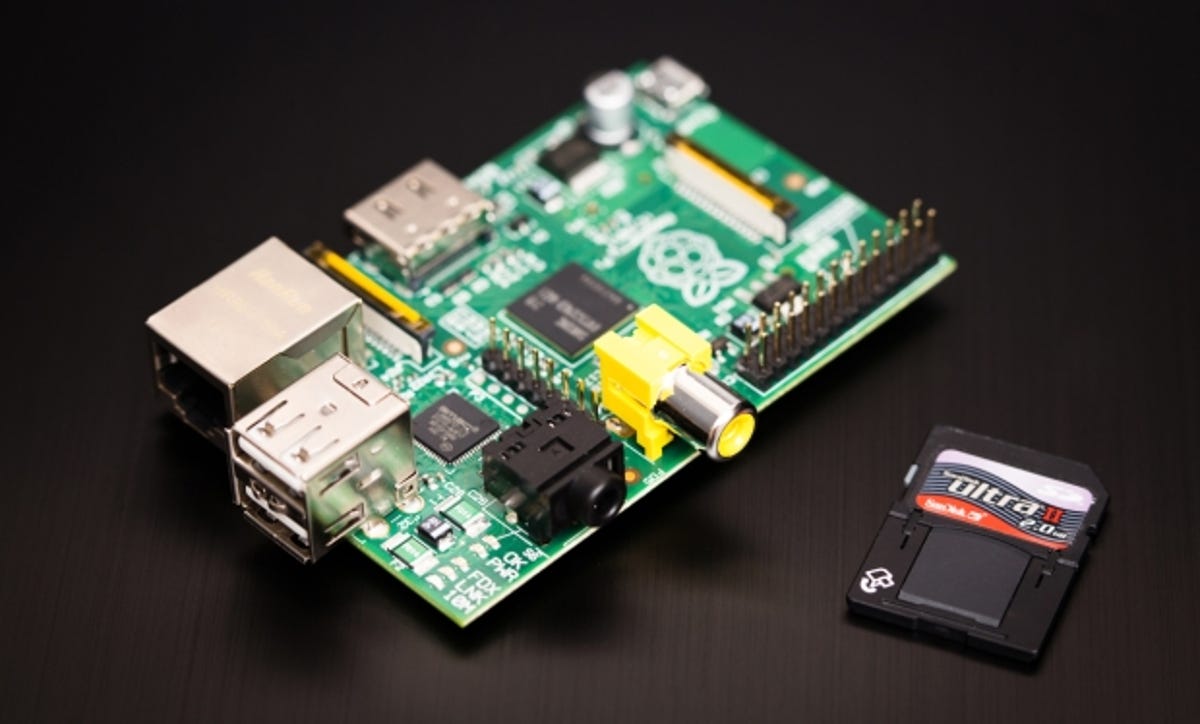
The Raspberry Pi has captured the imaginations of those who love to tinker with all things computing, and has re-ignited the fiery plumage of the reluctant phoenix known commonly as the bedroom programmer. If the super-budget mini computer has set your coding passions alight, but you need a little advice on setting it up, you've come to the right place.
It's difficult to lay down exact rules where the RPi is concerned, as it's such a
versatile little beast. But what we can do is get the OS installed, and update any software
that's pre-installed.
Getting started
To start with, you're going to need the operating system developed for the RPi. Head over to the Raspberry Pi site, and download a copy of the Raspbian Wheezy software.
For this you'll need an SD card with a minimum of 2GB storage. If possible, try to get hold of a 4GB card -- it should cost you less than a fiver -- as this will give you more flexibility and storage space.
Once you've downloaded the software, you need to transfer the image, as it's known, to the SD card. This isn't as simple as just dragging and dropping -- depending on your operating system, there are a couple of ways of doing this.
For Windows users
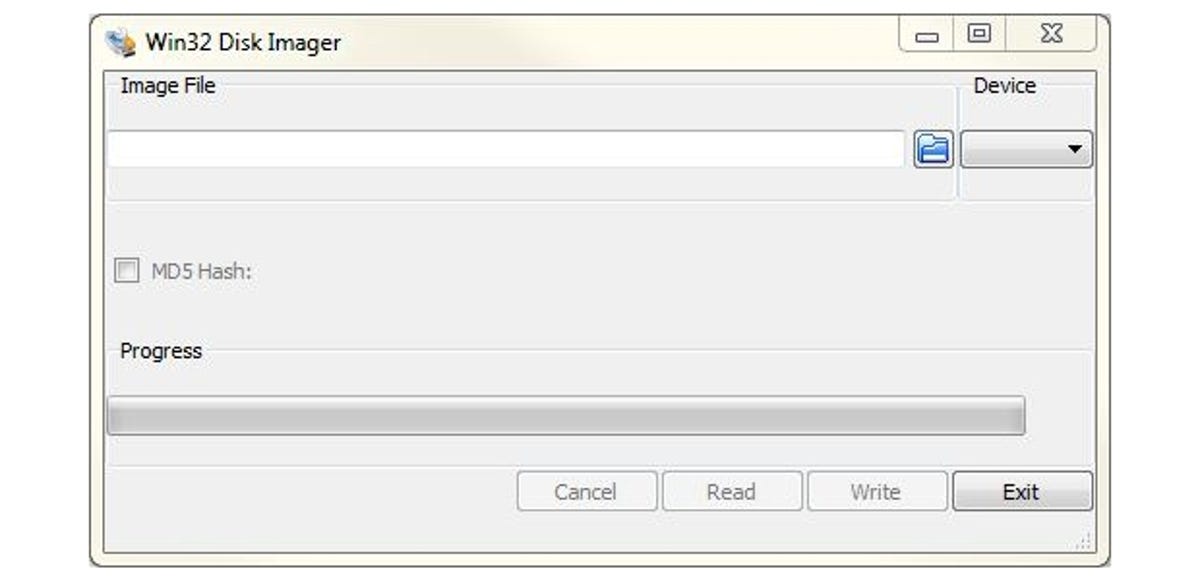
Open up a browser and navigate here -- a Windows app for writing images to SD cards will start to download. It'll work for 32- and 64-bit Windows, from XP to 8. Plug your SD card into the slot on your computer then unzip the Image Writer tool and double-click the .exe file.
Unzip the 2012-10-28-wheezy-raspian.img file you downloaded before, and point the Image File browser to its location. If it's not already selected, select the appropriate drive letter that corresponds to your SD card from the drop-down Device menu. Click on the Write button and wait for a few moments while the image is written to the SD card.
For Linux users
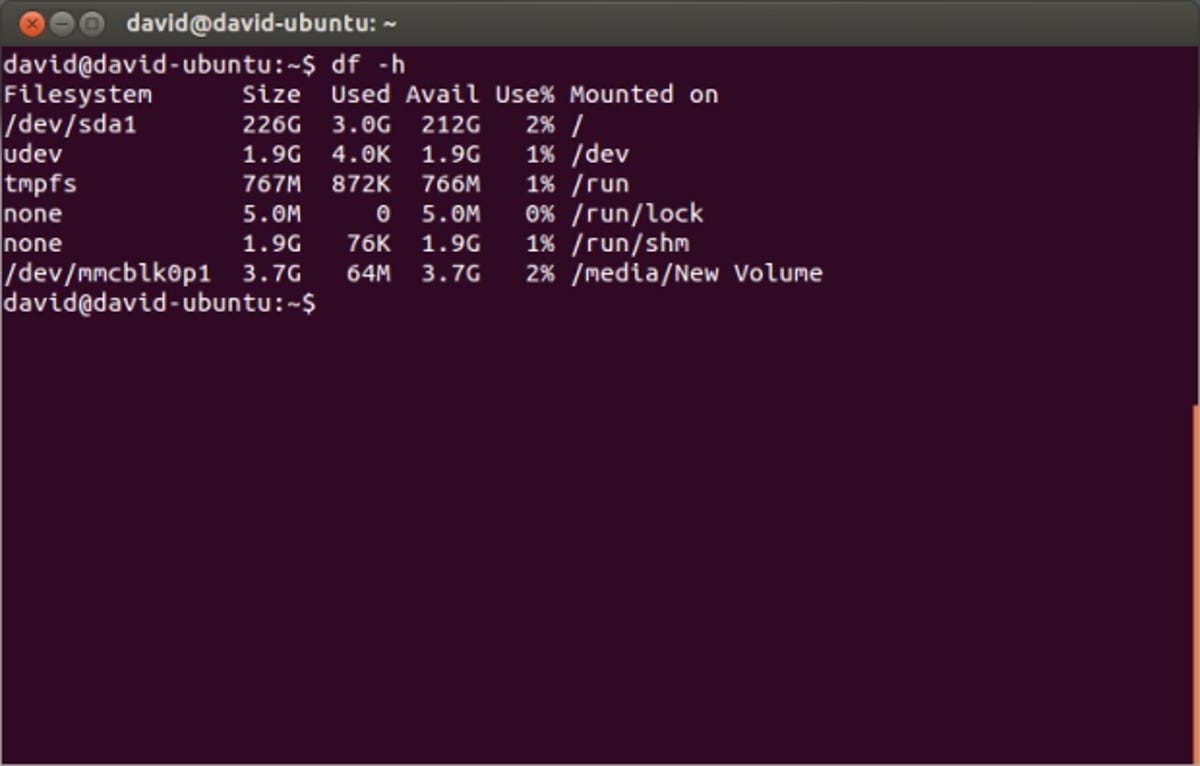
Unzip 2012-10-28-wheezy-raspian.img from the downloaded zipped file, and drop into the Terminal.
In the terminal type df –h and see which of the listed file systems is the SD card; it's usually /dev/something and it's mounted on /media/something. If you can't find it, remove the SD card, run the 'df –h' command, then re-insert the SD card and run the command again to see which of the file systems has been added. In our example, the device name is /dev/mmcblk0.
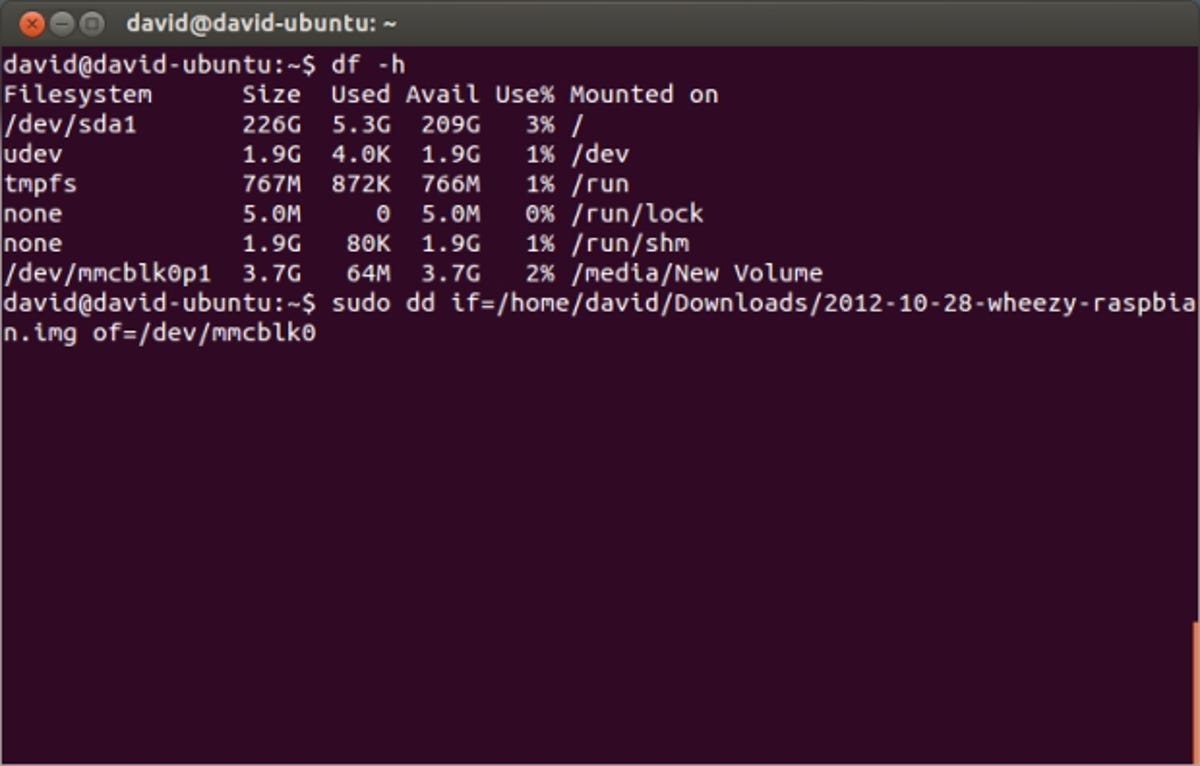
When you've located your SD device name, you'll need to write the image to the card by using the 'sudo dd' command. In our example, the command would look like this:
sudo dd if=/home/david/Downloads/2012-10-28-wheezy-raspian.img of=/dev/mmcblk0
Enter your password and hit Enter to continue.
Unfortunately you won't see a progress bar or anything, and the time it takes to write the image depends on the type of card you're using and the speed of your computer, but 10 minutes isn't an unreasonable amount of time. When the transfer is complete you'll get a readout of the amount of bytes written, and the time in seconds it took to complete. All you need to do now is type:
sudo sync
This will make sure the cache is flushed and that it's safe to eject your SD card.
For Mac users
If you have a Mac, this wiki page has all the instructions necessary for your system. I didn't have access to a Mac while writing this article, so I can't verify first-hand that they work, but is seems straightforward enough.
First boot
Once you've transferred the new OS to an SD card, insert it into the RPi, if you haven't done so already. Then hook up the keyboard, mouse, monitor and Ethernet cable, and finally provide power via the micro-USB port.
The RPi will now boot and configure the necessary files on the system. This may take a little while, but is normal during the first boot of a new image.
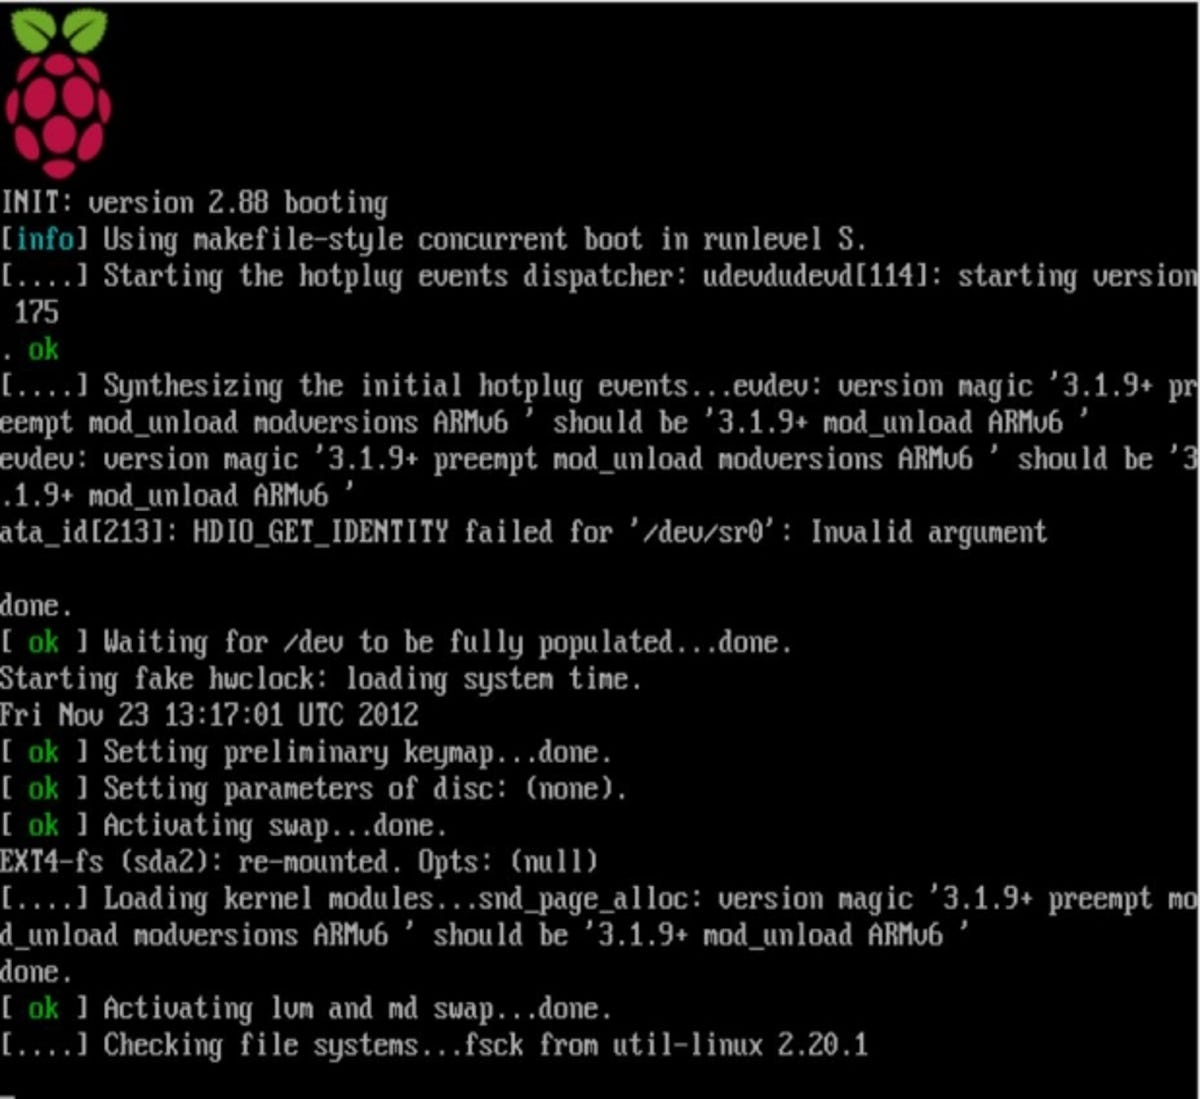
Since this is the first boot, you'll be presented with the Raspi-Config menu. From this menu, you can do all sorts of cool things, like auto-starting SSH, or start the graphical user interface (GUI) when it boots up. Anyway, there's plenty to look into, but for now we just need the GUI to be activated on boot and, if you have a 4GB or bigger SD card, to expand the root partition to fill the SD card.
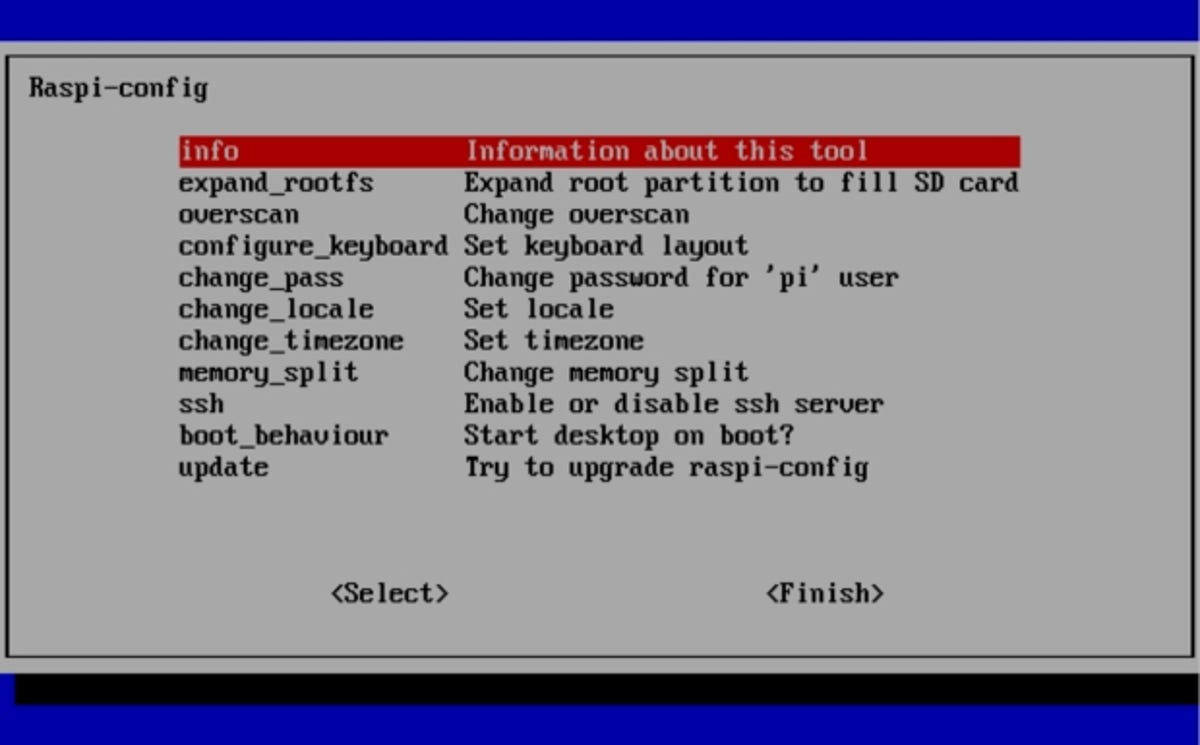
Raspi-Config
You can navigate the Raspi-Config menu by using the arrow keys on your keyboard. Start by pressing the down arrow until you reach the section labelled 'boot_behaviour', and hit Enter.
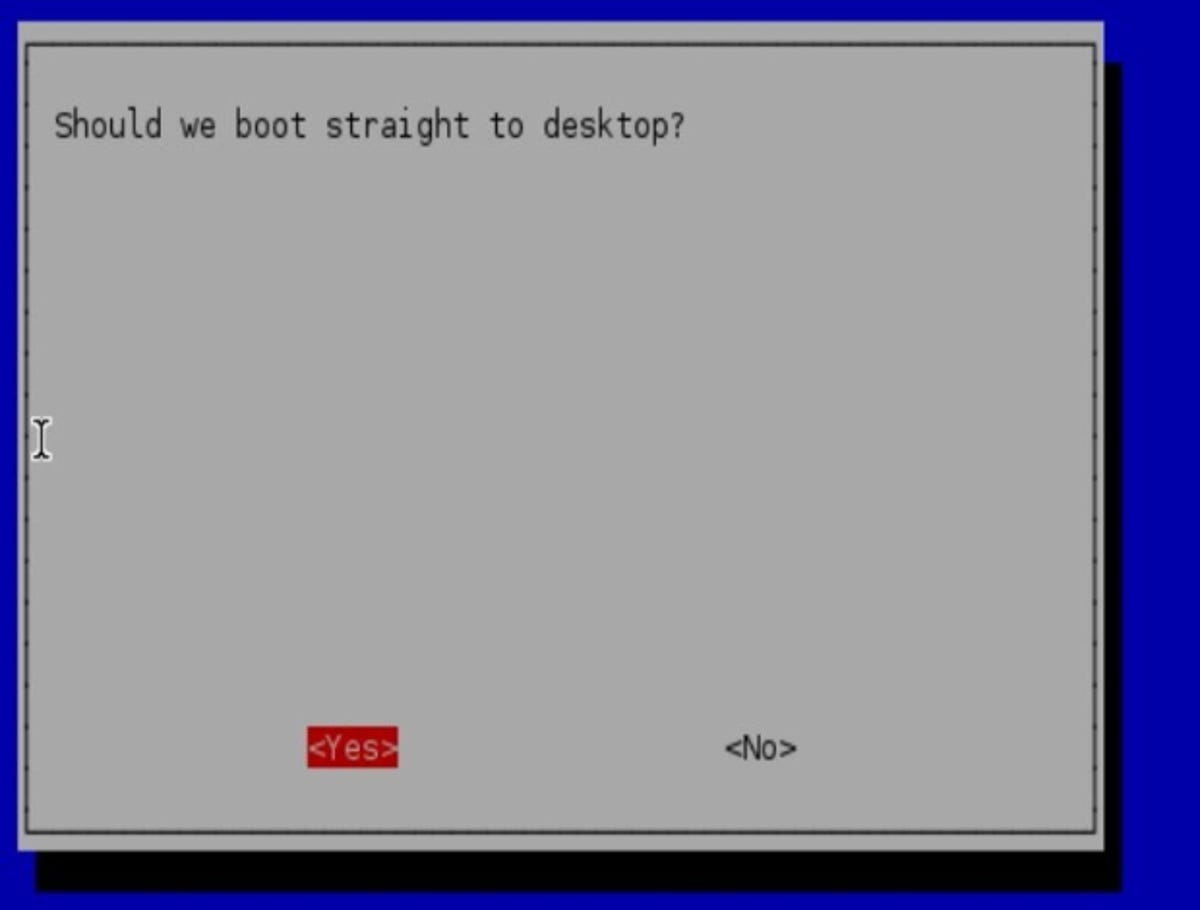
This option allows the RPi to boot straight into the LXDE desktop GUI, or directly into the Terminal command line. For most users, the LXDE desktop is the obvious choice -- if you prefer the command line, you hardly need me telling you how to work the Linux Terminal. In case you choose this by accident, you can start the GUI by typing in: startx.
After selecting the desktop (or your preference), you'll return to the Raspi-Config menu; from here, if you have a 4GB or larger SD card, use the arrow keys to select 'expand_rootfs' to expand the file system into the remaining space on the card. If you're using a 2GB SD card, navigate down to the 'Finish' label, and press Enter.
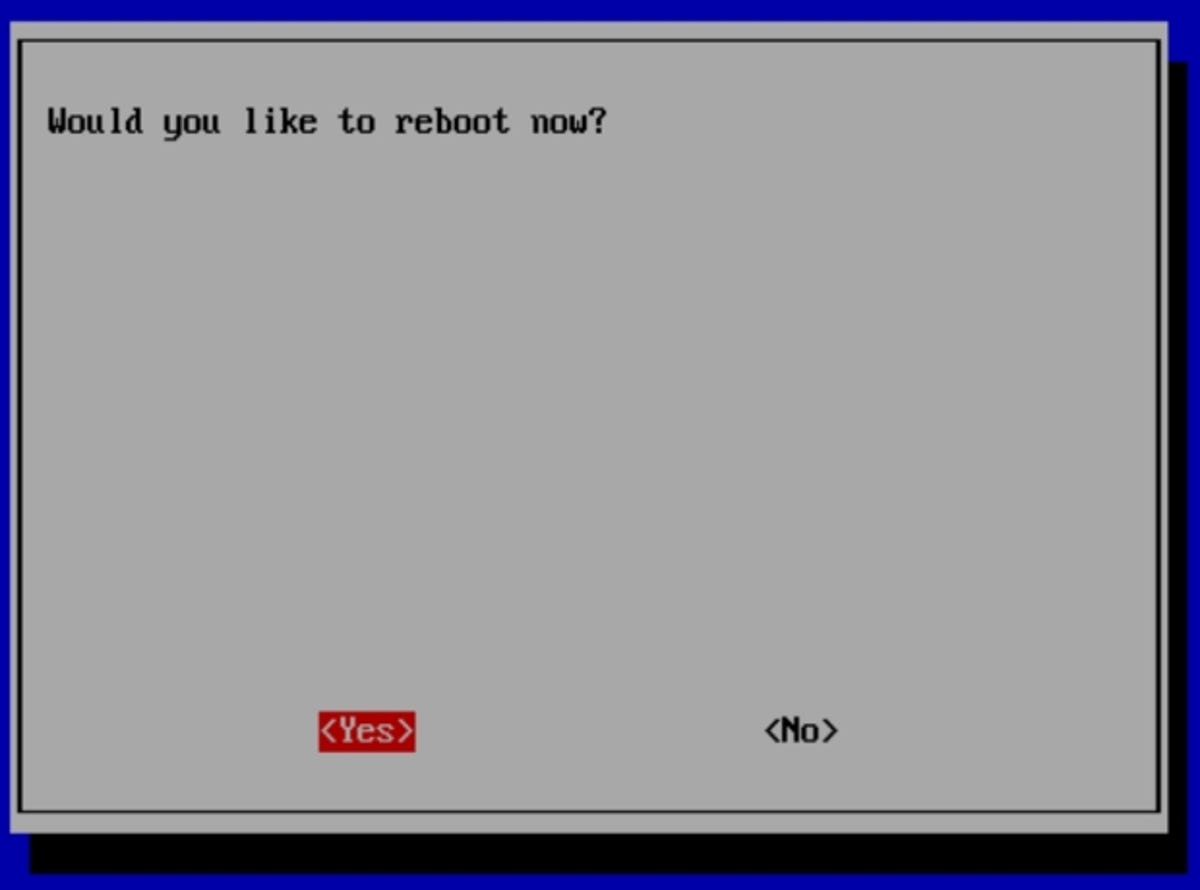
At the 'Would you like to reboot now?' window, highlight 'Yes' and press Enter. It's not necessary, but I'd recommend it at this stage. Should you ever need to access the Raspi-Config menu again, drop into a Terminal and type: sudo raspi-config, and press Enter.
Welcome to the Pi
After a few moments your RPi will boot into the GUI, and you'll have full access to all the various tools and applications.
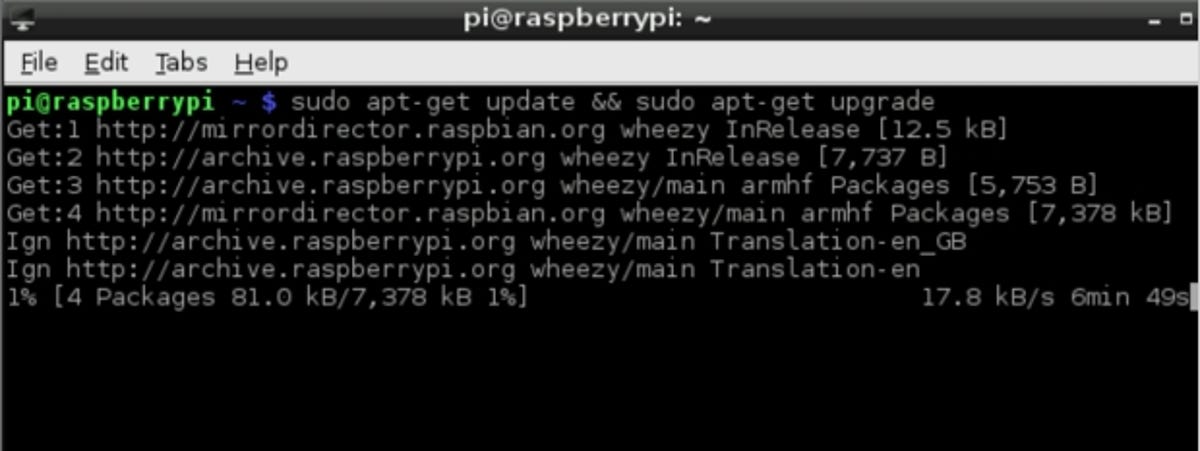
For now though, double-click the 'LX Terminal' icon to drop into the Terminal, and type the following:
sudo apt-get update && sudo apt-get upgrade
Then press Enter. This will search the various repositories for software and system updates and upgrades, if it finds any, then you'll be asked if you wish to apply then by answering 'Y' and pressing Enter. After a while the updates will be installed, and it's recommended that you reboot once more to start the system with the applied updates.
There you have it. The basic setup, and you're ready to explore your new mini-computer. Check out our how-to guides on 25 fun things to do with the Raspberry Pi and how to turn your Raspberry Pi into an XBMC media centre.