How to get started with iMessage
Curious how iMessage is going to work? Want to know the ins and outs of the new messaging platform from Apple? Read our getting started guide to find out.


iMessage was announced during Apple's annual Worldwide Developers Conference earlier this year, bringing a platform that rivals RIM's BlackBerry Messenger to all iOS devices.
We are going to take a look at iMessage and give you some tips on getting started with the new iOS messaging service once iOS 5 is released to the public.
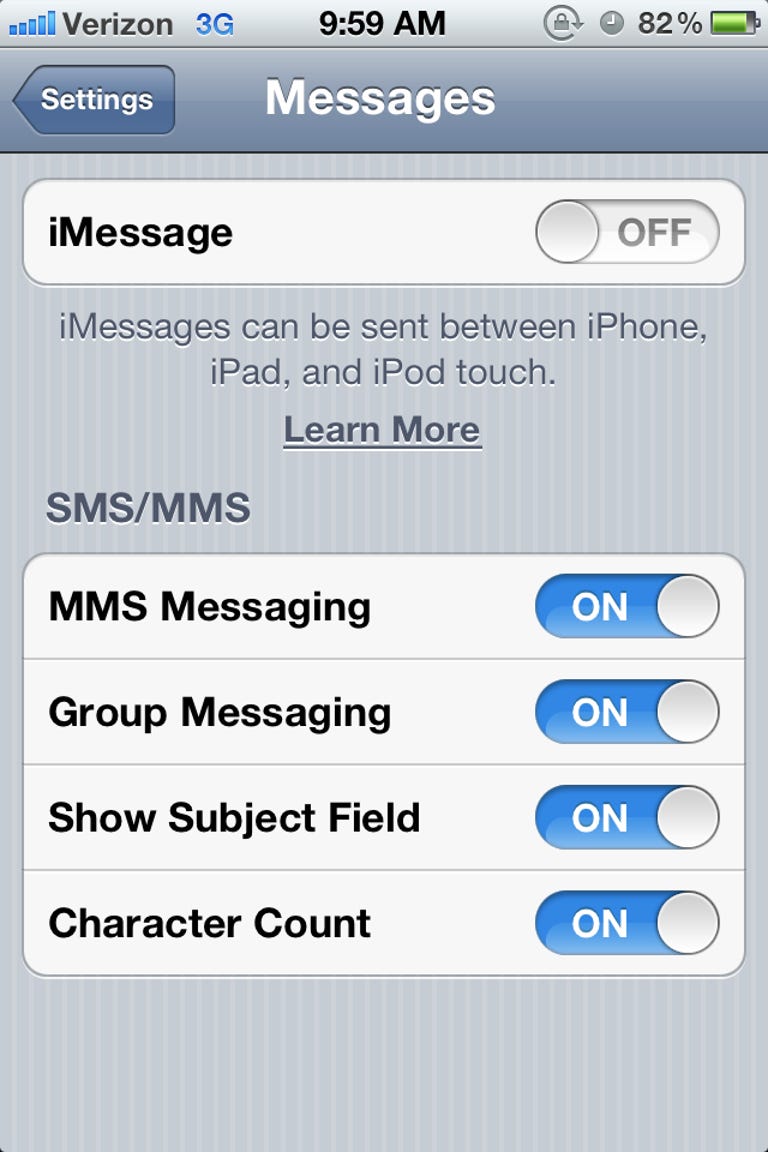
To turn on iMessage, or to adjust any settings for iMessage, you will need to go into Settings > Messages on your iOS device. If the switch for iMessage is turned off, tap or slide it over to turn iMessage on.
Once iMessage is turned on, you will see an "Activating" dialog followed by some new options appearing on the Messages setting screen.
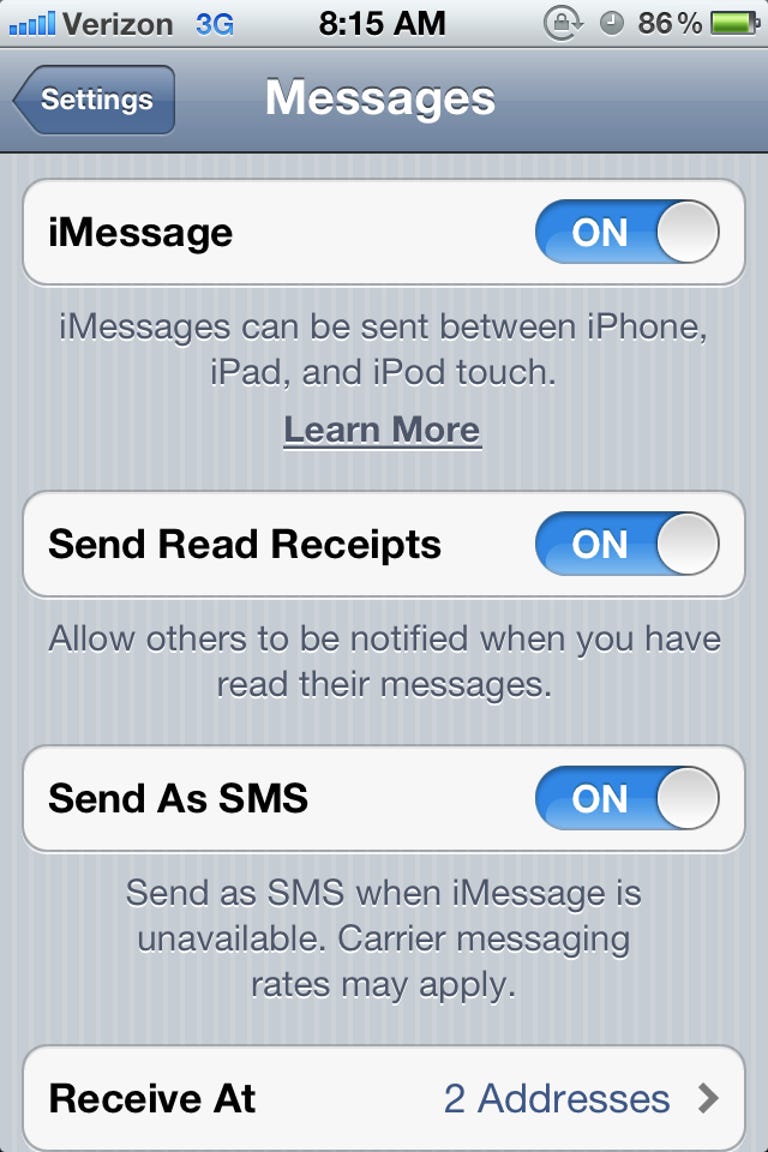
The first option is the ability to turn on Read Receipts for your iMessage conversations. With the option turned on, the other party in your conversation will be able to see once you view a message they have sent you. If you opt to leave read receipts turned off, they will only be able to see when the message has been delivered.
With the Send as SMS setting turned on, iOS will route a message through your carrier via SMS instead of iMessage when iMessage is unavailable. Currently, iMessage only works when either a Wi-Fi or 3G signal is present.
The last option that appears once iMessage has been turned on is the Received At setting. Go ahead and tap on it to set up the address(es) where you would like to receive iMessages.

Whether you are using iMessage on the iPod Touch, iPad or iPhone, you can set up multiple e-mail addresses where you'd like to receive messages. If you are using an iPhone, your phone number will be the default receive at address, with the option of adding an e-mail address to receive messages at as well.
To set up your e-mail address for iMessage, you will need to enter your Apple ID, followed by the e-mail address you would like to use. Apple will then verify your e-mail address, and add it to iMessage.
Tap on Caller ID to set which address you would like your outgoing iMessages to appear to be from.
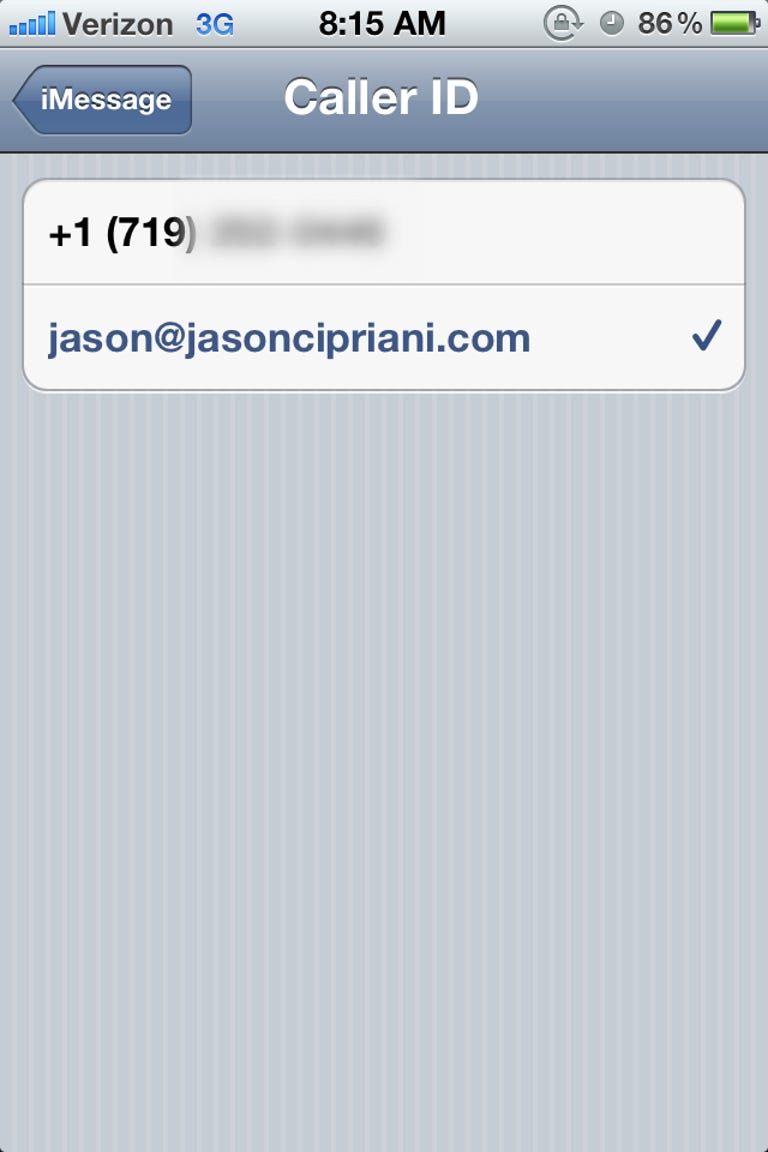
Setting your Caller ID to the same address across all your iOS devices comes in handy if you are wanting to keep all of your iMessage conversations in sync (in real time) across multiple devices. Even if you receive an incoming message at one of your other iMessage-enabled addresses, the outgoing message will be sent using the address of your Caller ID.
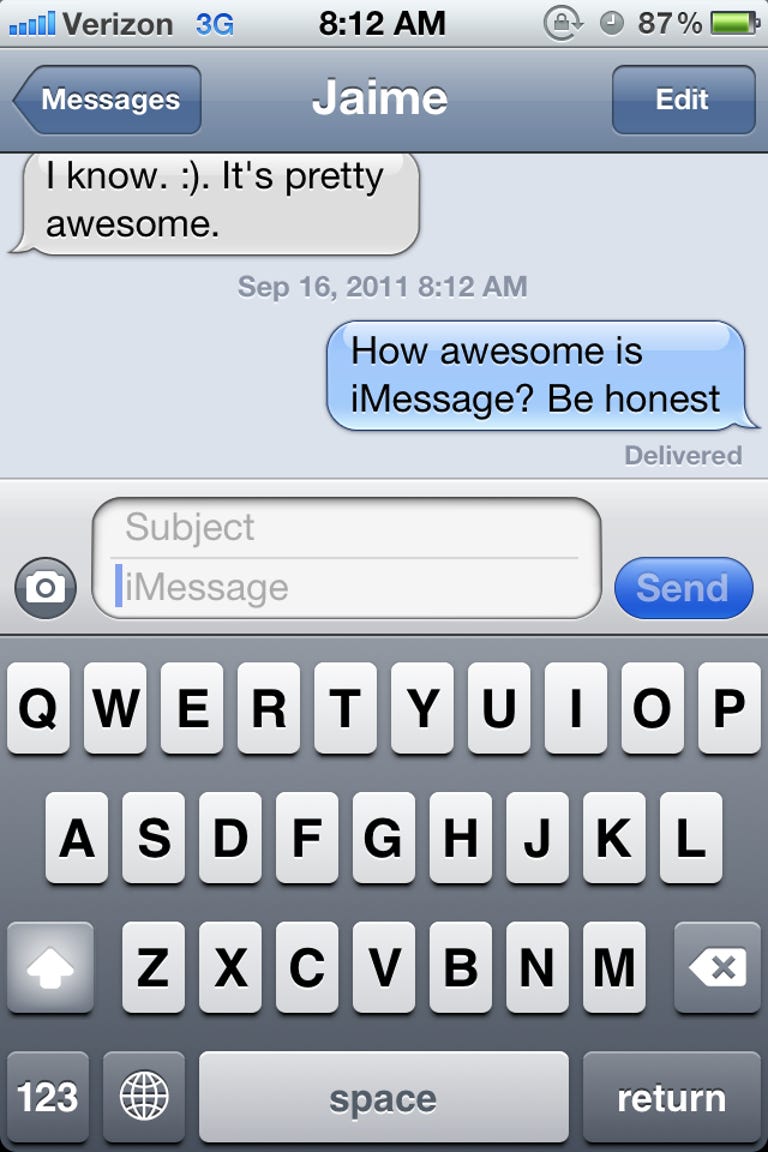
Above is a message that was sent using iMessage. You may notice that the color of the bubble is blue, as opposed to the green bubble you are accustomed to seeing when sending a text message. This is a fast and simple way to identify how your message was sent. You may also notice the text field has "iMessage" populated below the subject box, again this is a fast way to identify the method by which your messages are being sent.
When you are entering a contact at the start of a new conversation, the name of the contact will turn either blue or green, depending on which delivery method the Messages app is going to use for the conversation.
There is also a Delivered message below the chat bubble. This indicates that your message has indeed been delivered to the recipient.
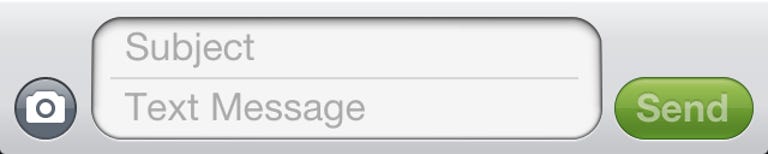
This screen shows the green Send button, as well as the text field indicating any messages sent will be Text Messages.

The sent message has been read, and the recipient is currently typing a response.
Once the recipient has read the message, assuming that person has the Read Receipts feature turned on, the Delivered message will then change to Read. The three dots on the left in the screen above indicate that the other person is currently typing a message.
With the release of iOS 5 in the coming weeks, iMessage will surely be used by millions of users around the world. It will allow for BBM-like communication, and possibly even save some users money by allowing them to drop the extra SMS plans with their wireless carrier. Hopefully this getting started guide will help you get your feet on the ground and your iMs (get it?) going with relative ease.