How to encrypt one volume on a drive in OS X
If you want to share a drive but keep some files on it encrypted, you can easily do so with a couple of approaches in OS X.


Encrypting data is a convenient method for keeping your data secure, especially when using external hard drives and thumbdrives that may be stolen or lost. While it might be easiest to encrypt an entire drive, sometimes doing so may be a touch inconvenient, especially if the drive is used for more than one purpose.
For instance, if you keep sensitive files on your drive, you may wish to keep it encrypted; however, this prevents you from sharing the drive with others. Therefore, if you want to use the drive to transfer files to another system, you will have to authenticate on the new system, after which you may have to monitor its use, since the drive will be unlocked.

Alternatively, you can set up such drives to serve both as an encrypted volume as well as one that can be accessed for everyday work, so when you share it with others you can keep your files secured.
There are two approaches for doing this. The first is to set the drive up with a single partition, but then use Disk Utility to create an encrypted disk image to contain your sensitive files on the drive. To do this, simply choose New > Blank Disk Image from the File menu and then set the size of the image (this will be the maximum size the image can hold) and the encryption level in the window that appears.
If you want this image to dynamically resize based on the files you add to it, then make it a "Sparse" or "Sparse Bundle" disk image format, and set the Partitions setting to "No partition map." Doing this will start the image off at only a few megabytes in size, and this will increase as you add items to it until the image reaches the maximum size you set when creating it.
When finished, this approach will require you to open the disk image each time to mount the drive it contains.

The second option is to take advantage of Apple's CoreStorage technology in OS X to set the drive up with two partitions, one that is encrypted and one that is left open. While this sounds complex, it is relatively simple to set up. First connect your thumbdrive or other storage drive to your Mac, and then follow these steps:
- Open Disk Utility and select the drive device. Then click the Partition tab and choose "2 Partitions" from the drop-down menu.
- Next, click the Options button and set the partition scheme to "GUID."
- Finally name each partition (shown here as "Encrypted" and "Unencrypted") and click the Apply button.

When the disk is partitioned, you can then encrypt the desired partition in two ways. The first is to right-click it in the Finder and choose the option to Encrypt "Volume name" from the contextual menu.
This will present you with a password prompt, and then convert the volume to a corestorage device and apply encryption to it. If the drive is empty then the encryption process should be nearly instantaneous, but if you have copied files to the drive already then it may take a little time to complete the encryption.
The second approach is to use the Terminal and list the newly created volumes, and then applying a command to encrypt the desired ones:
- Open the OS X Terminal and run the following command to view information on all the attached drives and volumes:
diskutil list

In this case, the target volume called "Encrypted" has the identifier "disk1s3." - In the output, locate the line that contains the name of the volume you would like to encrypt, and note its identifier, which should be something like "disk1s3."
- Now run the following command to encrypt this volume:
diskutil cs convert disk1s3 -passphrase MyPassword
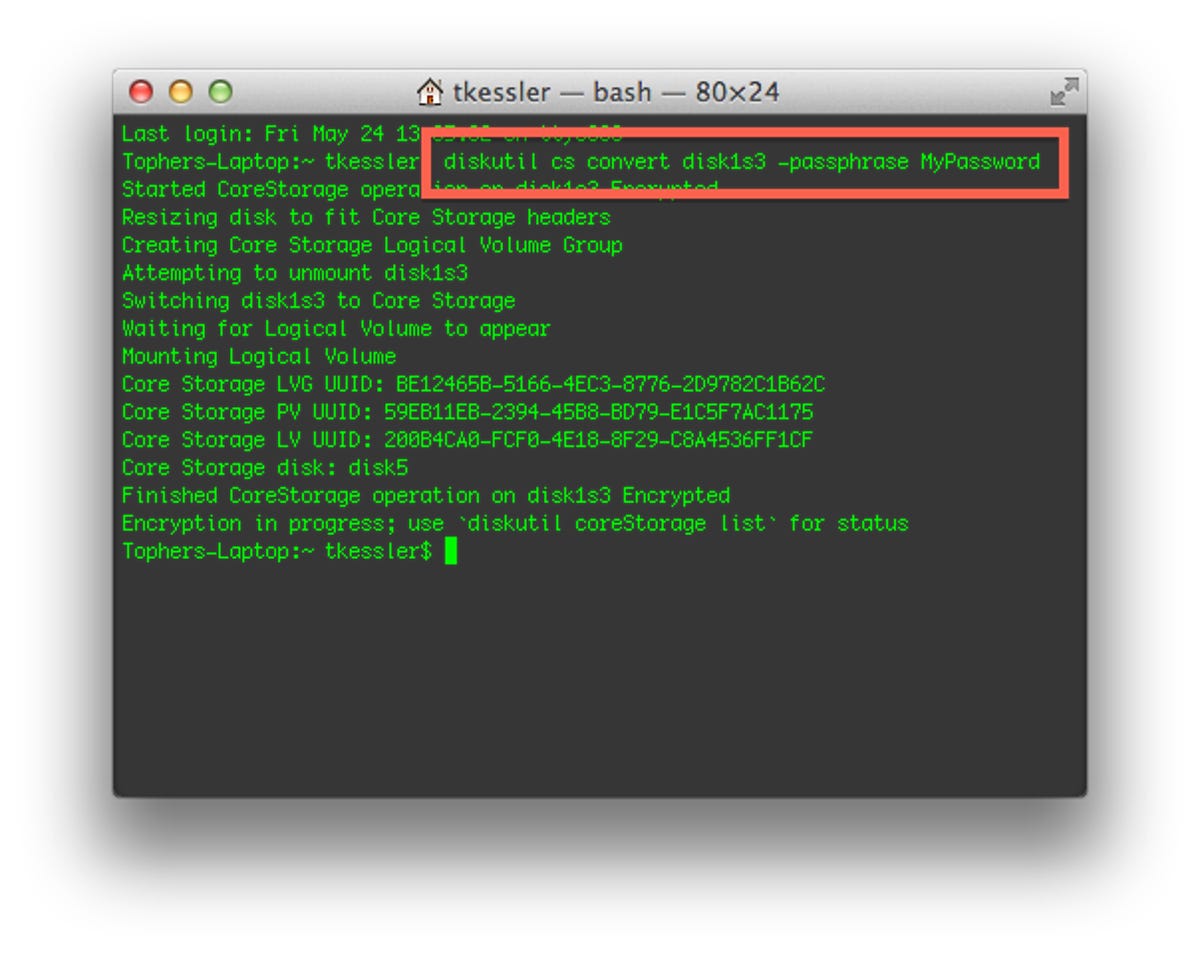
In this case I set the password for the encrypted volume to be "MyPassword."


In this last command, be sure the "disk1s3" component is the identifier you noted earlier, and also change "MyPassword" to the password of your choice. Then press Enter, after which you will see a progress indicator appear.
When this finishes, you will now have a drive that has one encrypted partition and one that isn't. While I only covered encrypting one of the partitions on the drive, you can apply this process to multiple partitions separately to encrypt them and provide them with individual passwords, or otherwise customize the setup.
Questions? Comments? Have a fix? Post them below or
e-mail us!
Be sure to check us out on Twitter and the CNET Mac forums.