How to convert video for the Zune
CNET editors offer a step-by-step tutorial on converting video for the Microsoft Zune MP3 player.

Microsoft struggled through two rounds of Zune before hitting the nail on the head with the third generation of the MP3 player, but the company got at least one thing right from the start. Even the first pass offered a larger-than-average screen, clocking in at 3 inches diagonally, and the latest version packs a video-worthy 3.2-inch screen. Of course, getting video content was a bit of a challenge at first, but the Zune Marketplace continues to expand its catalog, which now offers TV shows from several major networks such as NBC and Comedy Central.
However, that video content is going to cost you--about $2 per episode, to be exact--and the Marketplace currently does not offer movies to rent or buy (unlike iTunes). That's where this tutorial comes in: if you already have a collection of digital video content, this step-by-step guide will show you how to convert it for playback on the Zune. The software used in this how-to can convert from any of the following formats: MP4, 3GP, MPG, AVI, WMV, FLV, and SWF.
Note: Unfortunately, ripping most commercial DVDs is currently illegal in the United States, as it requires circumventing the copyright protection found on the DVDs. For unprotected DVDs, try Handbrake.
Cost: free
Level: beginner
Time commitment: Varies, but figure on about 15 to 30 minutes per hour of video (unmonitored)
System requirements: Windows
- Download and install FormatFactory
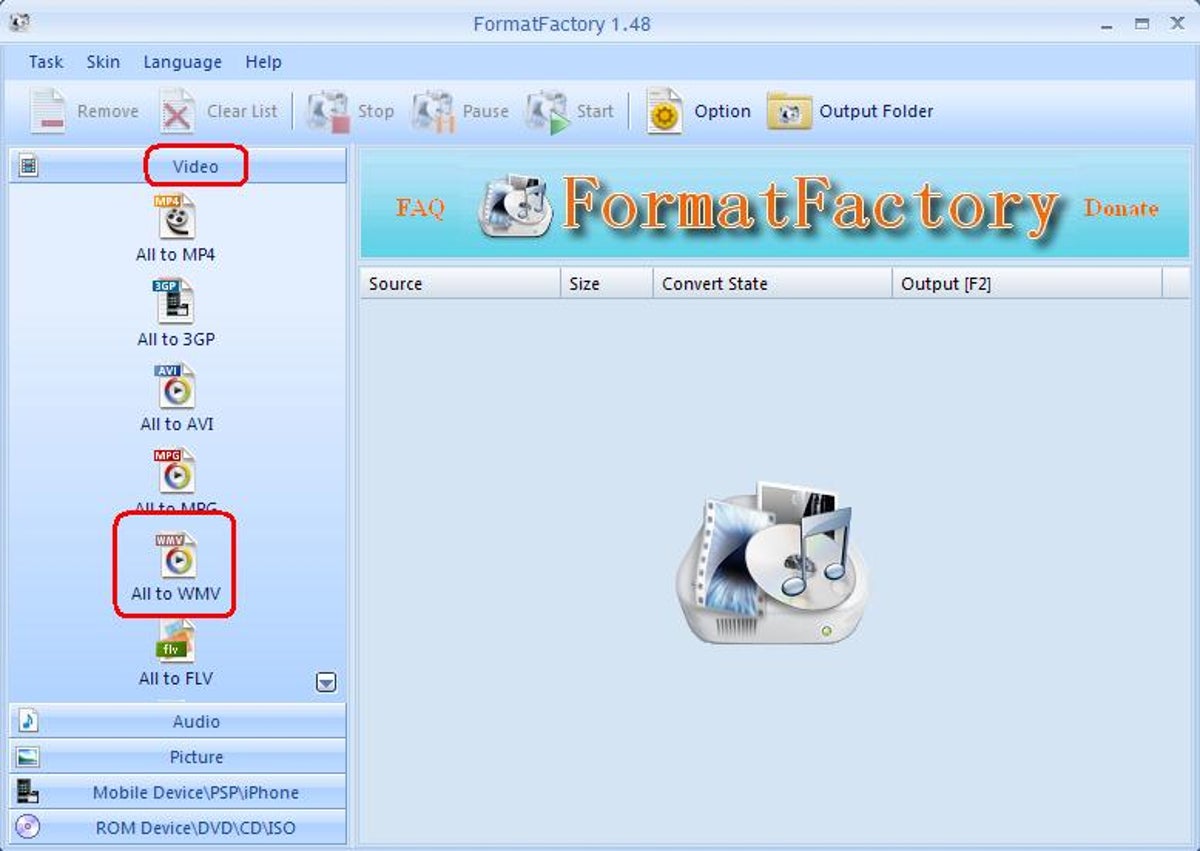
- Select format
In the left column, under Video, select All to WMV. - Adjust the output settings (optional)
Click the Output Settings button. The default output is Medium Quality, which is 320x240 WMV. This is just right for portable use (also, it's a fairly standard format that may work with other players you may have). However, if you plan to use your Zune to output video to a TV, you may want to select High Quality or Custom and increase the resolution. (The Zune supports up to 720x480 at 30fps.) - Add video
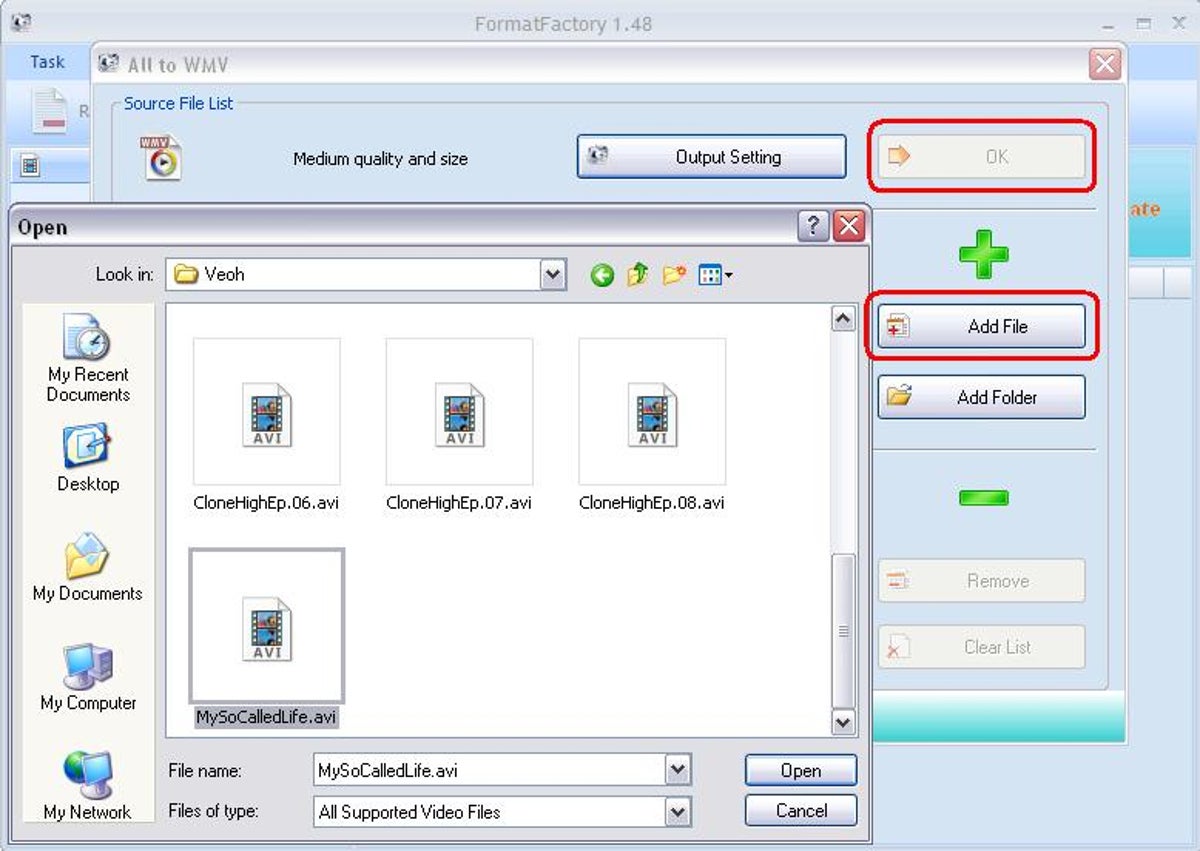
Click the Add File button, then navigate to the video you want to convert. (You may chose to add an entire folder by clicking the Add Folder button.) Repeat this for as many videos as you wish to queue up for conversion. After you've made your selections, click OK. - Select output directory
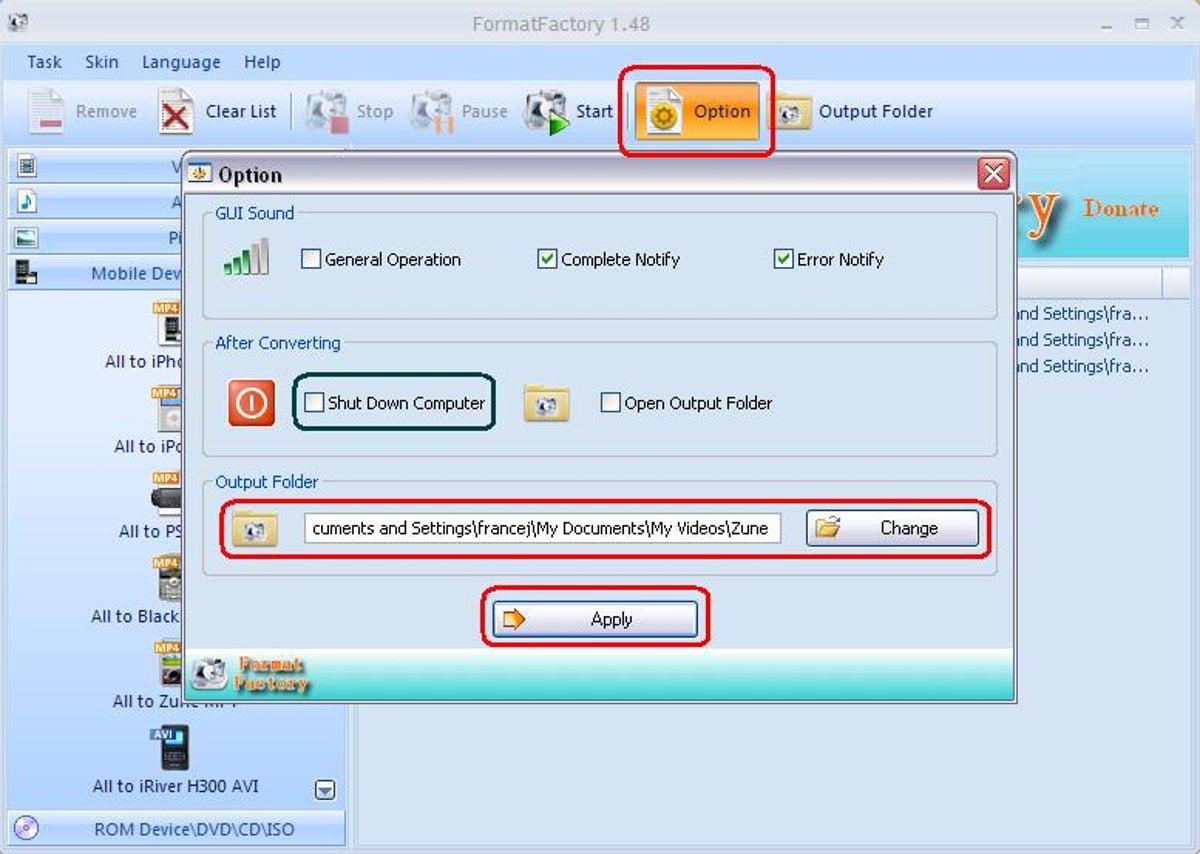
The FormatFactory default is to save your completed video files to My Documents > FF Output. If you want to select your own output directory, click Option. Then, under the Output Folder section, click Change and select the folder where you would like the files saved. (I use My Videos > Zune.) Now is also a good time to decide if you want the computer to shut down after conversion, a consideration for those who time the process to run overnight. Once your preferences are set, click Apply. - Start conversion and monitor progress
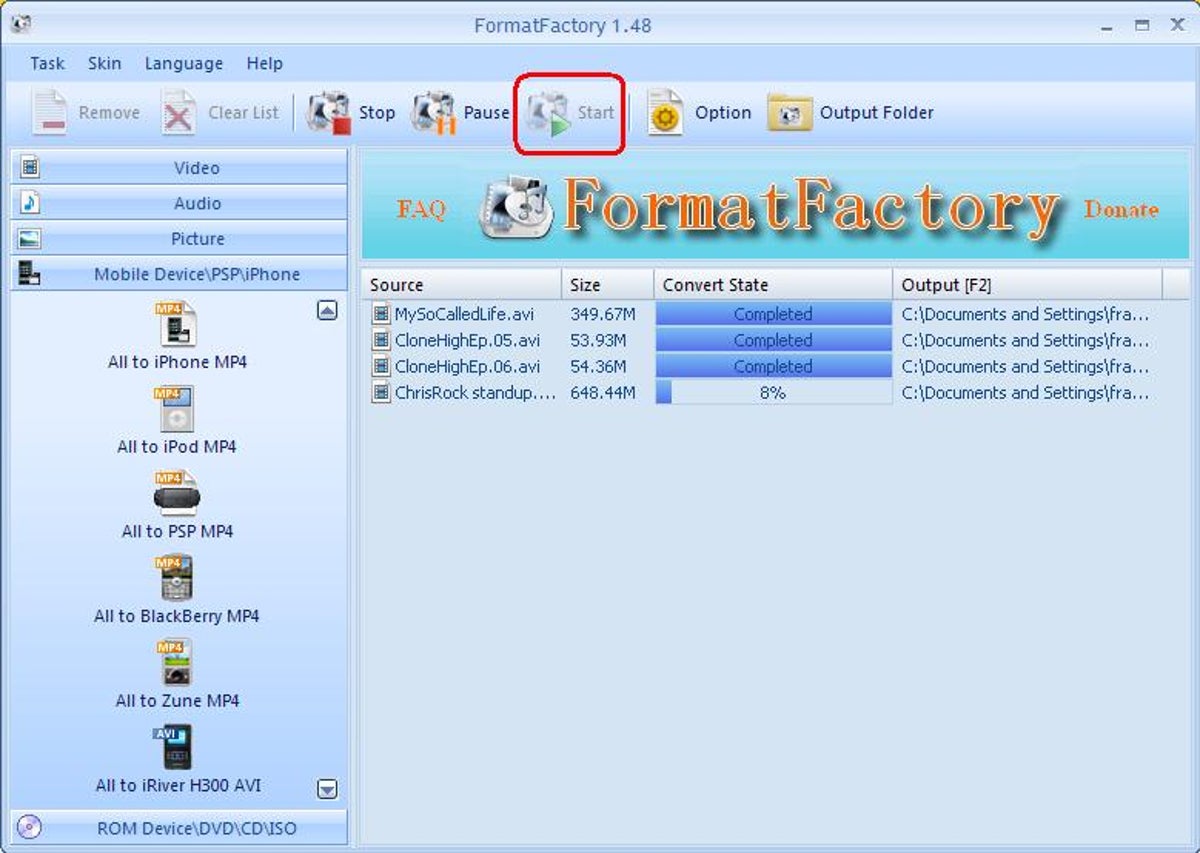
Click Start at the top of the window. You can monitor the conversion process in the middle of the main window. - Set up Zune software
If it isn't already, set the Zune Software to monitor the output folder for your videos. Go to Settings > Collection and click Add Folder under the videos section. You can then transfer the files to the Zune player.

FormatFactor will also work for converting video to play back on various other portable devices, such as the Creative Zen and Sony Walkman.