 Why You Can Trust CNET
 How to bake bread for beginners
Three tips for baking artisanal loaves at home, plus an easy no-knead homemade bread recipe.
Baking bread has turned out to be a wildly popular coronavirus lockdown activity. It's no wonder; freshly baked bread is not only delicious but extremely comforting, and the satisfaction that comes from knowing you made it yourself is not to be discounted. Plus, many people find the process of mixing, kneading and shaping dough meditative. If you've been wanting to try it but are intimidated, don't be. It truly is easier than you think. The hardest part right now might be finding flour, eggs or yeast. But when you can get your hands on the raw materials (try contacting a local bakery for the flour, and make your own yeast if you need to), it's the perfect time to try making bread at home.
Coronavirus updates
Even prior to this pandemic, the days of pre-sliced supermarket sandwich bread supremacy were long gone -- now, crusty artisan loaves from local millers and bakers reign supreme. These hearty loaves not only have more flavor and depth than those boring rectangular factory loaves, they are also much easier to digest without the extra yeasts, fats and emulsifiers added in mass production. But at up to $10 per loaf, switching to local bread isn't always affordable (even when it is easy to find). Surprisingly, making delicious homemade artisan bread is not only possible for the average home cook, it's actually pretty simple.
Read more: Top bread machines for home bakers
Start with an easy bread recipe to use as a base
The saving grace for inexperienced bread bakers is Jeff Hertzberg and Zoe François' The New Artisan Bread in Five Minutes a Day cookbook. Their simple recipe for country bread creates a large batch of wet dough that can be stored in the refrigerator, ready to be portioned and baked, for up to two weeks. Using their easy no-knead recipe and my accompanying tips, anyone can perfect the art of artisanal bread at home.
Here's a different no-knead bread recipe in action for all the visual learners out there:
And here's my go-to recipe (adapted from The New Artisan Bread in Five Minutes a Day):
- 3 cups lukewarm water
- 1 tablespoon granulated yeast
- 1 1/2 tablespoons kosher salt
- 6 1/2 cups (2 pounds) all-purpose flour
- In a large bowl or lidded food storage container (like this one) combine the water and yeast. (If you're new to working with this ingredient, see Chowhound's beginner's guide to baking with yeast.)
- Dump in all the flour and salt at once and stir with a wooden spoon or a Danish dough whisk (I have one, and it's super helpful).
- Stir the mixture briefly, only until all of the flour is incorporated. It will be a wet, rough dough.
- Cover loosely with plastic wrap (or gently put the lid on your plastic container) so the gases from the yeast can escape.
- Let the dough rise at room temperature for about two hours to double in size. Do not punch down the dough or obsessively check on it by lifting the lid, no matter how tempted you may be.
- You can now begin the process of baking your loaf, but I recommend refrigerating the dough first; it's much easier to handle when it is chilled. The authors explain, "It is intended for refrigeration and use over the two weeks, ready for you anytime. The flavor will deepen over that time, developing sourdough characteristics."
- When you're ready to bake your chilled dough, remove it from the fridge and sprinkle some flour on the surface to prevent your hands from sticking. Pull a one-pound ball of the dough from the container, which is roughly the size of a grapefruit. The dough should stretch, not break off, when you pull it, which is a sign of good gluten development. Put the rest of the dough back in the fridge for later use.
- Gently form the dough into a ball by pulling and rotating the edges to create tension along the surface, like this.
- Let the dough rest for at least an hour, and up to 90 minutes. About 30 minutes into the resting, preheat your oven to 450ºF with a baking stone on the center rack, and a metal broiler tray on the rack below (No baking stone? See Tip #1 below). It's perfectly normal if the dough doesn't rise much during this period.
- Dust the entire surface of the dough with a thin layer of flour. Score the loaf with ¼ inch slashes, which helps shape the loaf and lets gases escape (See Tip #2 below).
- Slide the loaf into the oven onto the preheated baking stone and add a cup of hot water into the broiler tray, then close the oven door. As the bread bakes, the water evaporates into steam, which allows the bread to develop a crisp and crusty exterior.
- Bake for about 30-35 minutes, until the loaf is a deep brown color (don't be afraid of a dark crust -- the more color, the more flavor). Allow the loaf to cool down until it's room temperature before you slice into it, otherwise the crumb will become tough.
Now, a few more tips to help you on your way to bread mastery...
Tip #1: Use your cast iron skillet or Dutch oven
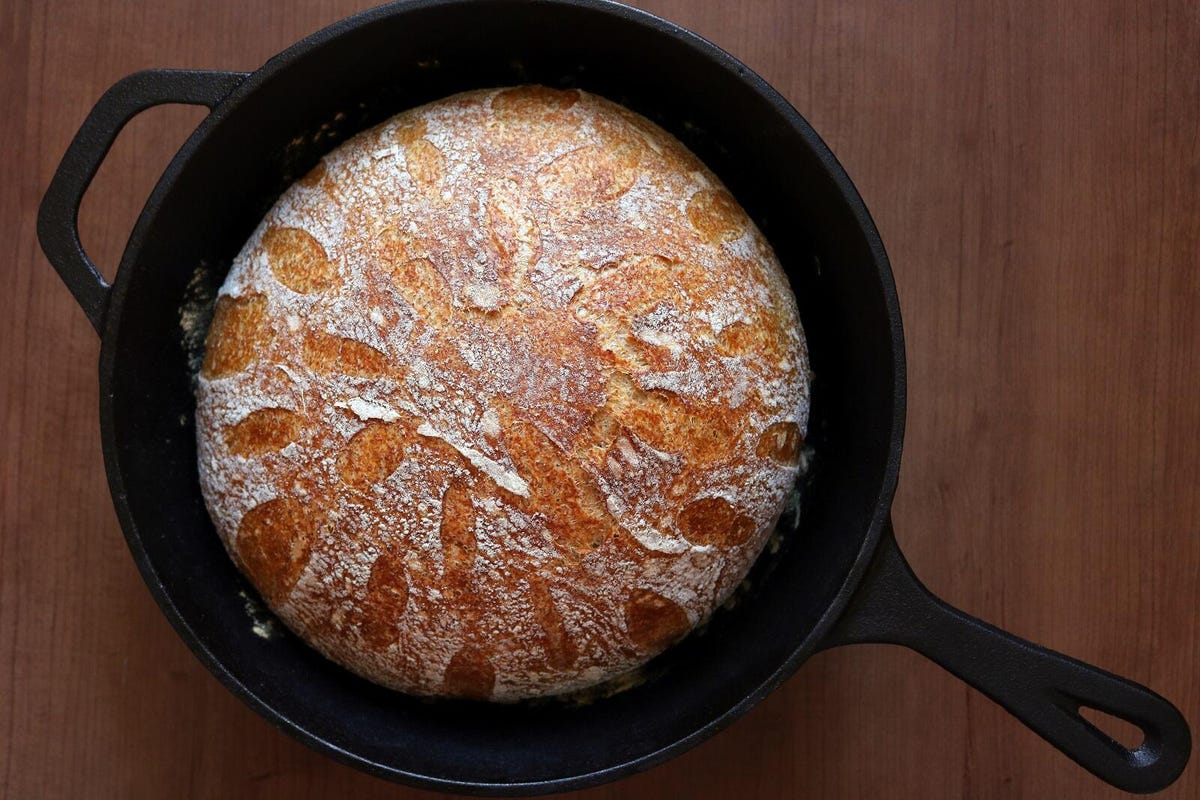
Everyone needs a staple cast iron skillet, no excuses. I've used my 10-inch skillet to fry eggs and bacon, bake cakes, sear steaks, deep-fry doughnuts and, of course, bake bread. The reason this recipe calls for a baking stone is because it conducts heat evenly and will help your loaf develop a nice crust, and a cast iron skillet does the job just as well! (Skillet pizza is also great.)
After shaping the loaf on my counter, I put the dough into my lightly-floured skillet for the final resting period, then I stick the skillet right into the oven when it's ready for baking. And if you don't have a broiler tray for the water, put a frying pan or any metal bakeware on the bottom shelf while the oven is preheating, and pour your water into there instead. Don't forget to properly clean your skillet afterwards.
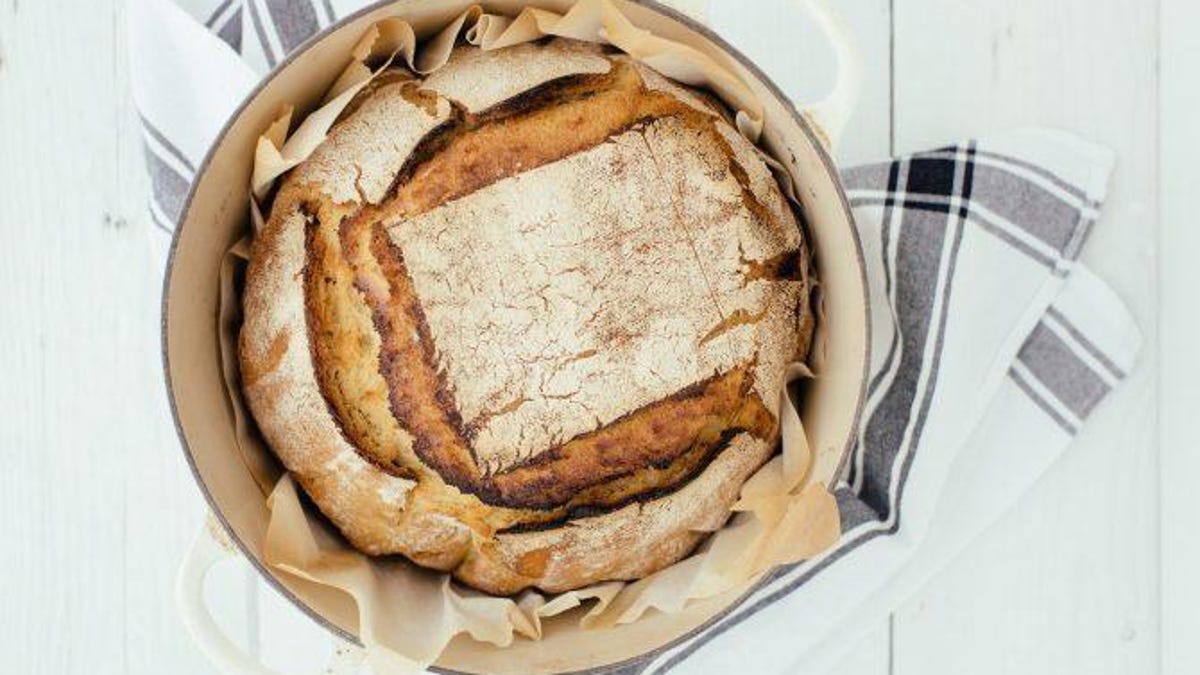
No skillet? Bake bread in a cast iron Dutch oven instead.
If you have a hankering for a softer crust, you can even make Crock Pot bread in a slow cooker (this also lets you skip the second rise).
Tip #2: Decorate your loaf like a pro
If you really want to impress, invest in a scoring blade. You can use a regular serrated knife to make simple crisscross slashes on your loaf, but that's boring. Using a tiny razor blade, you can create unique, intricate designs that will bring your homemade bread to the next level.
Tip #3: Use an oven thermometer
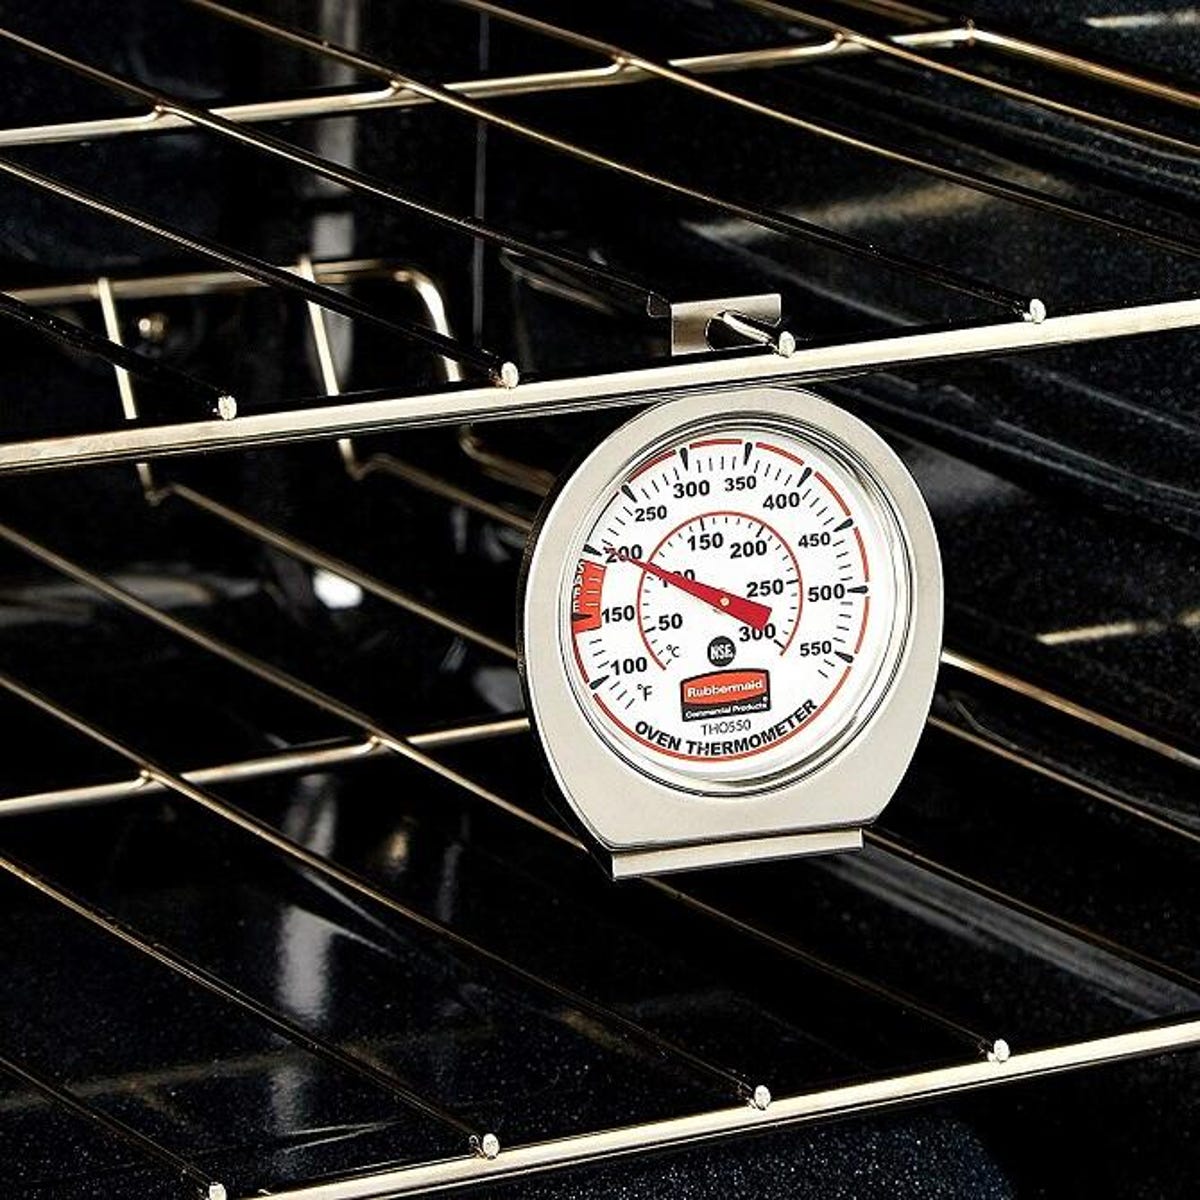
Unfortunately, there's a huge difference between commercial bakery ovens and the unreliable ovens in most home kitchens. Your oven may claim to be preheated, but you can't be sure that the temperature is really accurate. Avoid the mystery by buying a cheap oven thermometer, so you can finally be sure your creations will bake properly. Here are some more common bread-making mistakes that could trip you up.
Level up: Make a sourdough starter
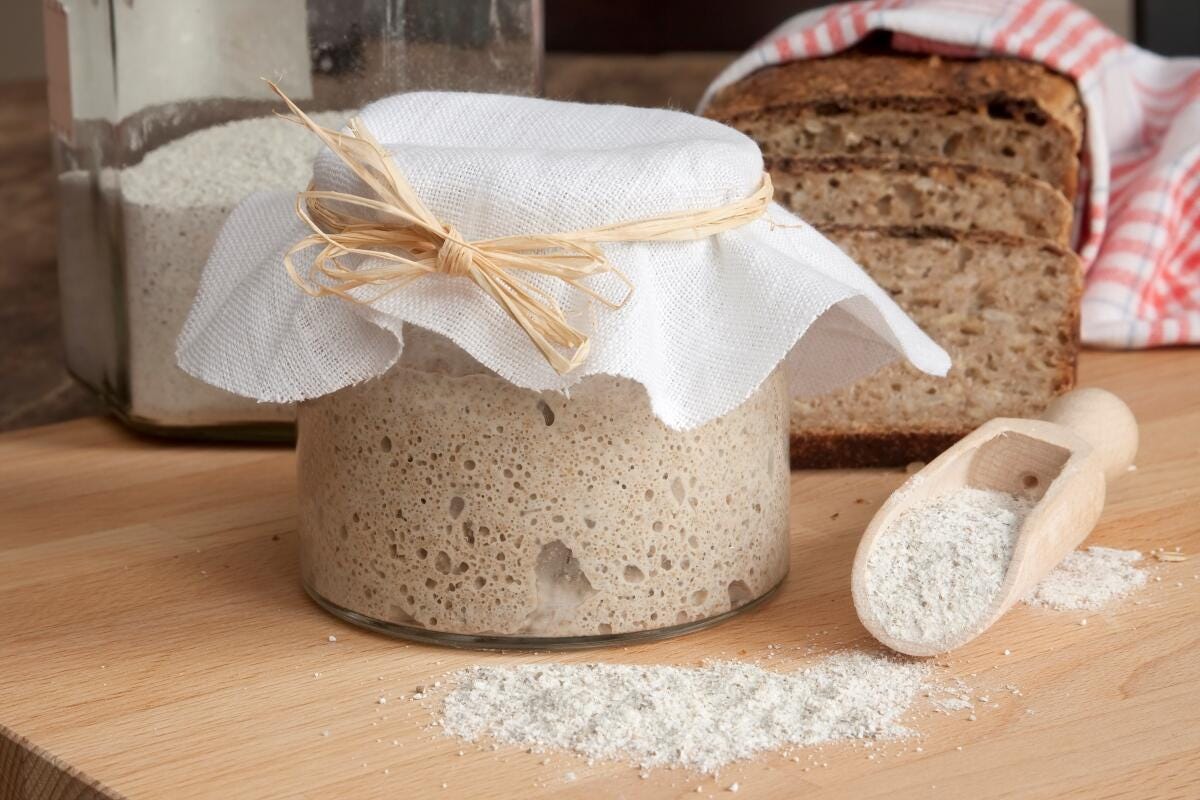
Once you have a basic understanding of how yeast works and you've mastered your first batch of dough, challenge yourself by creating your own sourdough starter. Check out this easy guide for pointers. When you want to bake with it, simply replace the yeast in the above recipe with 1 1/2 cups of activated sourdough starter, then decrease both the water and the flour in the recipe by 3/4 cup. And don't forget to feed your starter!
This story was written by Nikki Freihofer and originally published on Chowhound.