How to back up Kindle purchases on your PC or Mac
Here we'll show you how to save yourself the hassle of resurrecting your digital library by backing up your Kindle purchases to your computer.


Amazon's Whispernet service does a very good job of delivering books directly to any registered Kindle. The trouble is, if anything catastrophic should happen, you'd be forced to download them all again -- unless you have a backup. The process is free, but it can be time-consuming.
Here we'll show you how to save yourself the hassle of resurrecting your digital library by backing up your purchases to your computer, explain what digital rights measures Amazon has in place, and reveal how even those without a wireless network can save money by buying a Wi-Fi-only Kindle.
Backing up your Kindle
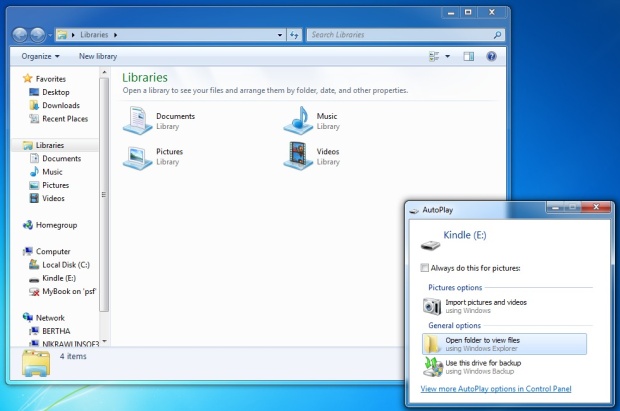
Your Kindle's charging cable is key to backing it up. As the icons on each end suggest, this is a regular USB cable, which once detached from the plug can be used to connect your Kindle to a Mac or PC.
Connected this way, its internal storage mounts as an external drive, appearing as 'Kindle' on a Mac's Finder sidebar, and assigned a drive letter when hooked up to a Windows PC.
Kindle's filing system isn't particularly tidy. It consists of three key folders called audible, music and documents. The first two contain your audiobooks and MP3s, the third, 'documents', holds pretty much everything else, including downloaded books, text files, PDFs and screen grabs. You can capture your Kindle's screen display at any time by holding shift and alt while briefly pressing 'G' on its keyboard. Grabs are saved in .gif format and given the prefix 'screen_shot'.
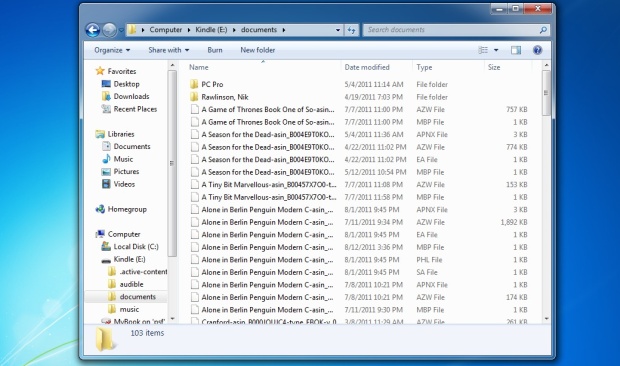
If you've connected your Kindle to your computer before, you may spot some other folders alongside these three defaults, particularly if you have used a management tool such as Calibre, which leaves small metadata files behind it.
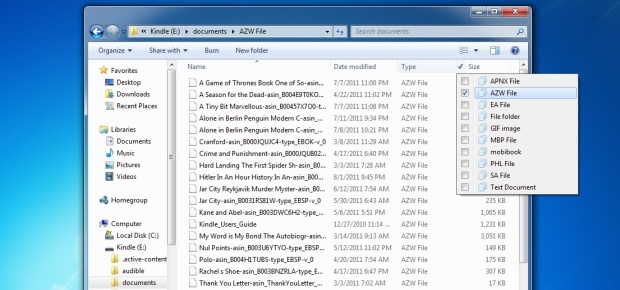
Sort the files in the documents folder according to type. If you're using Windows 7, the easiest way to do this is by clicking the drop-down menu on the right-hand side of the Type column header. From this, select AZW to filter out all of the non-book files.
On a Mac you can do the same thing by entering .azw in the Finder toolbar's search box to display only those documents with that extension.
This isolated selection is your collection of downloaded books, which you can drag to another location on your computer for storage. Each will be preserved in its original format without all of the associated bookmarks. To keep track of these, be sure to also copy across any .mbp files bearing the same names as your books.
Transferring books to another device
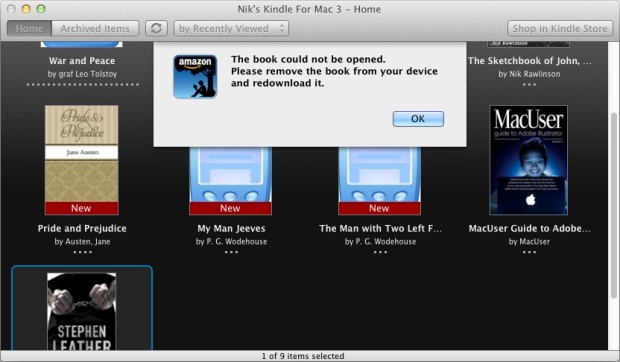
Charged-for Kindle books are copy protected, so while you can back them up this way you can't transfer them to another Kindle or reader application. Doing so will throw up an error.
You can, however, transfer free books on which copyright has expired.
This restriction not only prevents copyright infringement, but also stops you from either copying them to another device you own yourself, or reading your backed-up books in a Kindle app on your PC, Mac, tablet or phone.
To transfer a copy of your bought books to another device, ensure that it's registered to your account and either use the built-in synchronisation option to choose the books you want to download from your archive, or revert to the Amazon site to retrieve multiple documents over Whispernet. After logging in using a normal browser, click Your Account > Manage your Kindle (the latter is in the Settings box). Enter your password again, and Amazon will display a list of your past purchases.
Each is accompanied by an Actions menu that lets you re-send the book to any one of your devices or delete it from your library. This latter option removes it entirely from your list of purchased books, so use it with caution, as you'll have to buy it again if you want to get it back.
To dispatch another copy of a purchased book to one of your Kindles or apps, Amazon needs to know which device you want to re-send your book to.
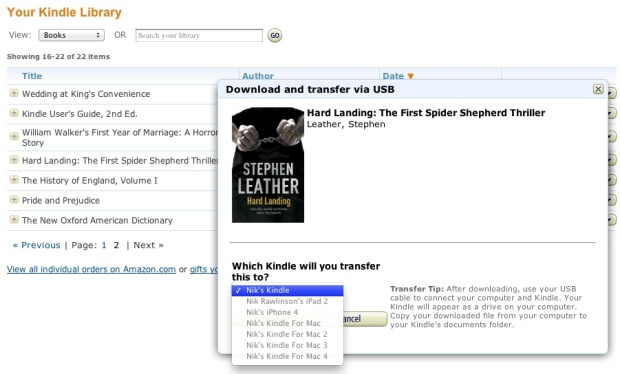
This isn't only so that it can find it over Whispernet, but so it can apply the necessary rights management. This is more obvious when you elect to download the file to your computer and transfer it by USB, as you'll still need to specify on which device it will be used.
Save money on your Kindle purchase
The ability to transfer purchases this way means that even if you don't have a wireless network at home you can still avoid paying extra on a 3G-enabled Kindle. If you bought yours from Amazon direct it will already be registered to your account, but if you bought it through a third-party such as Currys or Staples then you'll need to do this yourself.
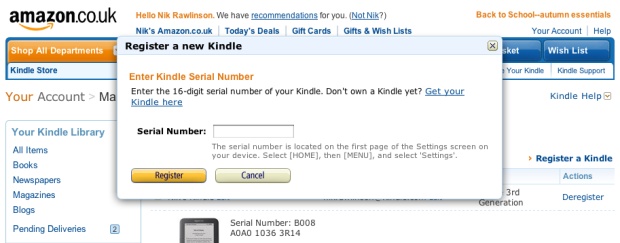
Every Kindle has a unique serial number, which Amazon claims is printed on the reverse. It's missing from our Kindle 3, but holding Shift and Alt on the Kindle keyboard while pressing full stop brings it up on screen, along with matching barcodes.

Make a note of this, log in to your Amazon account using a regular browser and go to amazon.co.uk/gp/digital/fiona/manage. Click the 'Register a Kindle' link in the sidebar and enter the serial number to tie it to your account. Amazon can now use this to apply the necessary DRM to your purchases that will allow them to be read on the device.
Now, having found a book you want to buy, instead of delivering it straight to the registered Kindle, pick 'Transfer via Computer' on the 'Deliver to' pop-up menu.
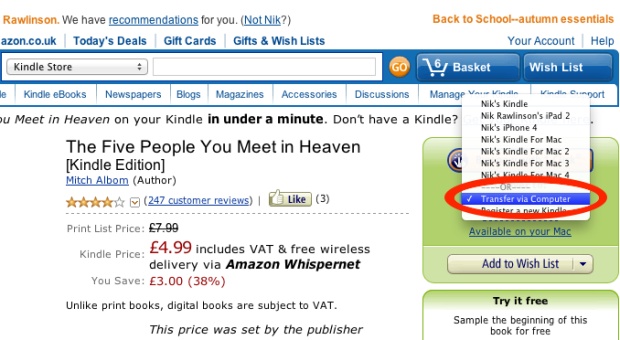
Amazon will ask you to confirm to which device you intend to transfer it. On a Mac it will be saved to your Downloads folder. On a PC, you'll need to choose whether to save or run the file. Opt to save it and choose a destination.
Finally, connect your Kindle to your computer and drag your downloaded book to its 'documents' folder.