Four essential tweaks keep Outlook simple and safe
Send and receive mail as plain text, block new-mail pop-up alerts, close the reading pane, and create a custom contacts view.


You can't expect any application as complicated and full-featured as Microsoft Outlook to suit you perfectly right out of the box. Here are the Outlook adjustments I rely on to make the program safer and easier to use.
Send and receive mail in plain text
In a previous post, I described how to make sure Outlook shows all incoming mail as plain text. Quick recap: in Outlook 2003, click Tools > Options > Preferences > E-mail Options, and in the Message Handling area, check "Read all standard mail in plain text." To do the same in Outlook 2007, click Tools > Trust Center > E-mail Security (in the left pane) and check "Read all standard mail in plain text" under Read as Plain Text.
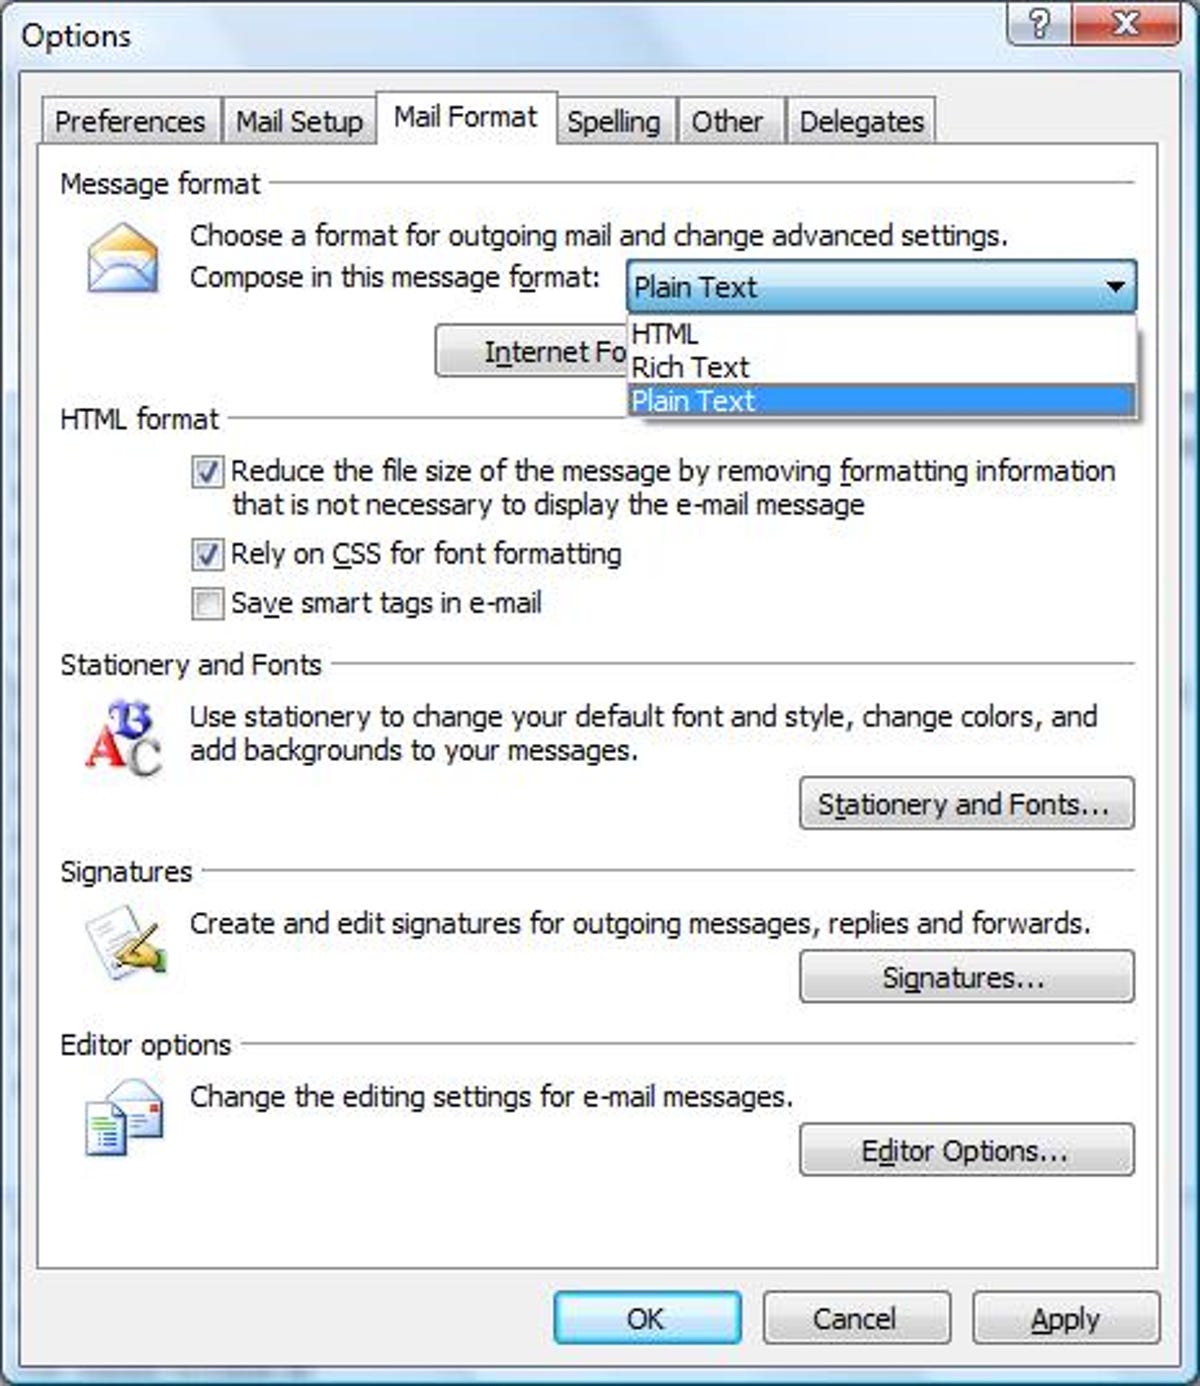
But what about the mail you send? Keep things simple for the recipients of your messages by sending them without the fancy--and usually unnecessary--HTML formatting. In Outlook 2003 and 2007, click Tools > Options and choose the Mail Format tab. In Outlook 2003, click Plain Text under "Send in this Format." In Outlook 2007, choose Plain Text in the drop-down menu in the "Message format" area.
Turn off new-mail pop-up windows
Some people want to know the moment a new message has arrived in their Outlook inbox. For me, the alerts that Outlook pops out of the system tray whenever a message comes in are distractions, plain and simple.
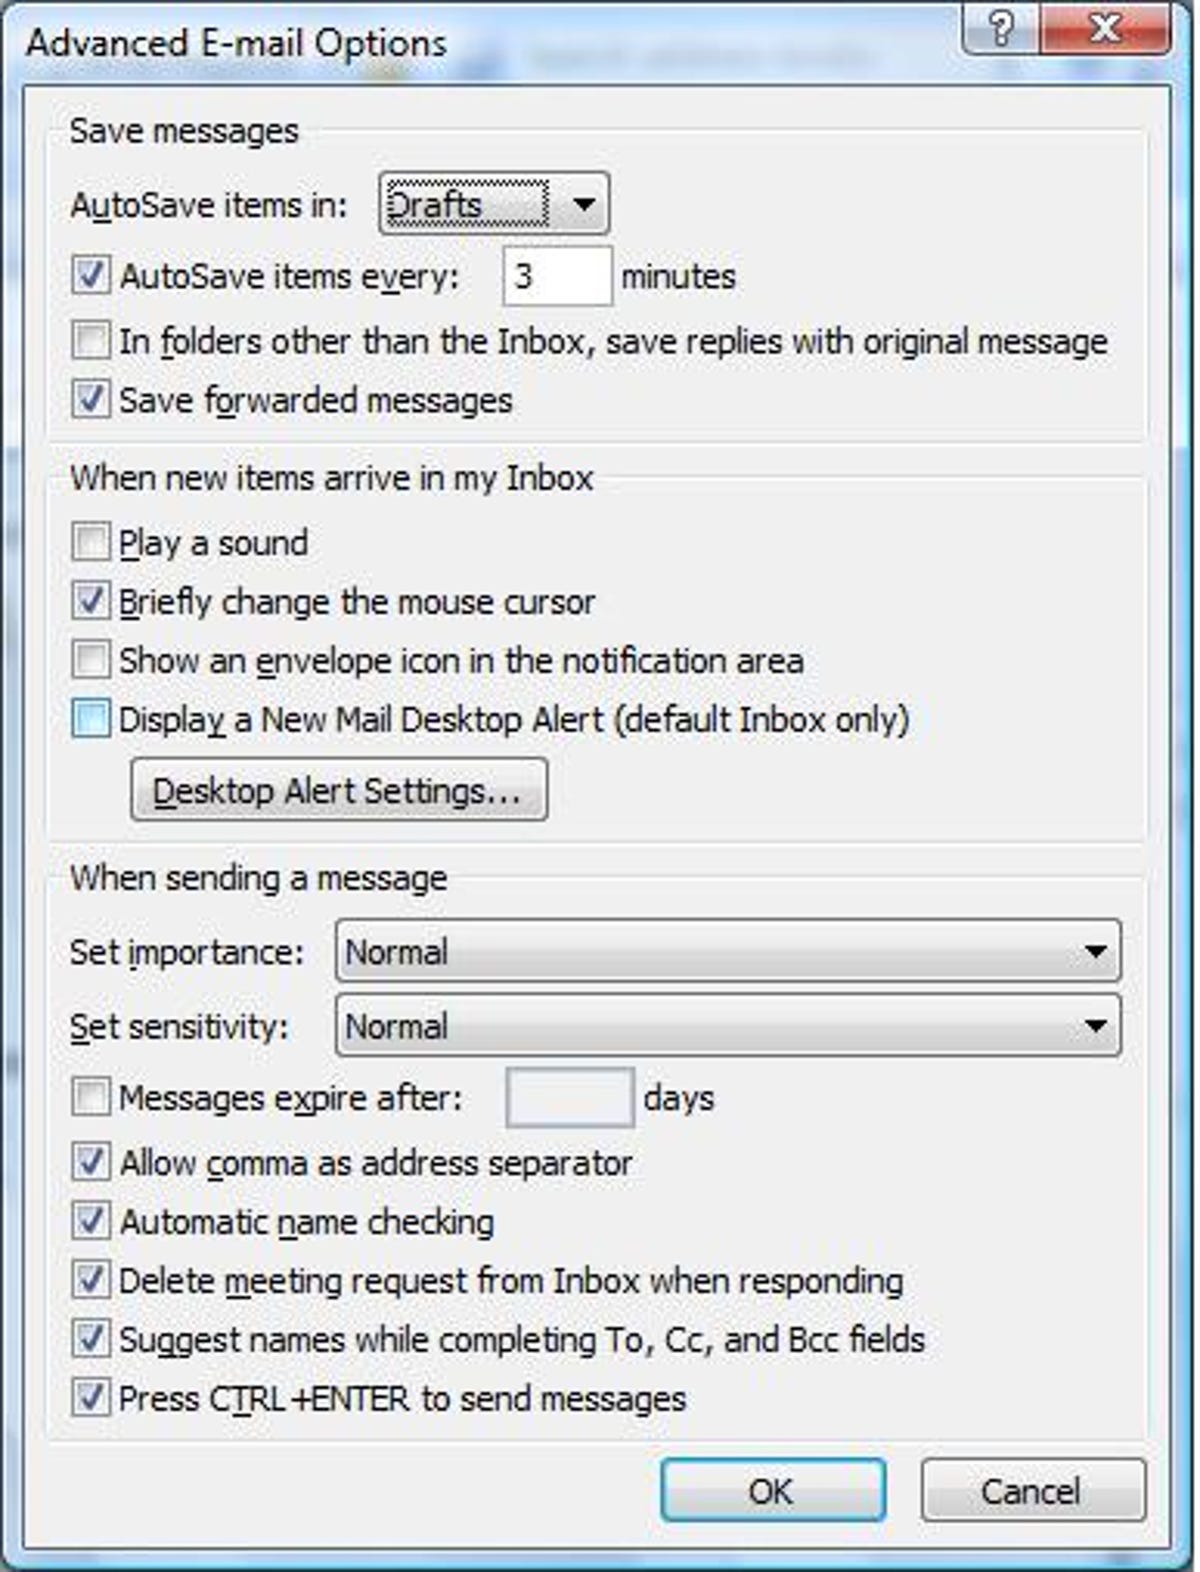
To quash the alerts, you can just click the Disable New Mail Message Alert option on the menu that appears when you click the down arrow in the top-right corner of the alert itself. Or if you'd rather not wait for the next alert to block alerts, click Tools > Options > Preferences > E-mail Options > Advanced E-mail Options. Uncheck "Display a New Mail Message Alert (default Inbox only)" and click OK three times.
See more of your inbox by disabling the Reading Pane
I tend to keep a lot of mail in my inbox--like, 301 messages, last time I checked. That's why I like to enlarge Outlook's Inbox window at the expense of the To-Do Bar (just click the X in the top-right corner, or drag it to the right to minimize it but keep it in view) and the Reading Pane (click View > Reading Pane > Off).
Another option for opening Outlook with the Reading Pane disabled is to add the switch "/nopreview" to the file path in the shortcut you use to open the program. Right-click the shortcut, choose Properties, and make the change to the path in the Target field under the Shortcut tab. For example, your file path may read like this:
"C:\Program Files\Microsoft Office\Office12\OUTLOOK.EXE /recycle /nopreview".
Roll your own Contacts view
Outlook gives you plenty of ways to view your contact information, but none of the choices was just right for me. So I created a custom view that shows only the fields I want to see, in the order I want to see them.
To customize the look of your Contacts window, click View > Current View > Define Views > New. Give your view a name, choose a format, decide whether you want the view to be available to every user on the machine, and click OK. Next, click the Fields button in the Customize View dialog box, add or remove fields as you see fit, click OK twice, and select Apply View.