Five iPhoto editing tips
Get the most out of the editing tools in iPhoto '11.


If you are overwhelmed by the sprawling features of Photoshop or another high-powered editing application, iPhoto offers simple yet effective editing tools for amateur photographers. In fact, performing edits in iPhoto can be as simple as pressing a single button. Don't be afraid to get in there and experiment; iPhoto editing is nondestructive, meaning that you can always return a photo to its original, unedited state.
1: Wave the magic wand
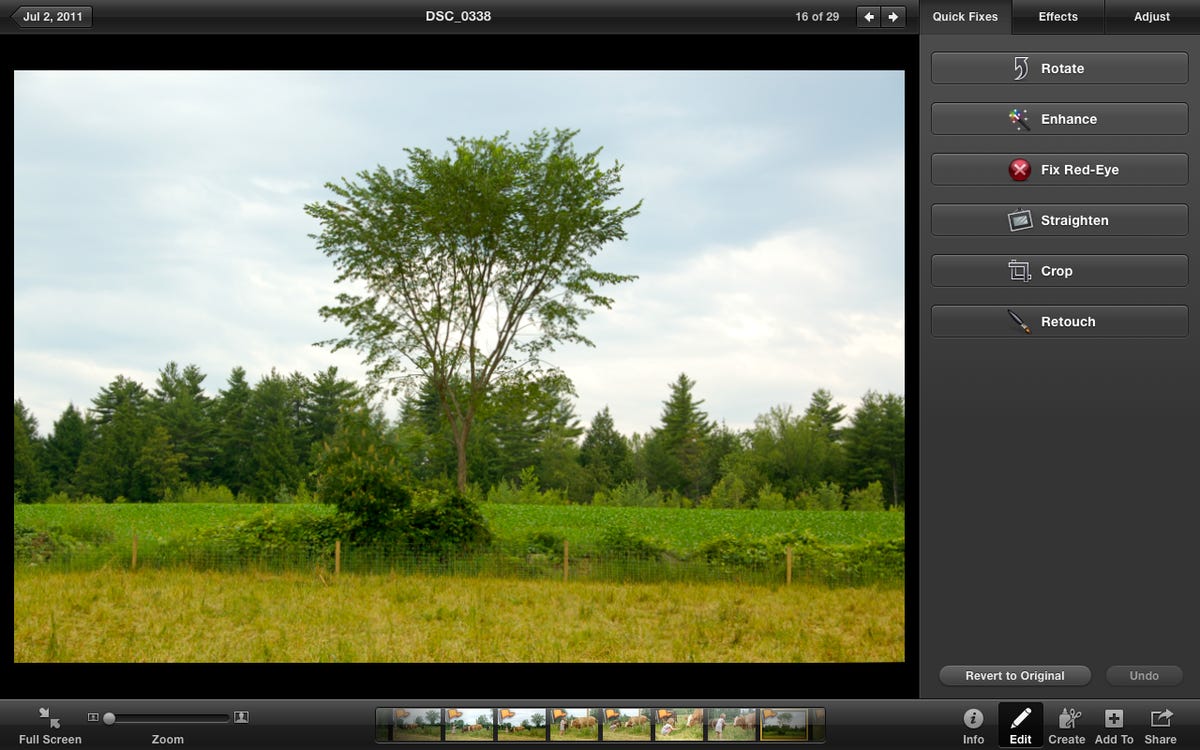
The quickest way to fix a photo is to hit the Enhance button. Simply highlight a photo you'd like to edit and click the Edit button in the lower-right corner of iPhoto. It will call up the edit panel to the right of the photo. At the top of the edit panel you'll see three tabs: Quick Fix, Effects, and Adjust. Among the Quick Fix tools for rotating, straightening, cropping, and retouching your photo is the magic Enhance button. Click it and your photo will likely improve.

If you click on the Adjust tab, you can see which sliders moved. By default, they are set at 0, with the exception of the Saturation slider, which is set at 50. In most cases, I find that Exposure and Saturation get bumped up, along with Shadows occasionally. By taking a look to see how the Enhance tool changes your photos, you can begin to understand the effects of the various sliders and can start manually editing your photos for finer editing control. You can also adjust the sliders after using the Enhance tool to make minor tweaks.

2: Shift to see original
If you aren't sure if the edits you've made to an image have improved it, hold down the shift key to see the original. It allows you to quickly toggle between the original image and the edited version, helping you determine which version looks better. If you don't like the way your edits are going, simple hit the Revert to Original button at the bottom of the edit pane. It's visible from any of the three edit tabs. Next to it is an Undo button, which lets you erase the last edit you performed, keeping any previous tweaks you might have made.
3: Edit in full screen, with multiple photos side by side
The full-screen command isn't just useful when viewing photos; you can also edit in full-screen mode. To view in full screen, click on the Full Screen button in the lower-left corner of iPhoto, or use the keyboard shortcut Command-Option-F. To exit, hit the Full Screen button again or press the Esc key.

If you have a batch of photos to edit before, say, printing or uploading to an online album, you can edit multiple photos side by side. Highlight two or more photos and then click Edit. All of the photos will be placed side by side in edit mode. I haven't found a way to highlight all of them to perform the same edit simultaneously on a batch of photos, such as the Enhance function, for instance. You can cycle through photos from your library in each spot, however, by pressing the arrow keys.
4: Zoom for greater control
Some edits, such as fixing red eye or retouching blemishes, require greater control. To zoom in on an image, press the 1 key to magnify by 100 percent or the 2 key to magnify by 200 percent. It will zoom in on the part of the image where the cursor is located, and a small navigation window also pops up, letting you easily move to the section of the photo you'd like to touch up.
If you choose to fix red-eye or retouch an image, you'll see a circle that you can move over the trouble spot. You can resize this edit circle with the slider in the edit pane or by using the bracket keys.
5: Protect your skin
As you gain confidence in making edits in iPhoto, you might find you are using the Enhance button less and using the various sliders on the Adjust tab more. The Saturation slider is a powerful tool; it can really make images pop as you saturate colors. Fans of super-saturated images from iPhoto apps Hipstamatic and Instragram will likely gravitate toward this tool. If you use the Saturation slider, be sure to check the box underneath it, labeled Avoid saturating skin tones. This will keep skin tones more natural looking as you over-saturate a photo, which can help create some unique shots without the person in them appearing radioactive.

There you have it, a handful of iPhoto editing tips that should help get you on your way. If you have any iPhoto editing tips or tricks, please let us know in the comments below.