Create a simple form in Microsoft Word
Use the form controls in Word 2007 and 2003 to gather information from a group of people.


Microsoft Office includes industrial-strength tools for creating forms of all types, but the Access database and InfoPath information manager are overkill for my meager form requirements. If I need to collect basic information from a bunch of people in a hurry, such as for planning a potluck lunch, I stick with the simple form-creation tools in Word.
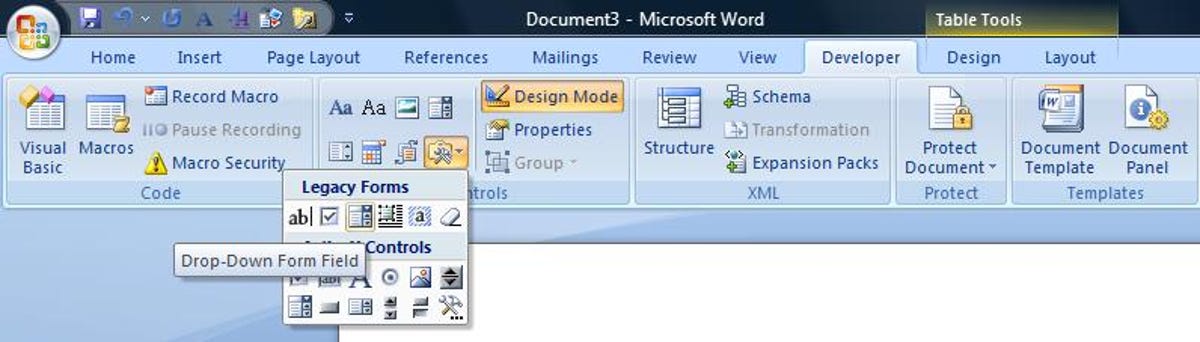
Word 2007 groups the options found on the Forms toolbar in Word 2003 into the Legacy Tools button in the Controls section under the Developer tab. These form fields are a subset of Office 2007's Content Controls, which allow you to populate forms automatically from external sources, extract form data as XML for use in other applications, and perform other operations. I may have use for these advanced features someday, but for creating a basic form, they're too much.
Start with a template and a table
Whether you're using Word 2007 or Word 2003, create a template to serve as the master copy of your form document. The simplest way to format the form is by using a two-column table: The left column lists the field names, and the right one holds the data you're collecting. In my example form for planning a company potluck lunch, I created fields for the respondent's name, department, and preferred event date, as well as for the food and beverage each person plans to bring.
Text boxes work for the name, department, and food fields, and I use a drop-down menu for the beverage choice. I also use a drop-down menu for the date preference in Word 2003, but Word 2007 adds a control that lets people select a date from a monthly calendar.
To select a form control in Word 2007, place the cursor in the table cell where you want the control, click the Developer tab, and choose the appropriate icon in the Controls section, or click the arrow in the bottom-right corner of the Legacy Tools icon and select the control from the drop-down list.
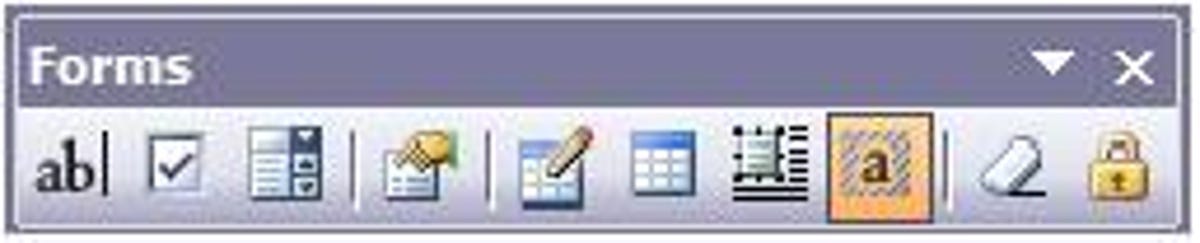
In Word 2003, place the cursor in the table cell you want the form field to appear in, right-click an empty area of the toolbar, select Forms to open the floating Forms toolbar, and choose one of the controls on the toolbar.
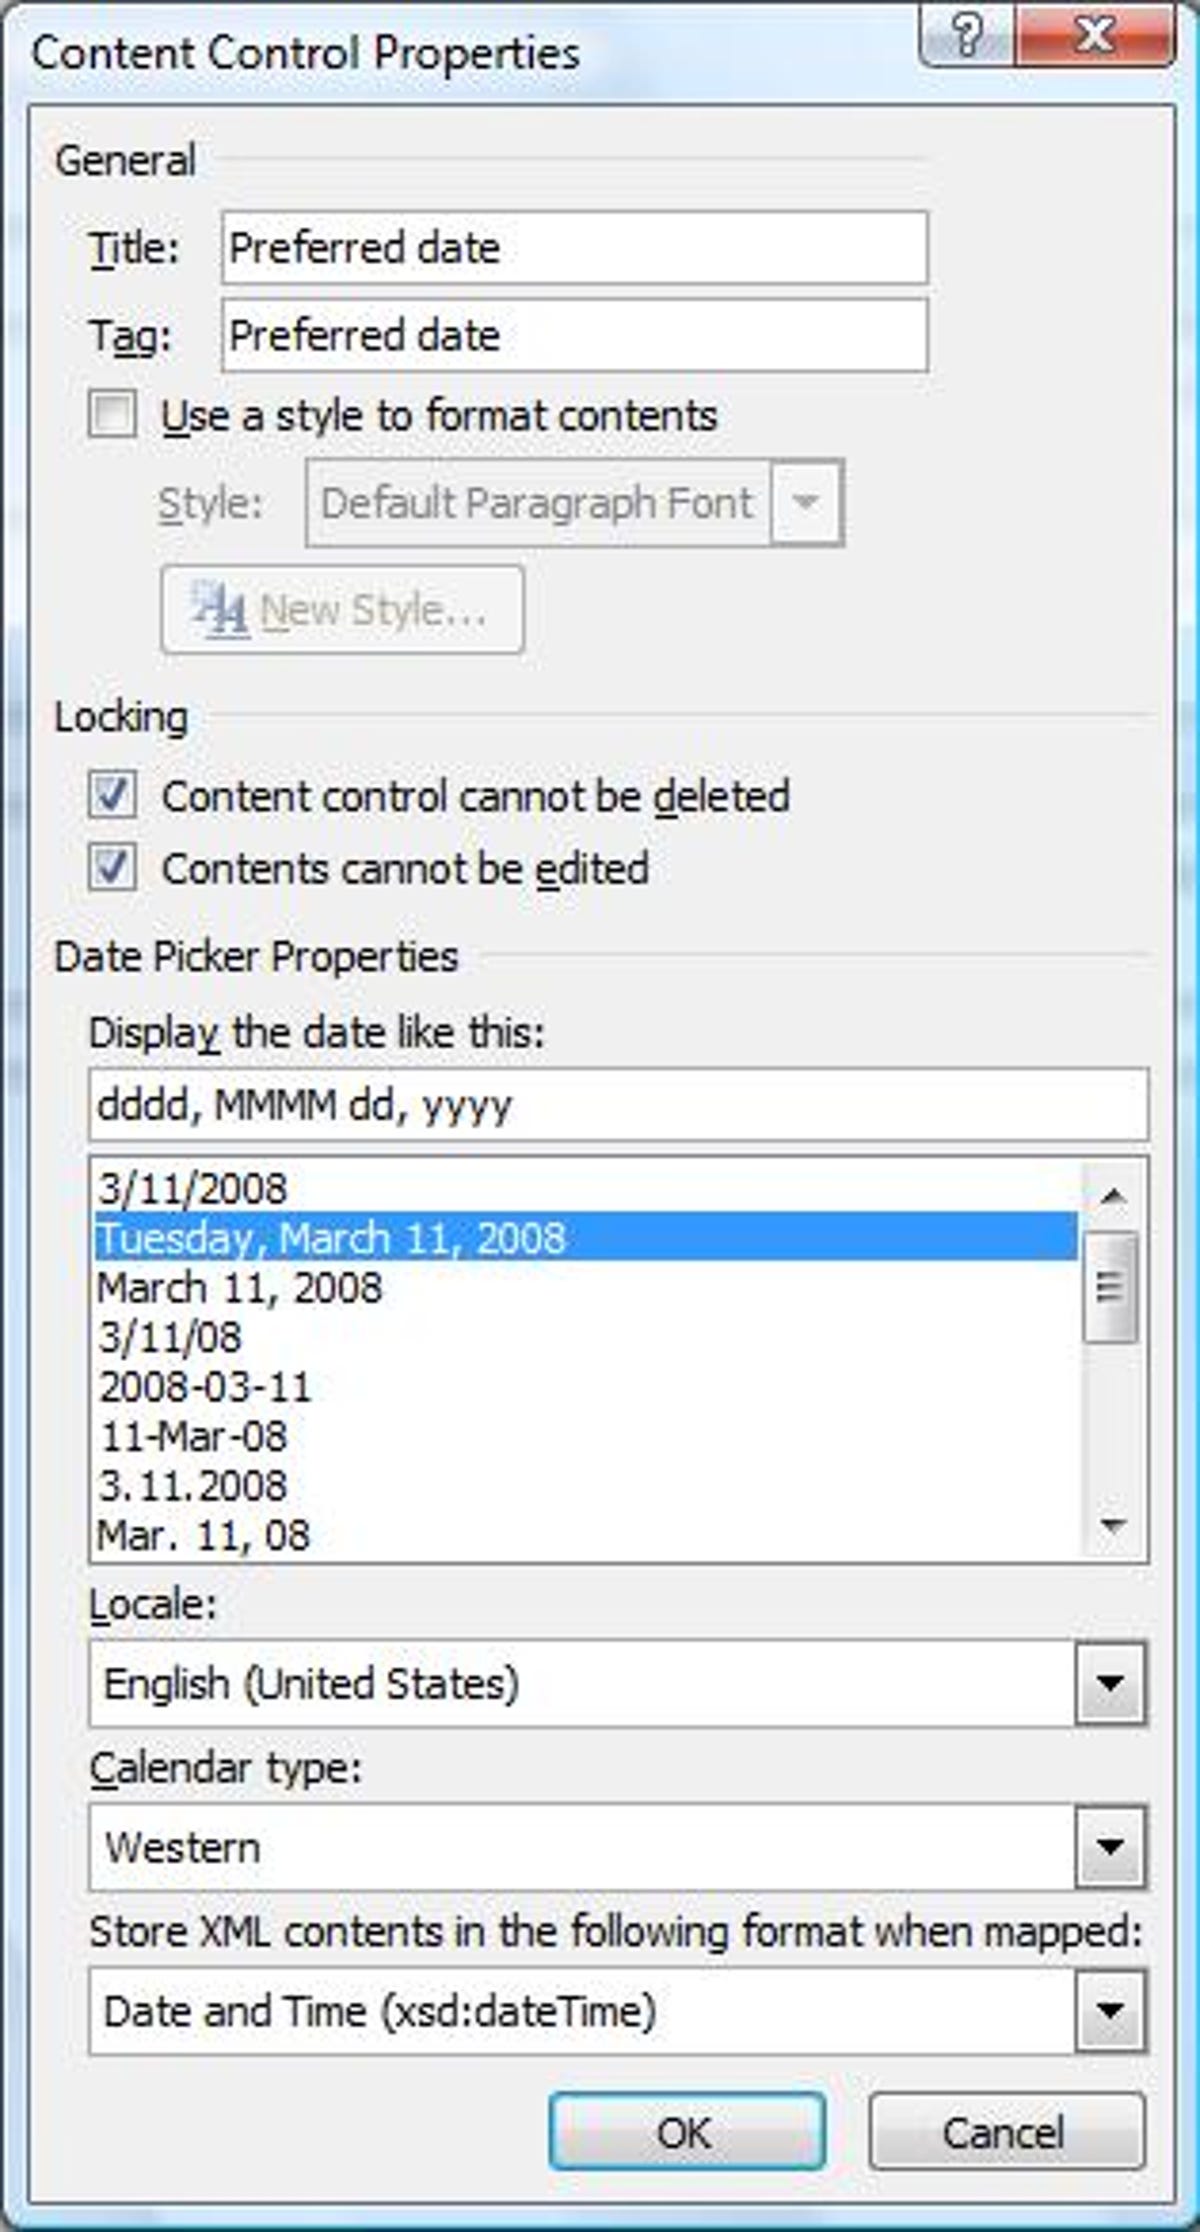
Once your form control is in place, right-click it and choose Properties to customize it. Another way to access the control options is by selecting the Properties button in the Controls section of the Developer ribbon in Word 2007, or by clicking the Form Field Options icon on the Forms toolbar in Word 2003. For text fields, you can change the default text that appears (by adding "Click here to enter text," for example). You can also specify that a number, date, or other type of text be entered; set a maximum length; specify a text format; and even set a macro to run when data is entered, or when the field is exited. This is also how you enter items for drop-down lists, and set the size and default values of checkboxes.

There's a more elegant way to ask people to select their preferred date in Word 2007: choose the Date Picker control, which adds a month-by-month calendar to the form that appears when you select it and choose the down arrow to the right of the current entry. The Content Properties dialog lets you specify the resulting date format.
When your form controls are in place, save the file using the .dotx format in Word 2007, or .dot in Word 2003. When you're ready to distribute your form, open a new Word document, and choose the template from the list that appears. Save the resulting file with the .docx format in Word 2007, or .doc in Word 2003. Now the form is ready for distribution, but first make sure your recipients can add text and otherwise access its fields. In Word 2007, place the cursor in the field, click the Properties button in the Contents section of the Developer ribbon (or right-click and choose Properties), and make sure "Contents cannot be edited" is unchecked. In Word 2003, ensure that the lock icon at the far right of the Forms toolbar is selected.
When the forms are returned, you can collect the data as comma-separated values in a text file (.txt) in Word 2003 by selecting File > Save As > Tools > Save Options, checking Save data only for forms, and clicking OK > Save > OK. In Word 2007 you should be able to do the same by clicking the Office button, choosing Save As > Word Document > Tools > Save Options, selecting the Advanced tab in the left pane, scrolling to the "Preserve fidelity when sharing this document" section in the right window, checking "Save form data as delimited text file," choosing Plain text (.txt) in the Save as type drop-down menu, and clicking Save > OK. Unfortunately, I couldn't get this function to save the form content when I tested it. I'll keep experimenting, though, and I'll let you know if I find the solution.
Tomorrow: Customize the Details view in Windows Explorer.