Clean up and organize your iTunes music library
I present four ways to tidy up the music you have stored in iTunes, none of which requires complicated procedures or added software.


What better way to end our month of Spring Cleaning than with the odious task of cleaning and organizing your sprawling iTunes music library. You may have started with the best intentions, but over the years the metadata got away from you. Or perhaps you were a mess to begin with and ditched your beloved collection for the simplicity and ease of a streaming service such as Pandora, Rdio, or Spotify. If you take a little time to wrestle with the data behind your files in iTunes, you may rediscover the greatness of your underused or abandoned music collection. So, let's dust off iTunes and get in there and clean up your library.
Metadata is your friend
Every track in iTunes has data behind it that helps iTunes catalog it, from the obvious track, artist, and album information to year, track number, and genre. The accuracy of a track's metadata depends on how you imported the track to iTunes. To tweak the metadata of a track or, better yet, an entire album, right-click on a track or album and select Get Info. On the Info tab, you'll find various fields to edit.
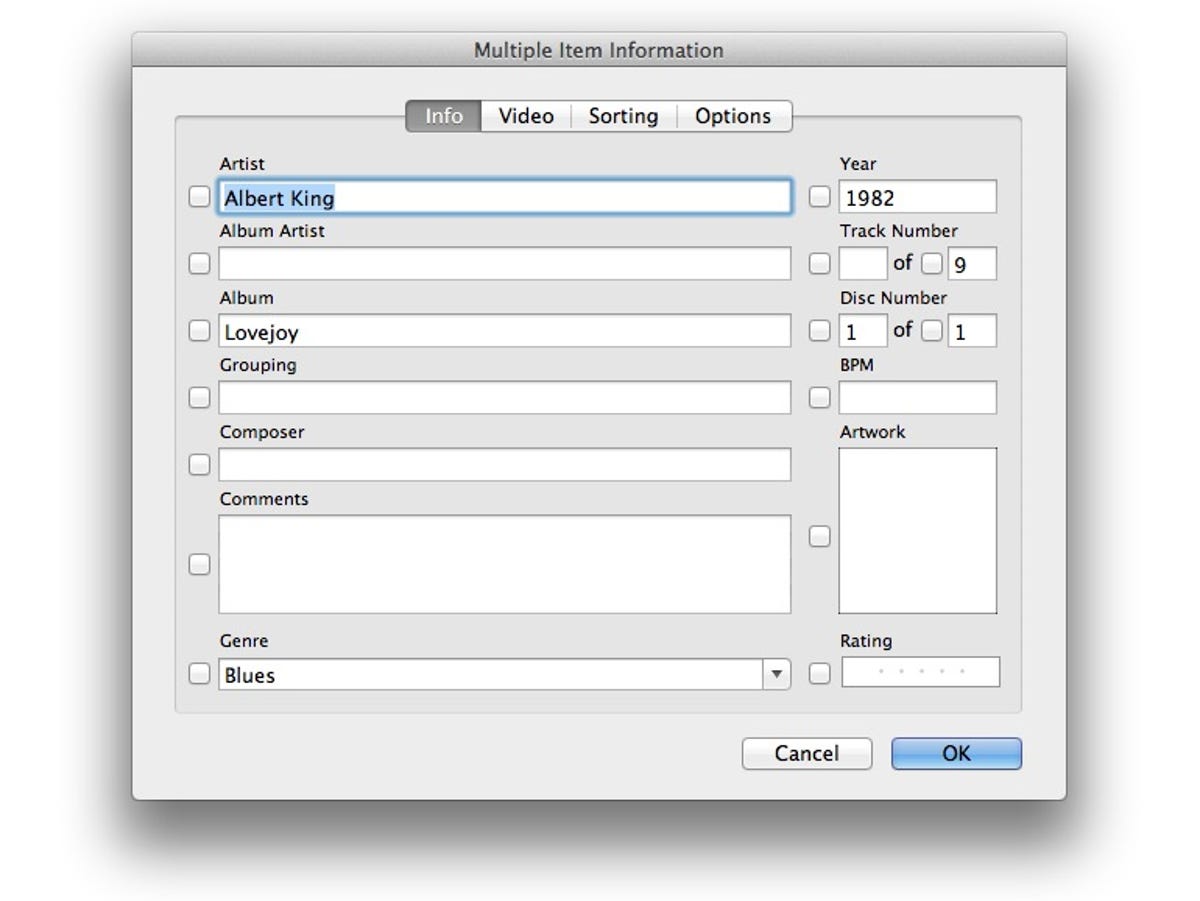
I'm a big fan of shuffling songs via genre (jazz shuffle during dinner, reggae shuffle on Sunday morning, a blues shuffle nearly any time of day), so I keep a close watch on how an album is categorized in this regard. For example, some albums I perceive as reggae get categorized as World, so I will change them to Reggae for my reggae-genre-shuffling enjoyment.
Genres in iTunes are selected via a pull-down menu and many are similar to one another. I don't listen to enough alternative and punk music to have a genre for Alternative and another for Alternative & Punk. So, when I import an album and iTunes classifies it as Alternative & Punk, I change it to Alternative. All the better for my Alternative genre shuffle. Same for the Electronic, Electronica, and Electronica/Dance genre choices and the Country and Country & Folk genres.
Find missing album art
I have found that iTunes is pretty good at grabbing album art; it found art for the majority of albums I have imported to iTunes over the years, the vast majority of which were from CDs. For the albums that iTunes failed to find art for, you have two options.
Option 1: Tell iTunes to look again
Right-click on a album that's lacking art and select Get Album Artwork. In my experience, iTunes is successful in finding artwork for more mainstream releases and occasionally surprises me by finding more obscure albums, so it's worth a quick check before preceding to method 2. And it doesn't take iTunes long to search for art -- only a couple of seconds, whether it finds it or not.
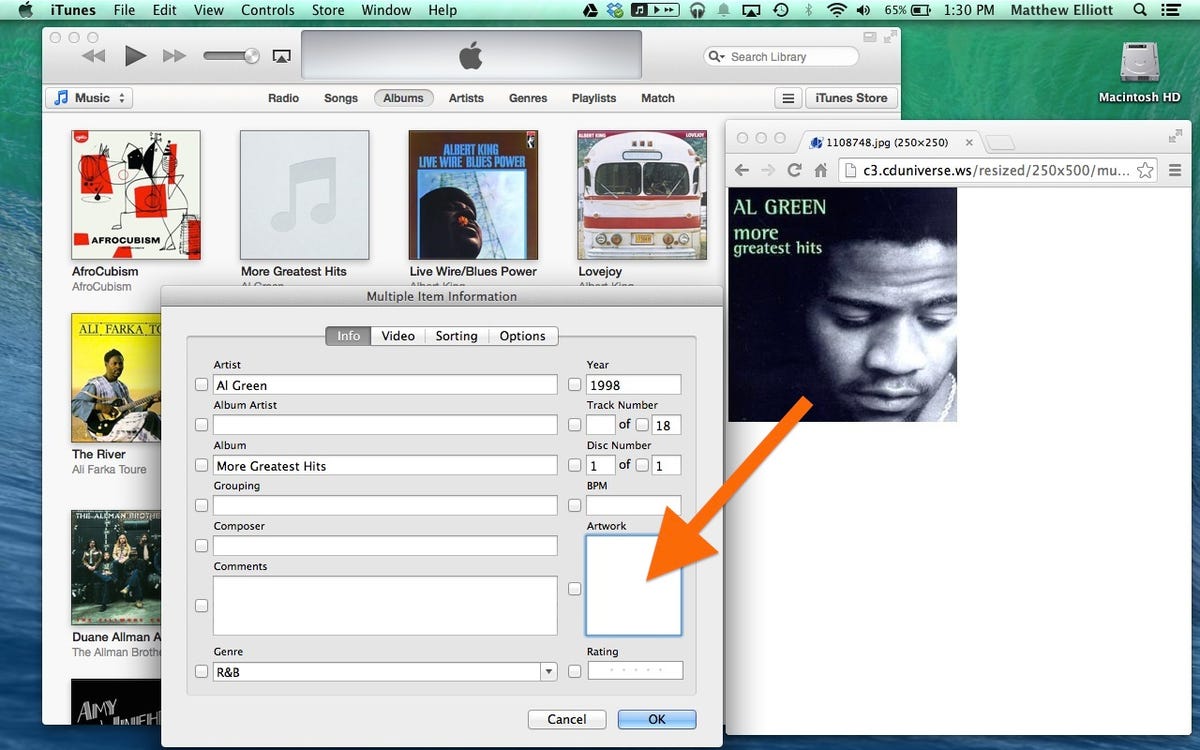
Option 2: DIY
If iTunes doesn't come up with anything, then you can add your own art. Find the art using Google or the search engine of your choice. Open the image in your browser and keep the window open next to iTunes. In iTunes, click on the album in need of this art and select Get Info. On the Info tab will be a blank box for Artwork. Just drag the image from your browser to this box. If dragging doesn't work, you can save the image to your desktop and then double-click the blank Artwork box to select a local file.
Display and delete duplicates
If your music library is sizable, then the odds are good you have a few duplicates in there. iTunes makes it relatively easy to ferret out such redundancy, but Apple has moved it in iTunes 11 from the spot where you might have found it in previous iterations of iTunes. From the menu bar, choose View > Show Duplicate Items.
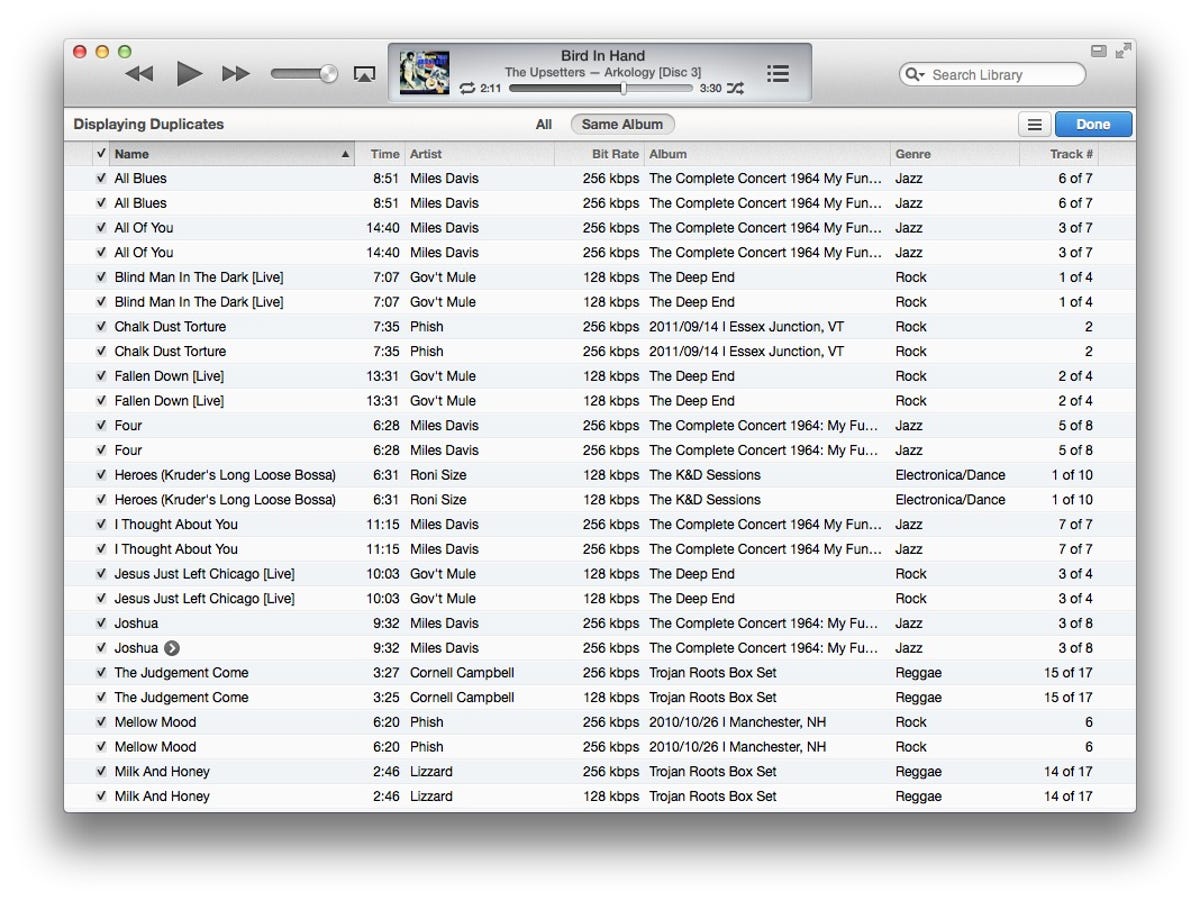
From this list, you can view all duplicates, which will show the same song no matter which album it's on. Or you can click Same Album at the top of the list to view only duplicates from -- you guessed it -- the same album. Before deleting a duplicate, be sure you add Bit Rate as one of the filter options. This way, if two duplicates feature different bit rates, you can remove the the lesser of the two.
Know your compilations
I have a number of reggae compilations, which greatly add to my reggae genre shuffle, but all of those artists with only a song or two to their name in my collection clog up my library and make it difficult to browse by artist. Thankfully, there is a way to clean up your artist list without needing to change the artist metadata for each track on a compilation to something inaccurate or vague.
Right-click on an album and select Get Info. On the Options tab, select Yes for "Part of a compilation."
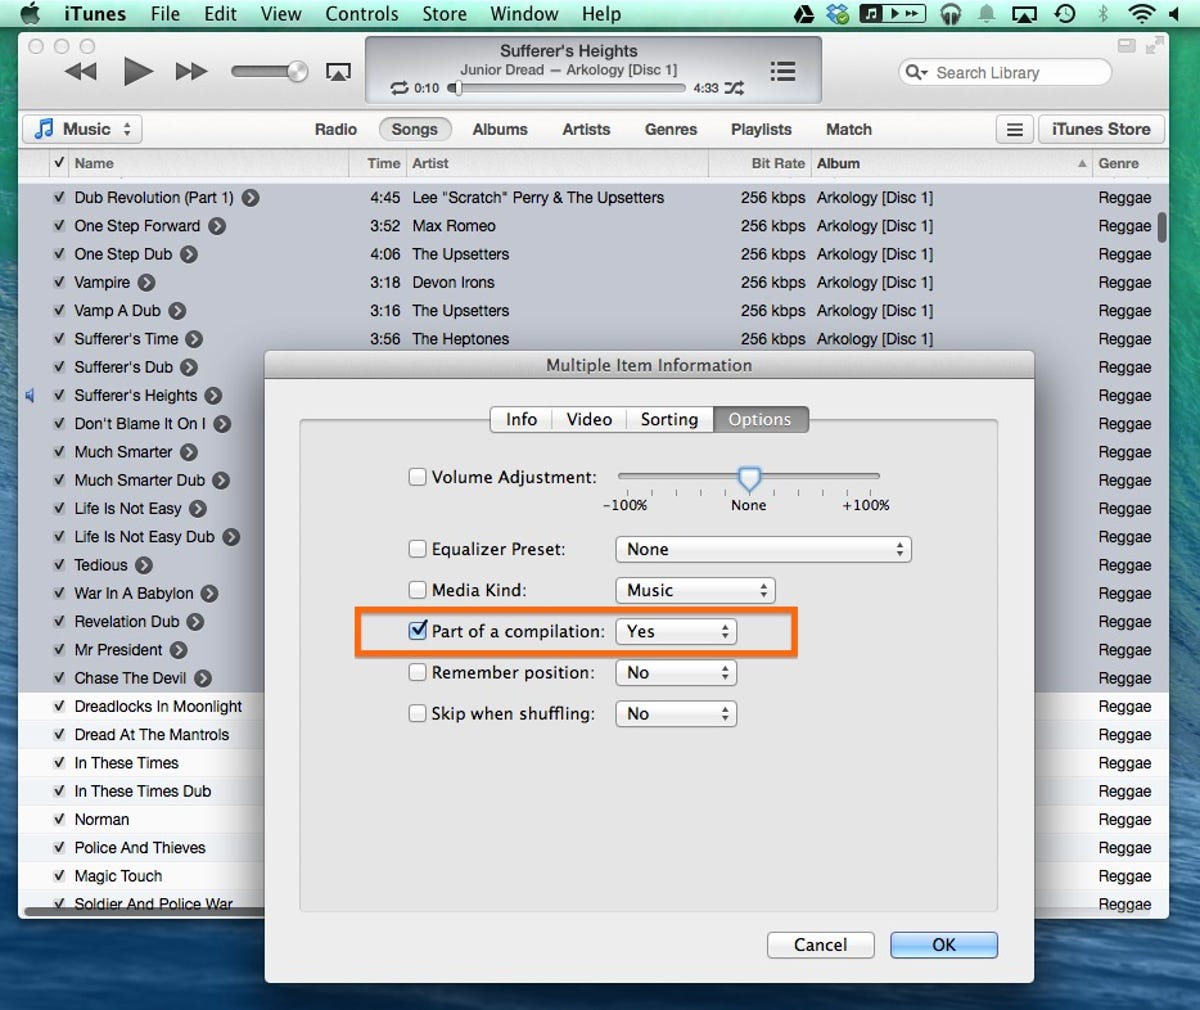
I have found that sometimes iTunes treats each track of a compilation as its own album, which scatters each track throughout the Album view because it's organized by artist name. In such cases, just go to the Songs view, order the list by album, and highlight all of the songs of the album to select all at once to tag them as part of a compilation.
For any song in an album that's marked as a compilation, the artist will not show up in the Artists view in iTunes. And you'll find a Compilations item at the top of the artist list for easy access to any and all of your compilation albums.
Editors' note: It's spring-cleaning time! Week five's theme: there is no theme. It's a bonus week. Check back this week through Wednesday for spring-cleaning tips on a variety of subjects.