Apple ProRaw can transform your iPhone photography. Here's how
As a professional photographer, I'm all-in on ProRaw.


- Shortlisted for British Photography Awards 2022, Commended in Landscape Photographer of the Year 2022
Apple's iPhone 12 Pro Max has already proven itself to pack one of the best cameras it's possible to get on a phone. The addition of ProRaw takes it further, though, and makes this phone camera an even bigger rival to professional DSLRs. I'm a professional photographer, and I spent some time with ProRaw in beta form on the 12 Pro Max before it officially launched in iOS 14.3. I shoot in raw all the time in my professional work, and Apple's ProRaw, even in its beta form, has allowed me to work with images from my iPhone exactly as I would with images from my pro DSLR. I'm very impressed.
ProRaw is Apple's version of the raw files that pros typically use on DSLRs. They're called raw because unlike JPEG images they don't save information about color, sharpening or other effects applied by the camera. They usually result in a more natural base image to postprocess in software such as Adobe Lightroom or Photoshop. ProRaw works in much the same way, but unlike DNG raw files you can take in third-party apps, ProRaw makes use of Apple's computational photography for deep fusion HDR. The result is a better-looking base image that still gives a lot more flexibility for editing than you'd get with JPEG images.
On paper, it's the perfect compromise, and in practice it's proven to be so for many of my images. Let's take a look at some.
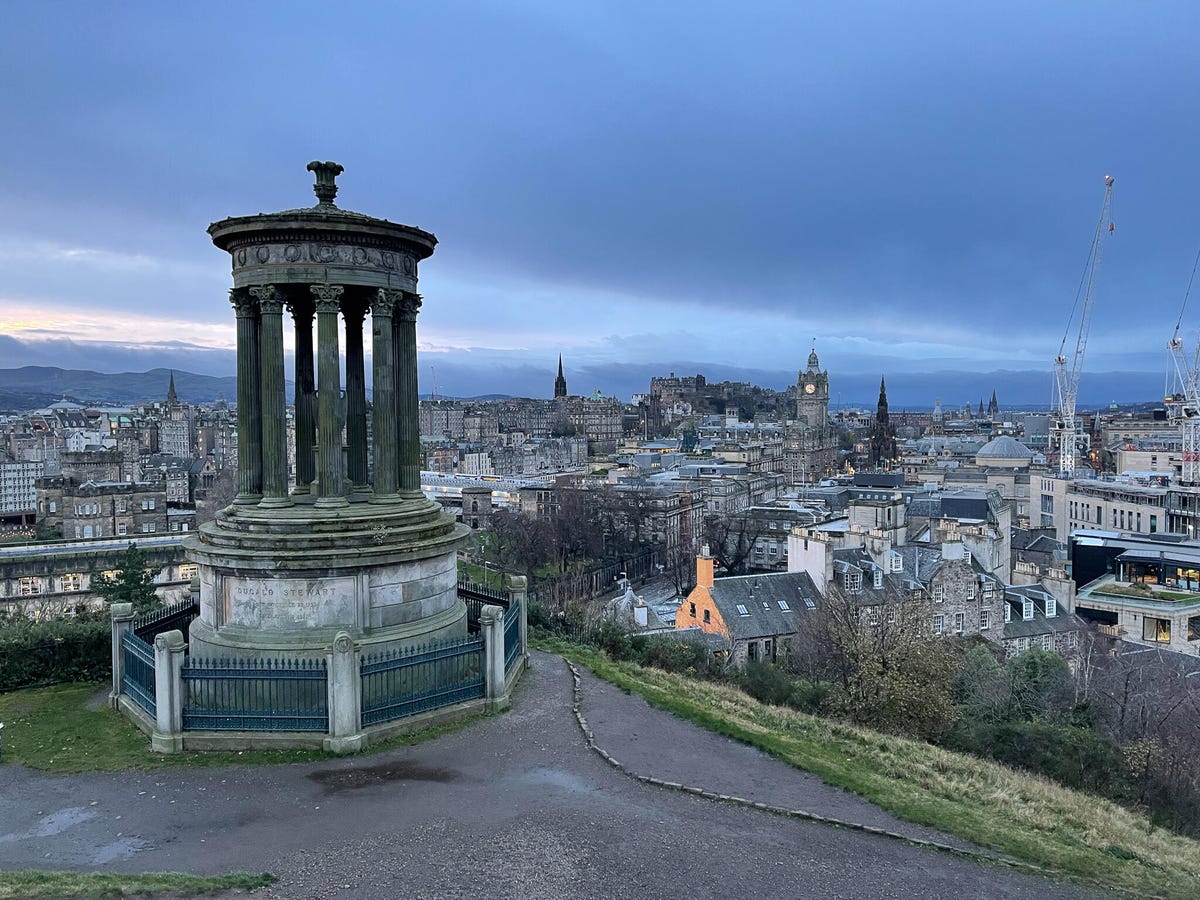
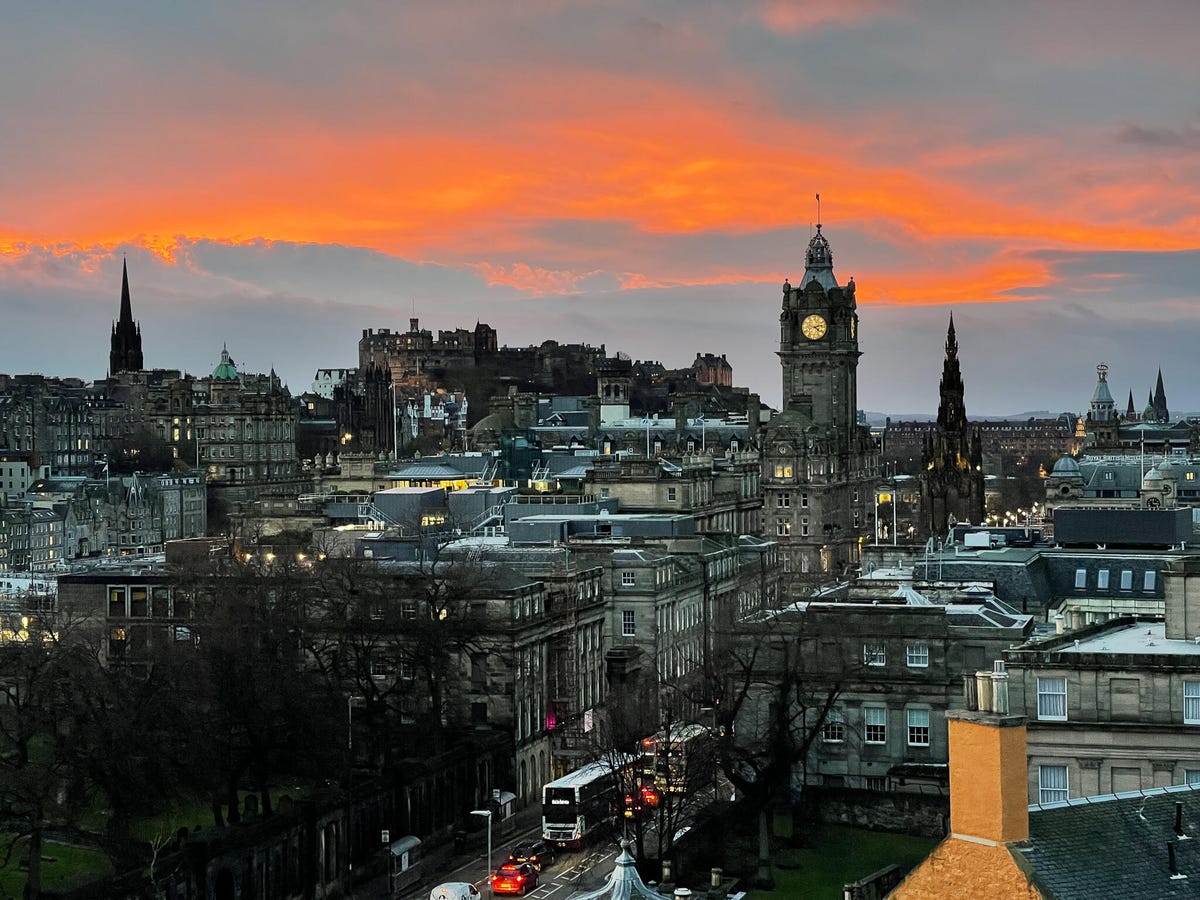
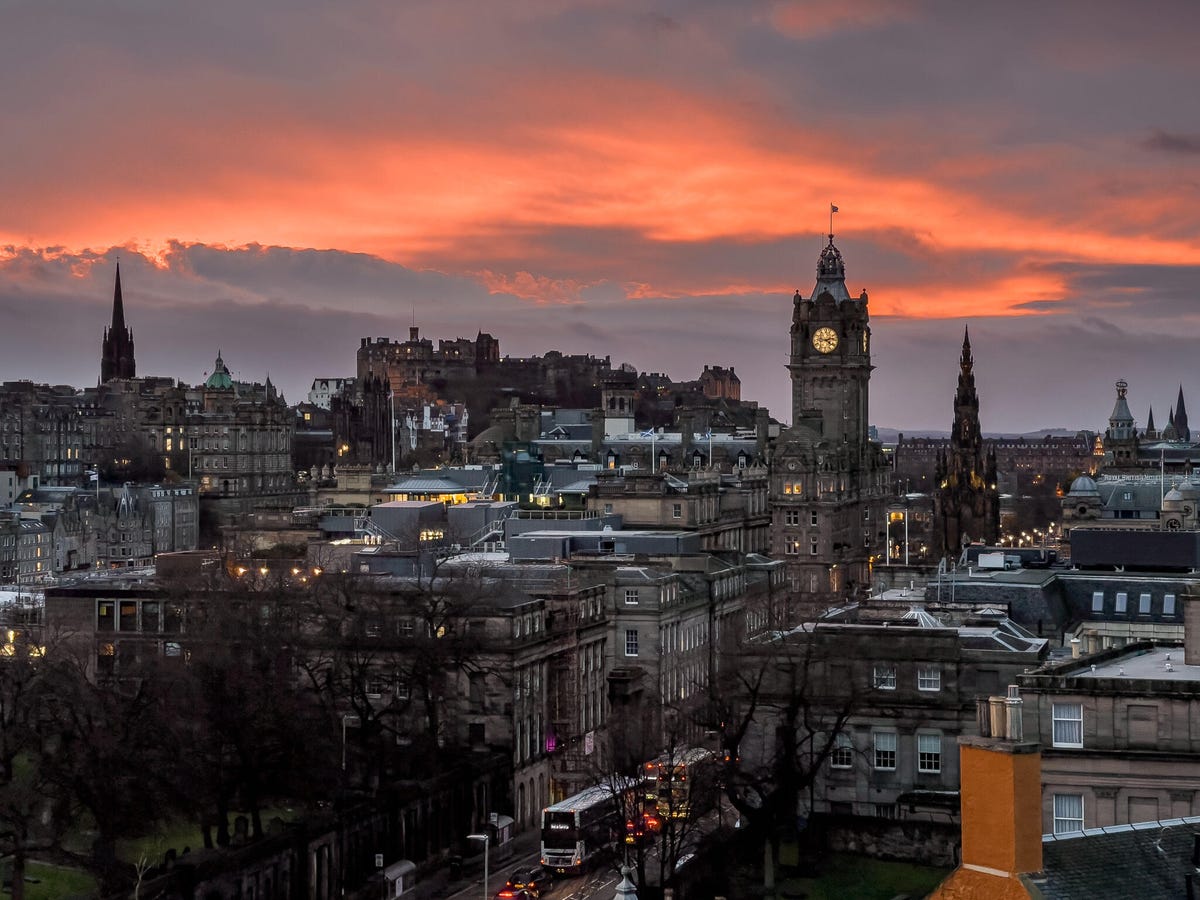
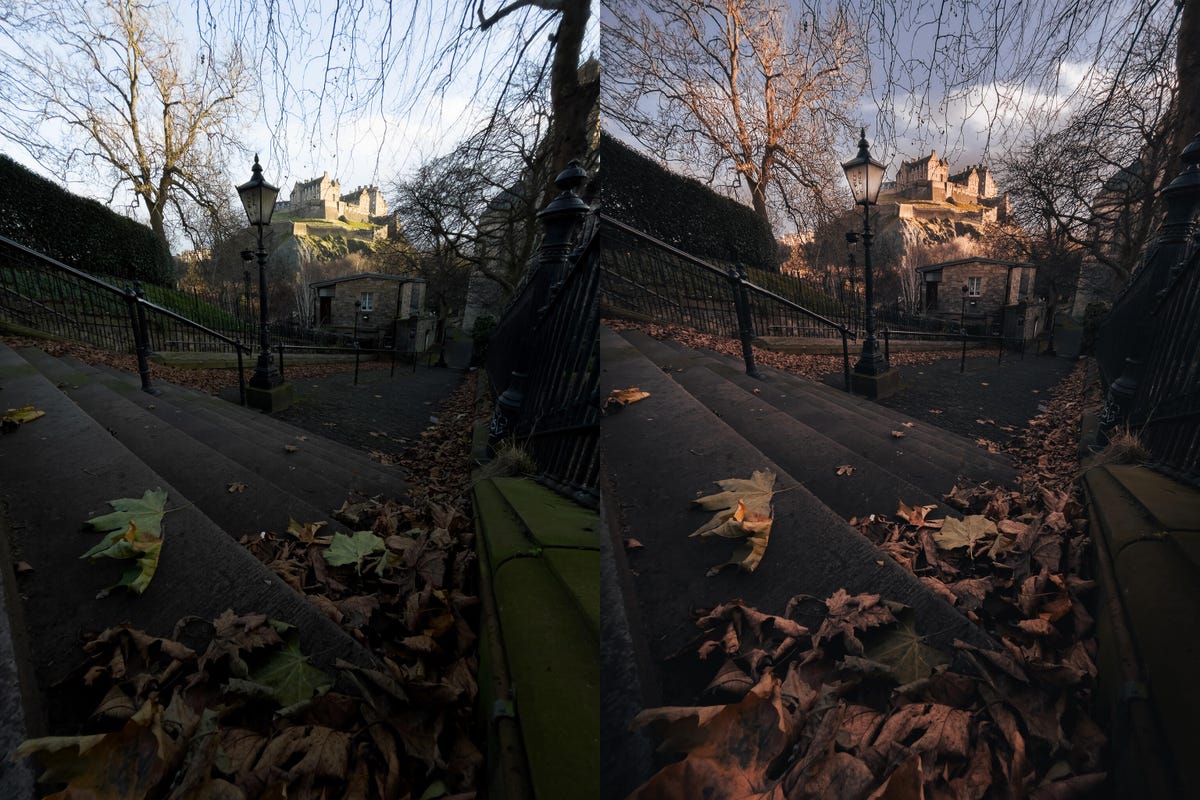
Let's start with this evening landscape shot in standard JPEG. It's fine, but the shadows have been lifted to such an extent that a lot of the contrast and mood has gone and there's a lot of oversharpening. As a snap, it's fine, but it's not a good starting point for a more artistic edit.
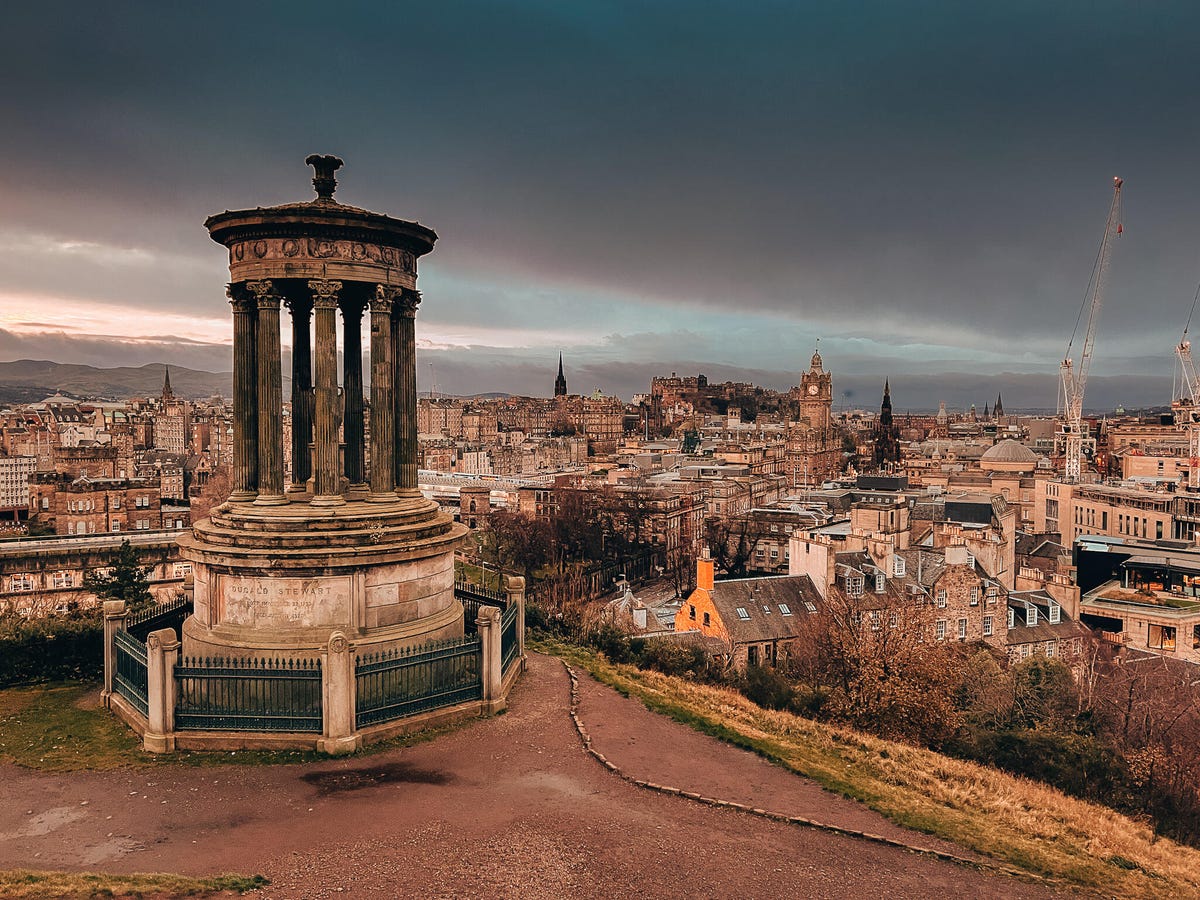
Here's the same shot, taken a few seconds later in ProRaw and then edited in Lightroom. I've been able to keep those shadows darker, maintaining the evening mood, while also having full control to correct the white balance and add much less sharpening to avoid messing up the fine details on the image. I've edited it with a moodier style that I really like -- it might not be to everyone's tastes, but it shows that these edits on iPhone shots are possible.
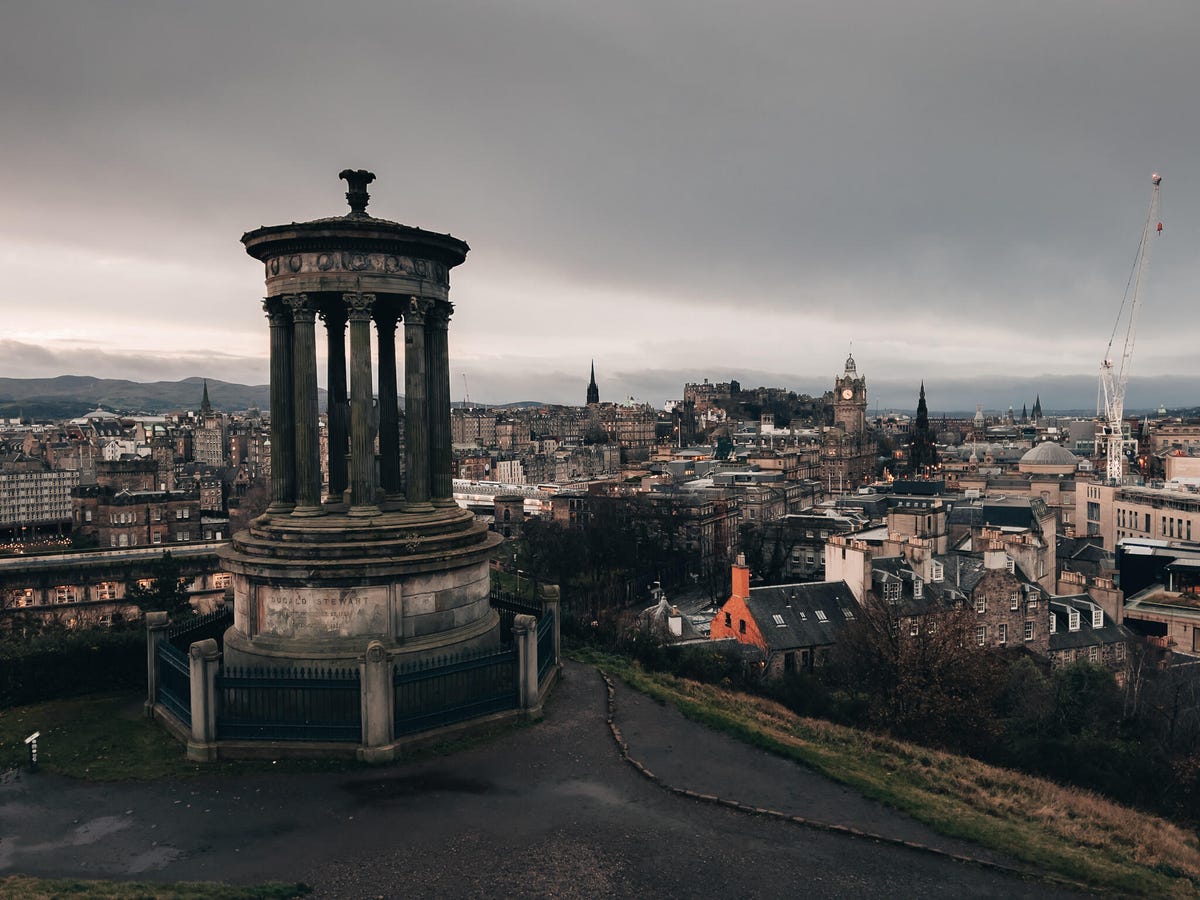
And here's what happens if I copy those exact edit settings I made from the ProRaw image onto that JPEG. Clearly, it hasn't worked.
A short time later the sky erupted in an incredible sunset. I've captured it here in JPEG and while the image looks decent enough, the vibrant sky looks a bit "burnt in" and there's again a lot of sharpening in the image which overall doesn't give me a good base image for a proper edit.
The ProRaw version gave me a lot more scope to control the vibrance of the sky, as well as the overall white balance and color tones. I'm really pleased with how this image has turned out, and I could only have got it to this point by shooting in raw over JPEG. But editing the shot was still around 15 minutes of work in Lightroom, so it's not the quickest way of working.
The straight-out-of-camera ProRaw file doesn't always look great and likely will look a lot worse than the JPEG version. ProRaw files, just like raw files from a DSLR, will need work and processing before they look their best.
Take this unprocessed ProRaw file, for example, which I imported in Lightroom and then exported as a JPEG without any editing. It looks way too dark.
But after spending some time in Lightroom I've been able to bring back all of that detail, while still maintaining the bright sky. It gave me a great base image to adjust the color tones to get the finished shot you see here and it's a shot I'm really pleased with. It's certainly a big change from the untouched raw version.
It's worth remembering, though, that I've been using ProRaw in beta form, and Adobe is yet to update Lightroom to properly support the files. I've noticed that ProRaw files that look good in the photo gallery suddenly look overly dark -- or sometimes overly bright -- when opened in Lightroom, as well as in some other editing apps like Snapseed. It's difficult to say why this is, exactly, but it means that I've had to work a bit harder to get the image back to a "good" place before I then start editing more creatively. The information has been captured however, which is how I've been able to lift the shadows in this example so well.
Some of you reading this might not love the idea of spending so much time editing a single image, but spending that time is common in professional photography to ensure an image comes out absolutely perfectly. I'll frequently spend half an hour or more on a single landscape image, and my product and car photographs may well take multiple hours of work. It's a slower process, but the resulting quality is much higher.
Here's another before and after example. On the left is the unprocessed ProRaw file. On the right is how I've edited it in Lightroom. The file has had a lot of scope to let me raise the shadows while also controlling that extremely bright sky. I've also used location adjustment brushes to "paint" light into some of the leaves, to help them stand out more in the scene, and I've tweaked the color balance throughout. This is exactly how I would process the image using a raw file from a Canon 5DMkIV DSLR, and I'm super impressed at how this final image looks.
While you've been able to shoot in regular DNG raw through third-party apps for a while, they don't use Apple's HDR blending, so being able to balance highlights and shadows like this was tricky. ProRaw has been noticeably easier to work with.
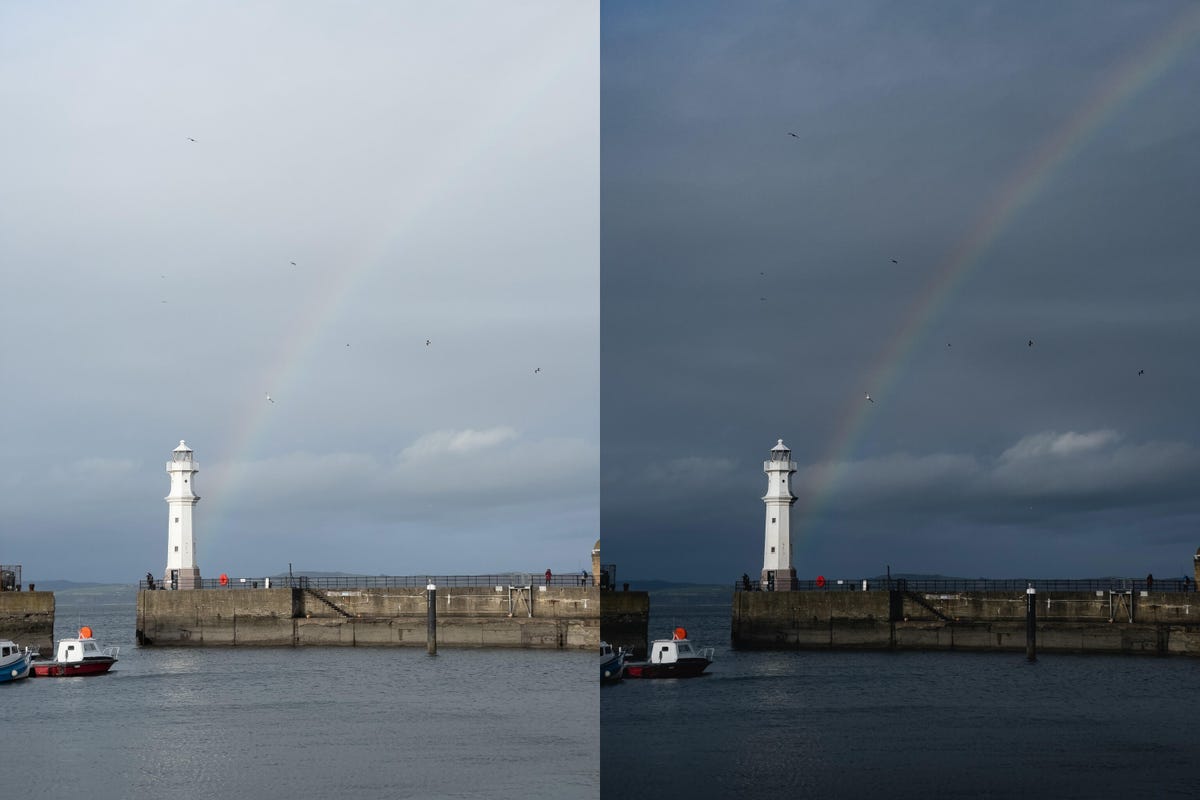
It's not always about huge, transformational edits. This shot involved darkening the scene to capture more of the moody sky, and enhancing that gorgeous rainbow.
While this shot just needed some shadow lifting and color toning and some darkening of the sky, it doesn't look a whole lot different from the original.
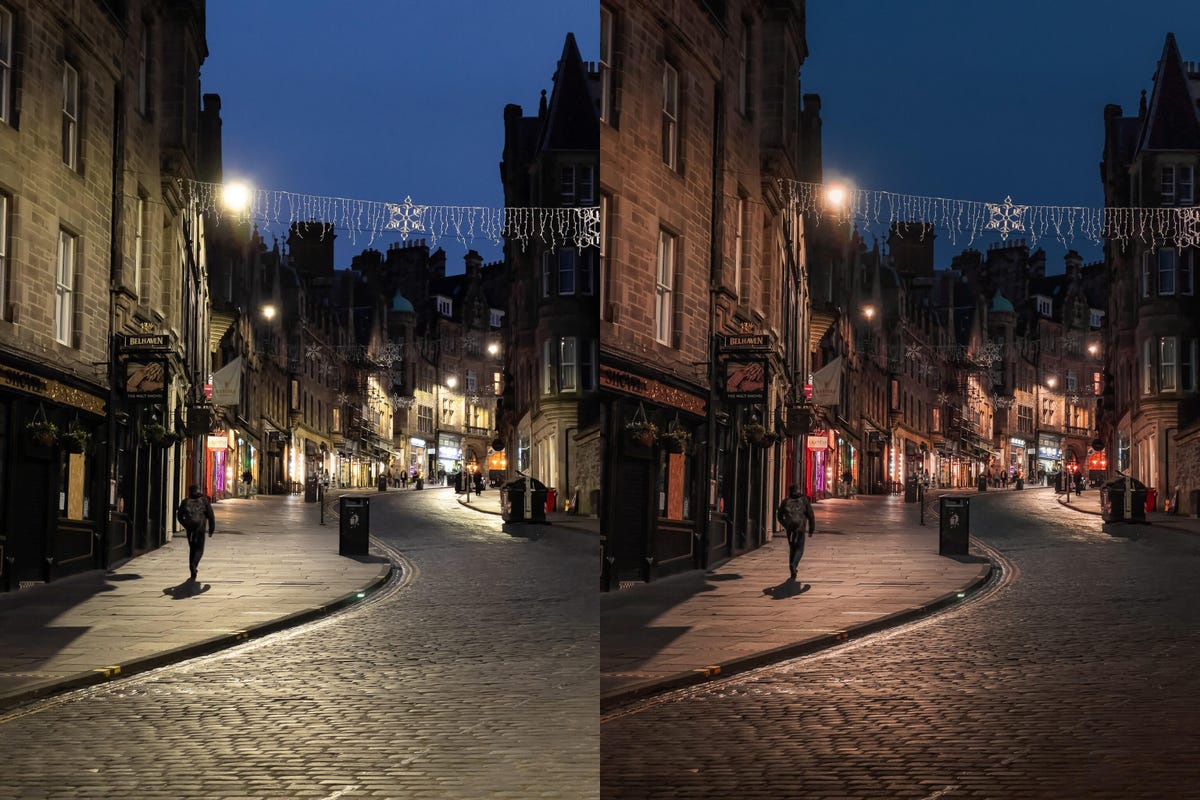
ProRaw works with night mode too -- another benefit over regular raw in a third-party app, which can't use night mode. Here, I've benefited from the bright shots night mode can take in the dark, but I've still had full control over white balance and color tone, while also having more accurate control over the highlights and shadows. Original ProRaw is on the left, with my edited version on the right.
I've been able to bring out more shadow detail in this night image.
While being able to lift the shadows and control the bright highlights from the Christmas lights in this scene.
Should you use Apple ProRaw?
Whether you should use it yourself depends very much on the style of your photography. If you're more about snapping and quickly sharing those moments with family and friends, then you should probably stick to JPEG. ProRaw shots demand editing work to bring out their best, just like any other raw file. Bear in mind too that ProRaw files are many times larger than JPEGs (around 3.5MB for the JPEG versus around 18MB for the ProRaw) so you'll quickly fill up your storage if you only shoot in raw.
But if you take a more artistic approach to your photography and want to make sure you have full control over the image for accurate post production in apps like Lightroom, then you should absolutely give it a try.
I use polarizers and neutral density filters on my DSLR when taking landscape shots, I accurately set up my tripod on location for my landscapes, and I love spending hours in Lightroom tweaking shots until I'm happy. So I'm used to a longer process in taking an image. For me, it's about crafting that perfect shot from start to finish, and ProRaw lets me do exactly that with shots from my iPhone, resulting in images that look better than their JPEG or standard raw counterparts can achieve.
It's early days, though, and while I've found some beta issues with how the images look in Lightroom, I'm excited about how it'll improve and how ProRaw will help me shoot even better images from my phone.
Read more: iPhone 12 Pro's cameras got some new tricks that serious photographers will love