Windows 10 Settings menu: The Accounts tab
Use this tab to manage your accounts, your work accounts, your kids' accounts...and everything else.


Looking to manage your Microsoft account, change how you sign in to Windows 10 or add a family member to your PC? You can do that in the Accounts tab in the new Windows 10 Settings menu. The Accounts tab is also where you can change sync settings across an account -- if you don't want your desktop background and password settings shared between computers every time you sign in, this is where you can fix that.
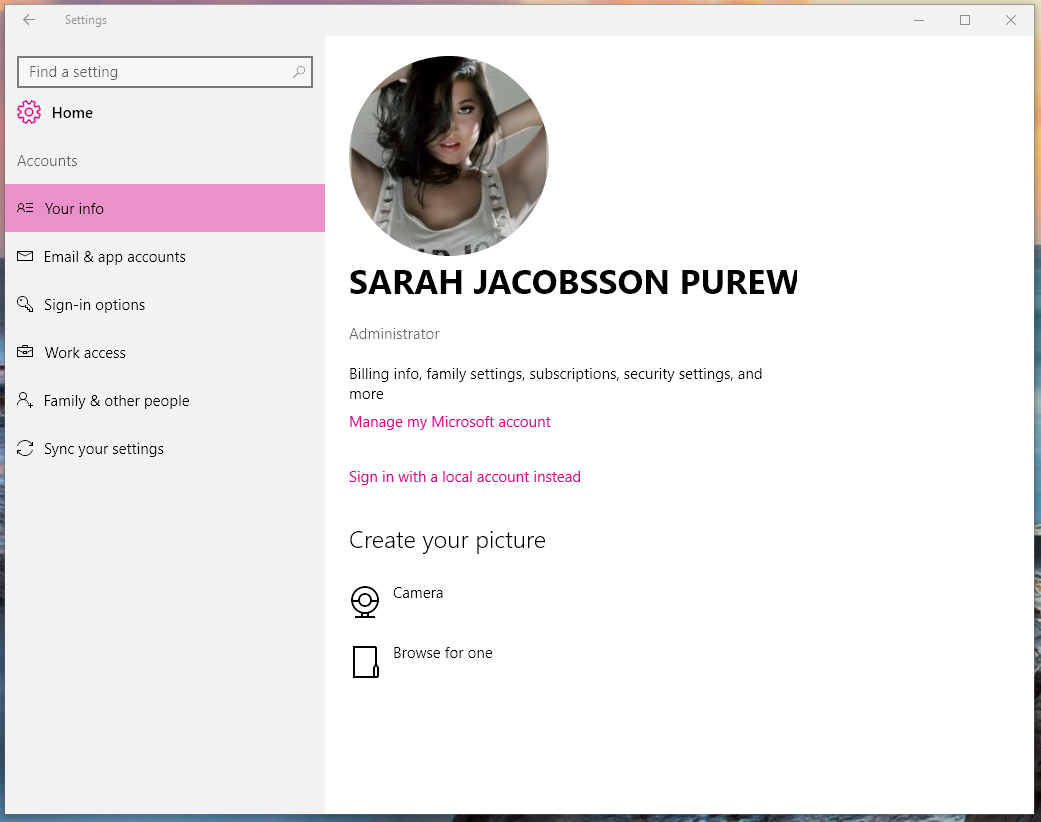
Your info
The first section in Accounts is Your info. Here you'll find -- you guessed it -- your information, including your photo, the email address tied to your account, and your account status (for example, "Administrator").
You'll also see links to manage your Microsoft account and the option to sign in with a local account instead, as well as options for changing your picture (you can either use your webcam or find a photo on your device).

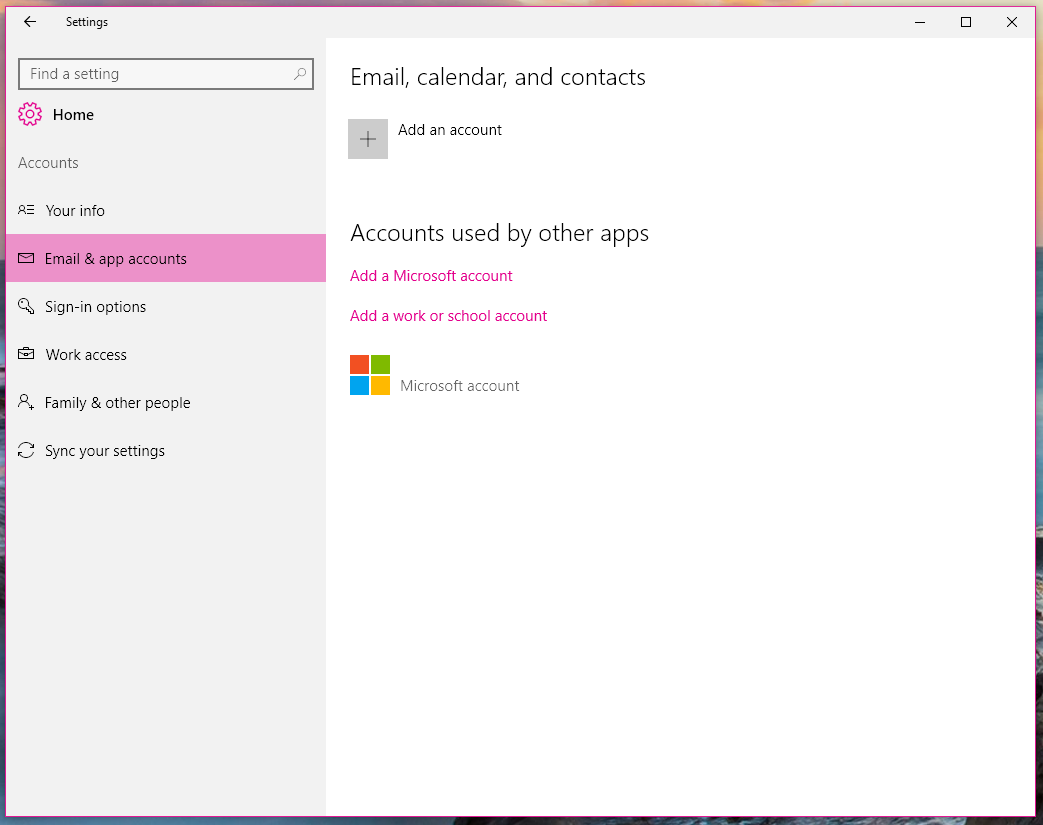
Email & app accounts
In this section, you can add accounts to your PC for use with Windows 10's email, calendar and contacts apps. These accounts can be from anywhere -- including Google, Yahoo Mail and iCloud -- they don't have to be Microsoft accounts.

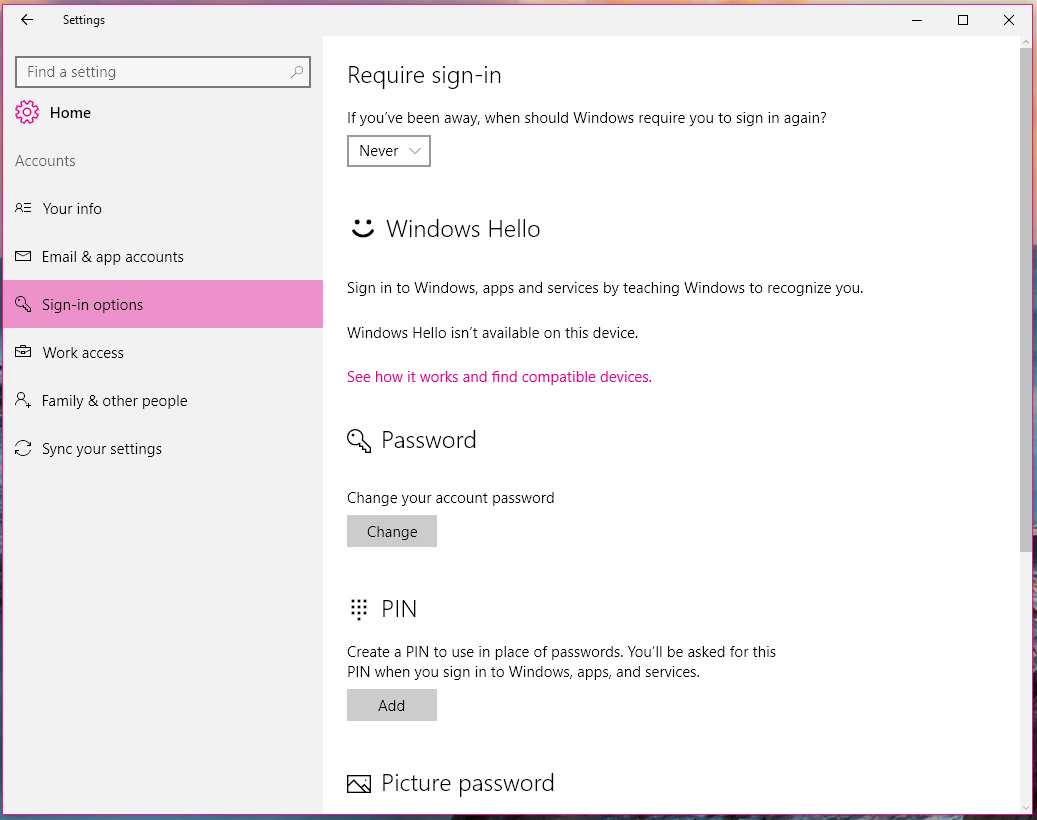
Sign-in options
The Sign-in options section lets you choose how you want to sign in to your computer: with a password, PIN, picture password (in which you draw gestures over a picture of your choosing -- best for touchscreen users). If your computer has a fingerprint reader or an advanced camera, you'll also see an option to set up Windows Hello, a Windows 10 feature that lets you sign into your PC using your face, iris or fingerprint.
Windows 10 will ask you to sign in every time your PC starts up, but you can change this. Read this guide to setting up your computer to automatically log in when you start your computer (this is not recommended for portable devices, such as laptops or tablets). In this section, you can choose whether you'll be asked to sign in again after you've been away from your device for a period of time.

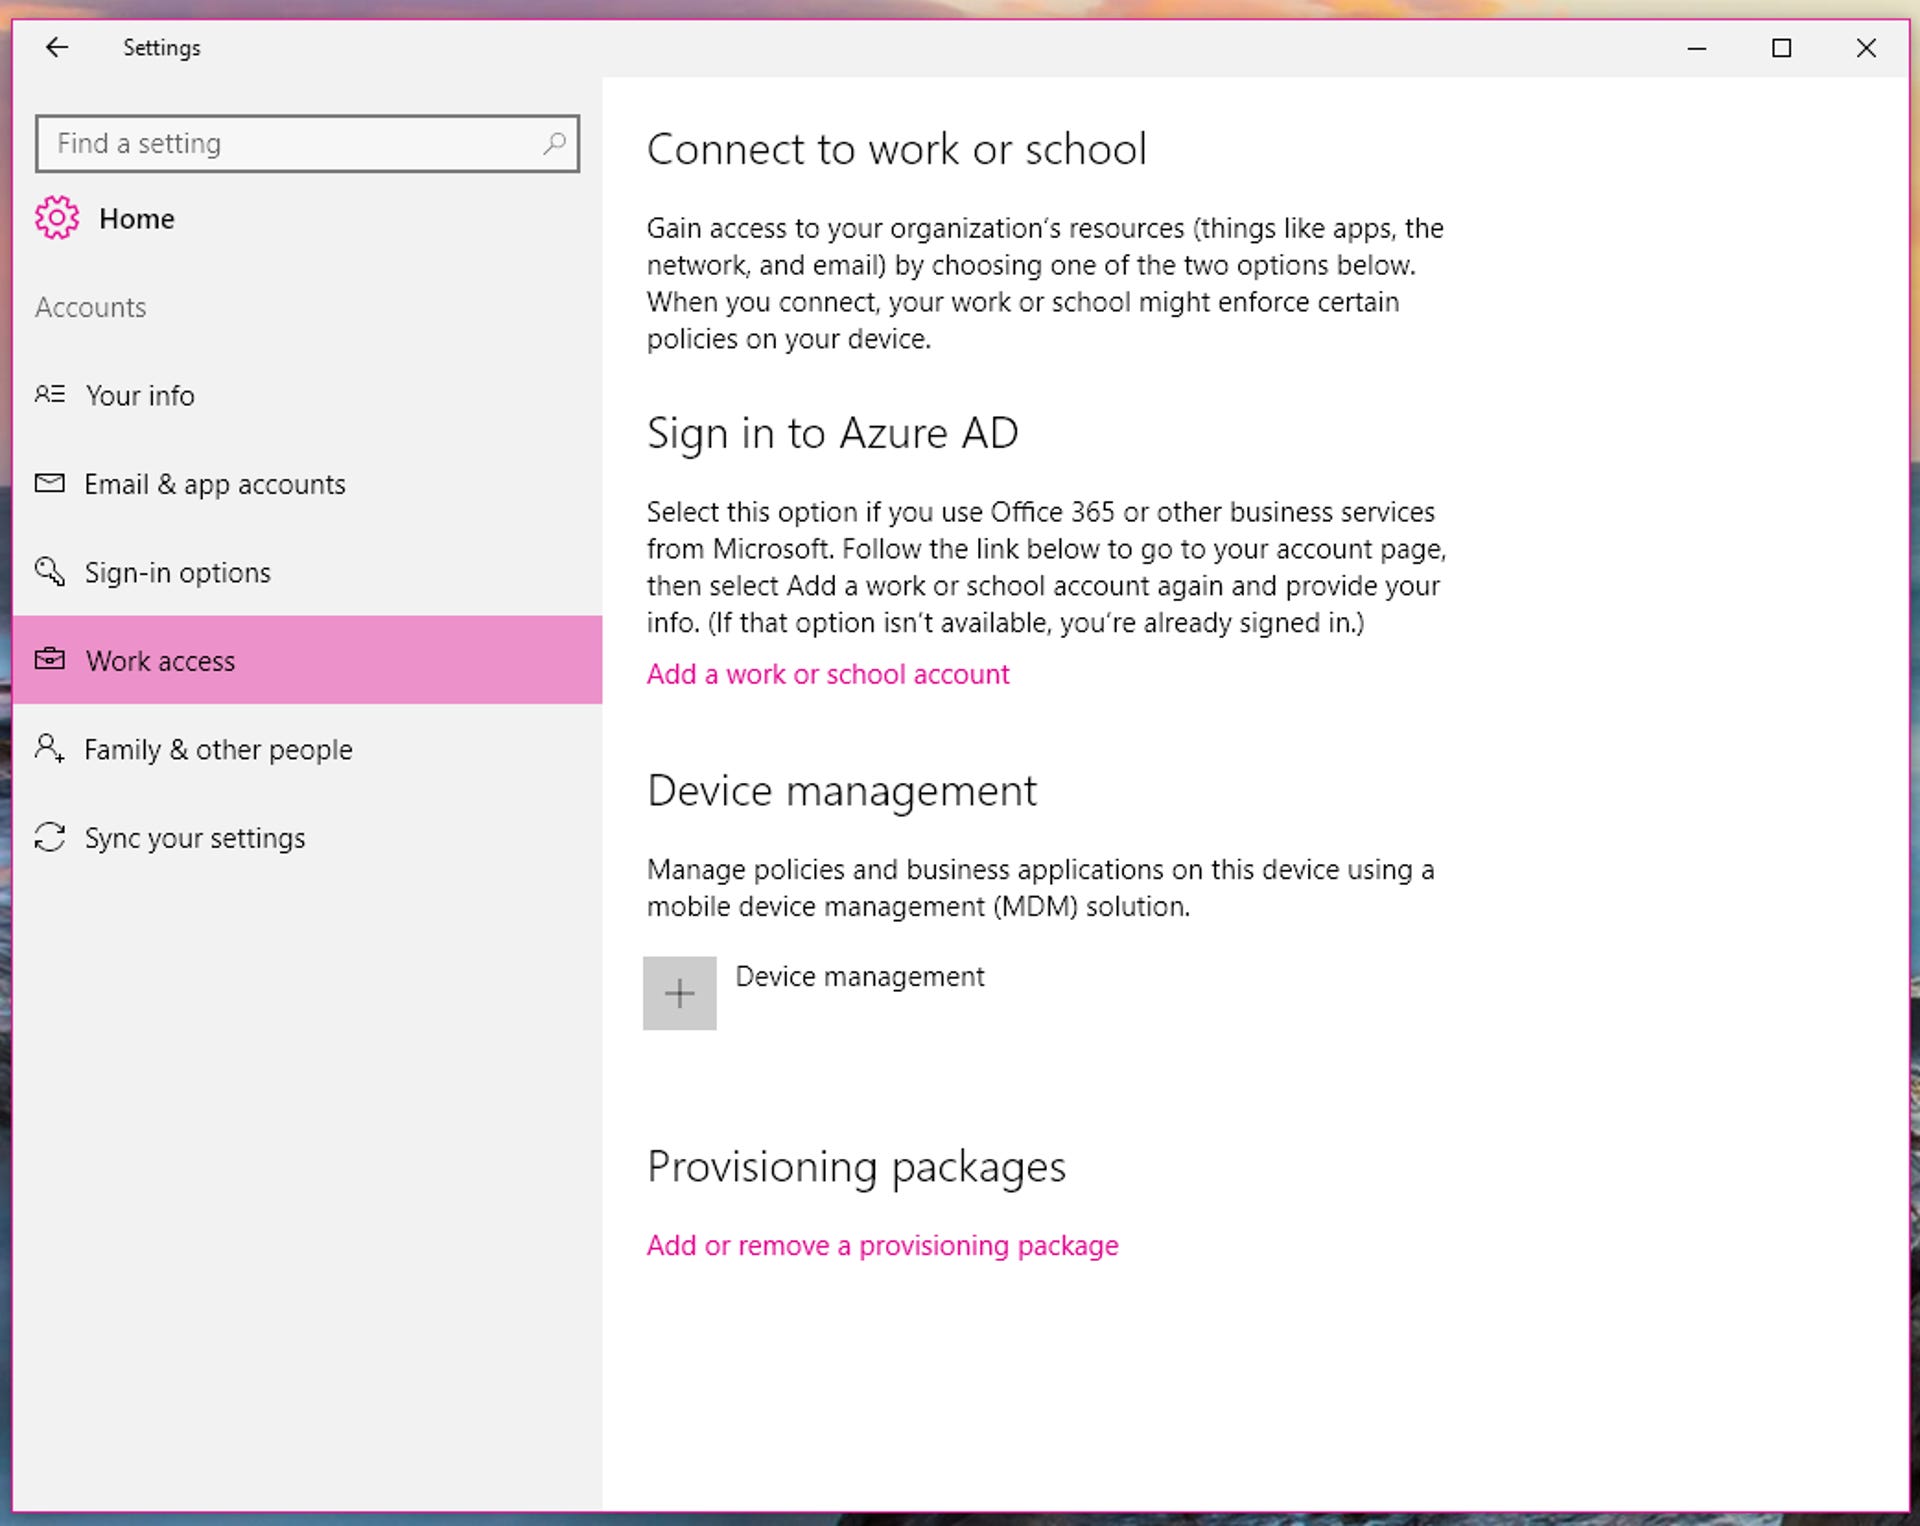
Work access
If your school, university or workplace uses Azure ID, this section is where you'll go to connect to the shared network. You can also enroll in device management (to allow a support person to manage your device remotely). You're unlikely to use this section unless someone has explicitly asked you to do so.

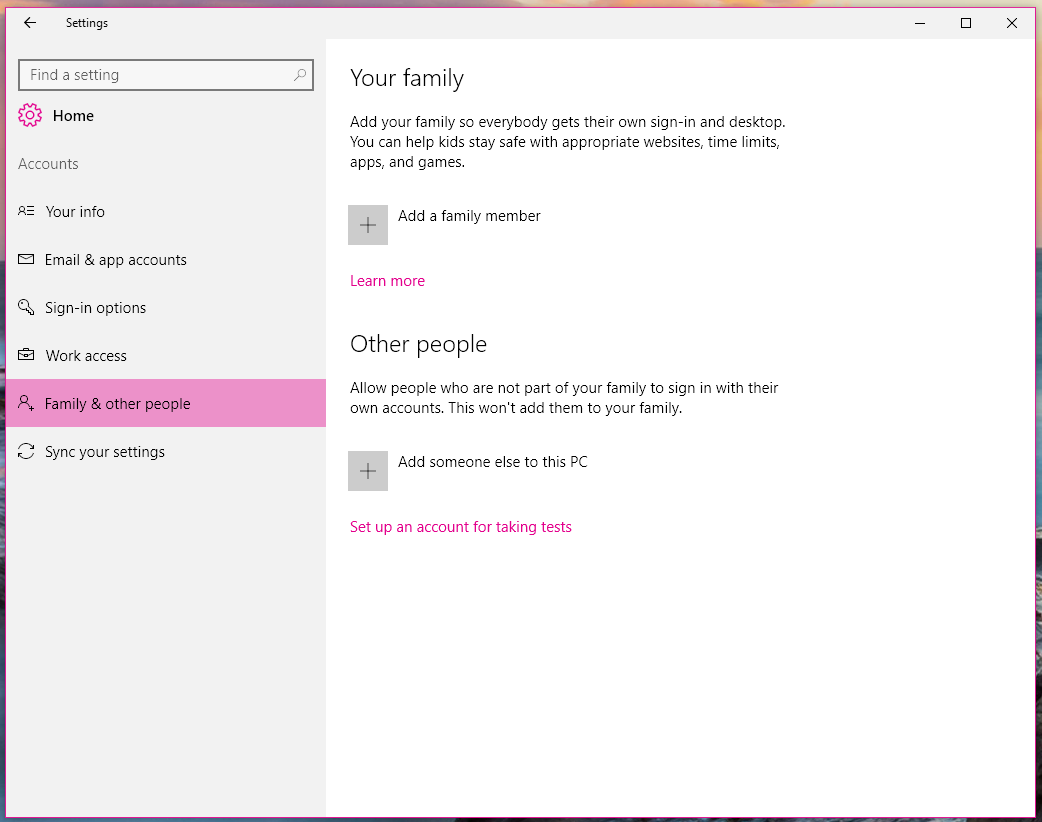
Family & other people
If you'd like to add additional accounts to your PC for family members or friends, this is where you'll do it. (If you'd like to add a local account for yourself, you can do that in the Email & app accounts section.) Windows now distinguishes between "family members" and "other users who are not family members." Family member accounts are linked -- adults in families can see reports of kids' online activity, block websites and limit app and game usage, but other users won't be able to see or manage kids' accounts.
For more info on how to add family members or other users to your account, check out our guide.

Sync your settings
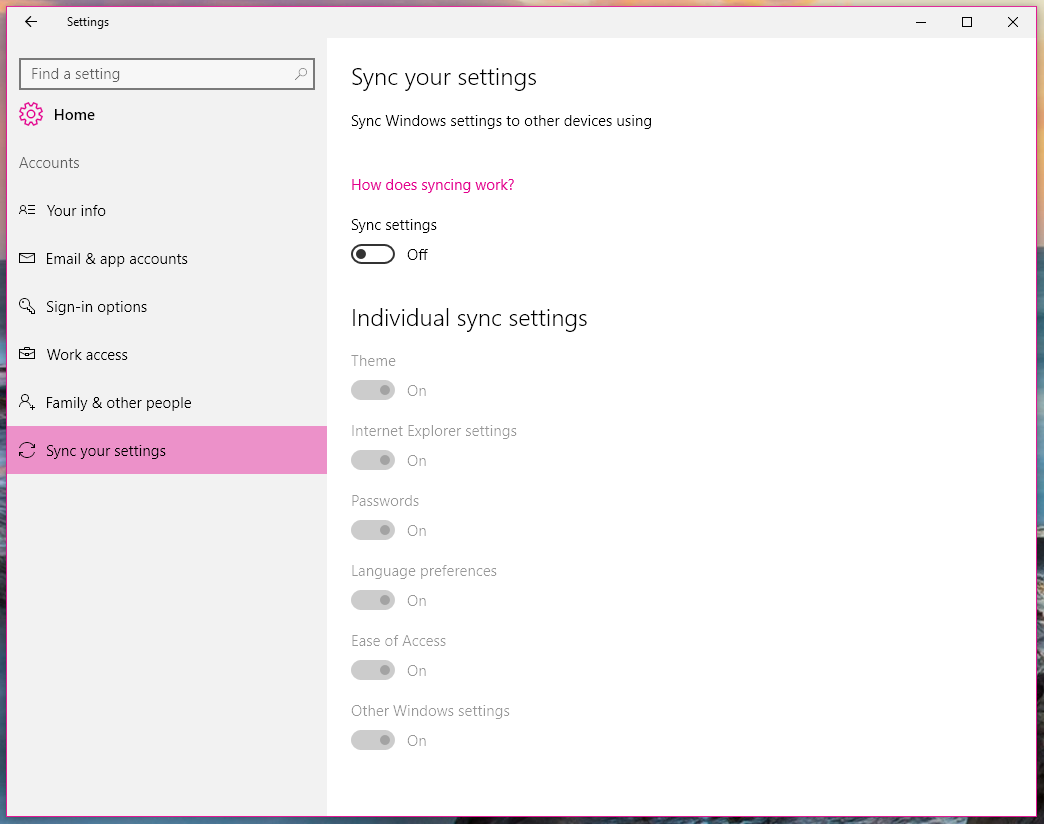
In Sync your settings, you can manage your PC's sync settings. This is useful because not everybody wants to have every setting on a home computer sync with a work computer (and vice versa). Settings sync is turned on by default, but you can choose to turn syncing off completely with the flick of a toggle in this section.
If you'd like some settings to sync -- but not all -- you can toggle off specific settings under Individual sync settings. You'll be able to set individual syncing for your theme, Internet Explorer, passwords, language preferences, ease of access and "Other Windows settings," which presumably includes settings such as Start menu preferences and Taskbar position.
Editors' note: This How To post was originally published on February 25, 2015, and was updated on May 23, 2016 to reflect new information regarding Windows 10 Insider Preview Build 14342.