Change your mind about Windows 10? Here's how you can roll back
CNET editor Dong Ngo shows you a quick way to roll back to your previous version of Windows if you just completed an in-place upgrade to Windows 10. Or, if you're completely happy with Windows 10, how to regain the storage space occupied by the previous version of Windows.


Updated, July 28, 2016: Updated with the latest information.
So we think Windows 10 is great. If you're still in doubt, though, keep in mind that you have only a few more days to upgrade to it for free. After that, it's going to cost $99 or $199 for Windows 10 Home or Windows 10 Pro, respectively. Here's the thing: you won't get stuck with Windows 10 and can easily roll back to Windows 8 or Windows 7 if you change your mind. We're here to show you how to do that.
Microsoft gives you 30 days from the day you upgraded to Windows 10 to roll back to your previous version of Windows. Before you do so, however, it's a good idea to back up your data, even though it will remain intact.
(On the other hand, if you are totally happy with Windows 10 after the upgrade, make sure you check the bottom of the post for what you can do to regain your storage space, occupied by the previous Windows' files, back.)
All backed up? OK, let's get going.
Rolling back to previous Windows

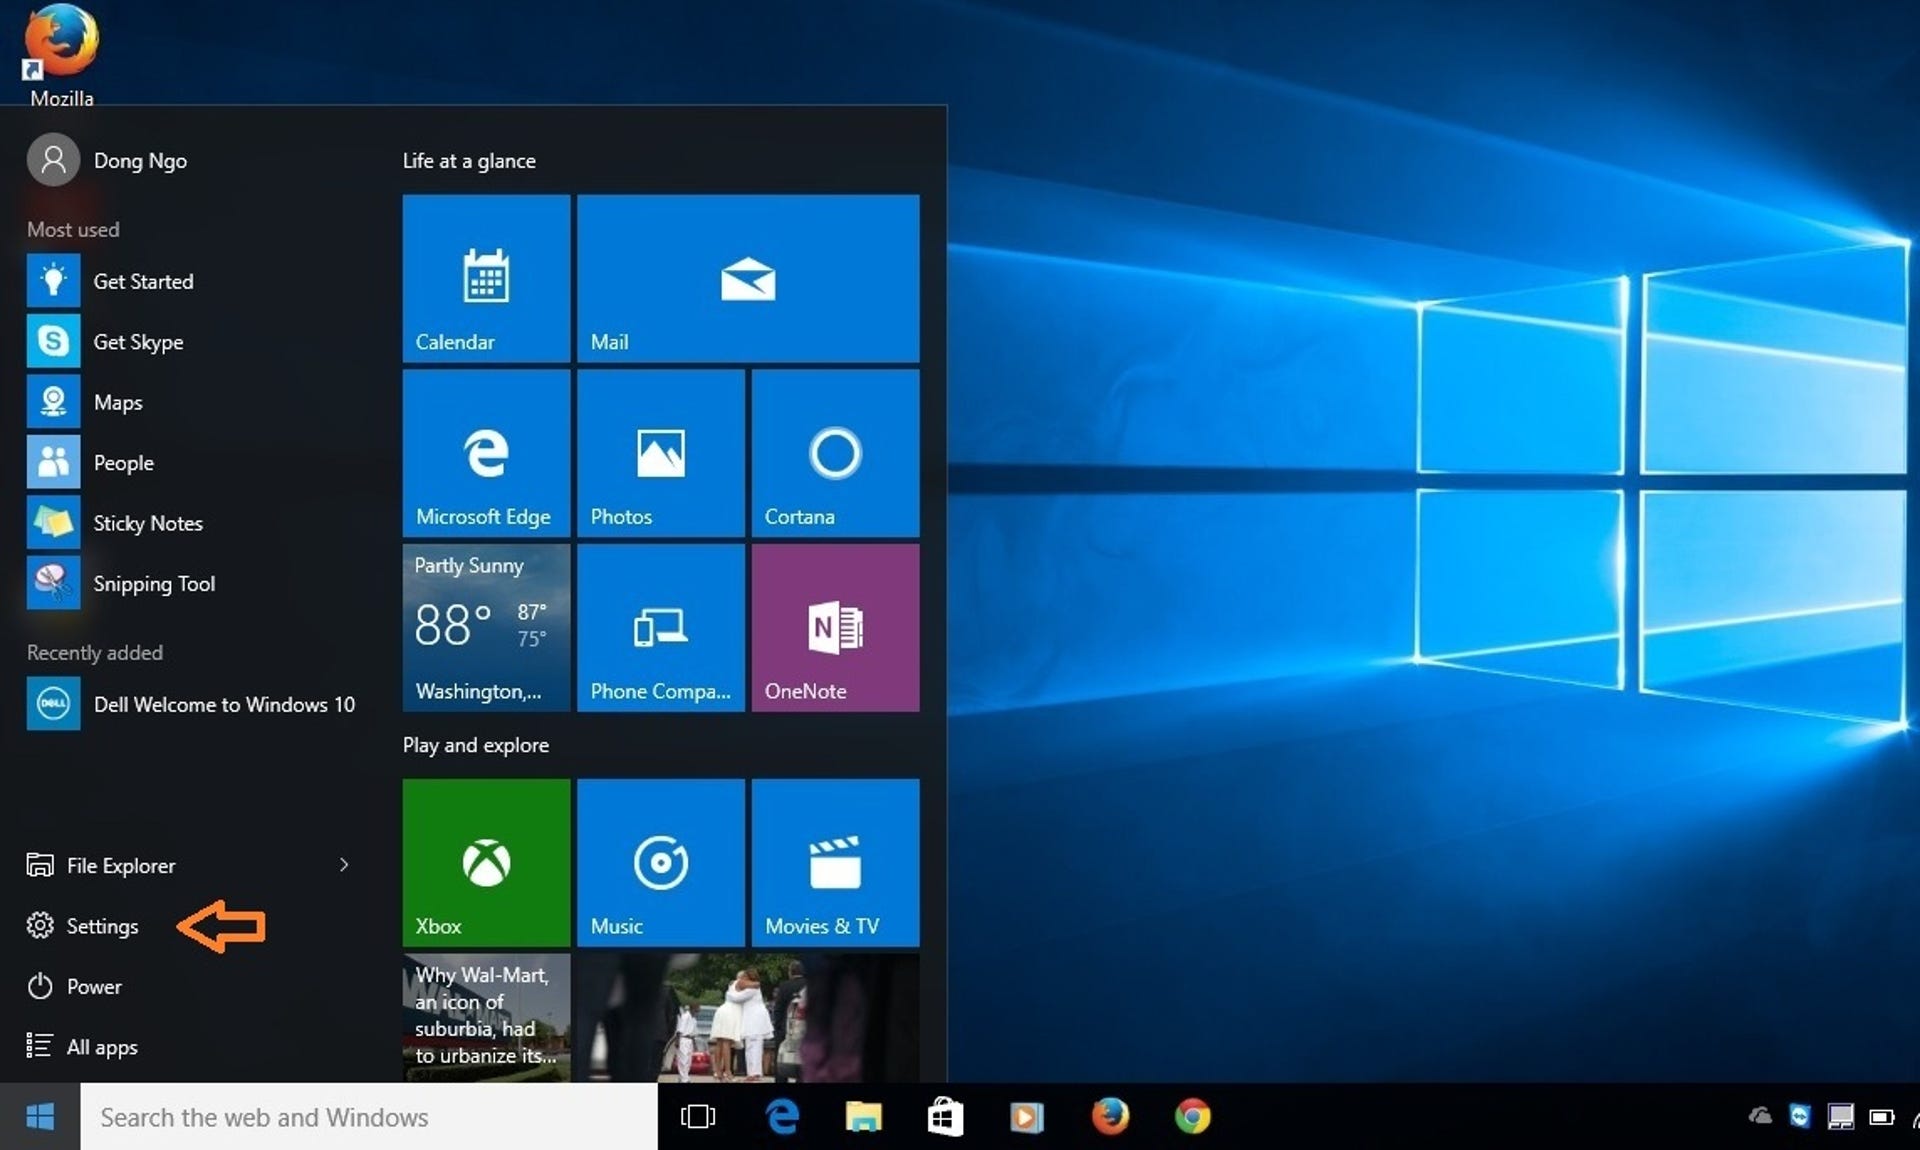
Step 1: From the Windows 10 Start Menu, click on Settings.
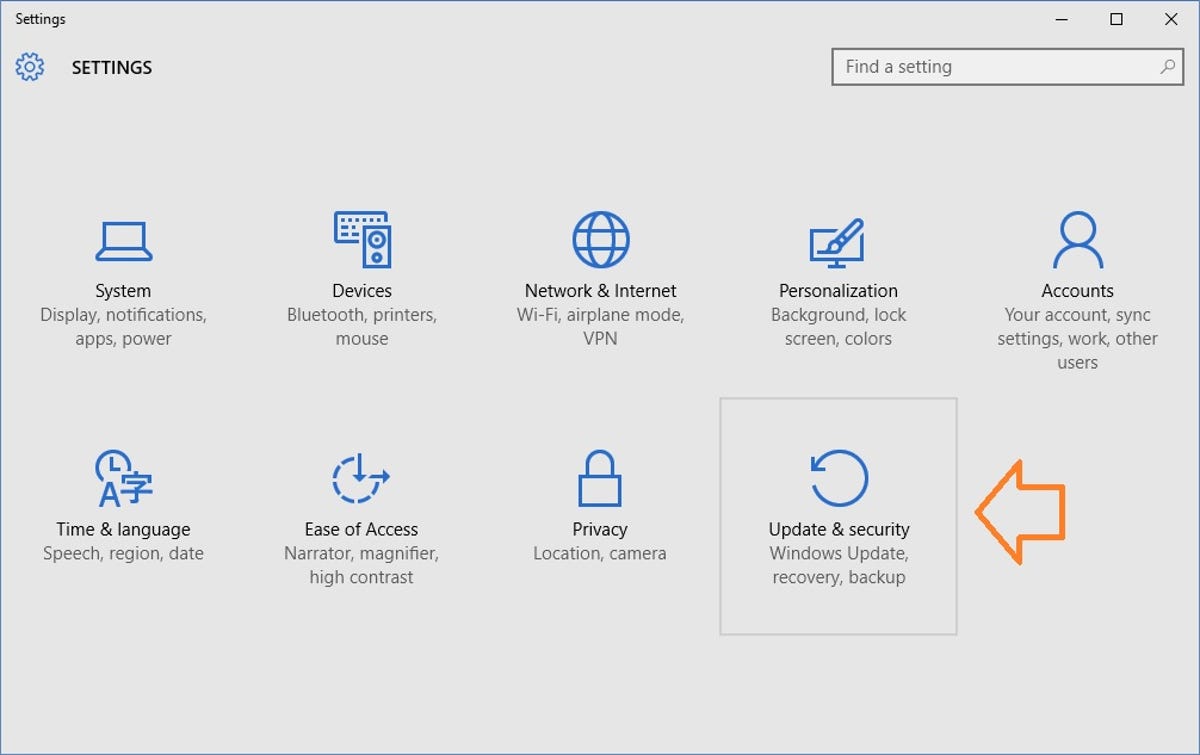
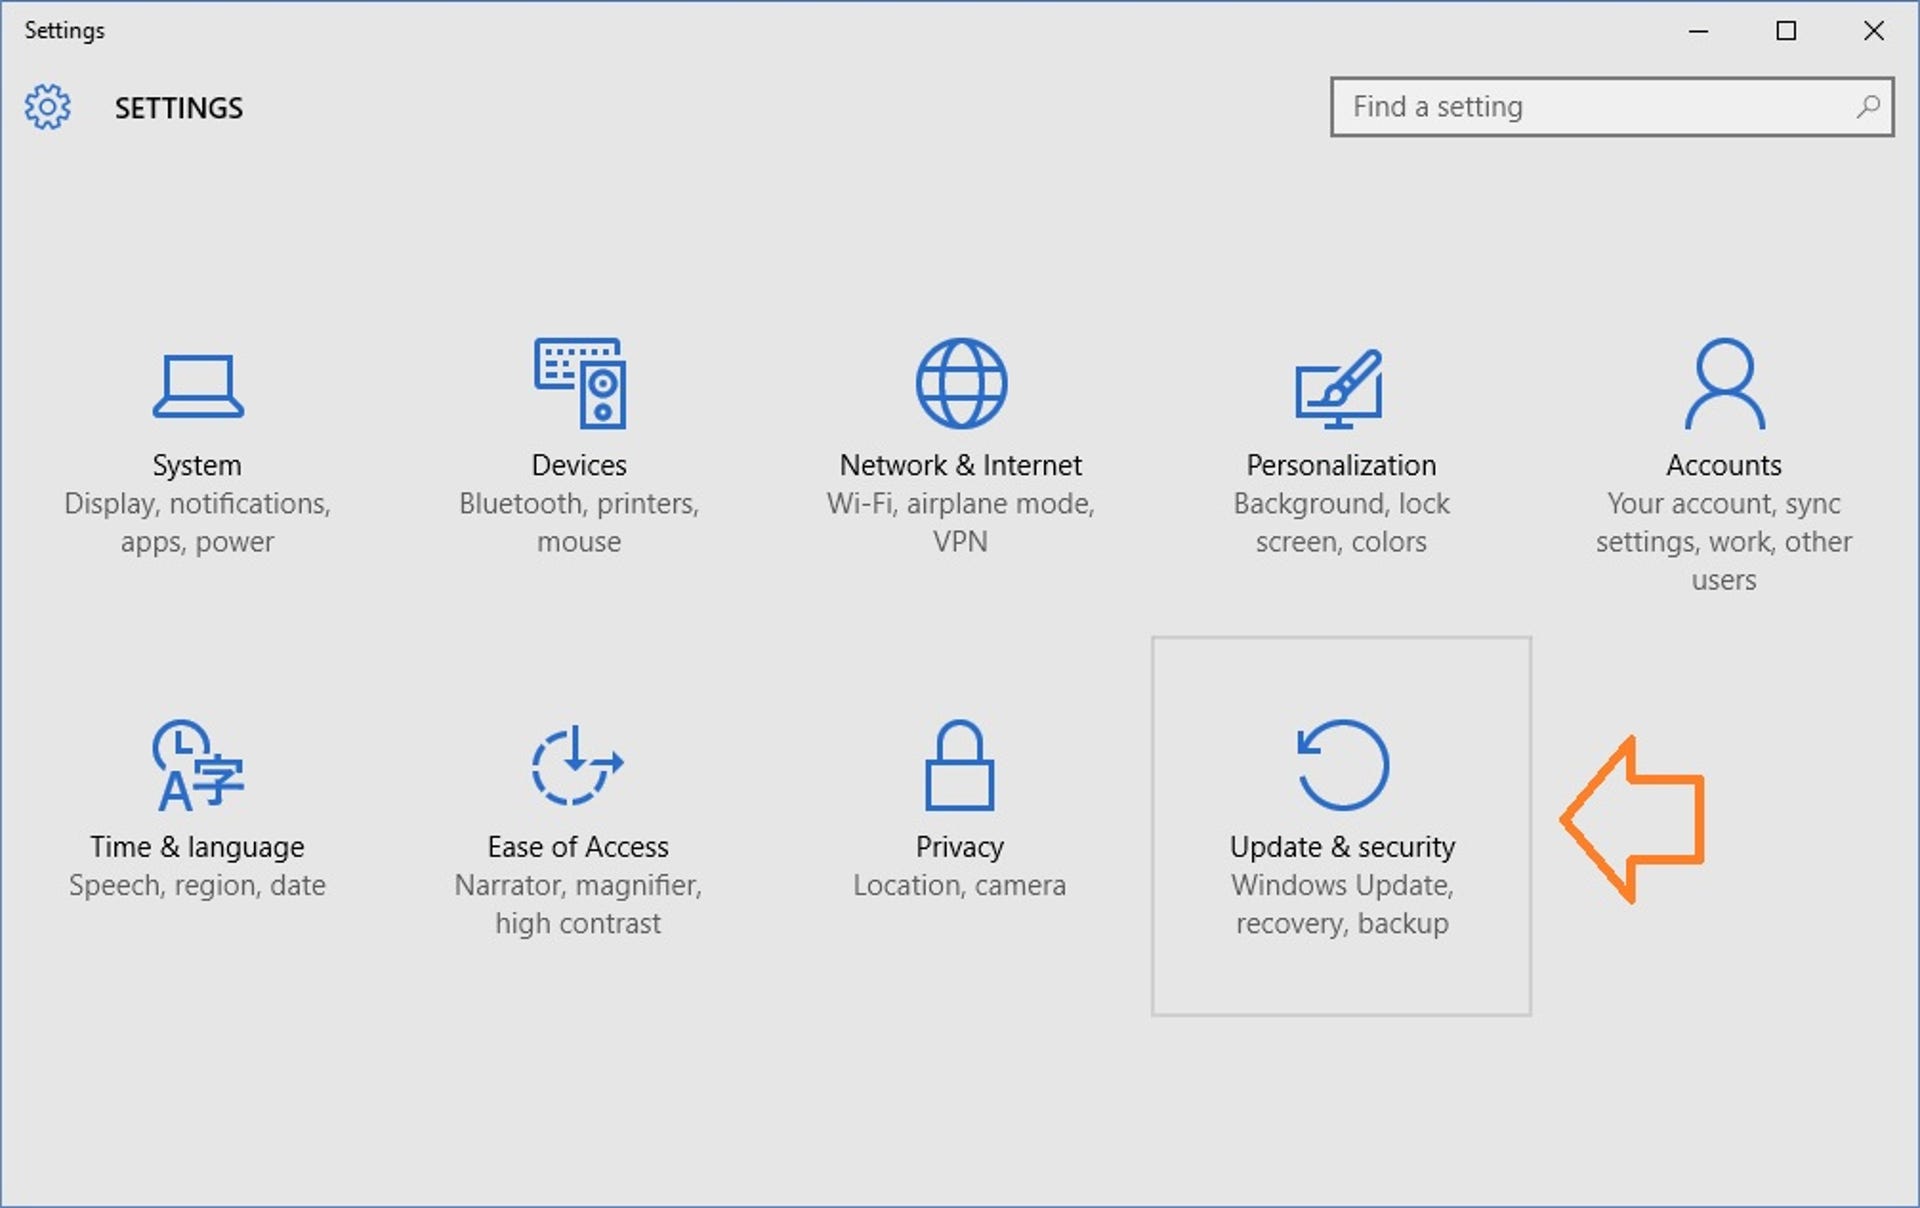
Step 2: On the Settings page, click on the button that reads Update & Security...
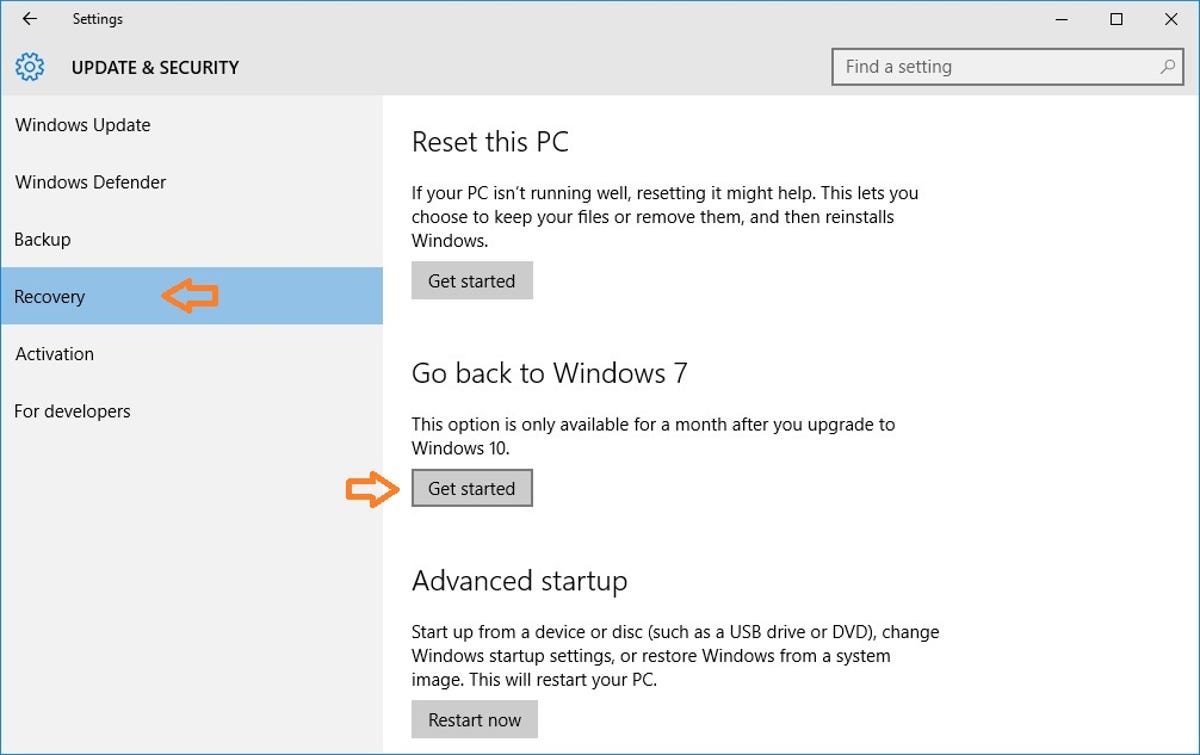

Step 3: Now on the Update & Security page, click on Recovery and then under Go Back to Windows X (where "X" is the version of your previous Windows prior to upgrading to Windows 10), click on Get Started.
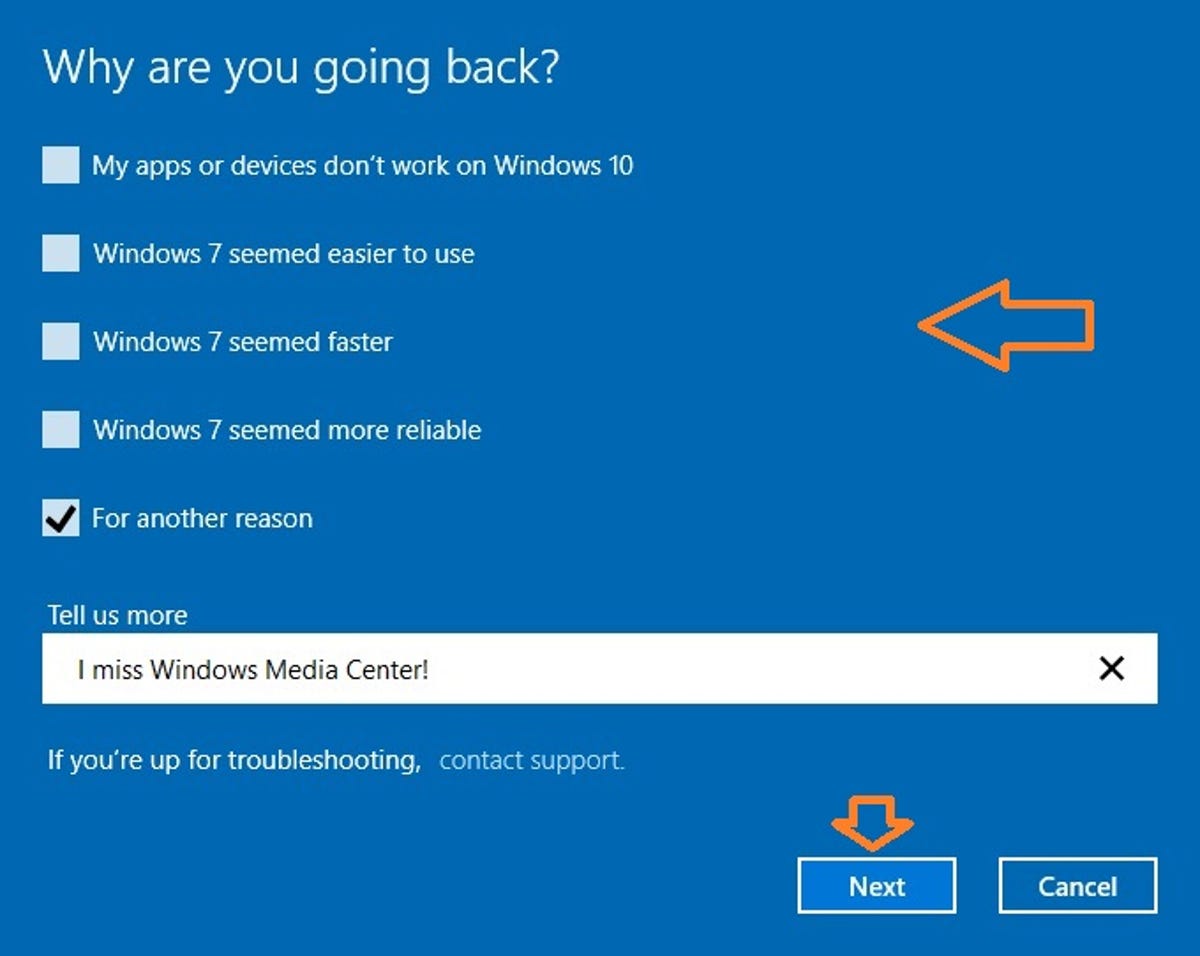
Step 4: Select a reason for the rollback and then click Next.
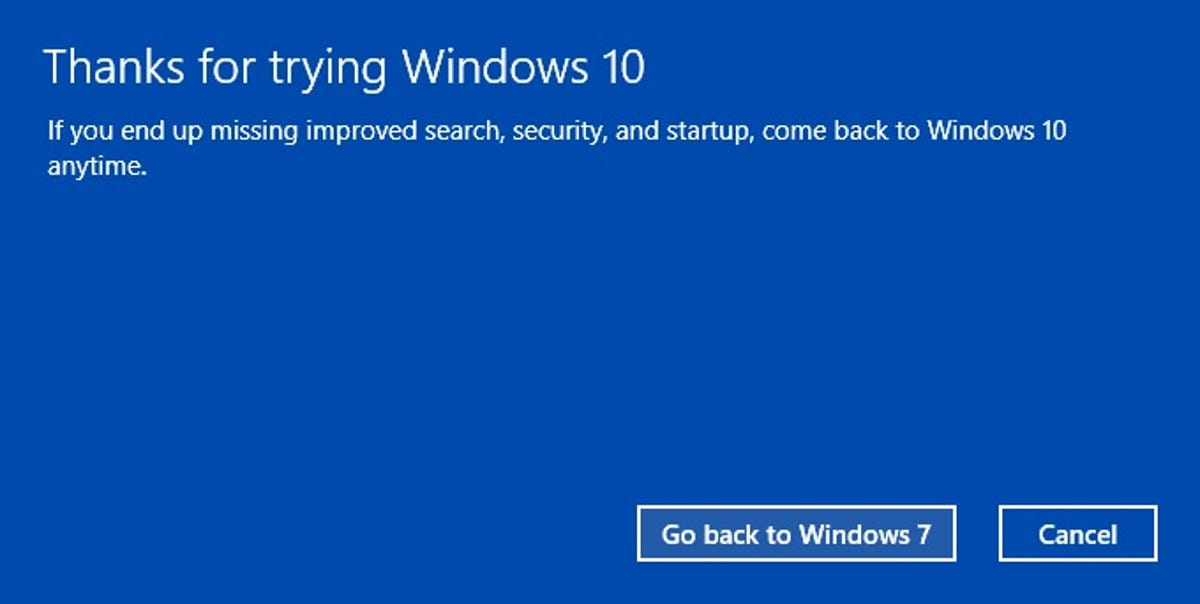
After a warning and a confirmation, the rollback process will start. The process can take as short as a few minutes to about half an hour depending on the speed of your computer. In my experience, rolling back from Windows 10 to Windows 7 was much quicker (just about a fourth of the time) than my original upgrade process.
Note that once rolled back, you might have to reinstall some apps, and some of the settings changes you've made in applications may also be lost. Also, make sure you remember the log-in password for the previous version of Windows since the password for Windows 10, if you have changed it, will not stick, either.
In case you're wondering why 30 days and not longer, Microsoft hopes that after this time you'll get used to Windows 10 enough and hence find no reason to go back.
So what if you want to roll back after the 30-day mark? There is at least one option: back up your previous version of Windows (7 or 8) using system backup software. You'll also need an external/secondary storage device to complete this. Personally, I'd recommend the free version of Macrium Reflect, which works smoothly and supports Windows 10.
Remove previous Windows' files
The reason you can roll back is that during the upgrade Windows 10 actually stores the entire previous Windows installation (and its software) on the computer's drive. This means a large amount of disk space, ranging from 5GB to hundreds of GB, is used for this options. If you're completely happy with Windows 10 and feel there's no need to ever roll back, or you have an alternative backup of the previous Windows stored on an external drive, it's a good idea to remove these files to gain back the disk space. Here are the steps:
Step 1: Run Disk Cleanup. You can look for it using the search field on Windows 10's Taskbar, then click on it.
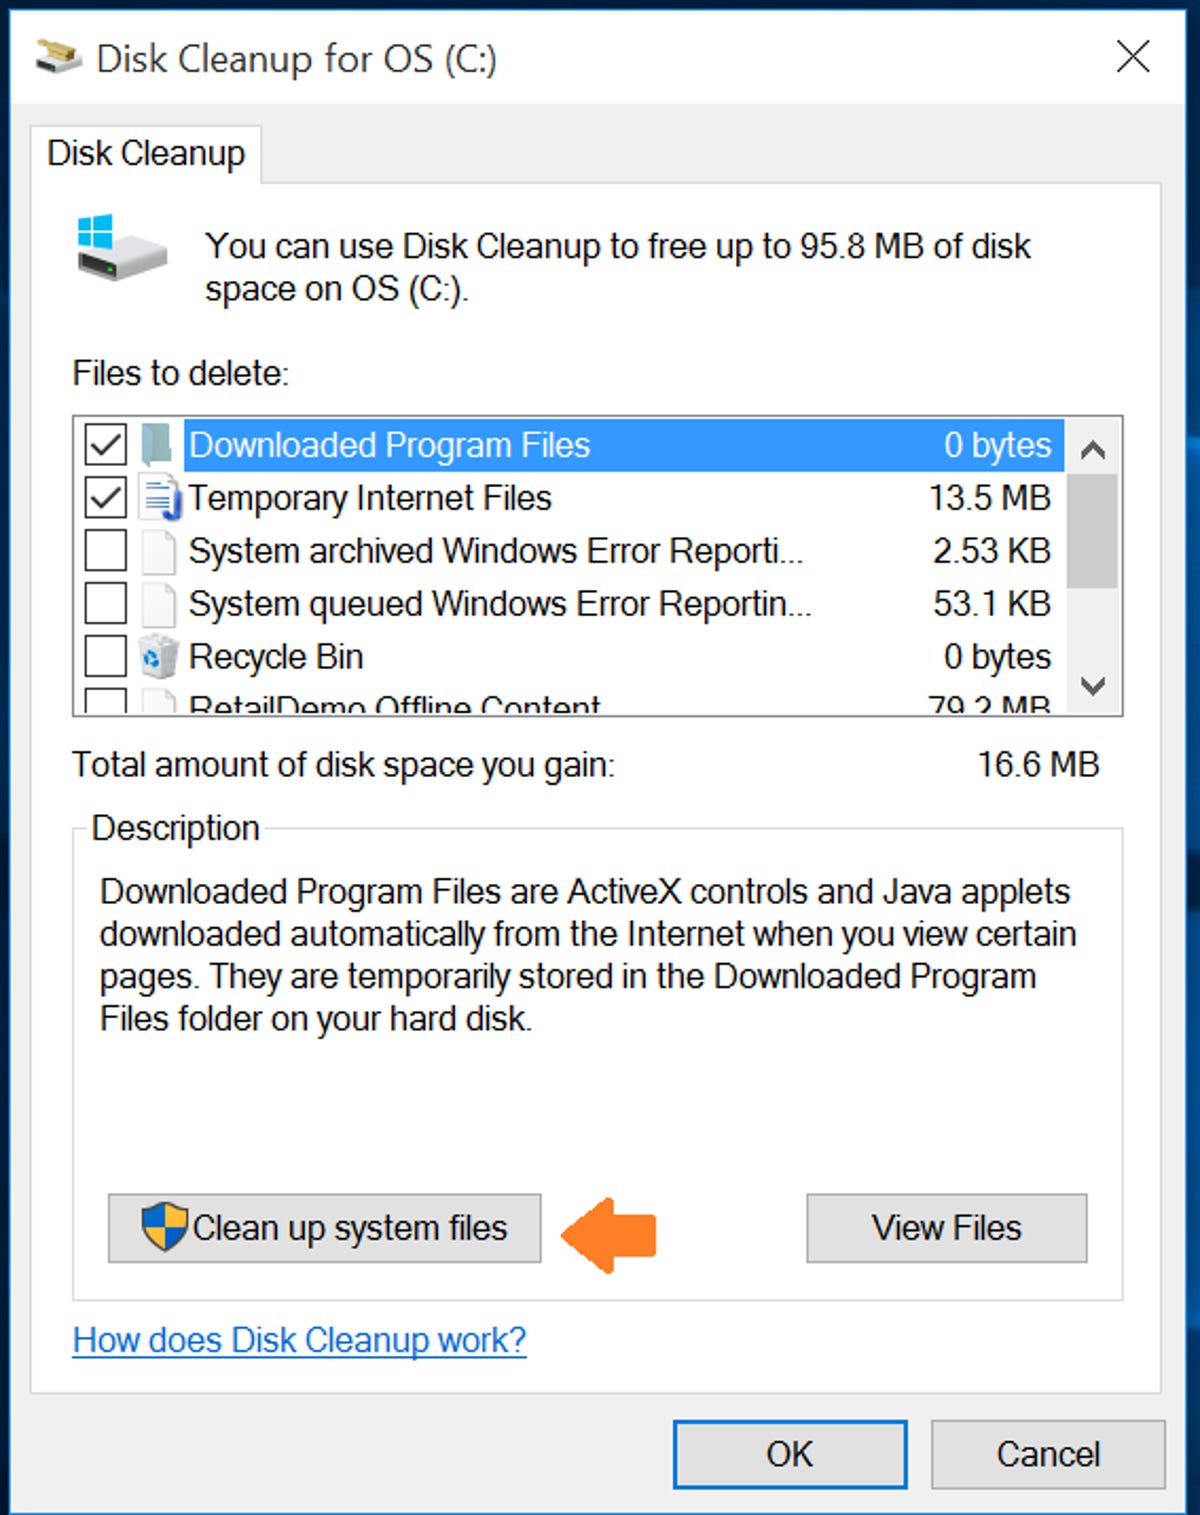
Step 2: Wait for the scanning to finish then click on Clean up system files.

Check the boxes for files you want to remove.
Step 3: The scan will restart, once it's done, check the box in front of Previous Windows installation(s). Optionally, you can also safely check all other boxes. Then click on OK. Answer the confirmation prompt affirmatively and wait for the cleanup process to finish.
Obviously, after this you can't roll back to previous Windows version anymore, unless you had backed up the machine using third-party software prior to the upgrade to Windows 10.