Shoot time-lapse videos with your phone
Learn how to capture professional-looking time-lapse photography using your smartphone.


Time-lapse photography -- when done right -- can reveal the beautiful, imperceptible slow movements of an otherwise mundane scene. By speeding up time, a sunset plunges into the horizon, and the slow crawl of cars in traffic take on a look of blood pumping through asphalt arteries.
Capturing scenes like this used to take a lot of money, time, and special equipment, but today you can get professional quality results using just your smartphone.
The app I'll be showing here is called Lapse It Pro. It's available for both iOS and Android. There are a lot of options out there, though, and most of the following tips can be applied to competing apps.
Choosing the scene
Time-lapse photography doesn't lend itself well to every situation. When you're picking a scene, make sure you're capturing something where there will be some action -- even if it's subtle. Waves on the beach, trees in the wind, cars on the road, people walking by, that kind of thing.
And even though the end result looks quick, these things take time to make -- 10 to 15 minutes minimum. Because of that, make sure you're in a location where you can relax for awhile or be able to leave your phone unattended. Placing your phone in a window works well, or perhaps the patio of your hotel room if you're on vacation with a nice view at your disposal.
Setting up
When it comes to setting up your smartphone camera to capture a time lapse, the most important thing is to make sure that your phone isn't going to wobble around, since that will break the spell that these videos can cast. Unfortunately, with today's thin smartphones, it's nearly impossible to rest these things on a table or prop them up on their own.
CNET's Sharon Vaknin has a great video on making your own tripod mount for your smartphone, but if you want something quick and cheap, try a binder clip. By placing one or two on the side of your phone, it makes it much easier to prop up or even hang on a nail.
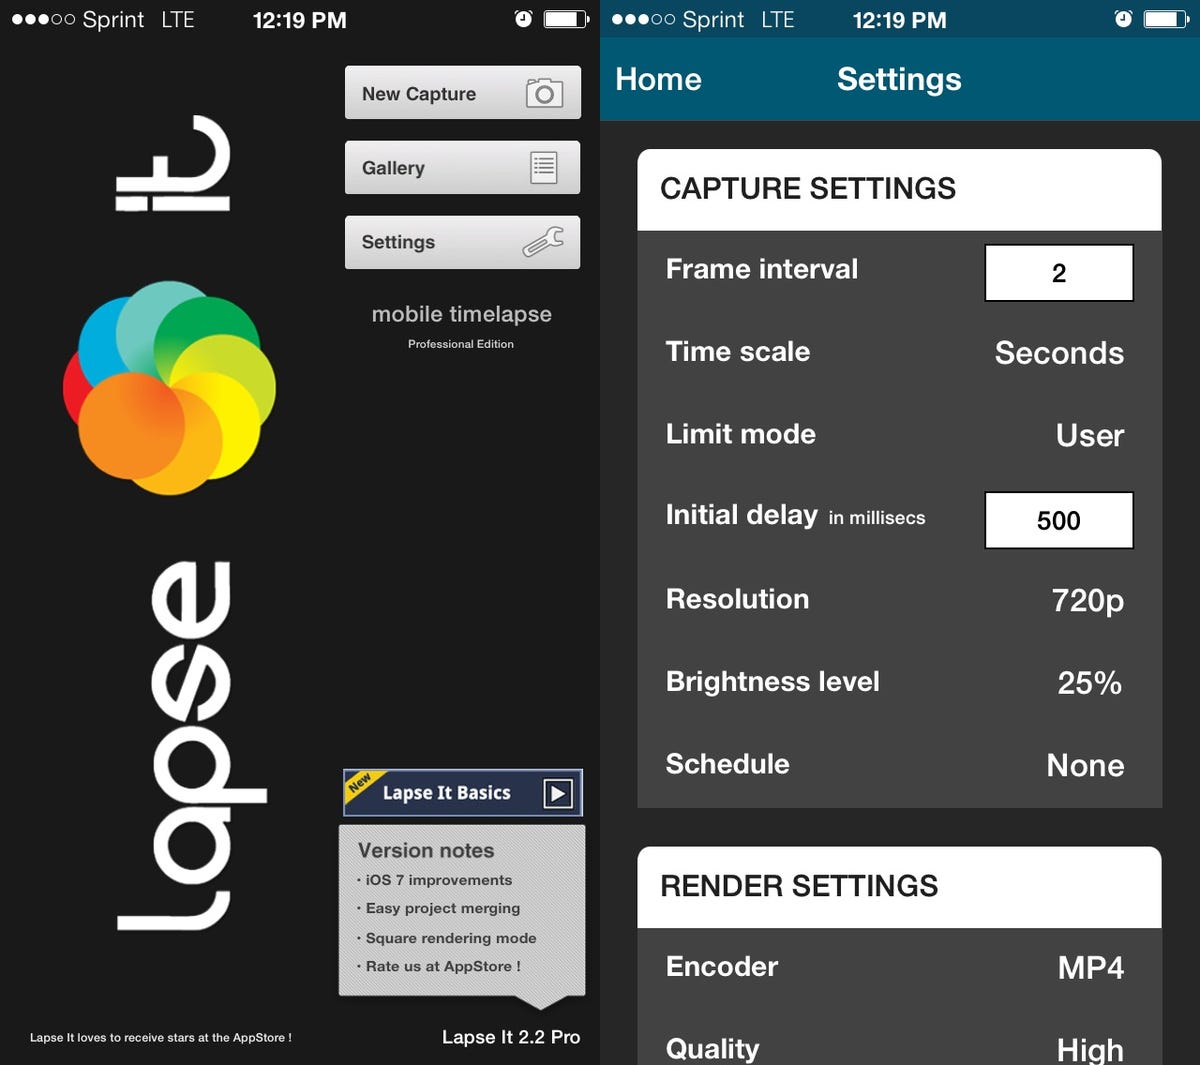
Also, before you commit to recording, tap the settings menu on the home screen. Here you can adjust the capture settings, video format, and resolution, and even automate when the capture will start and stop. By default, Lapse It will take a picture every 2 seconds, which is great for shorter videos. Fifteen minutes turns into around 18 seconds. But for longer stretches -- say, capturing hours or entire days -- it makes sense to raise this closer to 30 seconds, all the way up to a minute.
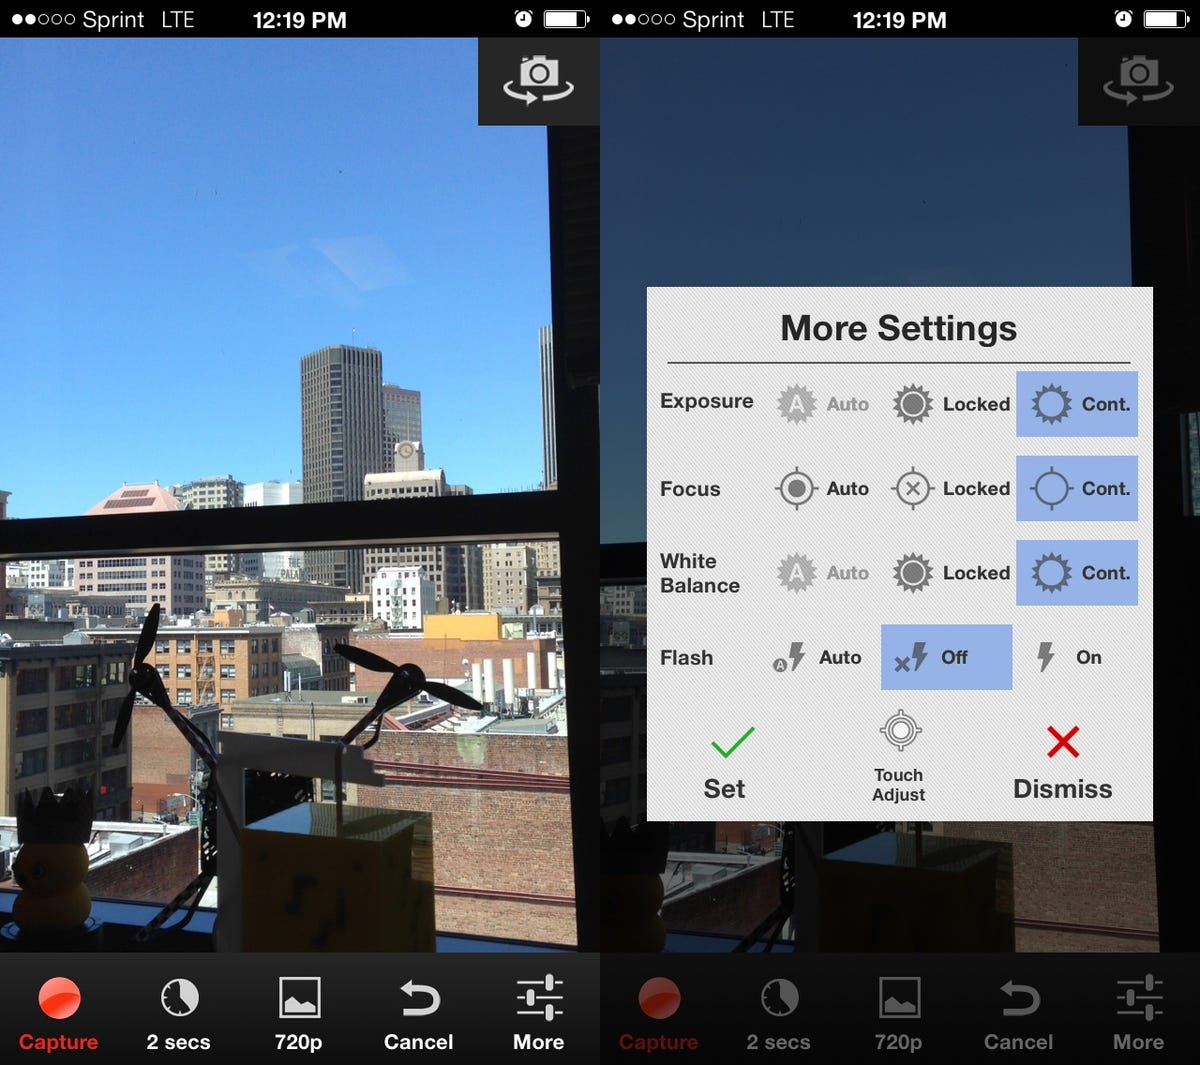
Once you're ready to shoot, you'll see a separate settings menu on the capture screen. This will give you options for locking down the focus, white balance, and exposure. Play with these if you really know what you're doing, but I got the best results leaving these on continuous automatic control. When you're ready to go, hit record.
Editing the results
When you're all done capturing your time lapse, wake your phone and hit the stop button. Then turn your phone to portrait orientation and you'll see a number of options for editing your video, adding effects, music, and exporting the final product.
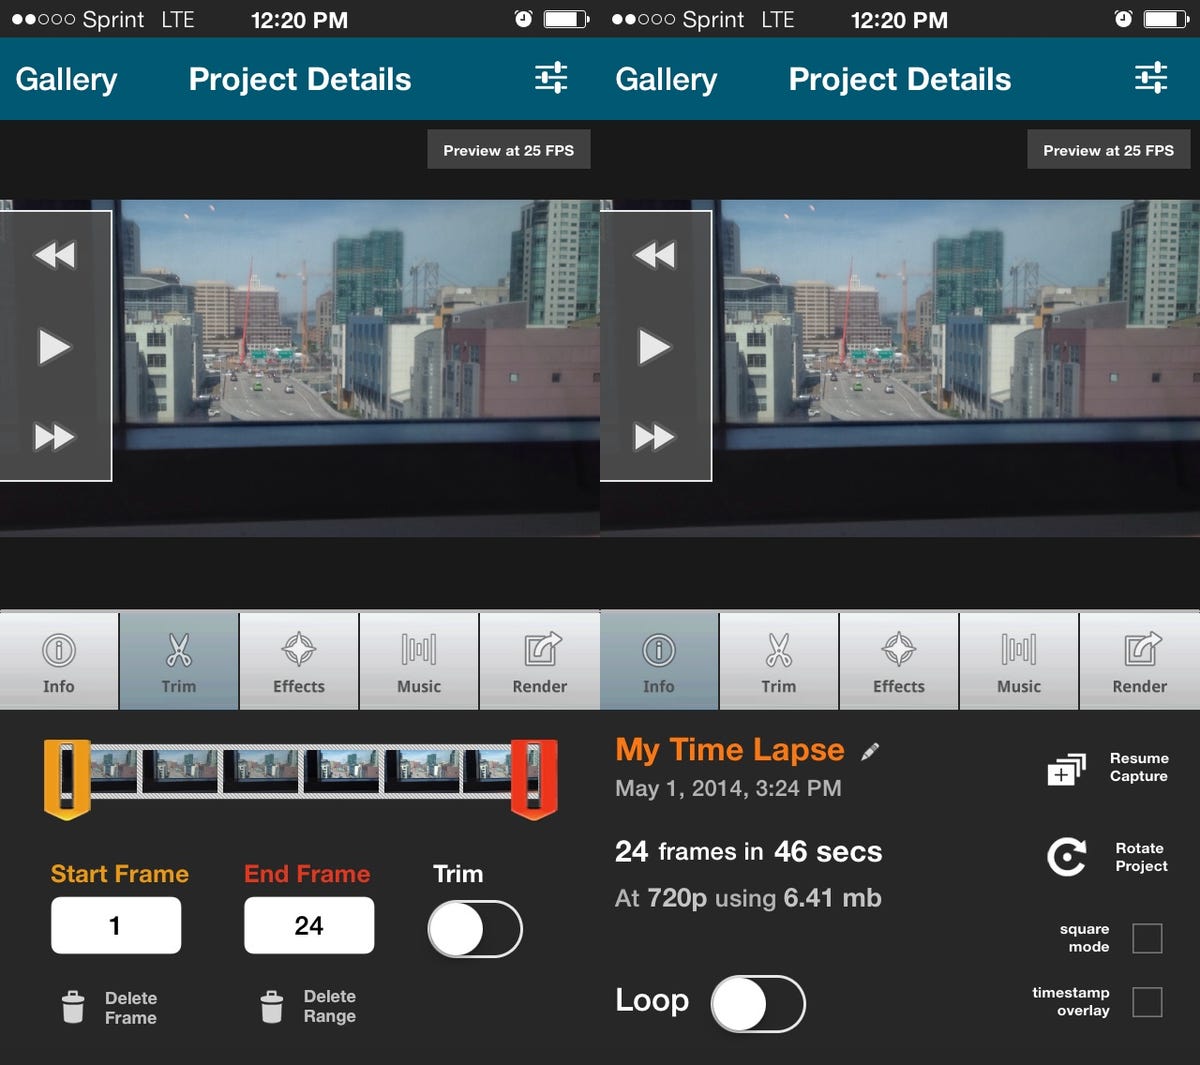
Use the trim button to edit out the shaky parts from the beginning and end, when you were probably handling the phone. In the Info panel, you can rotate the video, make it square, or lay a time stamp over it.
And when you're ready to export the final video, tap the Render tab, check the box for "copy to camera roll," and give your movie a name. Then, hit the Render button.
After a minute, you should have a new video added to your camera roll, which you can upload to YouTube or share however you like. And now that you know how simple it is to create a time lapse, the fun part will be experimenting and staying aware of situations that will lend themselves to this technique.