Save tag searches in Thunderbird
It's not well-documented, but it is possible to save searches for your tagged e-mails as a folder in Thunderbird 2.


Many moons ago when Mozilla introduced Thunderbird 2 (Windows and Mac), one of the neat new features was that the neat new feature of tagging could be combined with the neat new feature of Outlook-style saved searches. However, there was no documentation on how to do this, and it got pushed aside for more important things.
In other words, I forgot about it.
As soon as I remembered, I was surprised to find very little documentation about it. I could see how to save searches, but those were only for the options in the search drop-down, right? Turns out, I was wrong about that.

First off, let's quickly review how to create a tag and perform a search in Thunderbird 2. To create a tag, go to the menubar option Message, then Tag, and choose New tag from the drop-down list. The built-in color-coding feature makes tagged messages pop out from the others that surround it.
In the text box next to the magnifying glass icon on the toolbar, you can start typing to search, or narrow your search using the drop-down specifics such as To or CC and Subject or Sender. Frustratingly, there's no option for Tags in the menu, making it hard for me to see all the e-mails I've tagged as High Priority in every folder.
To begin the process to save a tag search across all your folders, type in any term--I chose "DVD". Then go back to the search box, click the triangle below the magnifying glass icon, and click on Save search as folder.
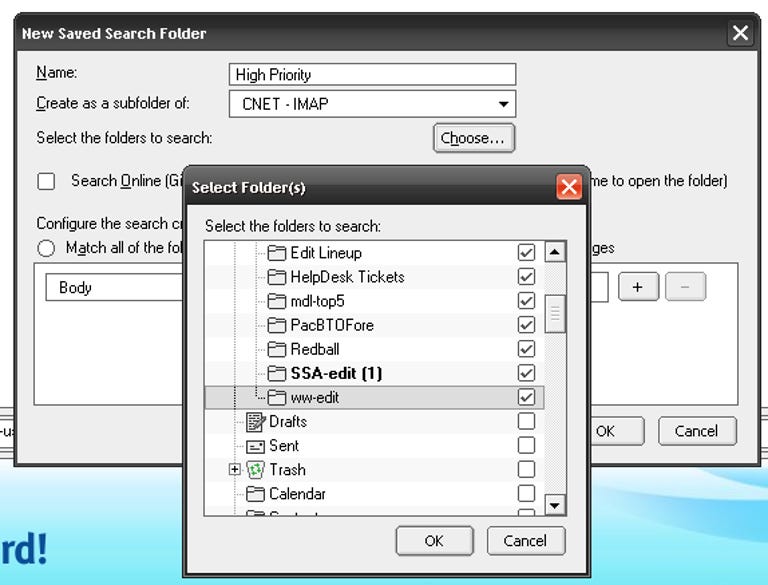
In the window that opens, rename the folder so you can easily identify it--mine is High Priority, same as the tag name. Then choose the folders you want to be included in the search by click the button directly below the search name. If you're on a Microsoft Exchange server, be sure that you specify whether you want local folders included. The next option is Search Online, which I left unchecked since I apply my High Priority tag on a case-by-case basis.
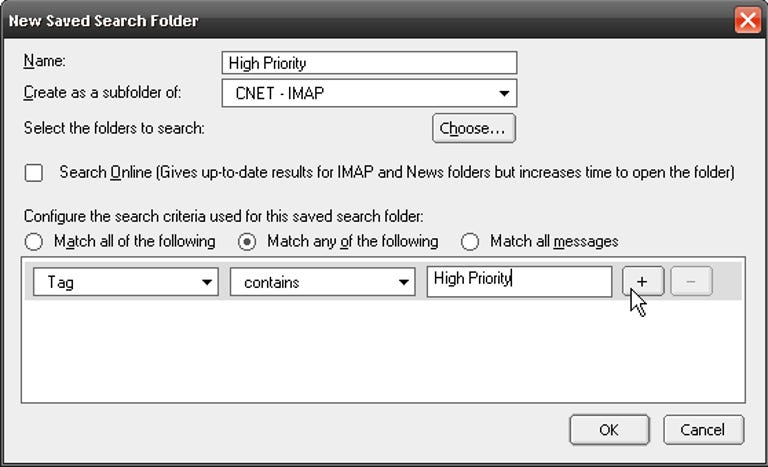
In the Configure search criteria box at the bottom of the window, change the first box from the default Body to Tag. The second box should be set to Is if you're searching for only one tag, but left at Contains if you want more than one. In the third box, type the name of the tag precisely. Pressing the plus button to the right of the third box will allow you to create more search criteria, while the minus button will remove them.
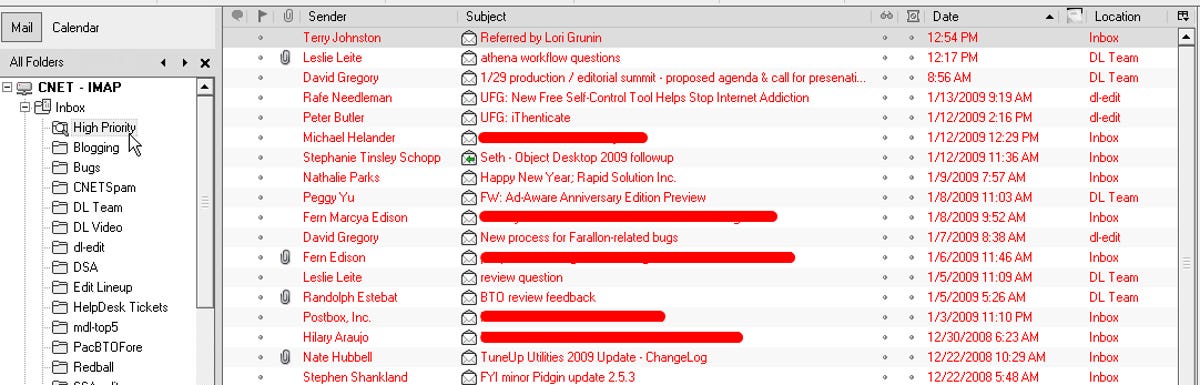
As you can see in the large screenshot, the resulting folder contains all e-mails that meet the search criteria. Using the hot key combination that's associated with the tag, you can toggle an e-mail's inclusion from within the saved search folder. Most importantly, you can now collect all your tagged e-mails in one place, cutting out a lot of organizational angst.