Quick and easy: Share files with Windows 10's Nearby sharing
Windows 10 April 2018 Update makes it easy to shuttle files between PCs.


Windows 10 April 2018 Update rolled out new security and privacy improvements and some hidden gems, but one of its best new features makes sharing files between two PCs a snap. This new feature -- "Nearby sharing" -- lets you shuttle files and links between PCs without needing to bother with email or using a cloud service like OneDrive or Dropbox as a middleman. It's Microsoft's PC-centric version of AirDrop, Apple's method of sharing things between Macs, iPhones and iPads . Let's have a look at how to use Nearby sharing.
What's needed for Nearby sharing
To use Nearby sharing, both PCs involved in the transaction need to be running Windows 10 April 2018 Update (Version 1803) and have both Bluetooth and the Nearby sharing feature enabled. (To check which version of Windows 10 you have, go to Settings > System > About and see if Version 1803 is listed under Windows specifications.)
To enable Bluetooth and Nearby sharing, click the notification icon in the bottom-right corner to open the Action Center and click the buttons to turn on Bluetooth and Nearby sharing. You may need to click Expand to see both buttons.

Sending with Nearby sharing
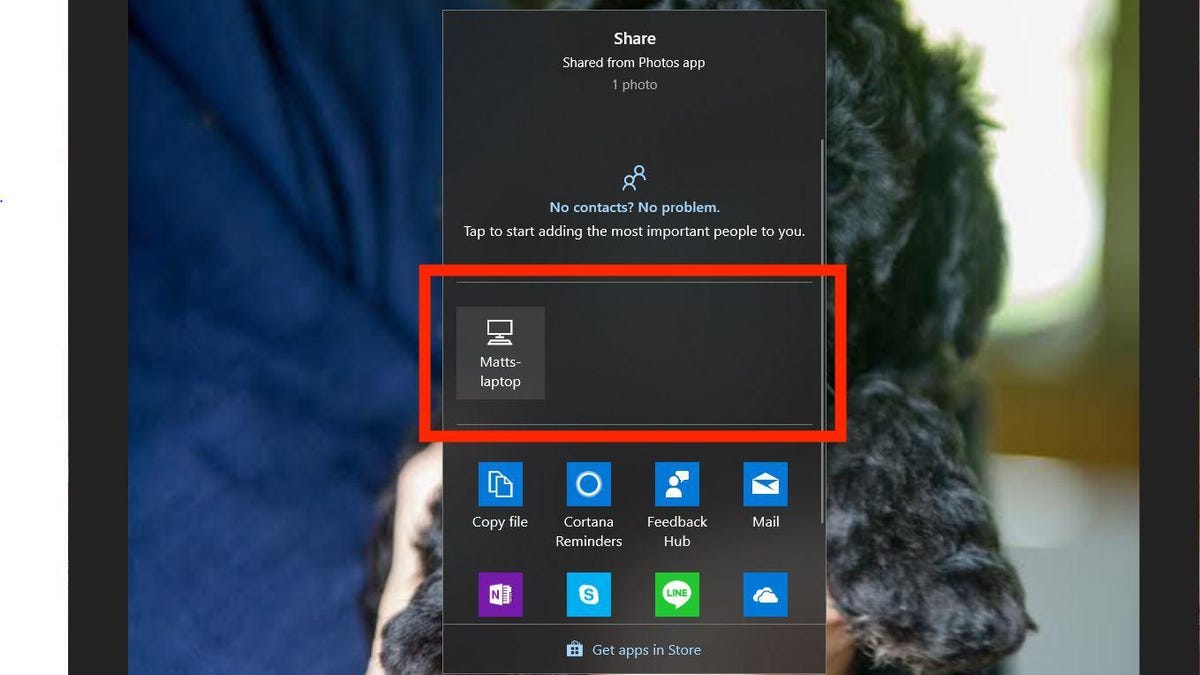
You can access Nearby sharing from the Share menu of Microsoft apps such as Photos, Edge and Windows Explorer. From Photos and Edge, click the Share button (the one with the arrow) and you'll see a section in the middle of the share window that says Looking for Nearby devices. When it finds another PC with Nearby sharing, that PC will appear here. Click the nearby PC listed and then you'll get a notification that your PC is waiting for the other PC to accept. It'll then show the status of sending the file, if accepted, or a notice that the request timed out. (I got the timed-out message whether I declined a sharing offer or just ignored it and let it time out.)
From File Explorer, you can right-click on a file and choose Share to access Nearby sharing. You can also right-click on an image in Edge and select Share picture, too.
Receiving with Nearby sharing
On the receiving end, you'll get a notification that says a PC wants to share a file or link with you. If you miss the notification, then you can find it in the Activity Center. It remains there for a minute before it expires and disappears.
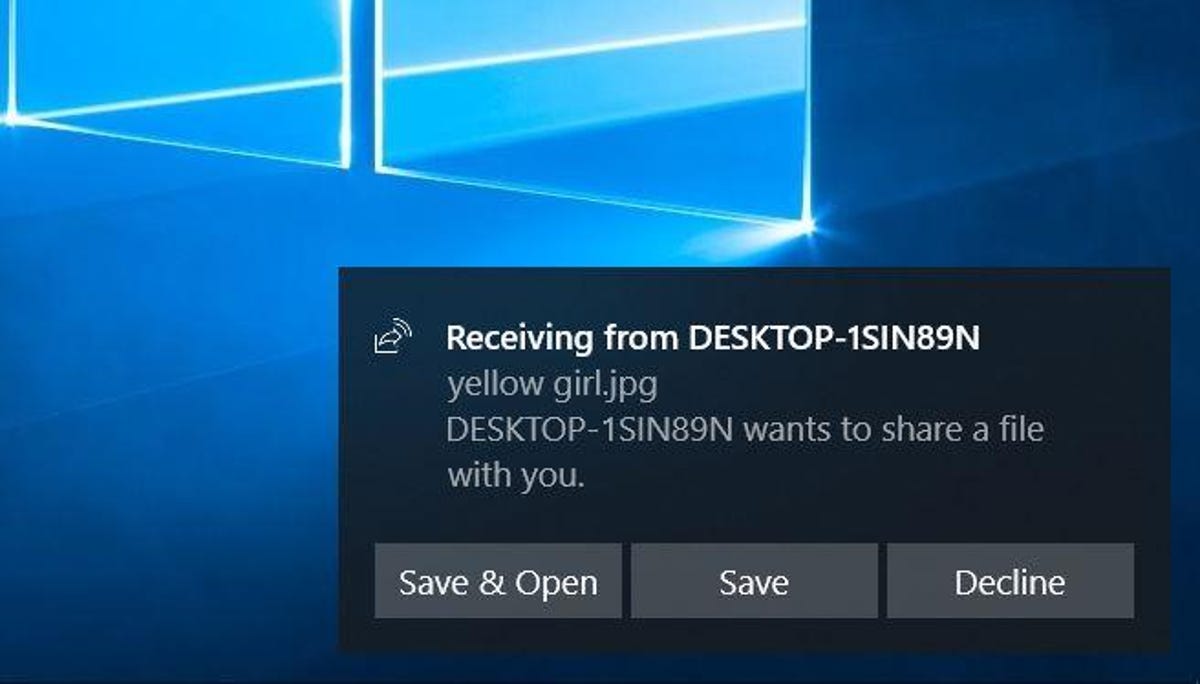
The notification shows the file name or URL so you can get an idea of what someone is attempting to share with you. For files, you can Save & Open, Save or Decline. For URLs, you can Open or Decline. File are saved to your Downloads folder or the folder you designated for file downloads.
Choose your sharing tolerance
Head to Settings > System > Shared experiences to set your sharing tolerance level, either Everyone nearby or My devices only.
What's in a name
If you find yourself using Nearby sharing with any frequency, then it might be a good idea to rename your PC since Nearby sharing identifies the sharer by the PC's name and not by user account. Vendors often slap vague names on PCs, and it's easy to rename it something more meaningful or useful. Just go to Settings > System > About and click the Rename this PC button.