Locate and eradicate duplicate photos on your Mac
PhotoSweeper for Mac helps you get rid of the duplicate or near duplicate photos clogging up your hard drive and photo library.


Digital photography is a blessing and a curse. OK, it's more of a blessing than curse. Freed from the cost of purchasing and developing film, digital photographers can take multiple shots of the same scene in an attempt to capture the perfect shot. Unless you dutifully manage your photo library and cull the extra shots from each photo shoot, your library quickly becomes difficult to navigate and your hard drive cluttered. PhotoSweeper for Mac identifies duplicate and similar photos and lets you dump the ones you don't need in the trash. The app costs $9.99 in the Mac App Store.
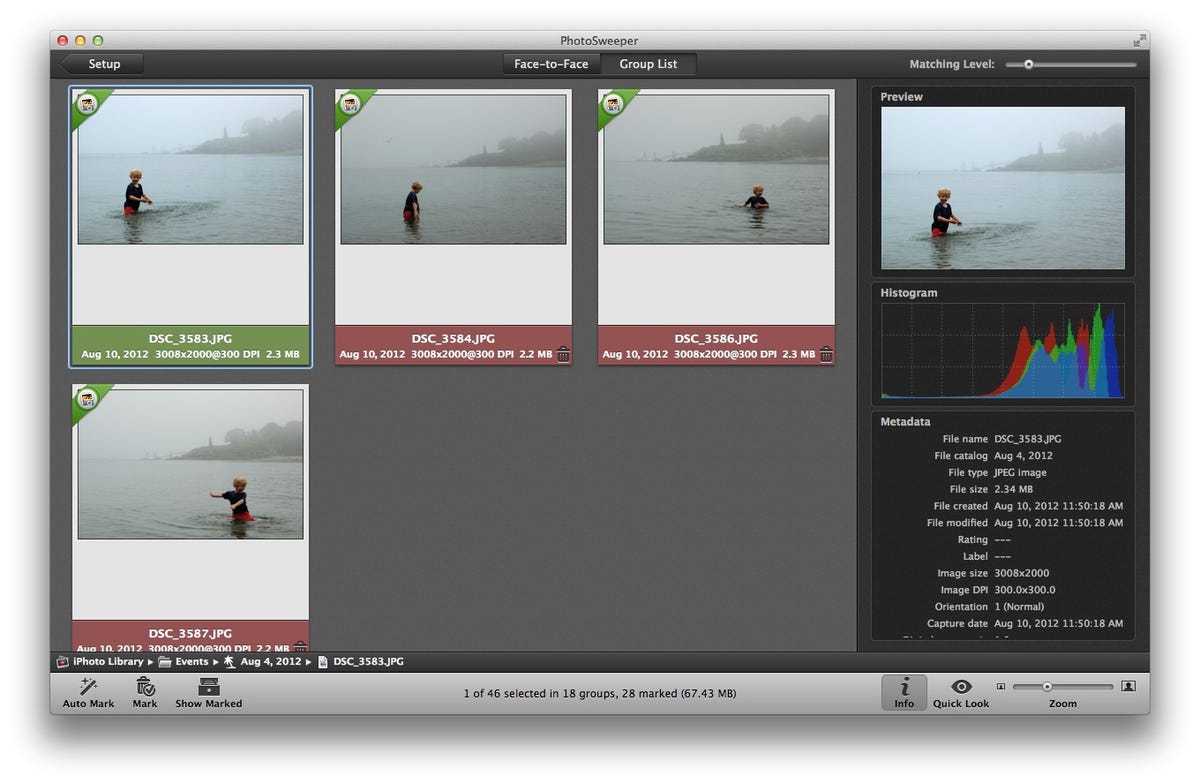
PhotoSweeper works with iPhoto, Aperture, and Adobe Lightroom. You can also drag and drop photos or folders from your desktop. The app features a large browser for your photos, but it will do the comparison work itself. To add photos to PhotoSweeper, use the Media Browser or Add Photos button in the lower-left corner. Choose a folder or group of photos and drag it to PhotoSweeper's browser. To the right of this large browser space is panel to view the settings for your comparison method or image info. In settings, you can choose to search only for duplicates or a handful of methods to root out needlessly similar photos. At the bottom of this right-hand panel is a slider to adjust the Matching Level. Set it more toward Exact Match if you feel PhotoSweeper is being too choosy.
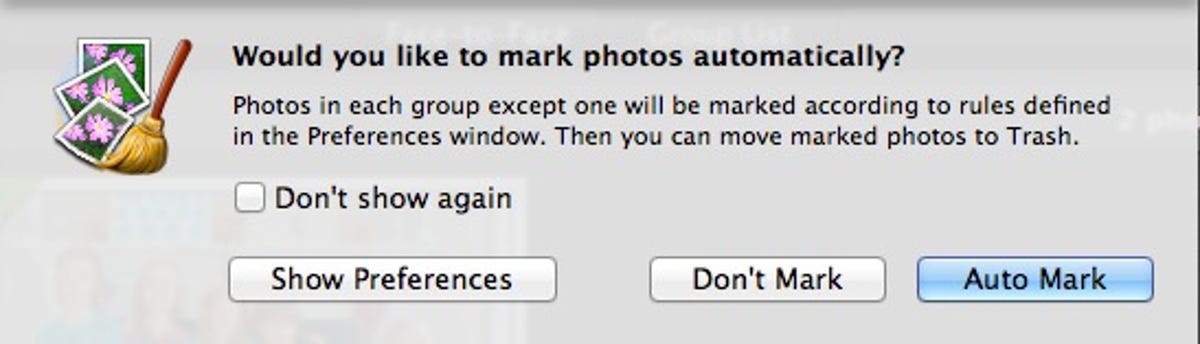
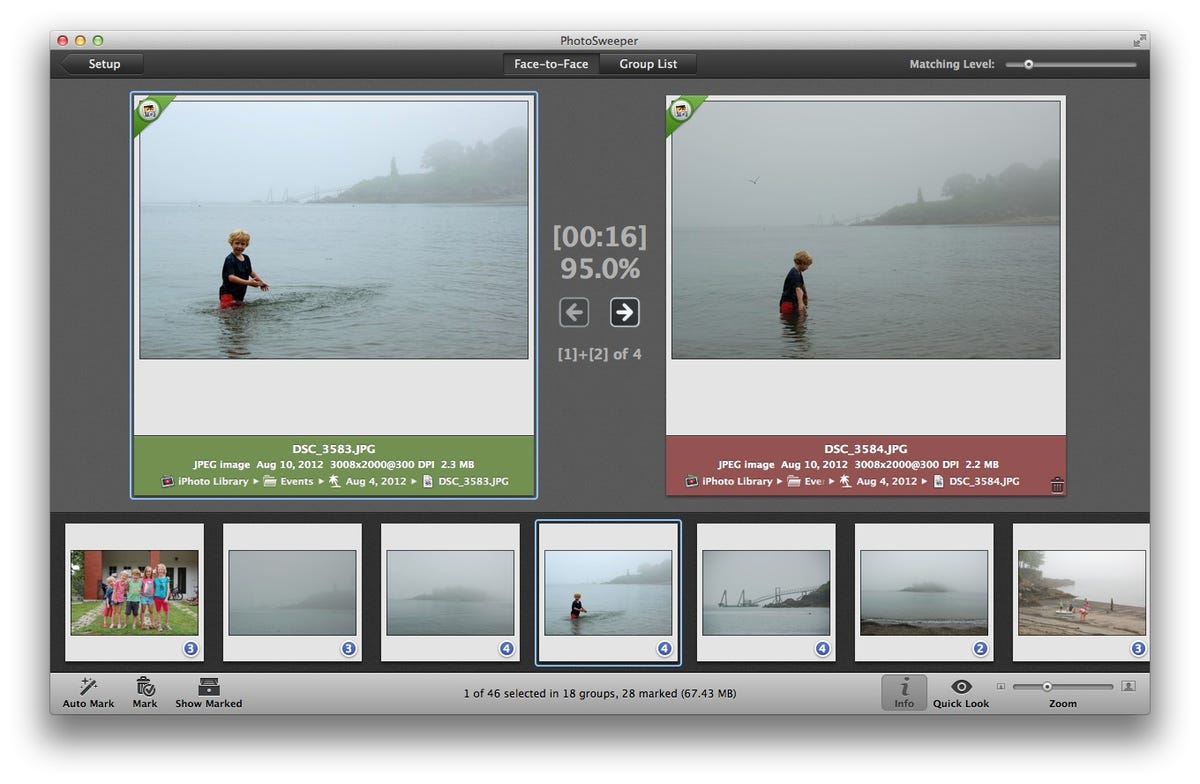
When you have your photos in the browser and your settings just so, click the Compare button at the bottom of the app, and PhotoSweeper will begin comparing your selection. When it has finished, a pop-up window will appear, asking if you'd like the app to mark your photos. Say yes by clicking the Auto Mark button. You will then see your photos arranged by groups, where all but one of the photos in each group is marked for deletion. Double click on each photo in this view to toggle from marked and unmarked. Using the two buttons at the top -- Group List and Face-to-Face -- you can view your photos by group or view two side-by-side for closer inspection.
When you are happy with the results, click the Show Marked button in the lower-left corner. With all of your marked photos laid out in the browser, you can use the buttons in the lower-left corner to move them all to the trash, move and rename them, or copy and rename them. Photos on your hard drive are sent to the system trash, and photos in iPhoto or Aperture are moved to the app's trash. For Adobe Lightroom, trashed photos are put in a collection named "Trash (PhotoSweeper)" and are marked as Rejected.