How to take photos of smoke effects
Want to get started with smoke photography? Learn how with this tutorial. All you need is a dSLR, tripod and flash unit.


- Webby Award honoree, 2x Gold Telly Award winner

Smoke may not seem like the most obvious subject for your photography, but it can produce some beautiful, ethereal results. Here is how to take photos of smoke.
The best time to experiment with smoke photography is at night, when ambient light is at its lowest.
Find a dark room without any drafts to get the best results. You can block out any extra ambient light using curtains if need be. As with any activity involving smoke, make sure you take regular breaks and ventilate the room every few minutes.
What you need
- Digital SLR or interchangeable lens camera (ILC)
- Tripod
- Backdrop, preferably black. This can be black cardboard or a black cloth to hang on the wall
- Off-camera flash
- Reflector. If you don't have a reflector you can easily use a reflective surface to bounce the light from the flash, like tinfoil
- Incense sticks and holder
Step one: Set up the scene
Attach the black cardboard or fabric to the wall. This will be your backdrop.
Find a stable surface or table to place your incense stick. Remember that it will drop ash, so lay down a non-flammable cover to protect the surface.
Make sure the incense stick is a fair distance away from the backdrop. Approximately 1 metre is a good distance to start with.
Step two: Get the flash in position
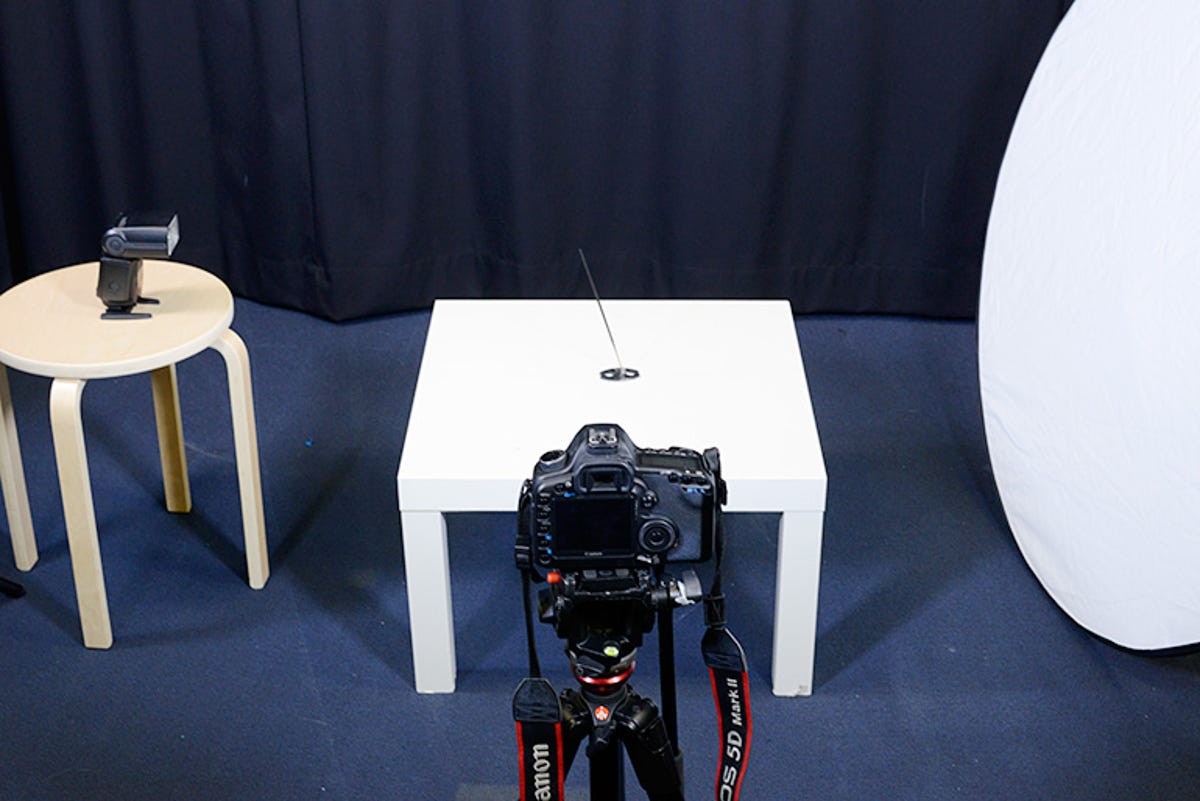
The key to illuminating smoke is to have light passing through it or across the stream at an angle, without having light fall on the backdrop.
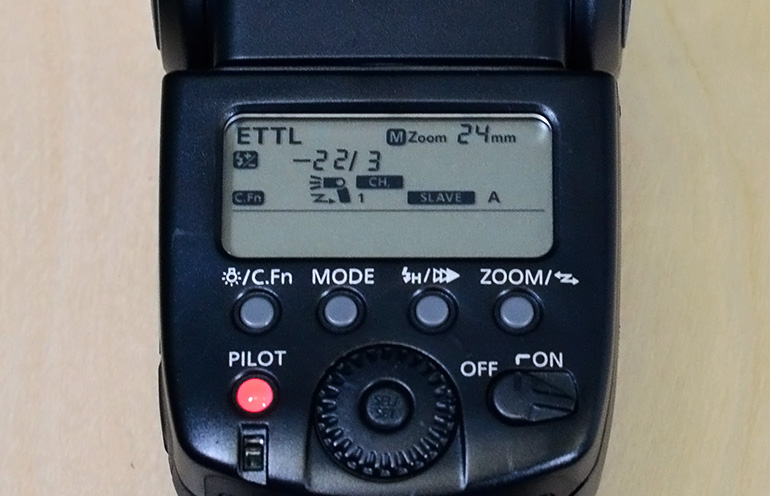
To do this, set your off-camera flash so it is pointing across the incense stick like in the image above. The flash can either be wirelessly triggered by your dSLR or attached with a cable to the camera. Check your manual if you are unsure if your camera has wireless flash control.
You may need to place the flash on another surface to keep it in position, or you can handhold it if needed.
Directly opposite the flash, place your reflector or tinfoil to bounce the light for even illumination.
Step three: Camera settings
Set your dSLR lens to manual focus and enter into live view. Use expanded focus to make sure the base of the incense stick is sharp.
Once focus has been acquired, enter into manual exposure mode. A good starting point for smoke photography is to keep your ISO around 100 or 200. The aperture should be around f/8 to f/11 and the shutter speed should be 1/125 or 1/160, enough to freeze the smoke in action when illuminated by the flash.
Step four: Light it up
Once the scene has been set up, light the incense. As with anything involving smoke in confined conditions, ensure you take breaks and ventilate the room regularly.
Turn out any overhead lights and start to take photos with your dSLR. This should trigger the flash to fire.
Review your images as you go in order to adjust the exposure accordingly. There are no right or wrong settings as the exact exposure will depend on your particular setup. Ideally you want to make sure that no light from the flash is falling onto the background so it is as close to pure black as possible. Review your histogram to check and adjust if needed.
You also may need to adjust the power of your flash and its position through the smoke. If images are a bit too washed out, you can dial down the power to something weaker.
In this example, most of the images were taken between -2EV and -3EV.
If you find that too much light is still falling on the background, consider adding a snoot over the flash which controls the direction and fall of the light.
Step five: Create shapes
When the room is blocked from drafts, smoke plumes from the incense will generally go straight up. To make things more interesting from a photographic perspective, consider creating some shapes in the smoke.
To do so you could gently fan the smoke with a piece of paper. Another option is to coax shapes from the smoke by manipulating the tip of the incense stick with a non-flammable object.
Remember that the longer you leave the incense burning, the more ambient smoke will build up. This can make your photos look hazy, so it is important to keep ventilating the room.
Step six: Editing
As with many photographic techniques, the key to perfecting your smoke effect photos is to keep practising. You may end up taking hundreds of frames in order to find a few with a desirable look.
Once you have finished taking photos, it's time to edit. This is totally optional, but can give the photos an interesting look that's difficult to achieve in-camera.
In Photoshop or an image editor of your choice, you can boost the contrast of the scene to make the smoke pop even more against the background.
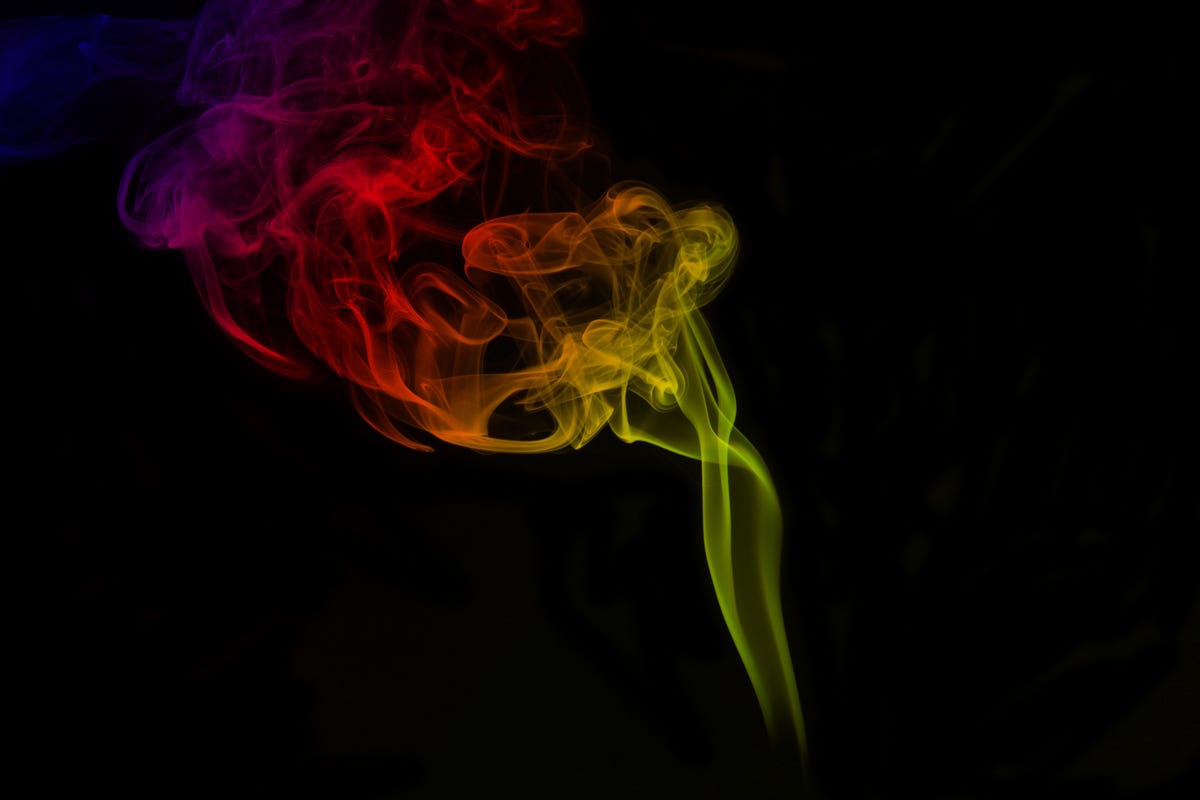
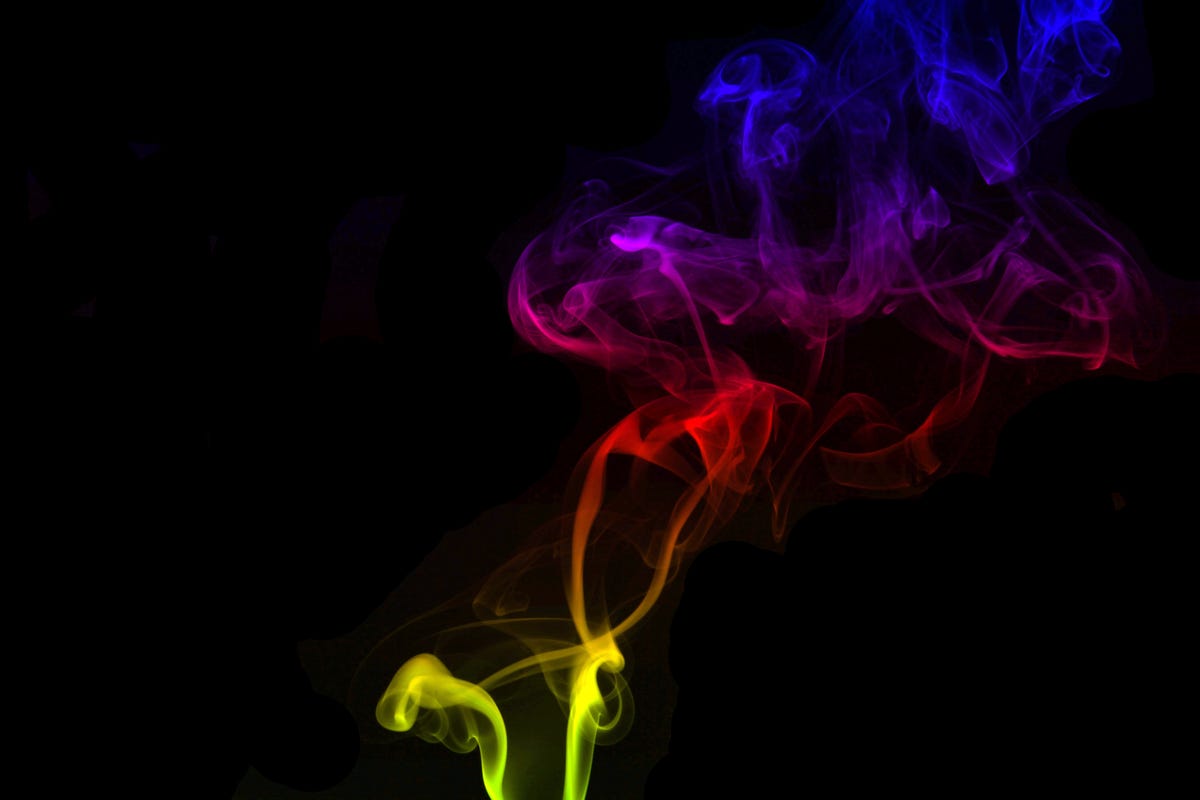
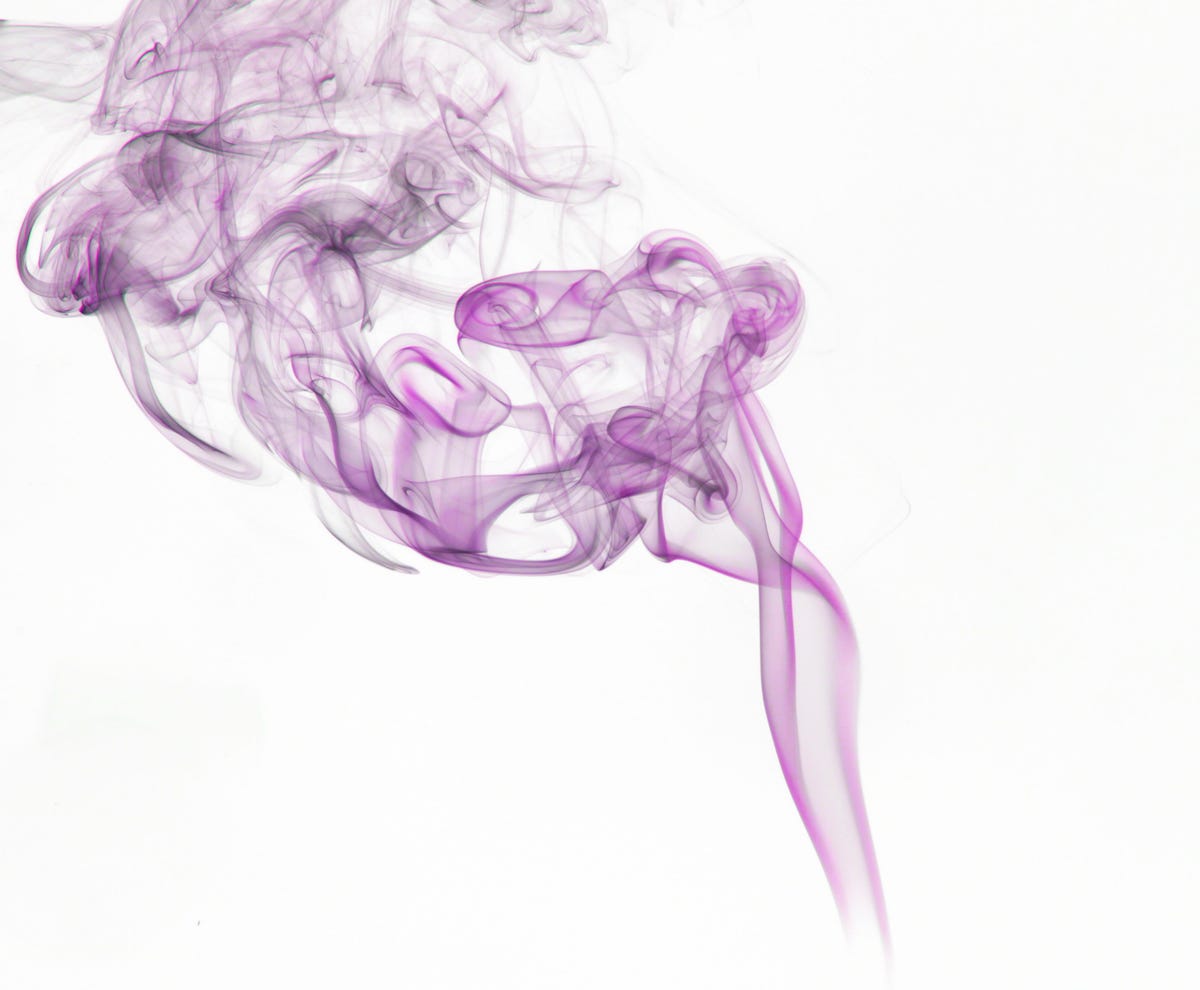
To give photos more of an ethereal look, try inverting the colours. In Photoshop this can be found through Image > Adjustments > Invert.
From here, you can add coloured effects to the smoke as well. Go to Image > Adjustments > Hue & Saturation to play around with the colour of the smoke.
To add a rainbow effect to the smoke, find the gradient fill tool in Photoshop. Select an option with three colours -- for the image below, I selected the blue/red/yellow preset. Change the blend mode to multiply and drag the gradient from the top of the image to the bottom.