3 tips for taking faster screenshots in Windows 10
The default method of taking screenshots in Windows 10 is clunky. Use these tips to take faster and more precise screenshots without the need for an overpriced app.


Using Windows, you'd think taking screenshots is simple. There is a button dedicated to this on almost every keyboard called the Print Screen key (abbreviated as PrtSc or PrtScn).
Pressing this key captures the entire screen (or multiple screens if you use more than one monitor) and copies it to the clipboard. But to save that screenshot, you need to paste it into Paint, where you can then crop and edit the screenshot and save it as an image. Ugh.
There are easier and faster ways to grab your screen in Windows. And, no, it doesn't require one of those expensive apps. Here's how you can do it -- without installing a new program.
Modifier keys
With Windows 10, a new screen capture hotkey combination was introduced. Holding the Windows key and pressing the Print Screen button will save a screenshot as an image, removing the need to paste the capture into Paint to save it manually.
By default, these screen captures will be saved at This PC > Pictures > Screenshots.
The problem is that this still captures the entire display -- including a second monitor if you have one. If you want to capture just a single open window without everything else, hold Alt while pressing the PrtSc button. This captures the current active window, so make sure to click inside the window you want to capture before pressing the key combination.
Sadly, this doesn't work with the Windows modifier key. Pressing Windows + Alt + PrtSc doesn't do anything at all. So when you use the Alt + PrtSc hotkey, you will still need to paste the capture into Paint and save it.
Of course, there is a workaround.
OneDrive or Dropbox
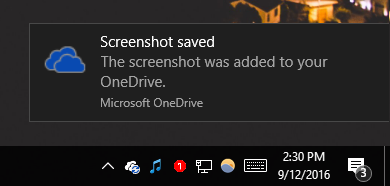
If you use Microsoft's OneDrive, which comes preinstalled, or Dropbox and have the application installed on your Windows machine, you can opt to have all screen captures saved to your cloud storage automatically.
This feature saves any Alt + PrtSc captures as images without the need for pasting into Paint.
Captures using the Print Screen key will be saved locally, either at OneDrive > Pictures > Screenshots or Dropbox > Screenshots, and automatically synced to your cloud storage.
To enable this feature in OneDrive:
- Click the Show hidden icons button in the Notification Area in the Taskbar.
- Locate and right-click on the OneDrive icon.
- Click Settings.
- Open the Auto Save tab and check the box beside Automatically save screenshots I capture to OneDrive.
For Dropbox:
- Click the Show hidden icons button in the Notification Area in the Taskbar.
- Locate and right-click on the Dropbox icon.
- Click the settings drop-down in the upper right corner of the window that appears.
- Click Preferences and open the Import tab.
- Check the box beside Share screenshots using Dropbox.
More precise screenshots
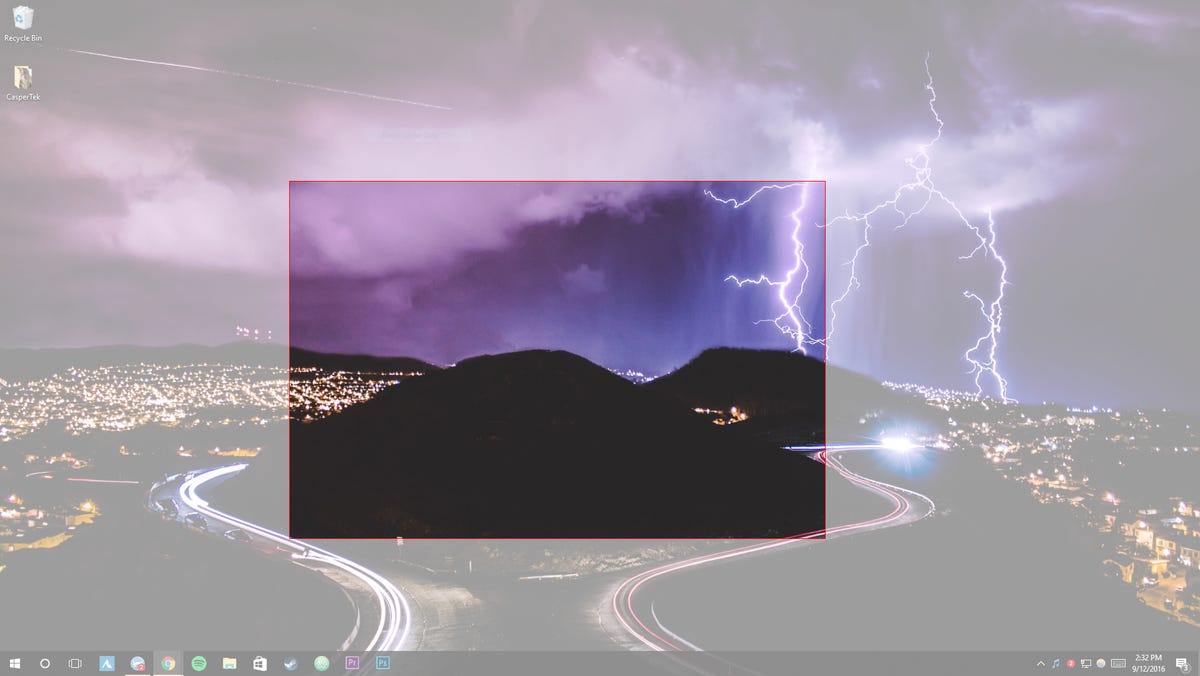
Windows comes with screen-capture software installed, as well. It's called the Snipping Tool and it's your best bet if you need more precise screen captures of only specific parts of your screen.
Click the Start button, start typing "snipping tool" and click on the app to open it. To capture an open window, click the drop-down menu beside New, select Window Snip and click on any window. Everything visible within the borders of that window (including other windows that overlap it) will be captured and available to edit, annotate, share or save as an image within the Snipping Tool app.
Also, you can use the Snipping Tool to select a custom portion of the screen. Click the dropdown beside New and select Free-form Snip or Rectangular Snip. Click once and hold to initiate the capture, drag until you've selected the entire area you want to capture, and release to finish.