How to set up multiple Gmail accounts on your iOS device
Learn how to set up and manage multiple Gmail accounts on an iPhone, iPad, or iPod Touch.


Setting up multiple e-mail accounts on an iOS device is a straightforward process, and a couple of tweaks will help you manage your inbox. You can set up an initial account right from the Mail app on your iPhone, iPad, or iPod Touch, but for subsequent accounts, you'll need to go through Settings. In this tutorial, I'll walk you through setting up two Gmail accounts and how to manage a couple of important settings.
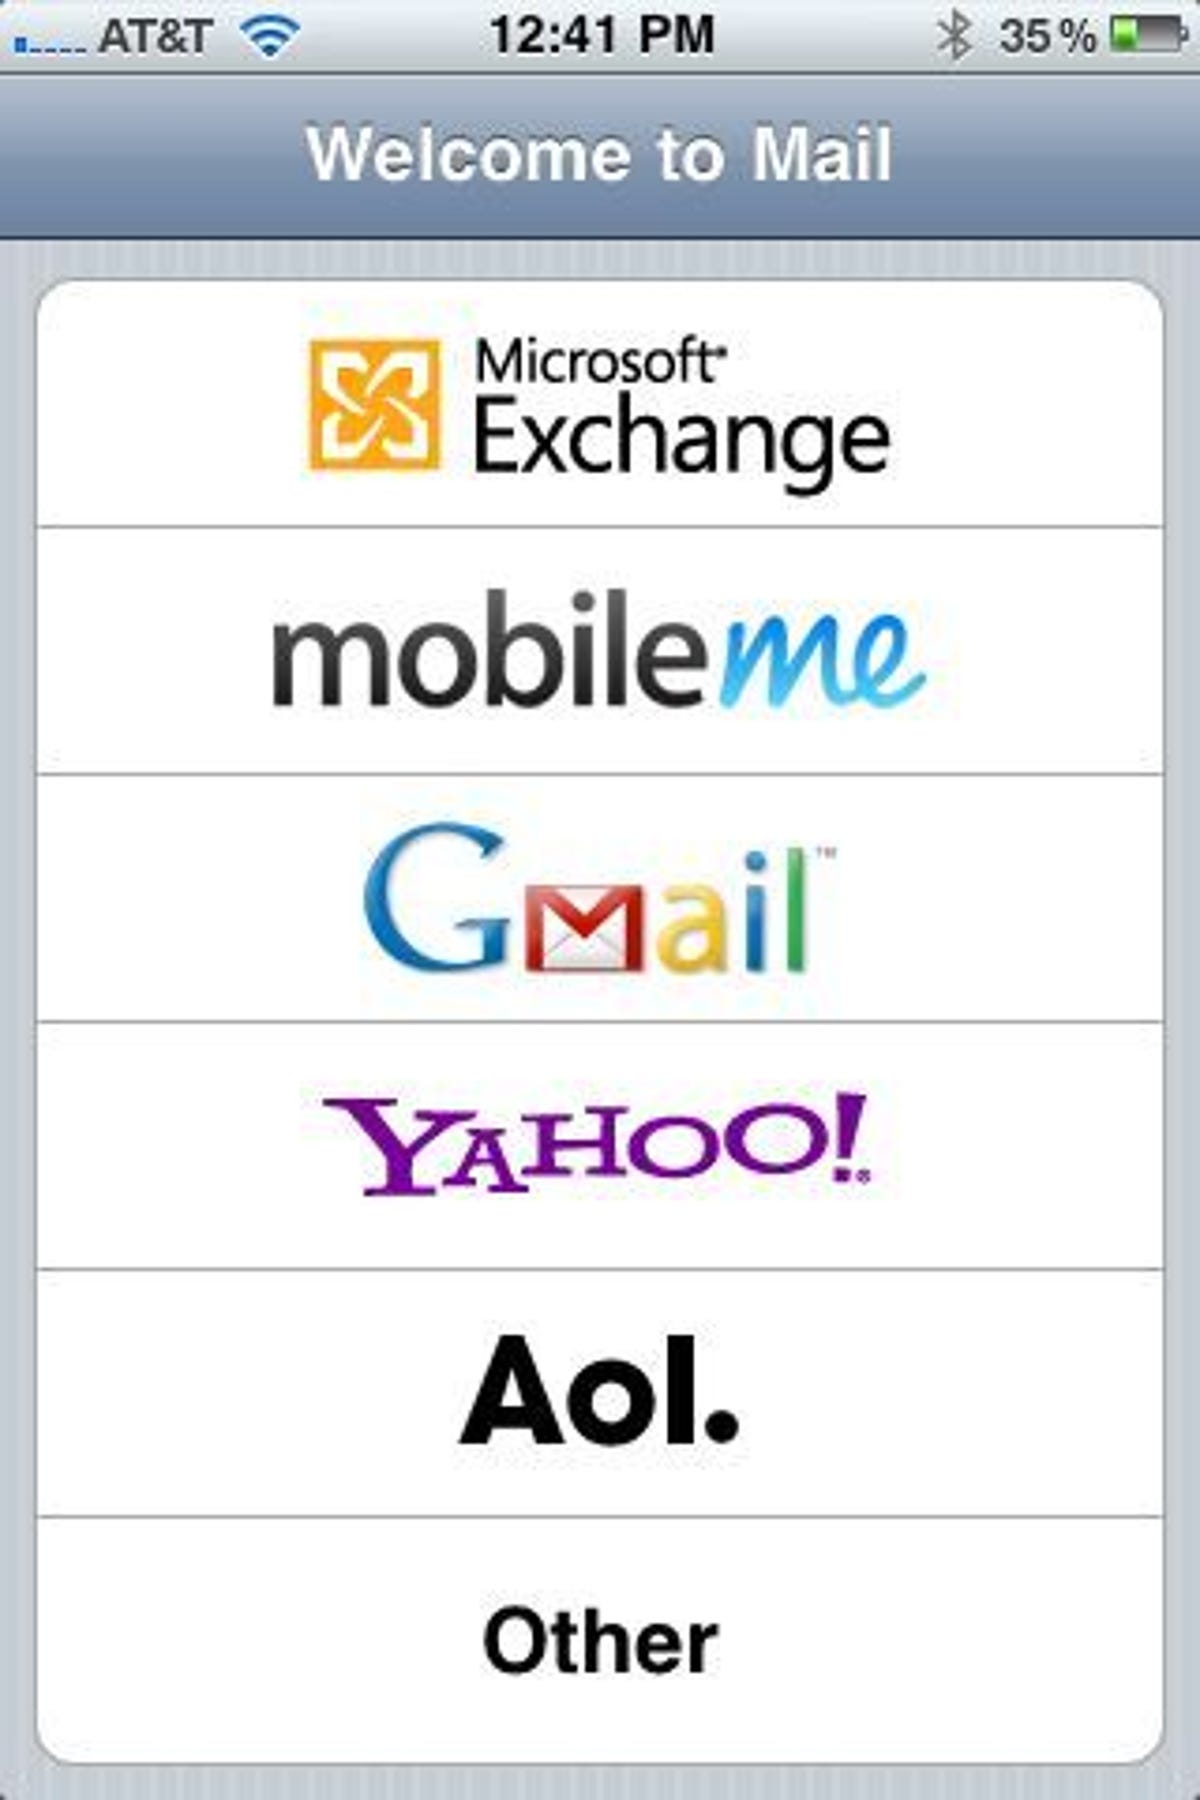
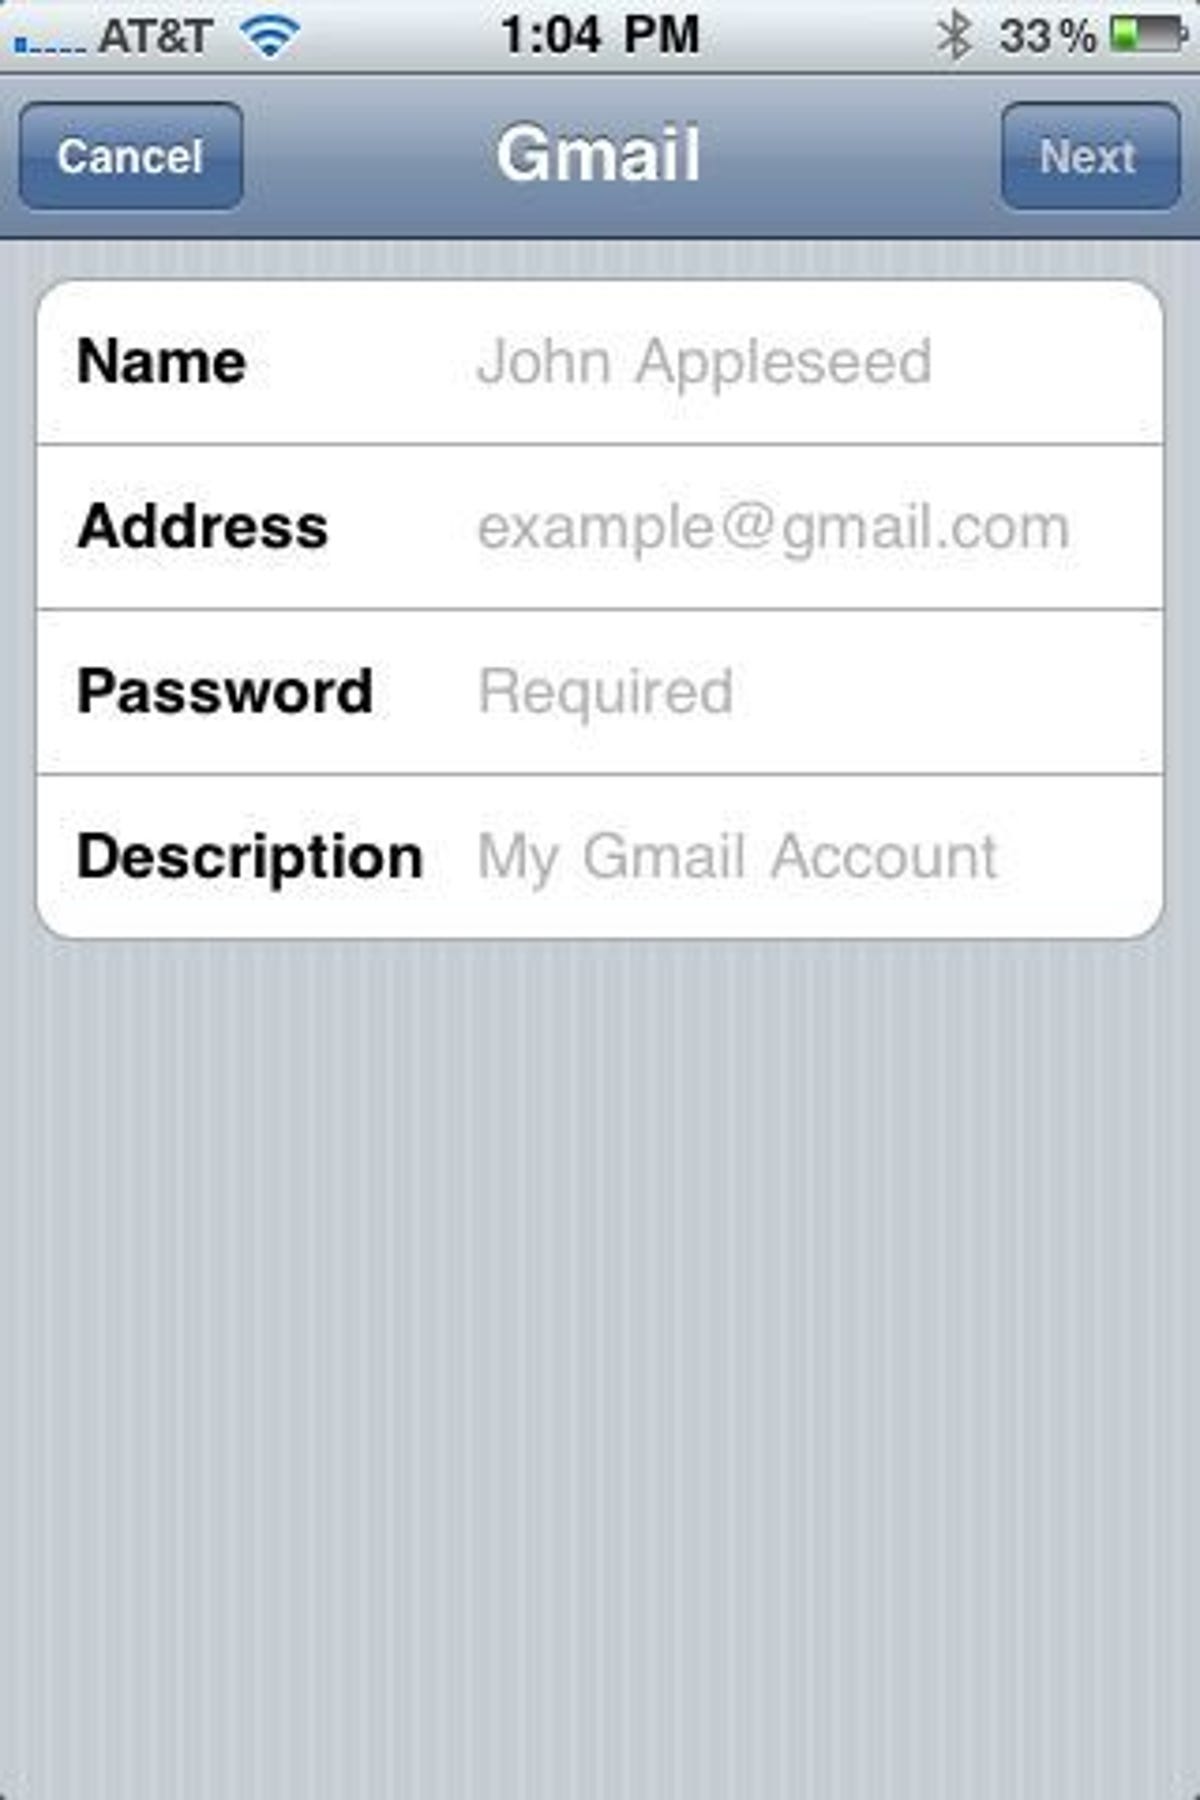
To set up your first e-mail account, tap the Mail icon and you'll be presented with a list of e-mail providers, including Other for a provider you use that's not listed. For my first account, I simply tapped the Gmail icon, which brought me to a screen to enter my account information.
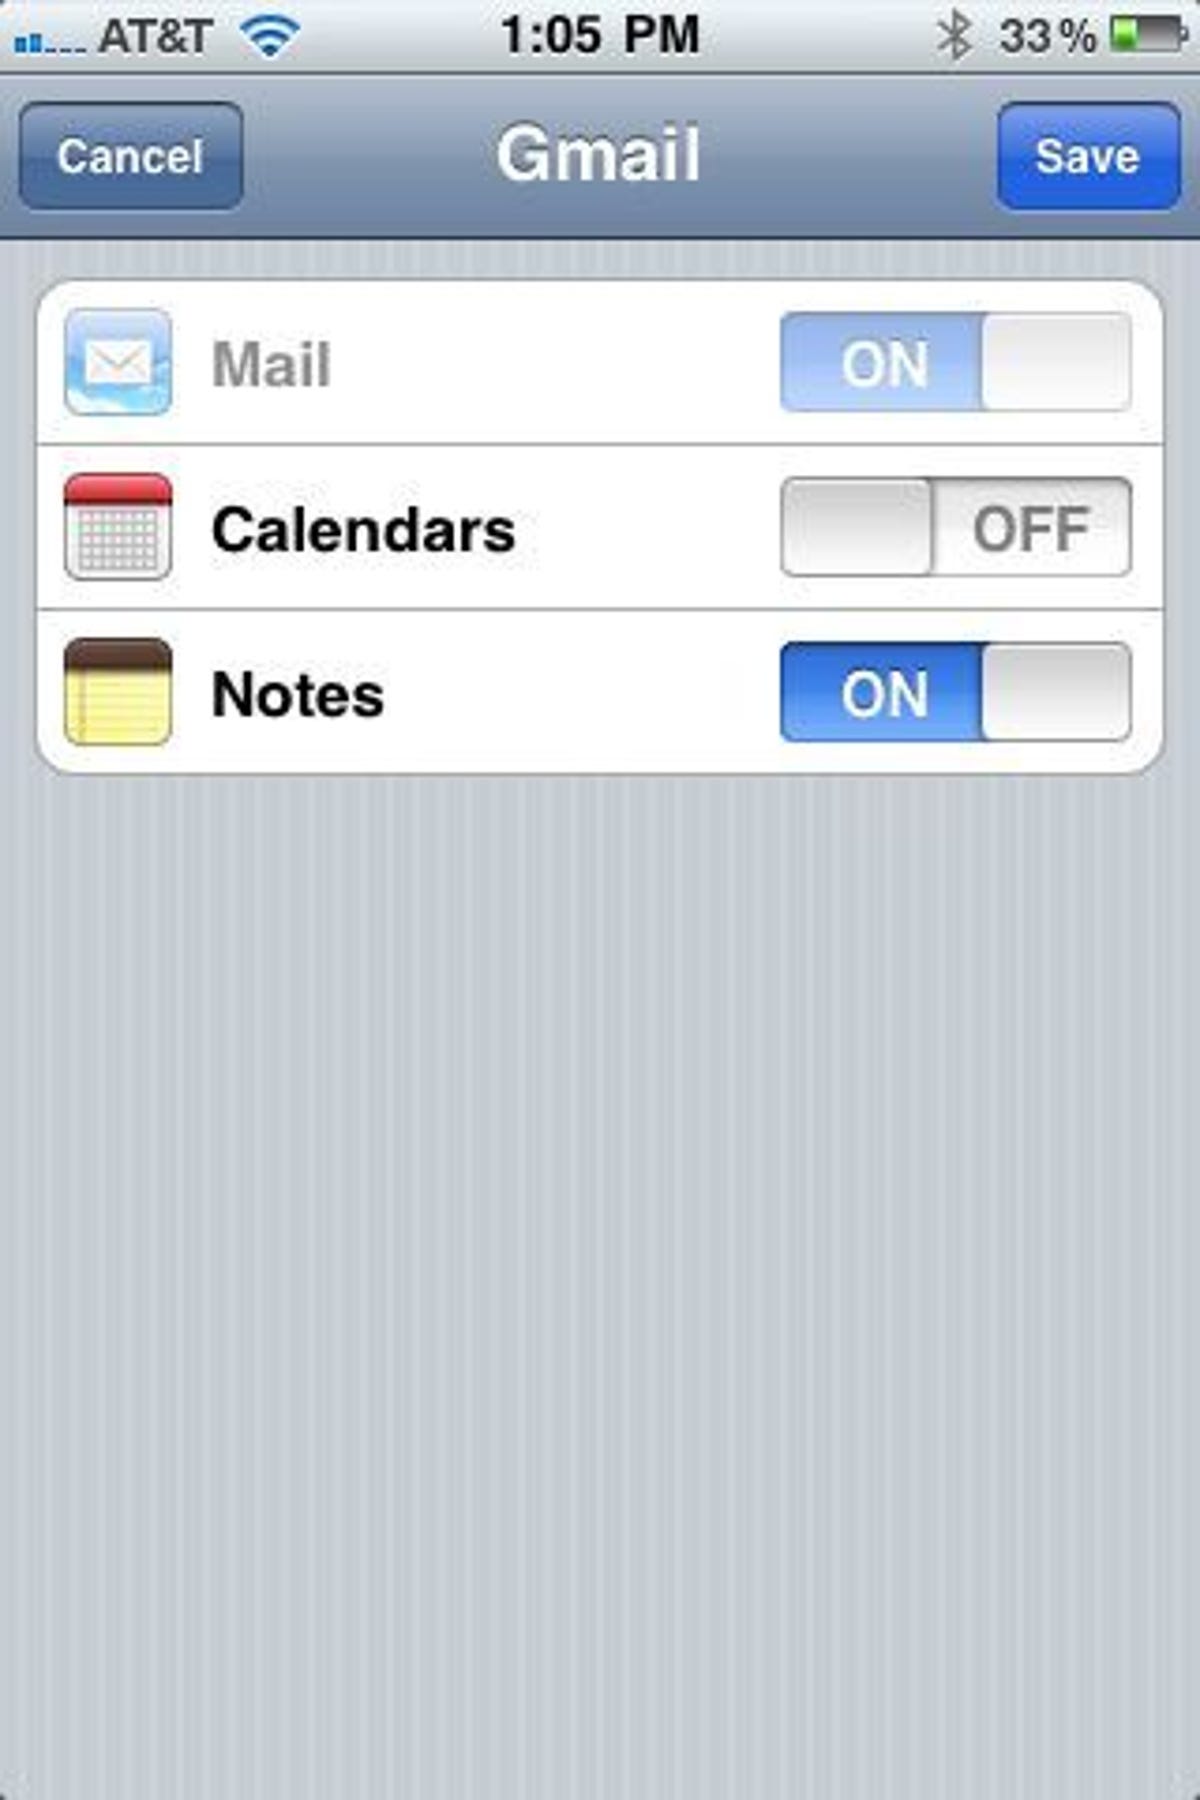
After entering my name, Gmail address, password, and a description, my account information was quickly verified. (The description is used to label your e-mail accounts in the mail app, so choose descriptions that will help you tell one account from another.) After getting verified (please, hold your applause) I was then taken to a screen where I could sync my calendar and notes. I hit Save, and my first account was established.
For additional accounts, you will need to set them up by tapping on the Settings icon and choosing Mail, Contacts, Calendars. Under Accounts, tap Add Account... Then follow the same procedure as your first account, selecting your provider and entering your account information.

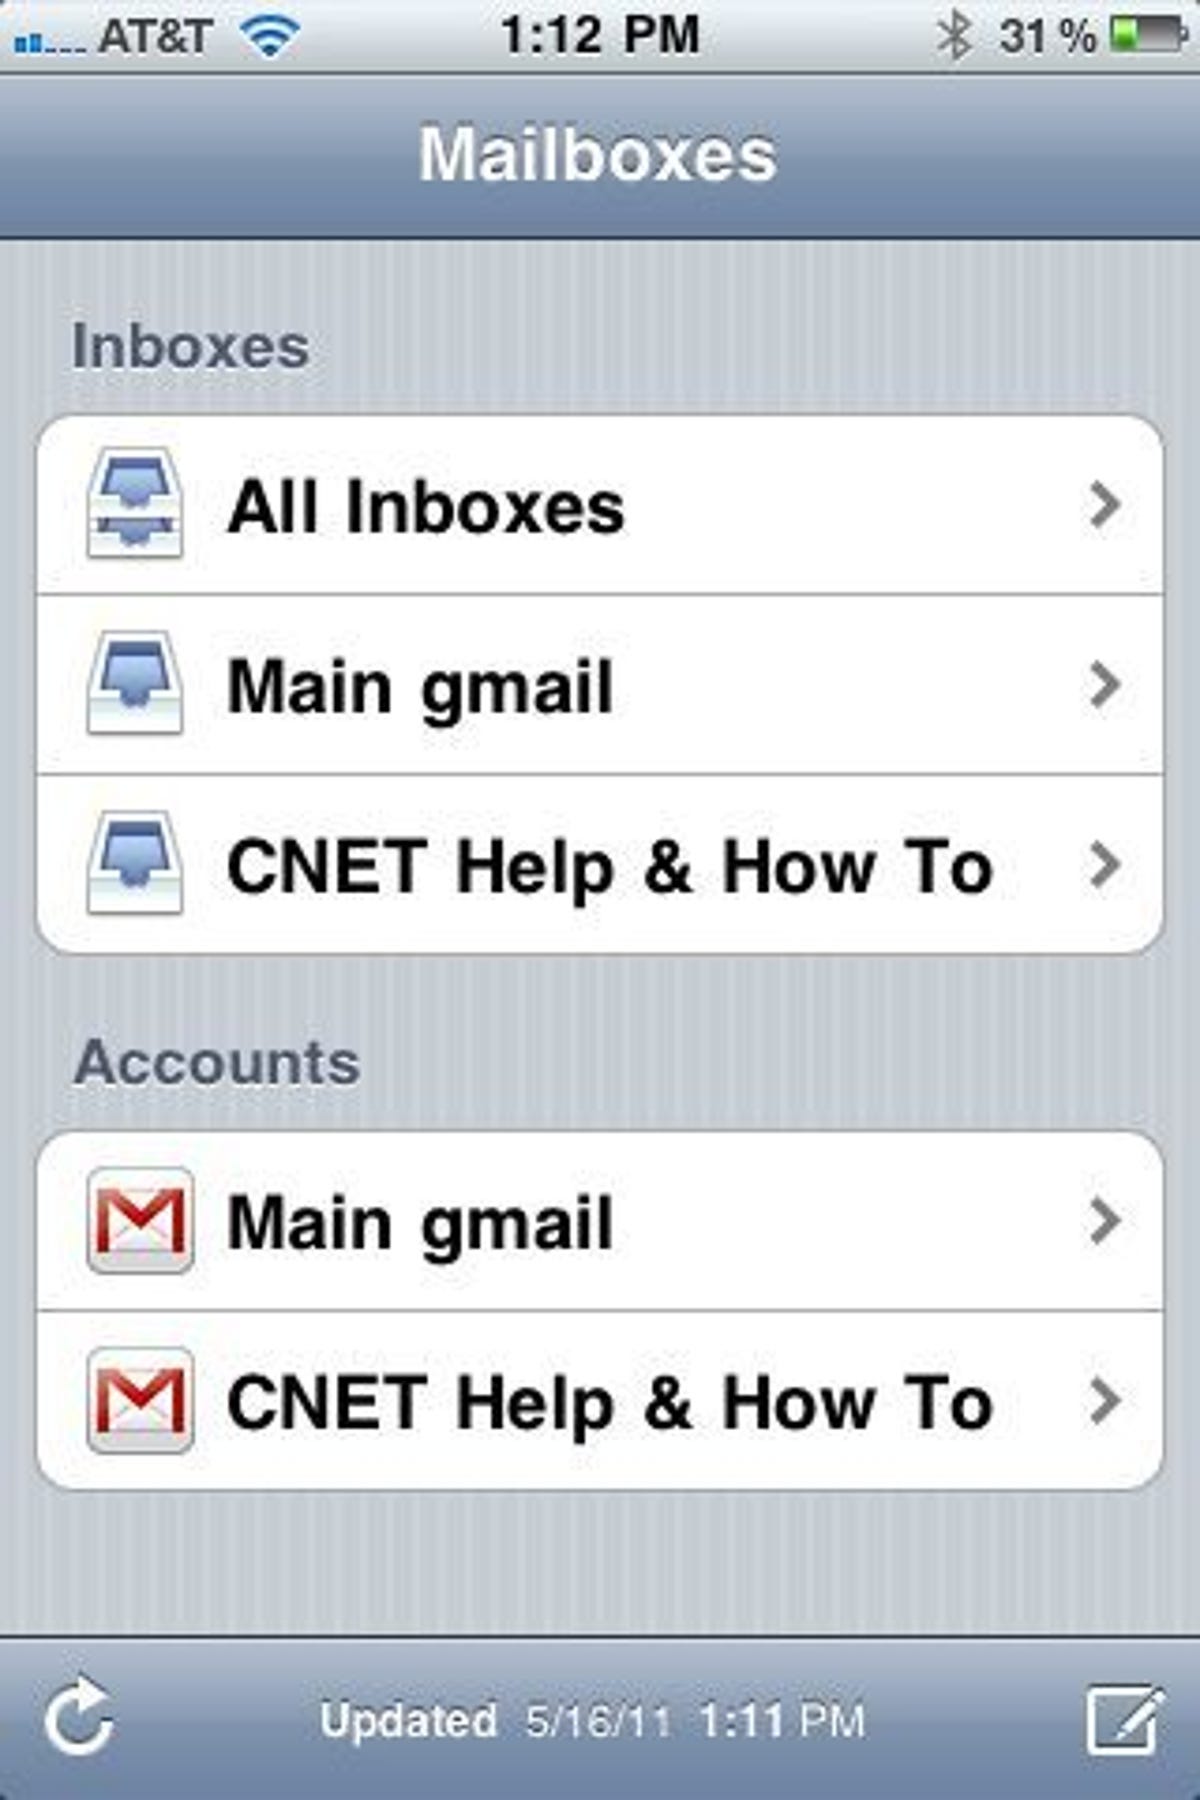
After setting up a second account, when you tap the Mail icon, you should see both accounts listed. You can browse each inbox separately, or you can view all messages by tapping the All Inboxes button at the top.
In Settings, you can designate which account you'd like as the default. This will be the account used to compose messages from the top-level Mailboxes or the All Inboxes view. To send an e-mail from an account other than the default, you will need to be in that inbox when you tap the compose button.
Gmail does not support push on the iPhone unless you set it up as an Exchange account. You can read about how to set up Gmail as an Exchange account here. Gmail will fetch new messages at a specified interval: 15 minutes, 30 minutes, or Hourly. Keep in mind that the greater the frequency, the more it'll drain your battery. To extend your battery life, you can set it to manually fetch new messages, which means it won't search for new messages until you open your inbox.
Lastly, a word on archiving vs. deleting Gmail messages. By default, a Gmail account is set up in iOS so that messages are archived instead of deleted. Archiving removes the message from your inbox and places it in the All Mail folder. By going to Settings > Mail, Contacts, Calenders and selecting a Gmail account, you turn off archiving, which will then give you the option to permanently delete a message instead of archiving it.

You can add a level of security against accidentally deleting messages in Settings by turning on the Ask Before Deleting option. Be warned, however, that you'll only be asked when viewing a message and clicking the garbage can icon at the bottom of the screen. When viewing your inbox, swiping on a message header and hitting the delete button will not prompt a question asking you if you are sure of your intentions. The message will simply vanish, something I've done a number of times unintentionally. Thus, I recommend you set it up to archive messages. With the seemingly endless (and growing) amount of storage space Gmail affords, you aren't likely running up against the limit anyway. Plus, to permanently delete an unwanted message, all you need to do after archiving it is go into the All Mail folder, swipe on a message header, and hit Delete.