How to root the Samsung Galaxy Ace 2
The Ace 2 is a tidy little smart phone for a reasonable price, but there's much more fun to be had. Let's start by rooting it.

The Samsung Galaxy Ace 2 is a sharp little phone (and having recently bought a Note 2, I really do mean little). It's far from top of the Android pile, but it's a cheap and cheerful device with enough power to keep the majority of people happy -- and it doesn't come close to breaking the bank. As a result, it's one of the most popular phones here on CNET UK.
We're going to be running some articles over the next few weeks about getting the most out of the
Ace 2, but most of these points start off at the same point: rooting the phone. That means getting access to the most fundamental level so you can change the software.
Now, as per usual with these rooting articles, I'm going to start with a warning: rooting your phone isn't allowed by your Samsung. If anything goes wrong, you'll be voiding your warranty. That said, I've written a bunch of these guides, and (touch wood) I've not run into any problems, so if you follow the steps below you shouldn't have any trouble. But if you do, CNET doesn't take any responsibility.
The reason mobile providers object to rooting isn't just to do with bloody-mindedness (although it's a bit to do with that). Rooting takes away all the safety features that are designed to protect you, meaning that a malicious app could wreak havok in a way that a non-rooted phone might be able to stop.
The flip side is that rooting allows custom ROMs if you find the Samsung one (or aspects of it) not to your tastes, alongside powerful apps that won't work without root access. If that's enough to tempt you, then before we begin, make sure you have the right version of the handset for the rooting process.
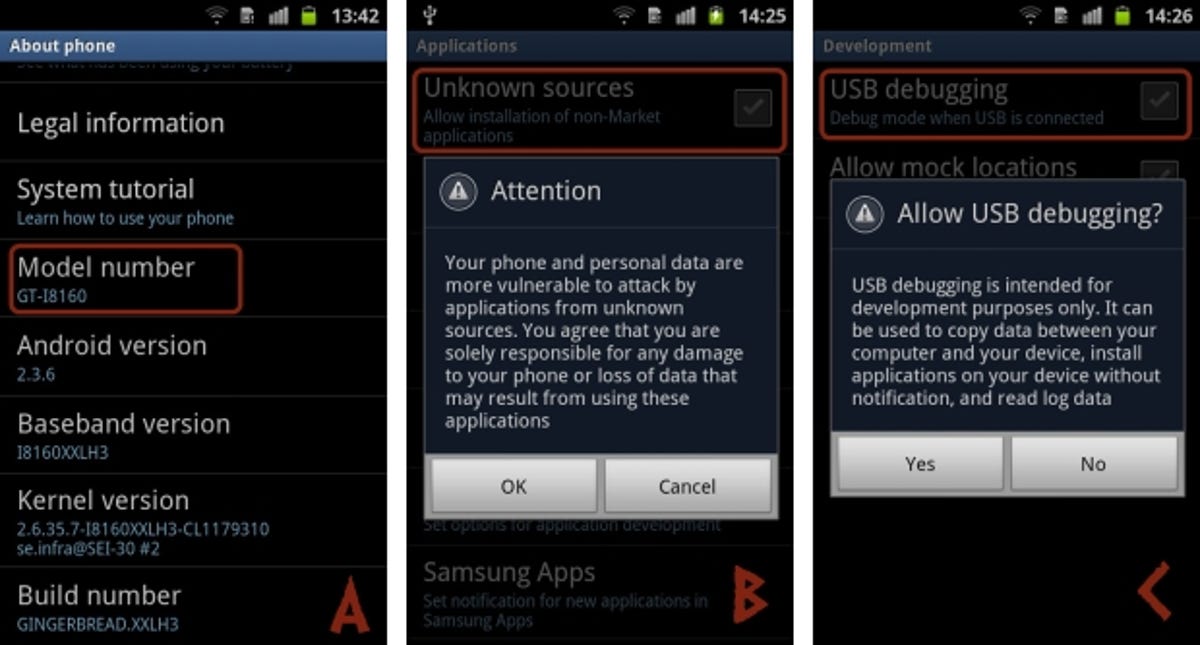
In this article, I'll be covering the GT-I8160 model of the Ace 2. Have you got that version? The easy way to check is to go to 'Settings', scroll down to 'About Phone', and scroll down to 'Model number' (pic A below). If it doesn't say GT-I8160, go no further!
Still with us? Then let's go!
1. Get your files in order
These are all direct download links -- keep them on your PC's desktop. Get the Samsung USB drivers if you haven't already, Odin (which will let you get the rooting software from PC to phone) and the rooting code specifically for the Ace 2 we need: remember, only the GT-I8160 model! Finally, you'll want to download this update_su.zip file and drop it onto your phone's SD card over USB.
2. Ready to operate
You should find that your phone remembers all the details you want, especially if it's linked with your Gmail account, in which case even a reformatted phone will download all your contacts again. Still, to be on the safe side, you'll want to back up all your pictures, text messages, anything else of any sentimental value from the phone (if you can get sentimental for content on a phone that's only six months old).
Then some preliminary steps: make sure your phone is running with most of its battery remaining -- 70 per cent or more should be fine for this, as it's quite a quick procedure. You'll also want to make sure your Ace 2 is set up to install apps from outside the Google Play marketplace, and to enable debugging mode over USB (this is a developer mode, but helpful for this).
These are both simple options in the Ace 2's settings. Go to Settings > Applications and tick 'Unknown Sources' at the top of the screen (pic B above). Then scroll down a little further to the Development section, and tick 'USB debugging' (pic C above).
Both of those will flash up warnings of great evil in the wrong hands, but they're pretty harmless compared to rooting (these bits are allowed by Samsung!), so if you're feeling panicky now, you ain't seen nothing yet and might want to back out.
3. For those about to root, we salute you
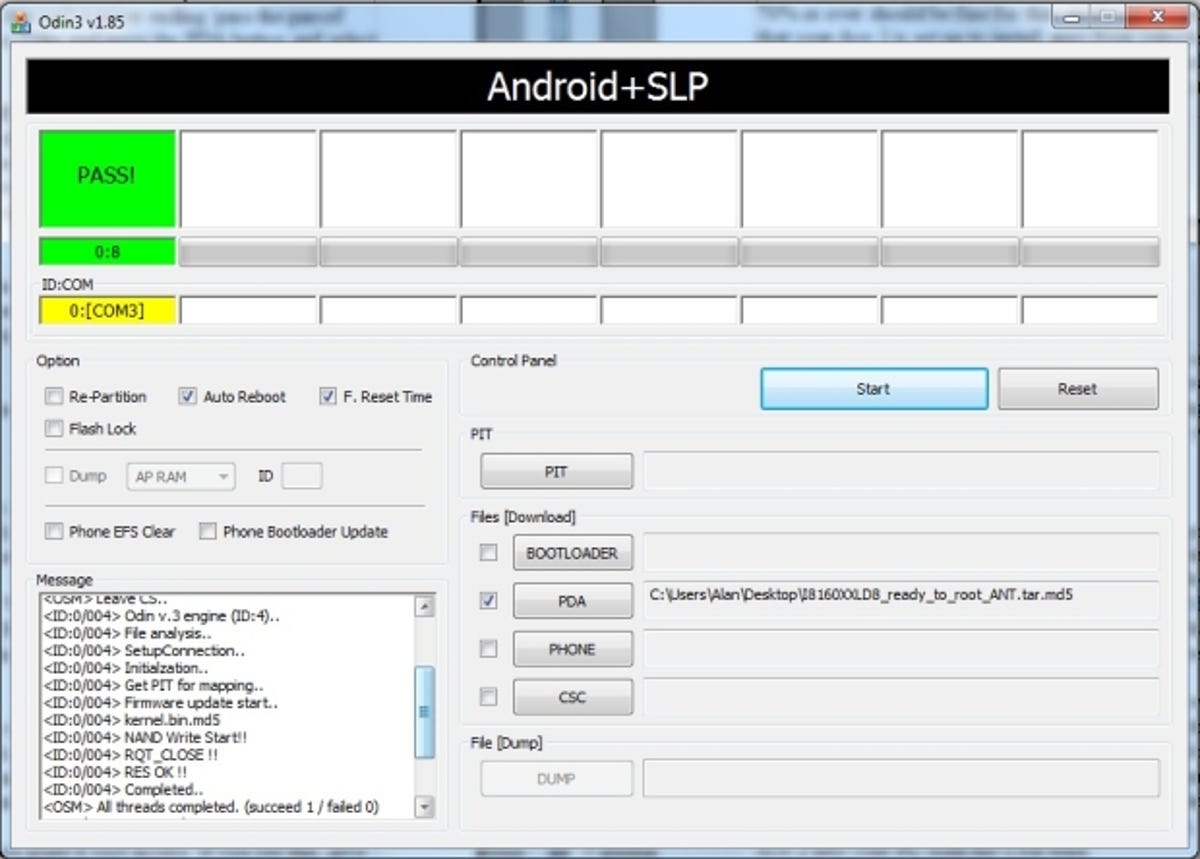
Install your USB drivers, then load up Odin. It's a pretty bland looking application with lots of intimidating boxes, but most of these will be left blank. Just make sure that 'Auto Reboot' and 'Reset Time' are ticked.
Now unzip (right click and Extract All) the rooting code we downloaded earlier -- that's the catchily named file 'I8160XXLD8_ready_to_root_ANT.tar', and you'll find an almost identically named file inside: 'I8160XXLD8_ready_to_root_ANT.tar.md5'. Put that on your desktop for safe keeping, and return to Odin. Press the 'PDA' button, and find the file we just extracted to the desktop and select it.

Now pick up your Ace 2, and turn it off. You may want to offer it some comforting words beforehand, like, "I'll see you on the other side, little buddy," but that's entirely up to you.
Once it's off, we're going to switch it back on in a different way: into download mode, by holding down the power, home and volume down buttons.
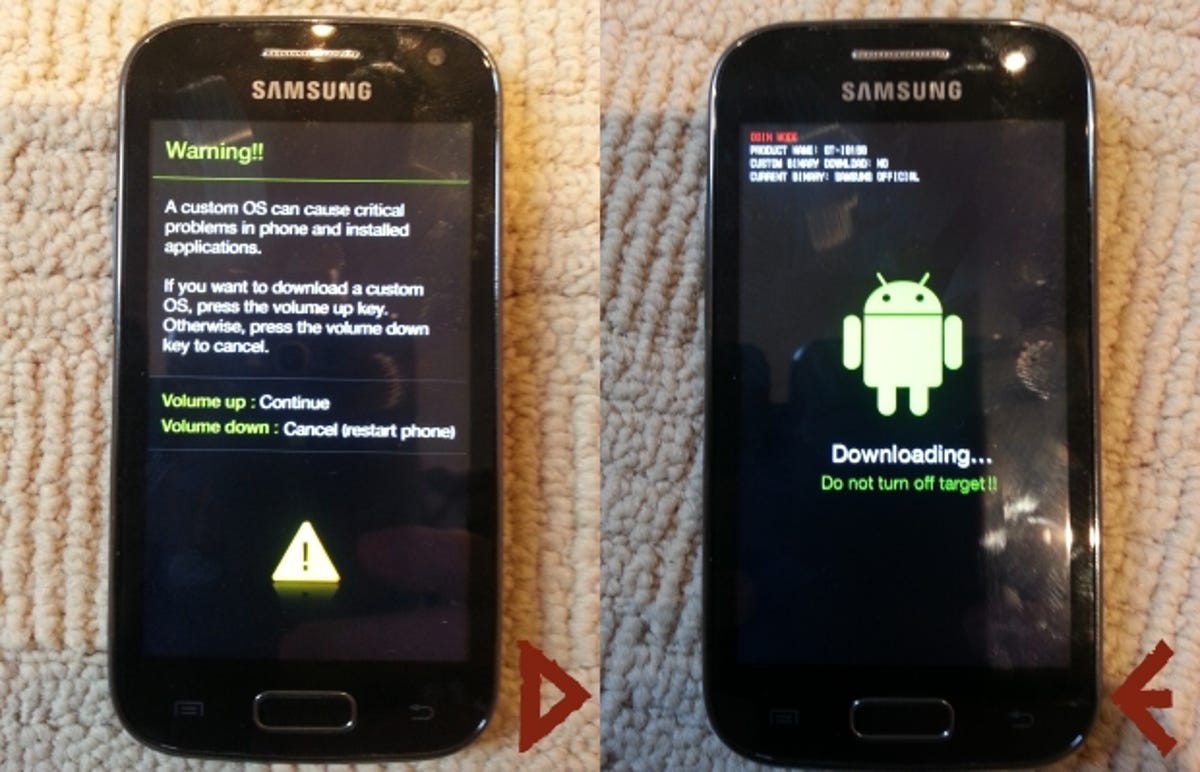
A warning screen will flash up warning you about the dangers of custom operating systems (pic D below), but we've covered this already, so press the volume up button to continue. You'll get a picture of an Android on screen and 'Downloading... Do not turn off target !!' on screen (pic E). Plug your Ace 2 into your PC with the USB lead.
Once connected, Odin will pop up with 'Added!!' in the bottom left-hand panel. That's what we're waiting for, so you're ready to roll. Press 'Start' in Odin, and we're off!
This should take seconds, and then your Ace 2 will reboot itself. Odin should look like this.
You're not done yet though: turn off the phone again, and load the phone into Recovery Mode, by pressing volume up, home and power this time (as distinct from the volume down for download mode).
Select 'Apply Update from Sdcard' and choose 'update_su.zip' which you dropped on there earlier (if you forgot, it's not too late, you can still do that from your PC, as in step 1). Now you can reboot the phone.
4. Has it worked?
After all that worry, you may wonder what all the fuss was about. Your phone will (fingers crossed) be back on and seem to be no different at all. That's actually what we expected -- this is laying the groundwork to bigger changes like custom ROMs, but that's for another article.
But... has it worked? If it looks no different, how do you know? Head straight to your apps and you'll find a new icon there: SuperSU (pic F below). Still not convinced? Let's find an app that won't work without root access to double check. Titanium Backup is a good one for this, as it's free and will tell us right away if something isn't right. You can download it straight from the Google Play store.
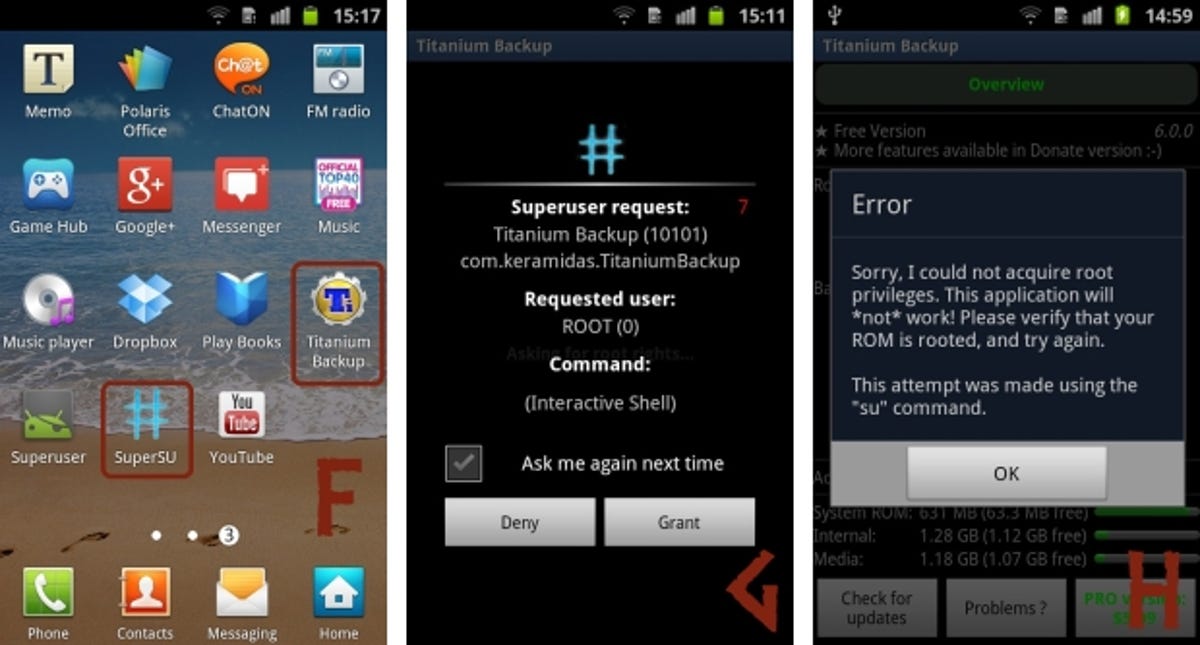
Once it's downloaded, open it up and a pop-up will appear asking if you want to grant it root access (pic G). If you see this, it's worked and you're done! The world of custom ROMs and root-friendly apps is now open to you. (Pic H is what it looks like if you haven't rooted.)
I'll be back soon with some more Ace 2 articles to help you get the most out of your new freedom...