Turn a laptop hard drive into a portable drive
If you've upgraded your laptop, don't discard that "naked" drive. You can put it back to work as external storage.


What's the single best way to upgrade a laptop? Easy: Take out the mechanical hard drive and replace it with a solid-state drive (SSD).
You'll enjoy faster performance, longer battery life, cooler running temperature (which may extend the overall life of the laptop) and even quieter operation: SSDs have no moving parts and therefore run completely silent.
Ah, but what happens to your old drive? After you've made the swap, you'll find yourself staring at a "naked" internal hard drive. What now?
Easy again: Turn that internal drive into an external one.
Why reuse an old drive?
The whole reason you got rid of that drive was because it was a slowpoke, right? Perhaps compared to the SSD that replaced it, but it's still a hard drive, and still useful as secondary storage .
Indeed, you could use it as a backup drive, or perhaps plug it into your router for network-attached storage (NAS) duty. It'll be portable, so you can toss it in your travel bag as needed. If nothing else, you should keep it accessible just in case there's a problem with the new drive and you need to retrieve all your old data.
Alas, it's not like you can just plug the drive into a USB port. Not yet, anyway.
Wrap it up
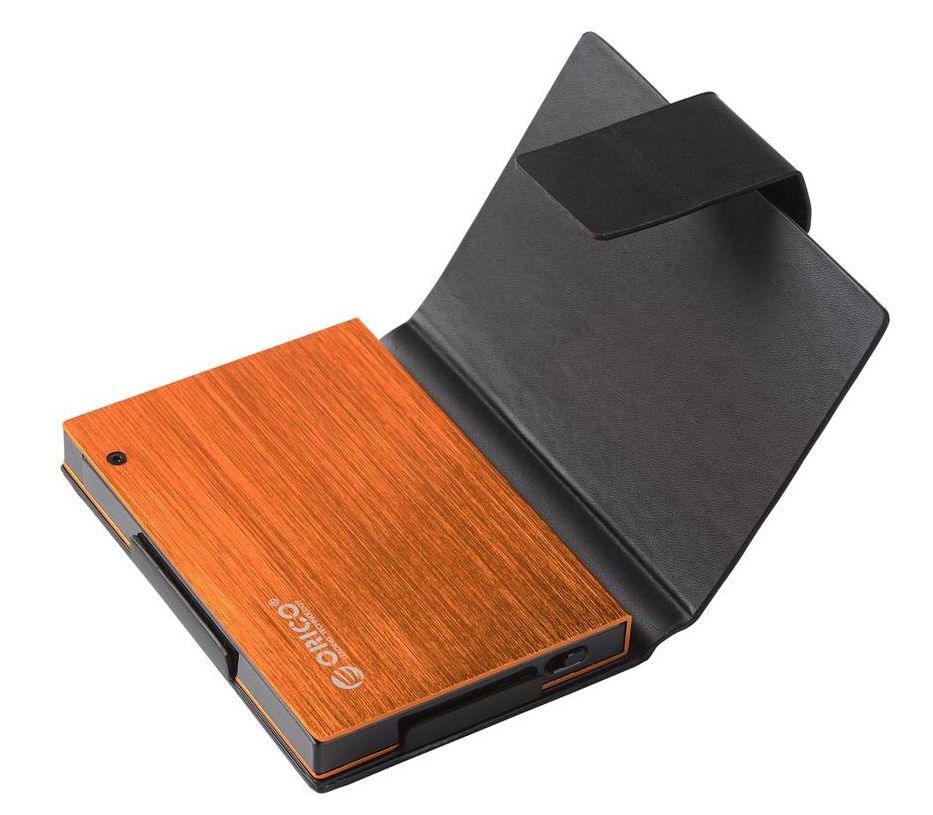
Hard drive enclosures can be snazzy, like this travel-friendly number from Orico.
You've seen traditional external hard drives, right? They're little slabs that plug into a USB port. So what's the difference between that and what you've got? One thing: an enclosure, a case that not only protects the drive, but also bridges the gap between its SATA interface (the one used inside your laptop) and USB.
Good news: enclosures are inexpensive and installation is a breeze.
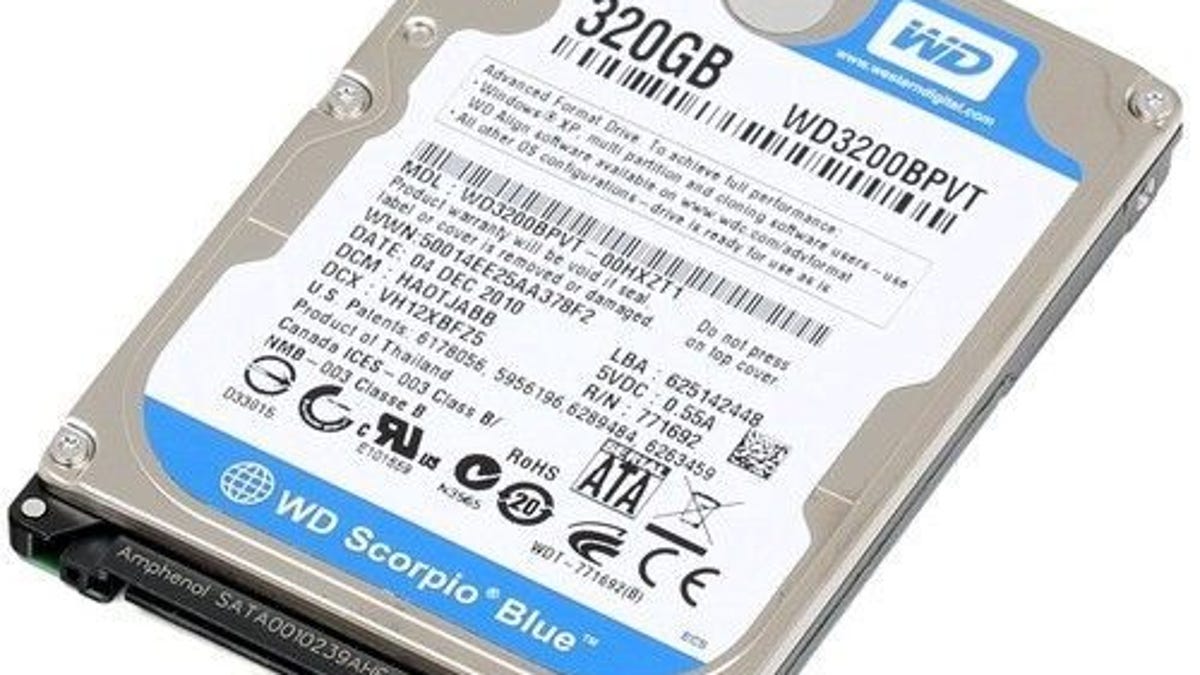
Start by determining what kind of drive you have -- something you may already know if you bought and installed the replacement SSD yourself. (If you had a shop do it, they can probably give you the particulars.) Most likely it's a SATA drive, and because it came out of a laptop, it's very likely a 2.5-inch drive as well.
So now you just need an external enclosure designed for a 2.5-inch SATA drive. That handles the internal aspects; now you need to decide on the externals.
Specifically, USB 3.0 or 3.1? The former guarantees compatibility with older hardware, but there are some enclosures with USB 3.1 (aka Type-C) interfaces. That's an option to consider if you think you'll use this drive with newer computers .
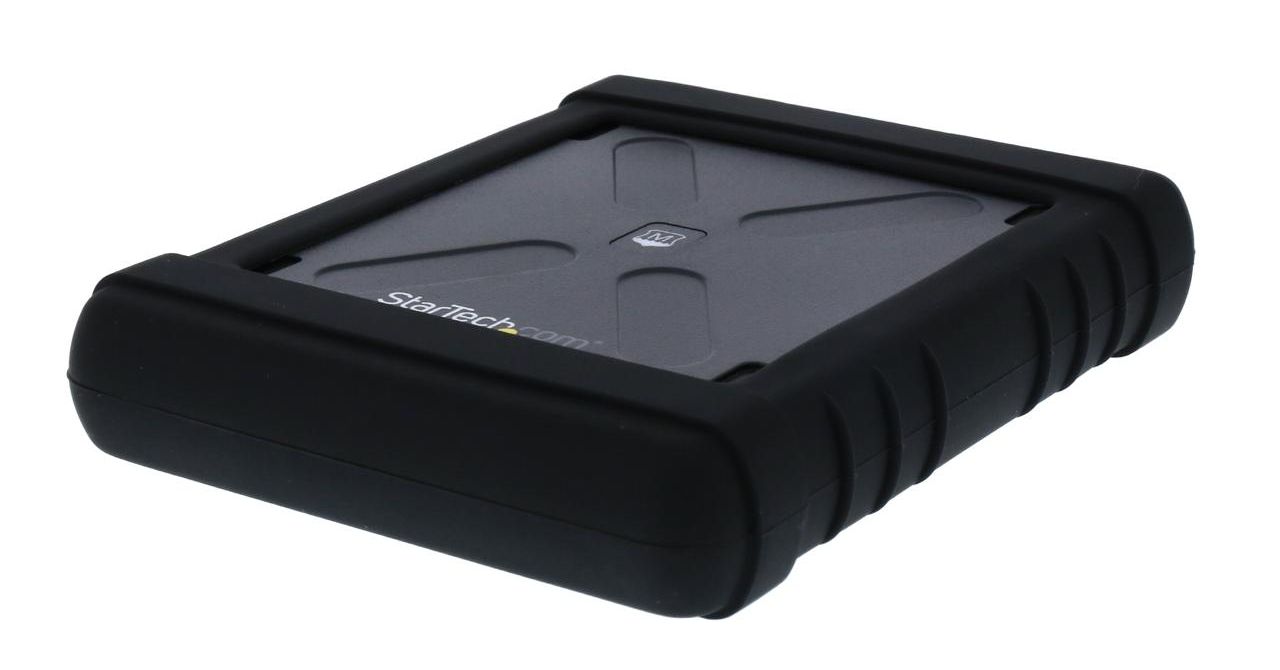

This rugged enclosure runs about $35.
If you plan to travel a lot (and bring the drive with you), look for a rugged enclosure, one that can withstand a lot of bumps. There are also transparent enclosures if you want to retain that "naked" look, light-up enclosures if you like glowing LEDs and even multi-bay enclosures if you think you might end up with multiple drives.
One option I can easily recommend is the Orico 25Au3, a compact aluminum enclosure available in red or orange. It's much snazzier than your average black or silver enclosure, and it comes with a protective case for travel. It has a USB 3.0 interface and screw-free design, meaning you don't even need a screwdriver to install your drive. Newegg currently sells the Orico for $16.99.
Post-op
After installing the drive in the enclosure, you should be able to plug it directly into your laptop or any other PC, and it should show up as a regular external drive. If it doesn't, you may have no choice but to reformat it -- which is something you might want to do anyway.
My advice: Consider leaving the drive intact, at least until you've used the new drive for a few weeks and you're comfortable everything is working the way it should.
One thing is certain: Given the low price of drive enclosures and the high utility of hard drives, the only reason to retire an old drive is if it's not working.