How to recover OS X Lion
Apple's OS X 10.7 software is currently a download only. But what if your Mac refuses to boot one morning? How do you get Mac Lion roaring again without access to the Mac App Store? Here's how.


Apple is pushing its users into a world without media. It has never shipped a Mac with a Blu-ray drive, and probably never will, and its sleekest laptop, the MacBook Air, doesn't even support DVDs.
The company's business is built on the back of broadband and a world in which we download everything from music and movies to upgrades and apps. Apple's decision to debut Mac OS X Lion as a Mac App Store download wasn't unexpected, then, but where does that leave you if your Mac refuses to boot one morning? How do you get Lion roaring again without access to the Mac App Store?
Lion's little secret
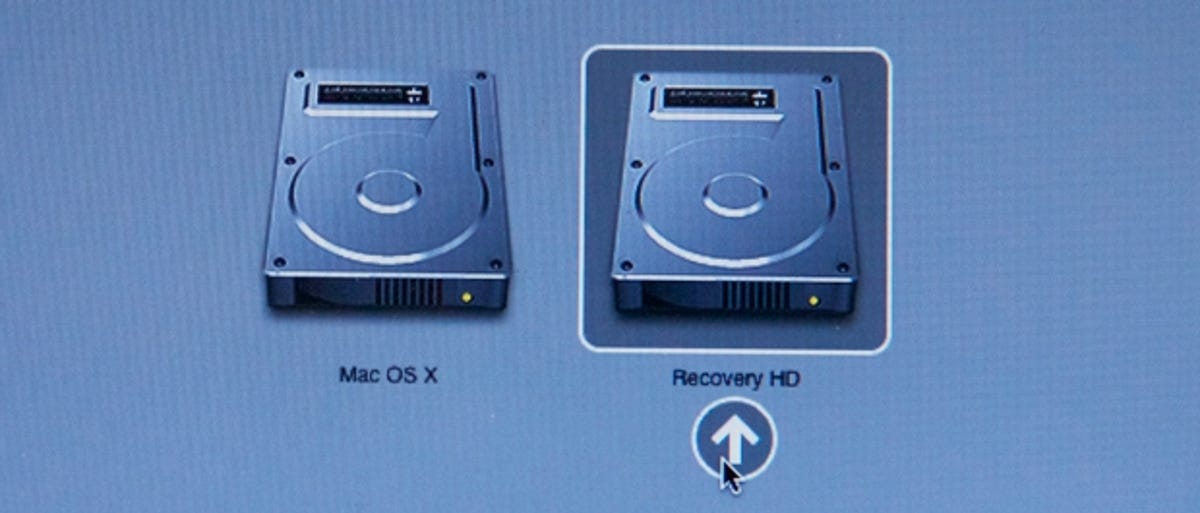
Install Lion on a clean hard drive, and you'll wonder how a 4GB download has come to consume so much space -- it took up nearly 10GB in our case. It's not a bits versus bytes discrepancy that's to blame, but a secret partition created as part of the install process, in which Lion installs a set of recovery tools. This is kept hidden, and appears in neither Startup Disk, which you'll find in System Preferences, nor in Disk Utility. The only way to find it is to reboot, holding alt on the keyboard (marked 'option' on some older keyboards).
Instead of booting straight into Lion, your Mac will display a list of your available drives, including external units and any CDs in your optical drive, if you have one.
Select the drive called Recovery HD and click the arrow beneath it. If you're using a trackpad, you'll have to enable the proper clicking action throughout this operation, as tap-to-select and Lion gestures are disabled during the recovery process.
Your Mac will boot into a stripped-down version of OS X installed on the recovery partition. Called 'Base System', this dumps most of the core operating-system features, leaving you with access to only a set of system utilities and minimal language and network preferences.
Your Mac won't automatically log you onto a wireless network, as your access credentials are tied to your user account. Unless you're using wired Ethernet, you'll need to use the AirPort menu to select your local network and enter the security details in order to use the online help function or reinstall your system from the Internet.
Repair permissions
Now launch Disk Utility, which, in recovery mode, reveals your disk's hidden partition. It's called 'disk1', and sits below the sidebar divider. You can select it, but, as the start-up partition, you can neither erase nor repartition it. You can, however, work with your primary boot drive, which is inaccessible in the full Lion environment, and which, in this instance, is the first drive listed above the divider.
Decide at this point whether you want to blitz everything and perform a clean install or simply write new system files over the top of the existing OS, keeping all of your documents, user accounts and settings in place.
To perform a clean install, click your boot drive -- not any of its partitions -- and then the 'erase' tab. Choose Mac OS Extended (Journaled) as the format type and optionally give the drive a name, then click the 'erase...' button. Skip the rest of this section and either reinstall from Time Machine or download a new copy of Lion, as detailed below.
If you want to try and retain your data while reinstalling Lion over the top of problematic system files, start by checking your drive for errors. Some less serious problems may have been caused by a permissions mismatch, which will stop your system or user account from accessing vital files.
Click the partition on which your operating system is installed -- in this case it's called Mac OS X -- and, under the First Aid tab, click Repair Disk Permissions. Disk Utility examines each system file on the partition and corrects any mismatched permissions, detailing what changes it has made, if any, until the process is complete.
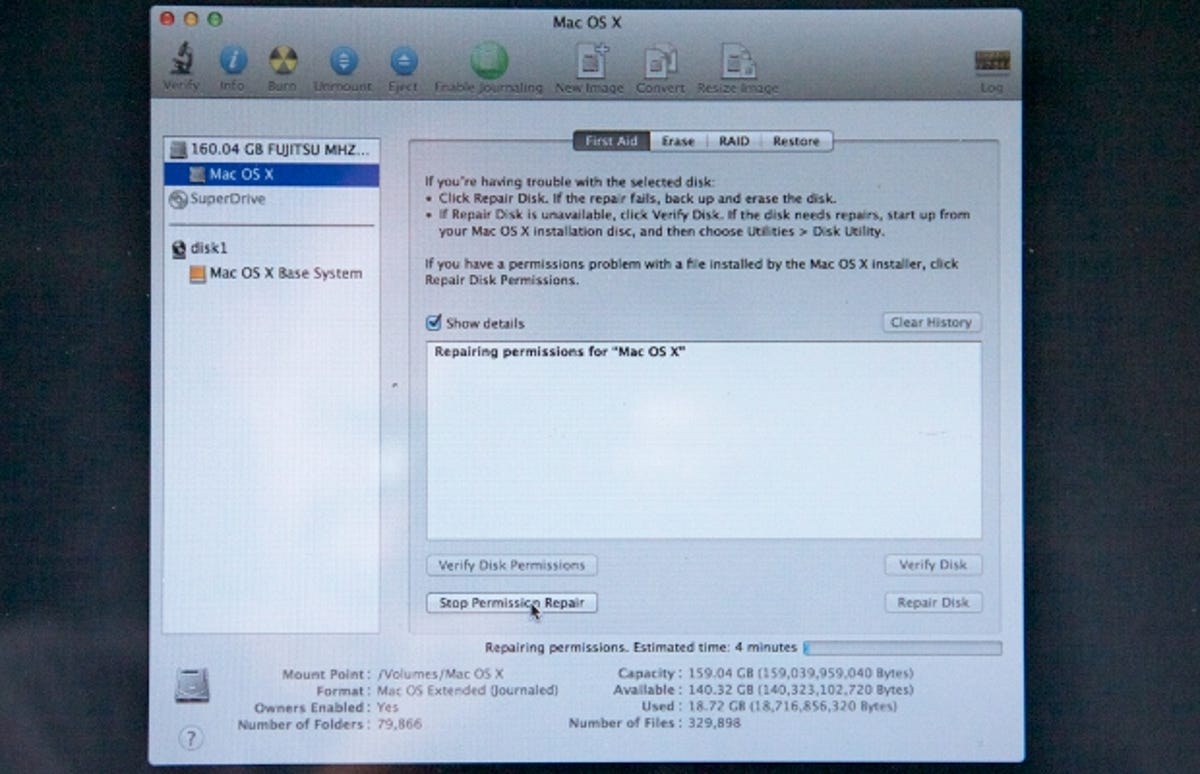
You should also verify or repair your disk to eliminate any problems in the structure of the disk's filing system.
Step back in time
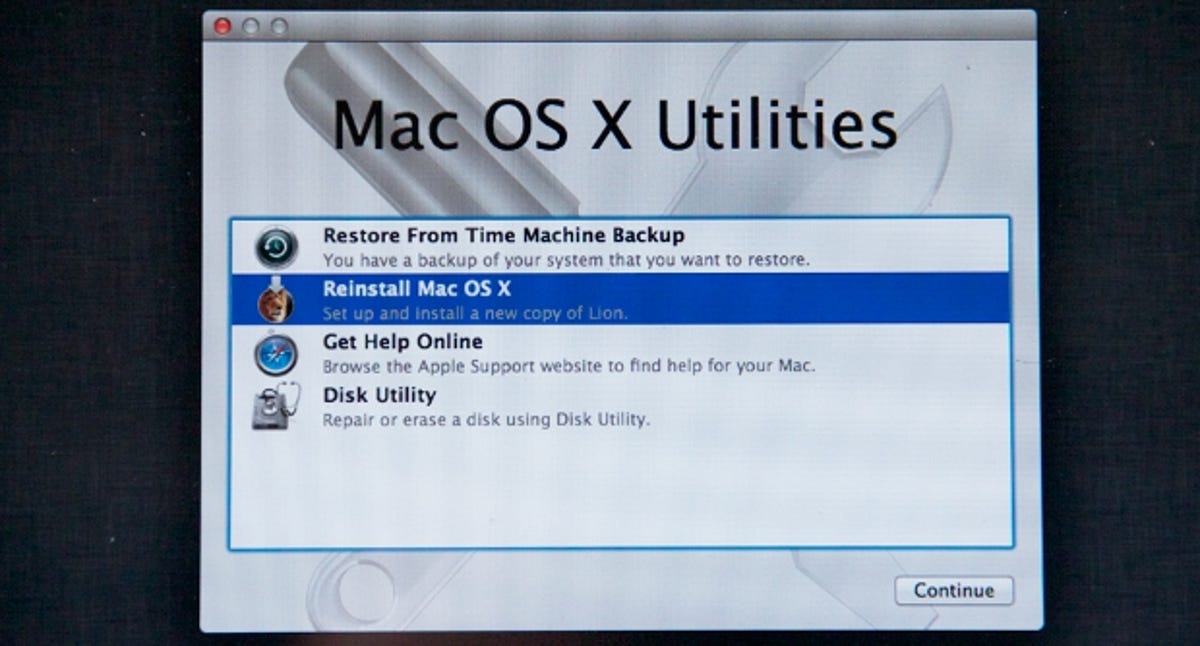
Now that we know our boot drive is in good shape, we can set about reinstalling Lion. By far the simplest method is to recover your system from a Time Machine archive -- Mac OS X Utilities can piece together your complete system by reassembling each element from your incremental backups.
Only select this option if you know for sure that your Time Machine archive is up-to-date, as it will reinstate your system's last-known condition. If your Time Machine vault has been unplugged for the last month, the reinstalled system will have lost any work completed during that time.
Reinstalling in this way is an all-or-nothing option. You can't reinstate individual system files or discrete working files -- for that you should use Time Machine itself within OS X. Neither should you use this method to transfer your files from one Mac to another while upgrading your system. Migration Assistant, again part of the full-blown OS X, handles this already, transferring your files across a local network or double-ended cable.
If you're happy to reinstall Lion this way, Utilities will search for a visible Time Machine drive. If your backups are stored on a Time Capsule, rather than a USB drive, ensure you have enabled AirPort from the menu bar before going any further.
Going clean
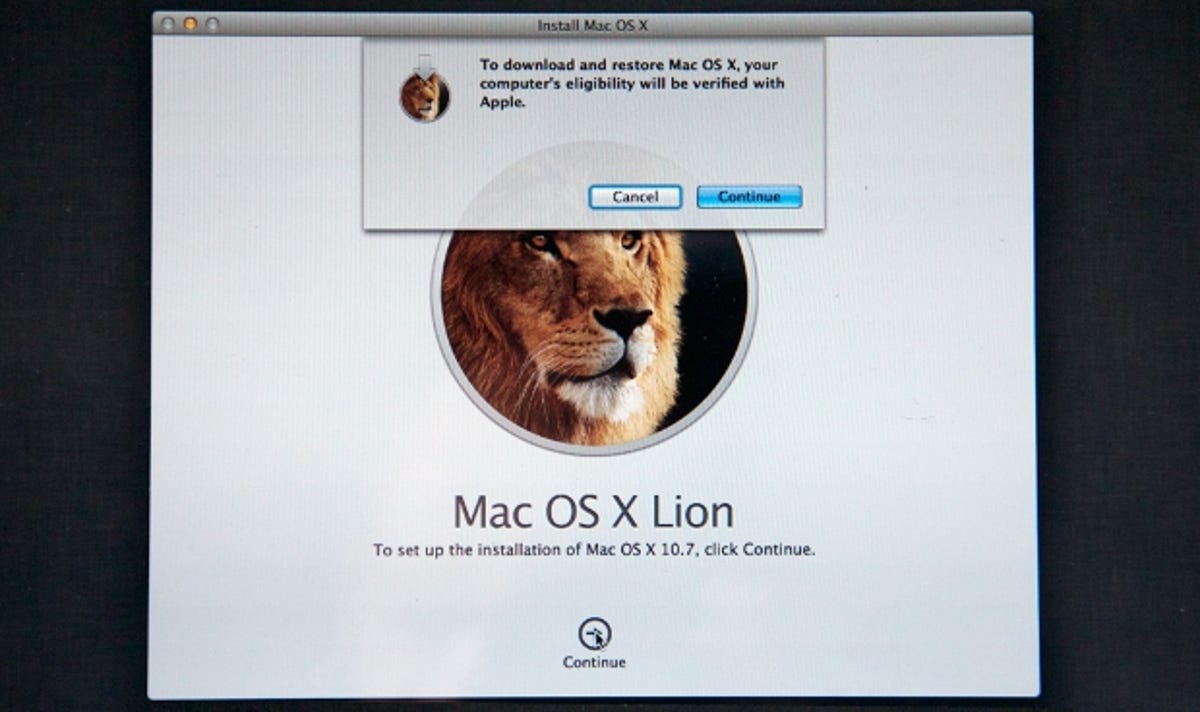
If you don't have a recent Time Machine backup, you'll need to download a new Lion install package. Ensure you have a live Internet connection and pick Reinstall Mac OS X. Utilities will check your eligibility and, assuming it finds no problems, display the end-user licence agreement.
This will be broadly similar to the one that you agreed to when first installing the OS, but, if that was some time ago, it may have been updated, so be sure you are happy with its contents before clicking 'agree', which you'll have to do twice.
Finally, choose the drive on which you want to reinstall Lion. You won't be able to choose the Recovery HD, as that's the one from which you're running the install process, but your main boot partition will be available. Pick this and click 'install' to begin the download process.
Bear in mind that Lion will download a complete new installer, not just replacements for the corrupted files currently in place on your drive. If you have a peak-hours cap on your broadband, you might want to wait until your service becomes unmetered before completing the last step.