 Why You Can Trust CNET
 How to make your own planter to liven up your backyard or balcony
Make your own planter to bring greenery exactly where you want it, whether you live in the city or the country.
Whether you live on acres of space in the country, or in the city with access to a balcony, planters are an easy way to bring flowers, herbs, and vegetables closer to your living space. With a few basic tools, you can even build them yourself, with custom measurements so they fit exactly where you need them to go.
Here are four planter ideas to get you started, all of which you can use to plant most general purpose flowers, herbs, or small and climbing vegetables. I've ordered the planters from easiest to most challenging difficulty, but none of them should be too tough if you have access to a hardware store and the space to do some cutting.
For all of these planters, you will want to consider the wood you use. Any wood that comes in contact with soil will rot eventually. Staining or painting cheap pine from a hardware store is one option. Cedar is naturally rot-resistant (but not rot-proof) and although it costs more, you can leave it unfinished or put a light coat of stain on it and it will hold up pretty well, especially if you reapply every year or two. For any wood, if you reapply stain periodically, the planter will last a long time and maintain its appearance.
The Stacked Planter
Required tools: Measuring tape, power drill, circular saw (optional: non-ferrous blade for cutting angle iron, or tin snips for cutting metal flashing), stain brush
Materials: Planks (1.25x6-inch decking boards depicted, but choose a size appropriate for your space), 1x4-inch pine strips (or smaller as appropriate), wood screws, wood stain, gravel, planting soil, metal flashing or angle iron (optional)
If installing on a hard surface: Planks or plywood cut to size for bottom, garden liner fabric
Measure the space where you want to install the planter and cut boards to desired dimensions. Screwing the corners together at 90-degree angles, create as many squares (or rectangles) as you like, depending on how tall you want the planter to be. Stack the individual squares on top of each other, and secure them by inserting a piece of 1x4-inch wood vertically into each inside corner of the planter and fasten to both faces with wood screws.
If you plan to leave the planter resting directly in contact with the ground, (not a deck or patio), fill the planter with gravel or dirt. Otherwise, screw a solid piece of wood -- or slats -- horizontally inside the bottom of the planter and attach garden liner fabric to hold soil in. However you choose to finish the bottom, you'll need to ensure that water can escape, so you can drill some holes if needed. For a modern finish, cut a piece of angle iron or flashing the height of the planter to fit over the corners and attach with adhesive or screws.

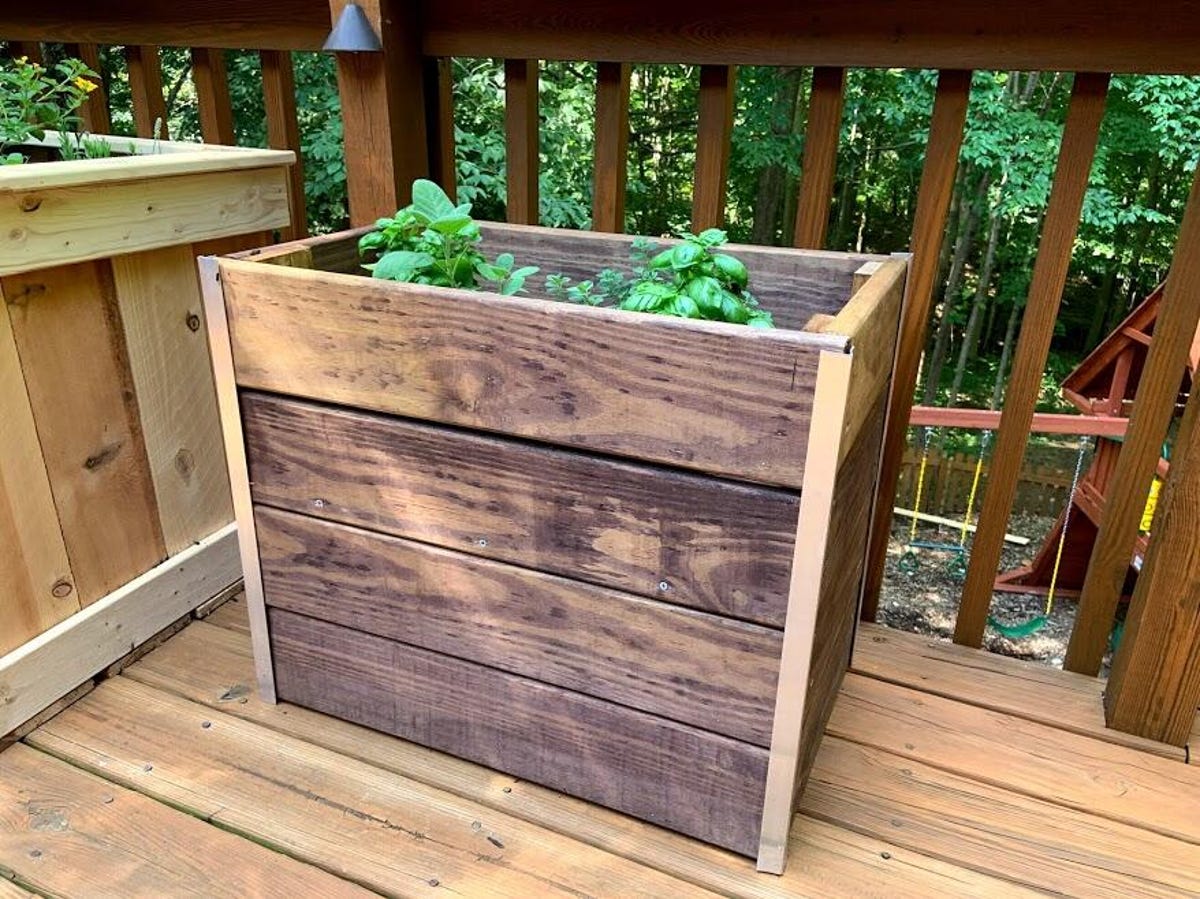
Vertical Wood Planter
Required tools: Measuring tape, power drill, circular saw, miter saw, stain brush
Materials: Planks for base and top (1x4-inch pine pictured), planks for sides (and bottom if required, 1x6-inch cedar pictured), exterior wood screws, gravel, planting soil, garden liner (optional)
This planter is made up of two square or rectangular frames for the base and top, joined by any number of vertical planks. Start by measuring the width of the vertical boards you'll use to fill in the sides of the planter. This will save you from having to rip, or cut a board along its length, which can be tricky without a table saw.
After you build the square or rectangular base and top, attach two vertical planks to each interior corner of one of the squares (eight in total), forming the structure of the planter. Slide those vertical posts that are now attached inside of the perimeter of the other square and attach at the corners using screws. You can now attach the top frame. Cut a horizontal board (I used 1x4-inch pine) to size with the miter saw at a 45-degree angle and attach to the top of the planter for a fancier finish. Add floor and garden liner if you're not installing the planter directly on the ground.

Corrugated Metal Planter
Required tools: Measuring tape, power drill, circular saw, miter saw, tin snips, stain brush
Materials: Planks for base and top (1x4-inch pine pictured), corrugated metal sheeting, exterior wood screws, gravel, planting soil, garden liner (optional)
This planter uses the same building method as the previous planter, but instead of vertical boards, the walls of the planter are made from corrugated metal sheets. Determine the boards you want to use and cut them to desired lengths. You'll need eight pieces to make two square or rectangular frames for the top and bottom. After you complete the top and bottom frames, attach the vertical posts to each corner of one of the completed frames using screws.
For the vertical posts, you can use either two boards in each corner, or a piece of angle flashing. After the posts are attached to one frame, flip it over and screw it to the other one at the opposite end of the posts. Measure to determine the dimensions of the metal panels and cut the panels to size. Attach the metal panels to the inside of the horizontal posts with screws. Add trim around the top of the planter as before to cover up the metal edges and create a cleaner look.
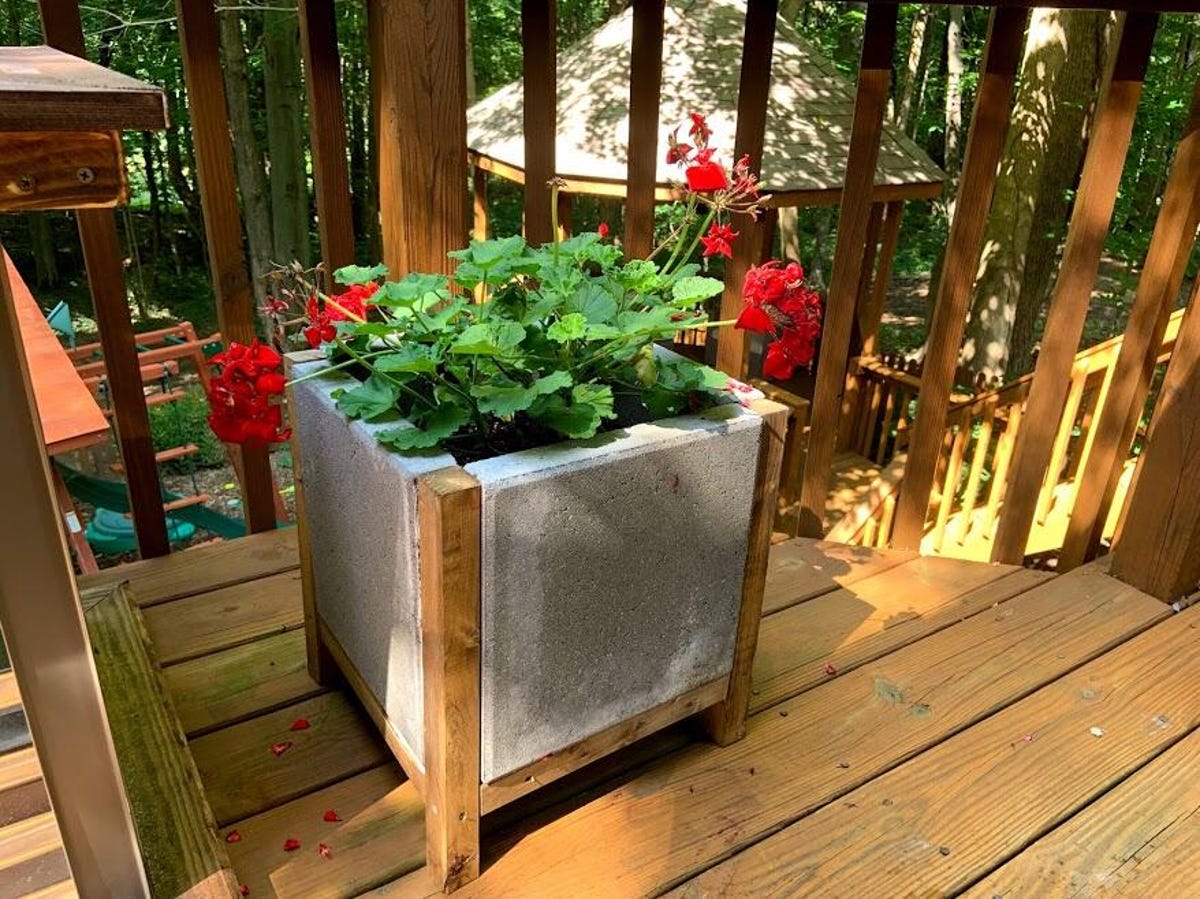
Concrete Paver Planter
Required tools: Measuring tape, power drill, circular saw, caulk gun, stain brush, ratcheting cargo strap
Materials: 2x2-inch pine, concrete pavers, gravel, planting soil, construction adhesive
Find four square or rectangular concrete pavers to use for the sides. Create two wood frames that resemble high school football goal posts out of 2x2 planks (ensure the width of the opening and height of the 2x2 matches the pavers dimensions exactly). The pavers will sit inside of these frames. Attach the two frames to each other using two other 2x2s, measured to fit, and screws. Fill in the bottom of the planter with 2x2s cut to fit. The end result will be a frame structure with space for pavers on all four sides.
You'll be putting two screws through each upright piece of wood to connect the horizontal pieces, so you'll need to stagger the heights of the screws to keep them from obstructing each other. Apply construction adhesive like Liquid Nails to inside edges of the 2x2s and rest pavers in place. Using a ratcheting cargo strap, tighten the structure to hold firmly in place while the adhesive dries. Wipe off the excess adhesive. Tip: Build these where they will sit, as they're fairly heavy.