How to install Android 2.3 on the Raspberry Pi
Android 2.3 is available for the Raspberry Pi -- here's how to download and install it on the micro-computer right now.


With a 700MHz CPU and at least 256MB of RAM, the Raspberry Pi has specs that are comparable to an entry-level smart phone, so, naturally, many users have expressed an interest in installing Google's mobile software Android on the device.
The good news is that you can do just that -- Android 2.3 has already been ported, and you can download and install it right now. The bad news is that it doesn't support hardware acceleration yet, which means the experience isn't quite as smooth as you might like it to be.
Android 4.0 for the Pi with hardware acceleration is in the works, but if you're itching to try the earlier version out, here's what you'll have to do...
What you'll need
- Raspberry Pi -- if you've just got yours, here's how to set it up
- An SD card with at least 4GB of free space, formatted as FAT32
- CyanogenMod 7.2 (custom Android ROM) for the Raspberry Pi
Windows
So, you've downloaded CyanogenMod from the link above, but how do you get that onto your SD card? Simply dragging it across won't work; your Raspberry Pi won't be able to boot from an SD card with an .img file sitting on it. You'll need some third-party software to first unzip the 7z file -- 7-Zip and WinRAR are both equally capable -- and then another piece of software is needed to extract the files from the image and transfer them to the SD card.
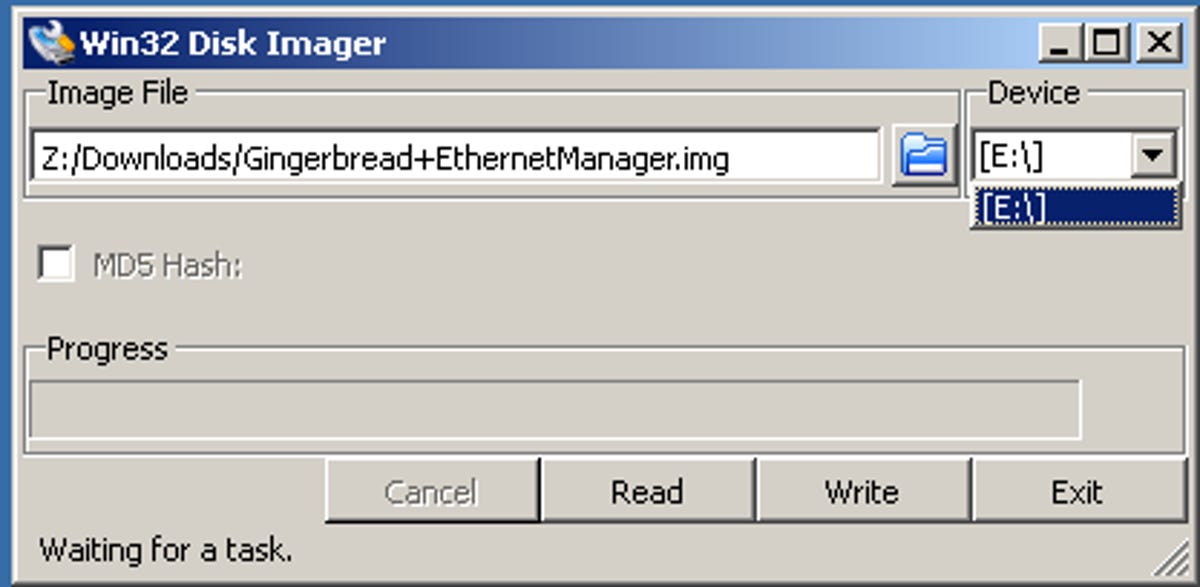
Fortunately, there's a handy program for Windows called Win32DiskImager that is both free and lightweight and will be able to take care of all the heavy lifting for you. Simply show it where the .img file that you have extracted is and which device you want to copy it over to. In this case, the SD card was E:\.
Once you've started the process, it shouldn't take too long to complete. When it's finished, pop the SD card into your Pi and you'll be navigating around Android in no time.
Mac OS X
Unfortunately, the process in Mac OS X involves a little command line work, but it's nothing that we can't handle, and you'll be up and running before you know it.
Like on Windows, the first step if you're using a Mac is to unzip the 7z file that you've just downloaded. There are lots of free programs available to do this, but I like to use 'The Unarchiver', which is really lightweight and available for free from the App Store.
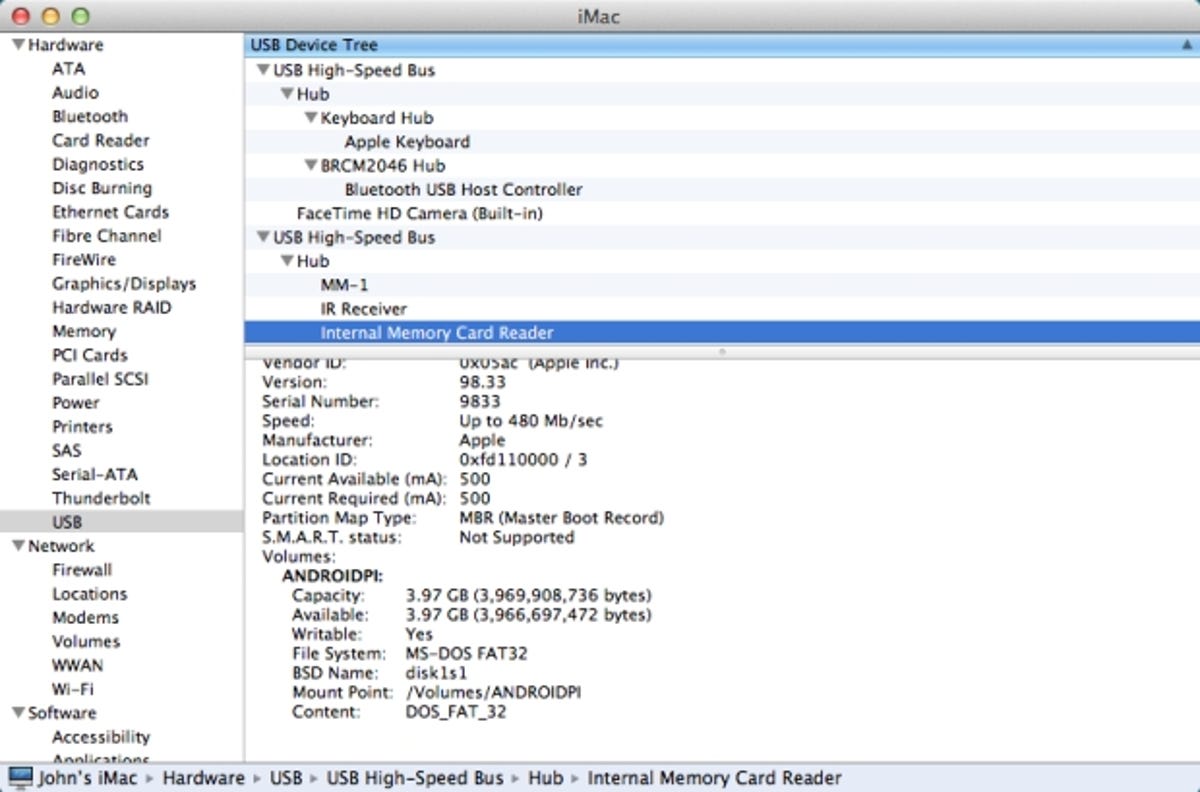
Next, you'll need to find the BSD Name of your SD card -- don't worry, you don't need to know any fine details here, we're just looking for one piece of information. To do this, click on the Apple logo from the menu bar, then go to About This Mac > More Info and take a look at your System Report.
Once you're there, select 'USB from the sidebar and look for 'Internal Memory Card Reader'. Once this is selected, the BSD Name will be listed in the details below. In my case, it says 'disk1'.

With that information, we can now open Terminal to run the command which will copy your .img file over to the SD card. Type in the following command: sudo dd if=image_path_here.img of=/dev/diskn bs=1m -- replacing image_path_here.img with the path of your downloaded file, and where it says 'diskn', you'll want to replace n with the number of your disk that you found in System Report during the previous step. Be sure to get this right, as dd is a powerful command, and it won't hesitate to format whichever drive you point it to and replace it with the image that's specified.
It will take a while for the dd command to work its magic, and it doesn't provide any feedback while it's working, so don't be impatient and just let it do its thing. Once it's completed, you'll have an SD card loaded with files that will allow you to boot into Android.
Linux
Like Mac OS X, Linux distributions are based upon Unix, so they can also utilise the dd command to copy your image file over to an SD card. The process is a little more involved than it was for OS X, but if you're a Linux user, you're probably comfortable with the command line anyway.
To extract the image from the .7z file you just downloaded, you can use a command line tool called p7zip. Ubuntu users can install it using the command: sudo apt-get install p7zip-full.
Once p7zip is installed, you can then point it to your .7z file and extract the contents by typing: 7za e path_of_your_file.7z.
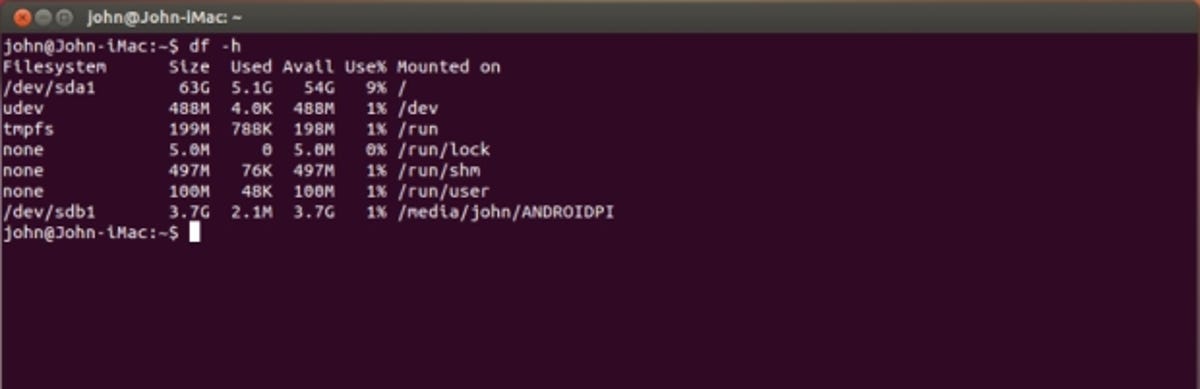
The next step is to find out what label your SD card has been assigned by the system. To do this, type: df -h into Terminal and you will be presented with a list of all your devices. In this example, the SD card is located at /dev/sdc1.
Remembering the location of your SD card, you can unmount it with the 'umount' command. In this example, the command is umount /dev/sdc, but you will need to adjust it depending on the location of the card in your system.
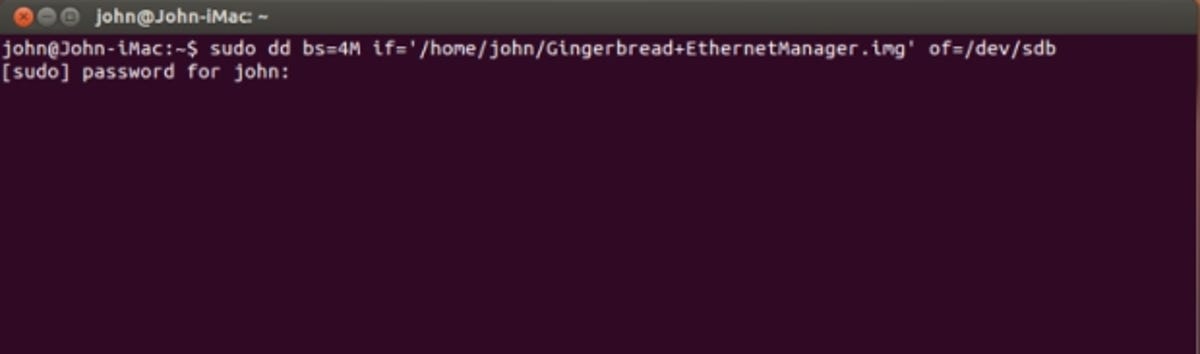
Finally, you can use the dd command to copy the contents of the image file across to the SD card. In this example, the command will be: dd bs=4M if=image_path_here.img of=/dev/sdc (dropping the 1 from the end of the path that you found earlier, as that is the location of the partition, not the card itself).
Now all that you have to do is wait for the data to be copied and you're good to go.
I've installed Android! What next?
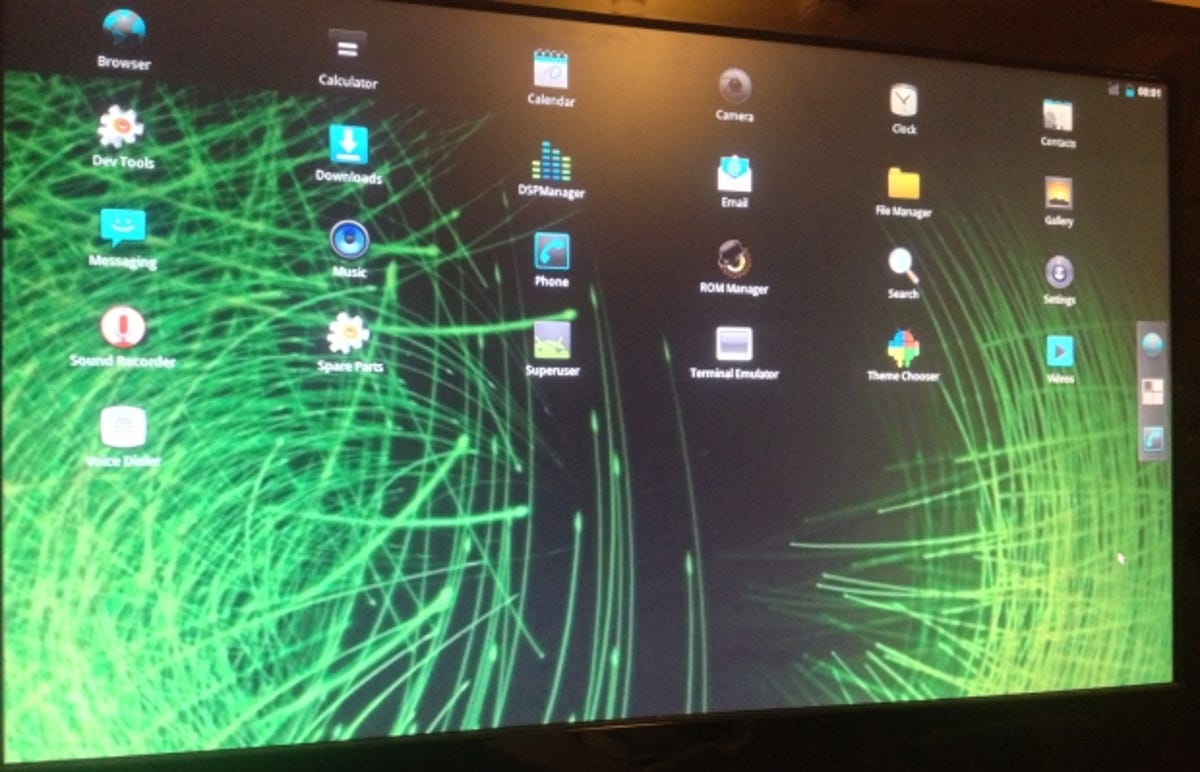
Once you've managed to boot off your SD card, you can do pretty much anything that you'd do with Android on a smart phone. You have full Ethernet support, so as long as you're plugged in, you can browse the Web, check your email and show your really cool Raspberry Pi off to your friends on Facebook.
As I mentioned earlier, without hardware acceleration, it might be a slightly underwhelming experience, and the mouse and keyboard are quite limiting if you're used to using Android on a touchscreen. That aside, however, this is still a really cool project to do with your Raspberry Pi, and it will only get better in the future once AndroidPi 4.0 has been released with hardware acceleration.
- For more things to do with your Raspberry Pi, check out our 25 fun projects guide.
Editor's note: Some of these instructions were modified from the excellent Raspberry Pi community's SD Card Setup wiki.