How to disable preinstalled apps on the Galaxy Nexus
Too afraid to root your device, but want to get rid of some of those preinstalled apps on your Galaxy Nexus? You're in luck; you can disable preinstalled apps on your Galaxy Nexus. Read on to find out how.


Bloatware and custom apps preinstalled by wireless carriers are to be expected on Android devices. These types of apps have even made their way on to one of Google's own devices--the Samsung Galaxy Nexus on Verizon.
While rooting your device will allow you to uninstall any unwanted apps, we know rooting isn't for everyone, no matter how simple it may be. We also know how annoying it can be to have multiple apps preinstalled on your device, with no way of uninstalling them.
Android 4.0 Ice Cream Sandwich allows you to disable an app, in lieu of uninstalling them. The process is simple, and can be done on nearly any app preinstalled on your device. Follow the steps below to disable an app.
There are a couple of ways of going about getting into the App Info screen. You can go into Settings > tap on Apps > select All. You should then see a list of all apps installed in your device. Tapping on one will launch the App Info screen for that particular app.
- The second method of getting to an app's App Info screen is just as simple. While viewing your apps in the app launcher, tap and hold on an app until the launcher disappears (the same method as if you were going to place a shortcut to an app on your home screen). At the top of the screen you will see App Info. Drag the icon up to the text and let go.
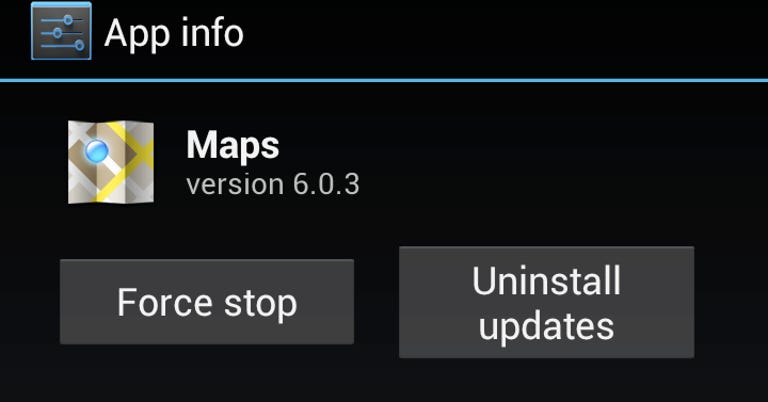
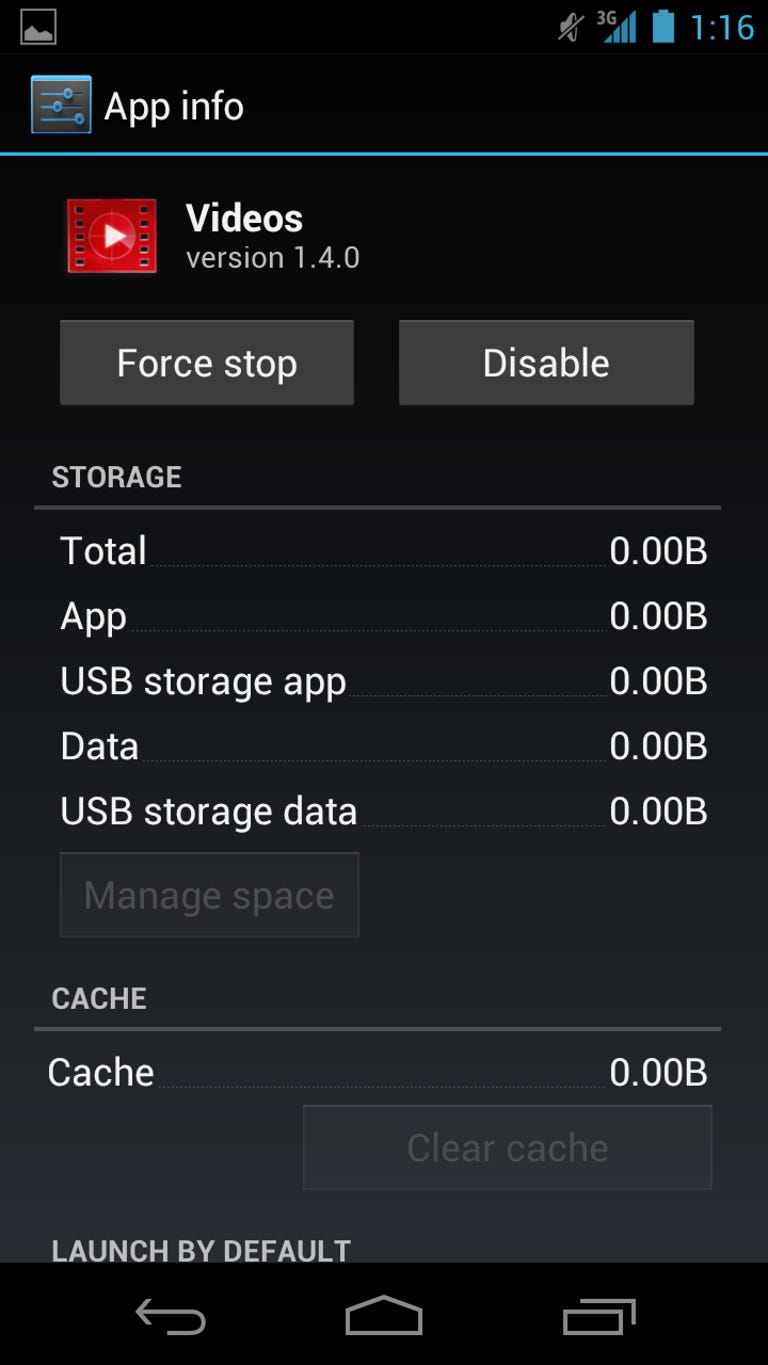
- You will now be able to view important information regrading the app, as well as force-stop it should you encounter any issues with closing the app. If you have installed updates from the Android Market, you will see an Uninstall Updates button. You will have to uninstall any updates before you can disable the app, so go ahead and tap on Uninstall Updates.
- If you haven't installed any updates from the Android Market, or you have finished uninstalling any updates from the previous step, the button will now display Disable. Tapping on disable will remove the app from your app launcher.

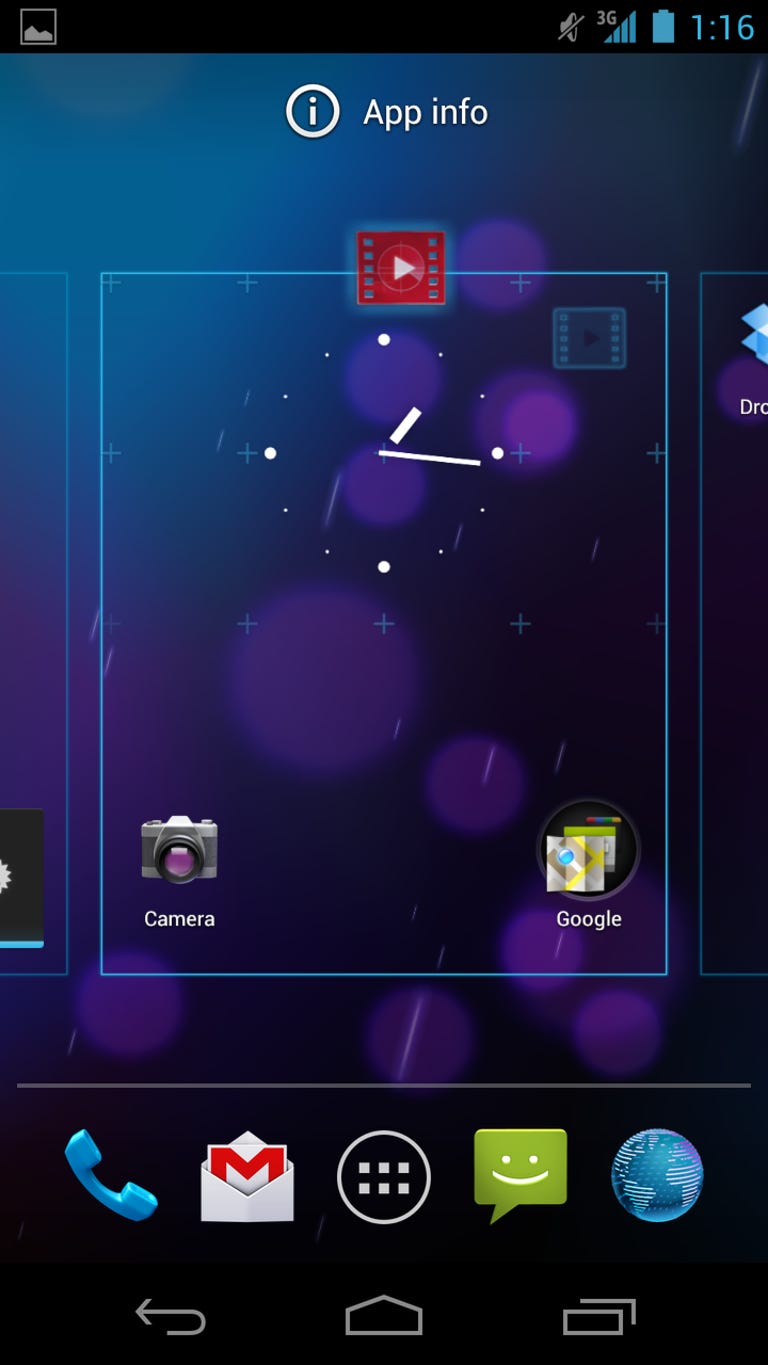
You should then see the App Info screen for the app.
If you want to be a pro with Ice Cream Sandwich, make sure you check out Jessica Dolcourt's video.
While this method doesn't uninstall the app and clear up important space on your device, it does remove the app from your launcher, as well as your Android Market list of apps.
Should you ever change your mind, and decide you would like to use the app, simply go into the Apps section of the Settings app using the method outlined in step one, and scroll to the bottom of the list. There you will find all of your disabled apps. Tapping on one of the disabled apps and selecting Enable on the App Info screen will make the app available for use.