How to create a Facebook Group
Create Facebook Groups to share certain information with certain Facebook friends.


If Facebook's new facial-recognition photo-tagging feature has you thinking more about how you are sharing information on the site, one easy tool at your disposal is Facebook Groups. A group lets you share different information--status updates, photos, links, and so on--with different subsets of your Facebook friends. Create a group of local friends and another one of old high-school buddies so that your neighbors on Facebook don't have to listen to the intricate plans surrounding your 20th high-school reunion. Or create a group that includes everyone but your mother, who recently surprised you with her Facebook presence.
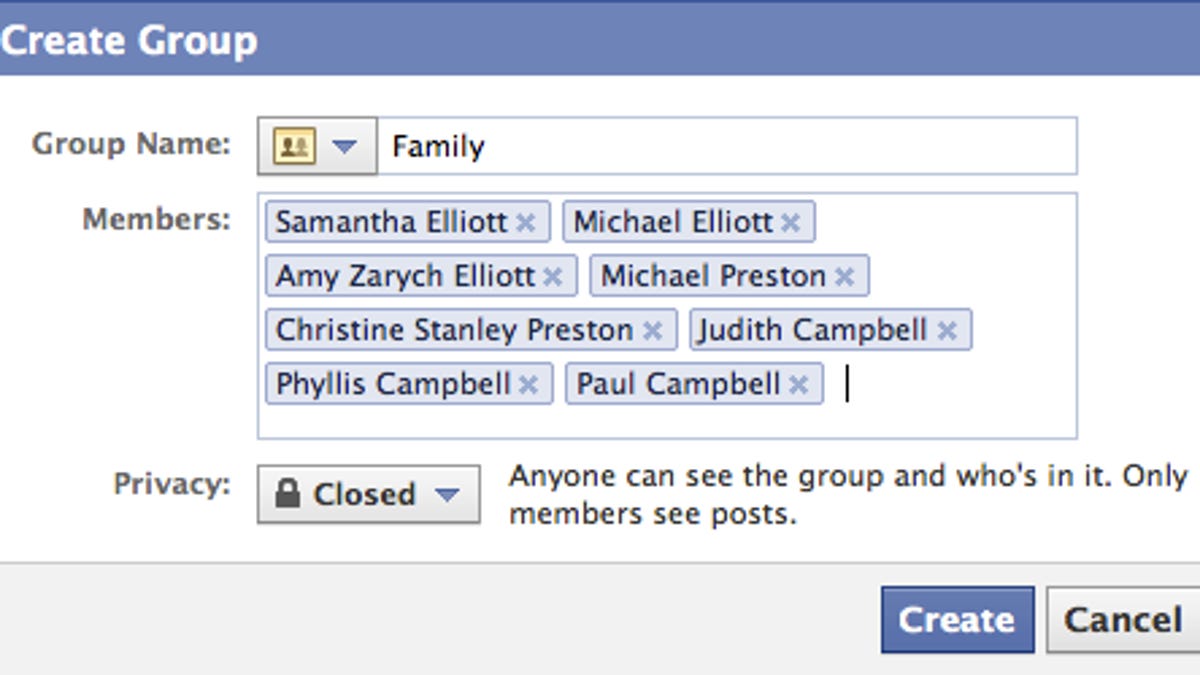
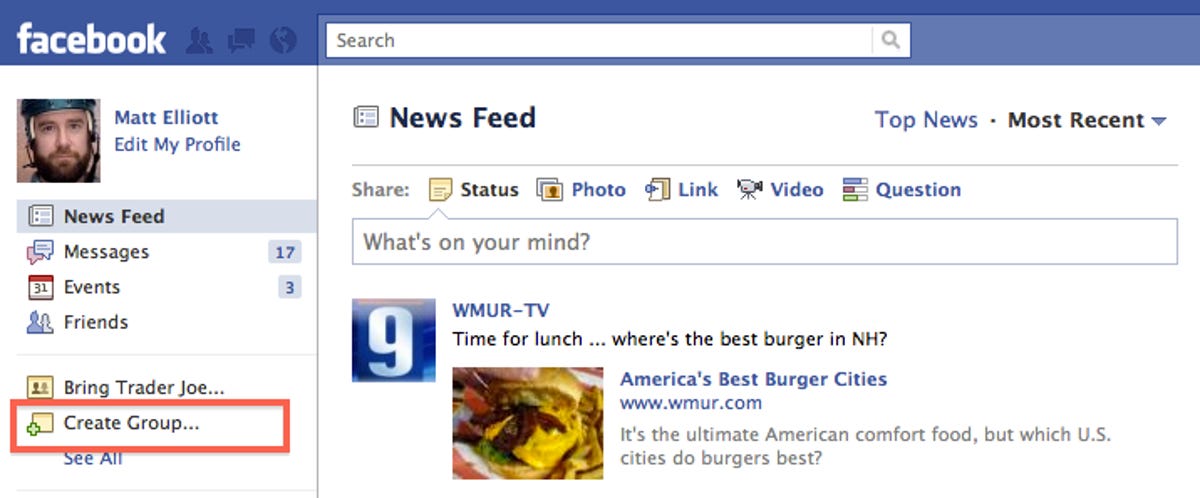
To create a Facebook Group, click on the Home button to view your News Feed. In the left-hand column, you'll see a "Create Group..." link. It brings up a small pop-up window, where you can name your group and add members. You can also select one of three privacy settings:
Open: Anyone can see the group, who's in it, and what members post.
Closed: Anyone can see the group and who's in it. Only members see posts.
Secret: Only members see the group, who's in it, and what members post.
Each member you add to the group will then get an e-mail, alerting them to the formation of the group and their inclusion in it.
Leaving a group is as easy as creating one. On the group page, just find the Leave Group link in the right-hand column. If you do leave a group, however, you'll have to request to be added back should you ever want to rejoin.
