Convert images using Preview in OS X
Apple's Preview program can be used to quickly convert any supported image or PDF into one of several formats.


Regardless of the specifics, if you need to convert images then you might find yourself considering expensive tools like Photoshop, or perhaps free open source projects like The Gimp as options for converting images; however, in doing so you will be overlooking a built-in option for doing this in Apple's included Preview program.
Single-image conversion
- Choose "Export" from the File menu
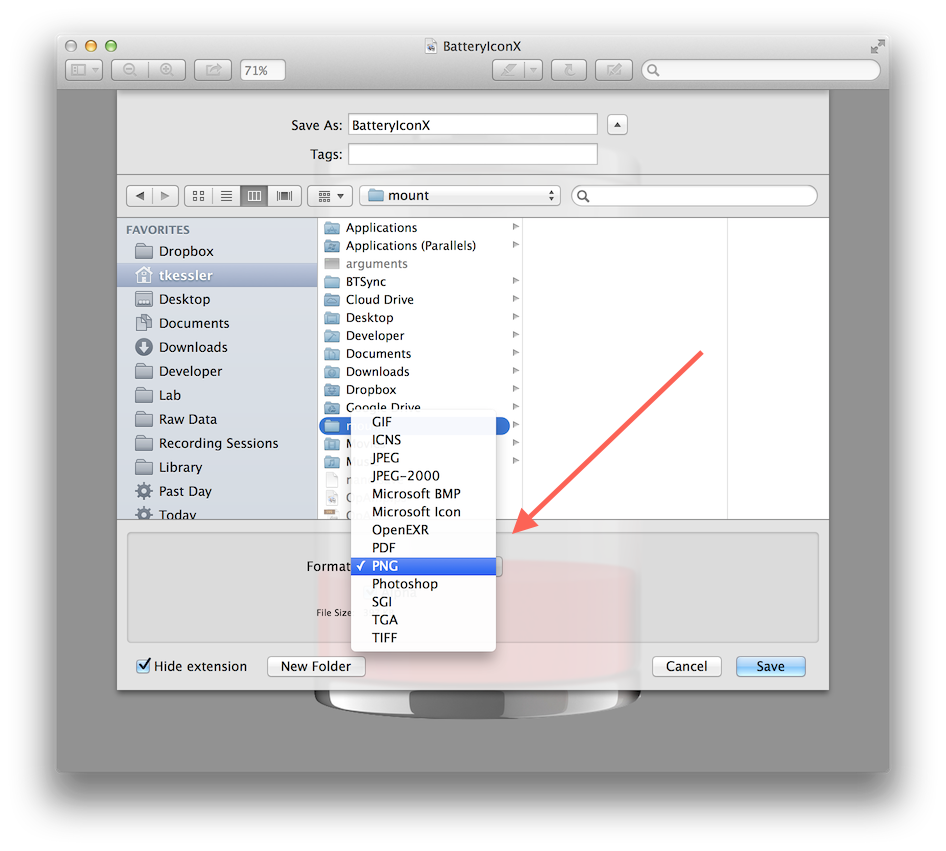
- Select a desired format from the drop-down menu
- Supply a name and location for the new file, and click Save
By default, the format selection menu in Preview contains options for JPEG, JPEG-2000, OpenEXR, PDF, PNG (default selection), and TIFF; however, in addition you can choose from GIF, ICNS, Microsoft BMP, Microsoft ICON, Photoshop, SGI, and TGA by holding the Option key when you open this menu.
Batch-image conversion
These routines can be applied to batches of images, so instead of converting one image at a time, you can apply these changes to a number of different files all at once. To do this, simply make a selection of the desired files in the Finder, right-click them, and then choose the Open option so they are all opened in the same Preview window.
Note that the images are shown in a list next to the displayed one. Click this list to bring it into focus, and then press Command-A to select all items in the list. Now choose the option to Export the images, and follow the instructions listed above.
Questions? Comments? Have a fix? Post them below or document.write('e-mail us');!
Be sure to check us out on Twitter and the CNET Mac forums.
The MacFixIt blog can be found directly at http://www.macfixit.com