How to change your DNS and (maybe) take the internet back
Is your fav website down? Want your privacy back? Try this one quick trick.


Sometimes, when your favorite websites go "down," they're actually still right there. You just can't see them, because your computer doesn't know the route.
What if you could give your PC some better driving directions right now, in just a minute or two tops? What if this trick improved your privacy too?
To do that, you just need to change your DNS server.

What's a DNS server?
"CNET.com" is just the street address of this website. To figure out the "driving directions," if you will, your computer contacts a special server (called DNS, for Domain Name System) to figure out the route. That server tells your web browser that "CNET.com" actually means "203.36.226.2". The number, known as an IP address, is a far better description of where CNET actually lives.
If your DNS server goes down... it's like your computer no longer has GPS! But you can simply switch to another public DNS server to resolve those issues.
How does a DNS server help with privacy?
By default, your computer probably reaches out to a DNS server controlled by your internet service provider (ISP), say Comcast or AT&T. That means they can easily see the websites you visit -- and because they've got your name and address, too, they could theoretically build a fairly complete profile of you.
If you use a DNS server provided by a different company, they might record that info too...but at least it'll be harder for them to figure out who exactly is browsing those websites, which could make the data less valuable.
And at least one DNS provider has sworn it won't keep a log: CloudFlare (1.1.1.1) says it'll open itself up to third-party auditors to guarantee they aren't collecting data from you.

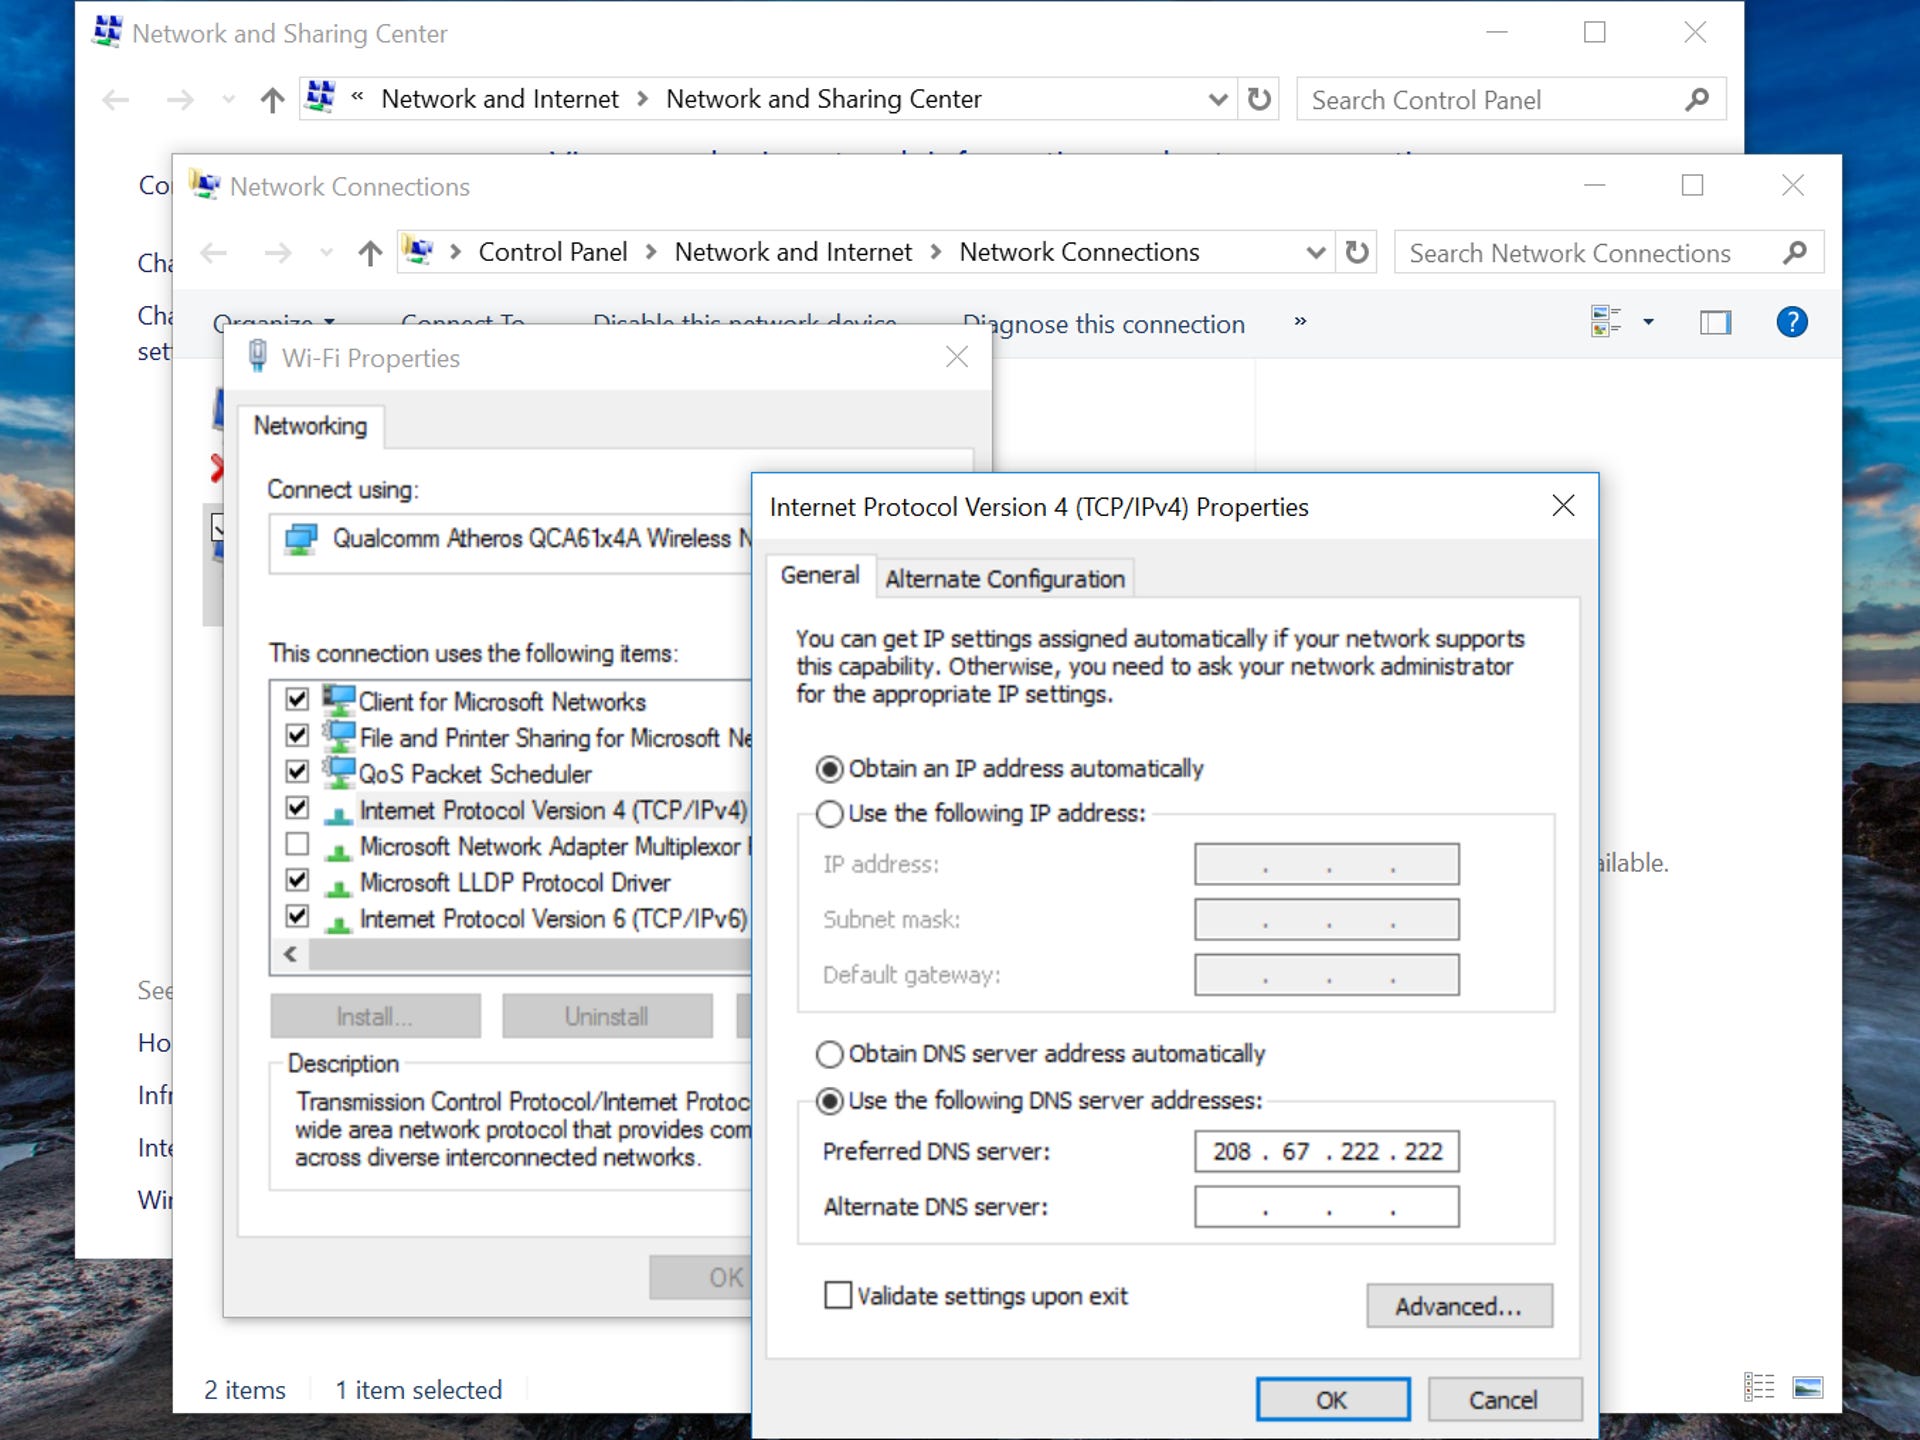
How to change your DNS in Windows.
OK, so how do I change my DNS on Windows?
- Hit Start and type Network Status (or right-click on your Wi-Fi icon and pick Open Network and Internet settings).
- Click on Change Adapter Settings.
- Right-click on your active network connection, then hit Properties.
- Left-click on Internet Protocol Version 4 (TCP/IPv4) and hit Properties. (If you use IPv6, change that one also/instead.)
- Click on "Use the following DNS server addresses:" and type in one of the following public DNS server addresses:
1.1.1.1 = CloudFlare DNS
208.67.220.220 or 208.67.222.222 = OpenDNS
8.8.8.8 or 8.8.4.4 = GoogleDNS
84.200.69.80 or 84.200.70.40 = DNS.Watch
64.6.64.6 or 64.6.65.6 = VeriSign Public DNS
Note that you may need to try more than one to get your sites working. OpenDNS helped us around a Twitter and Netflix outage back in 2016, but GoogleDNS didn't.
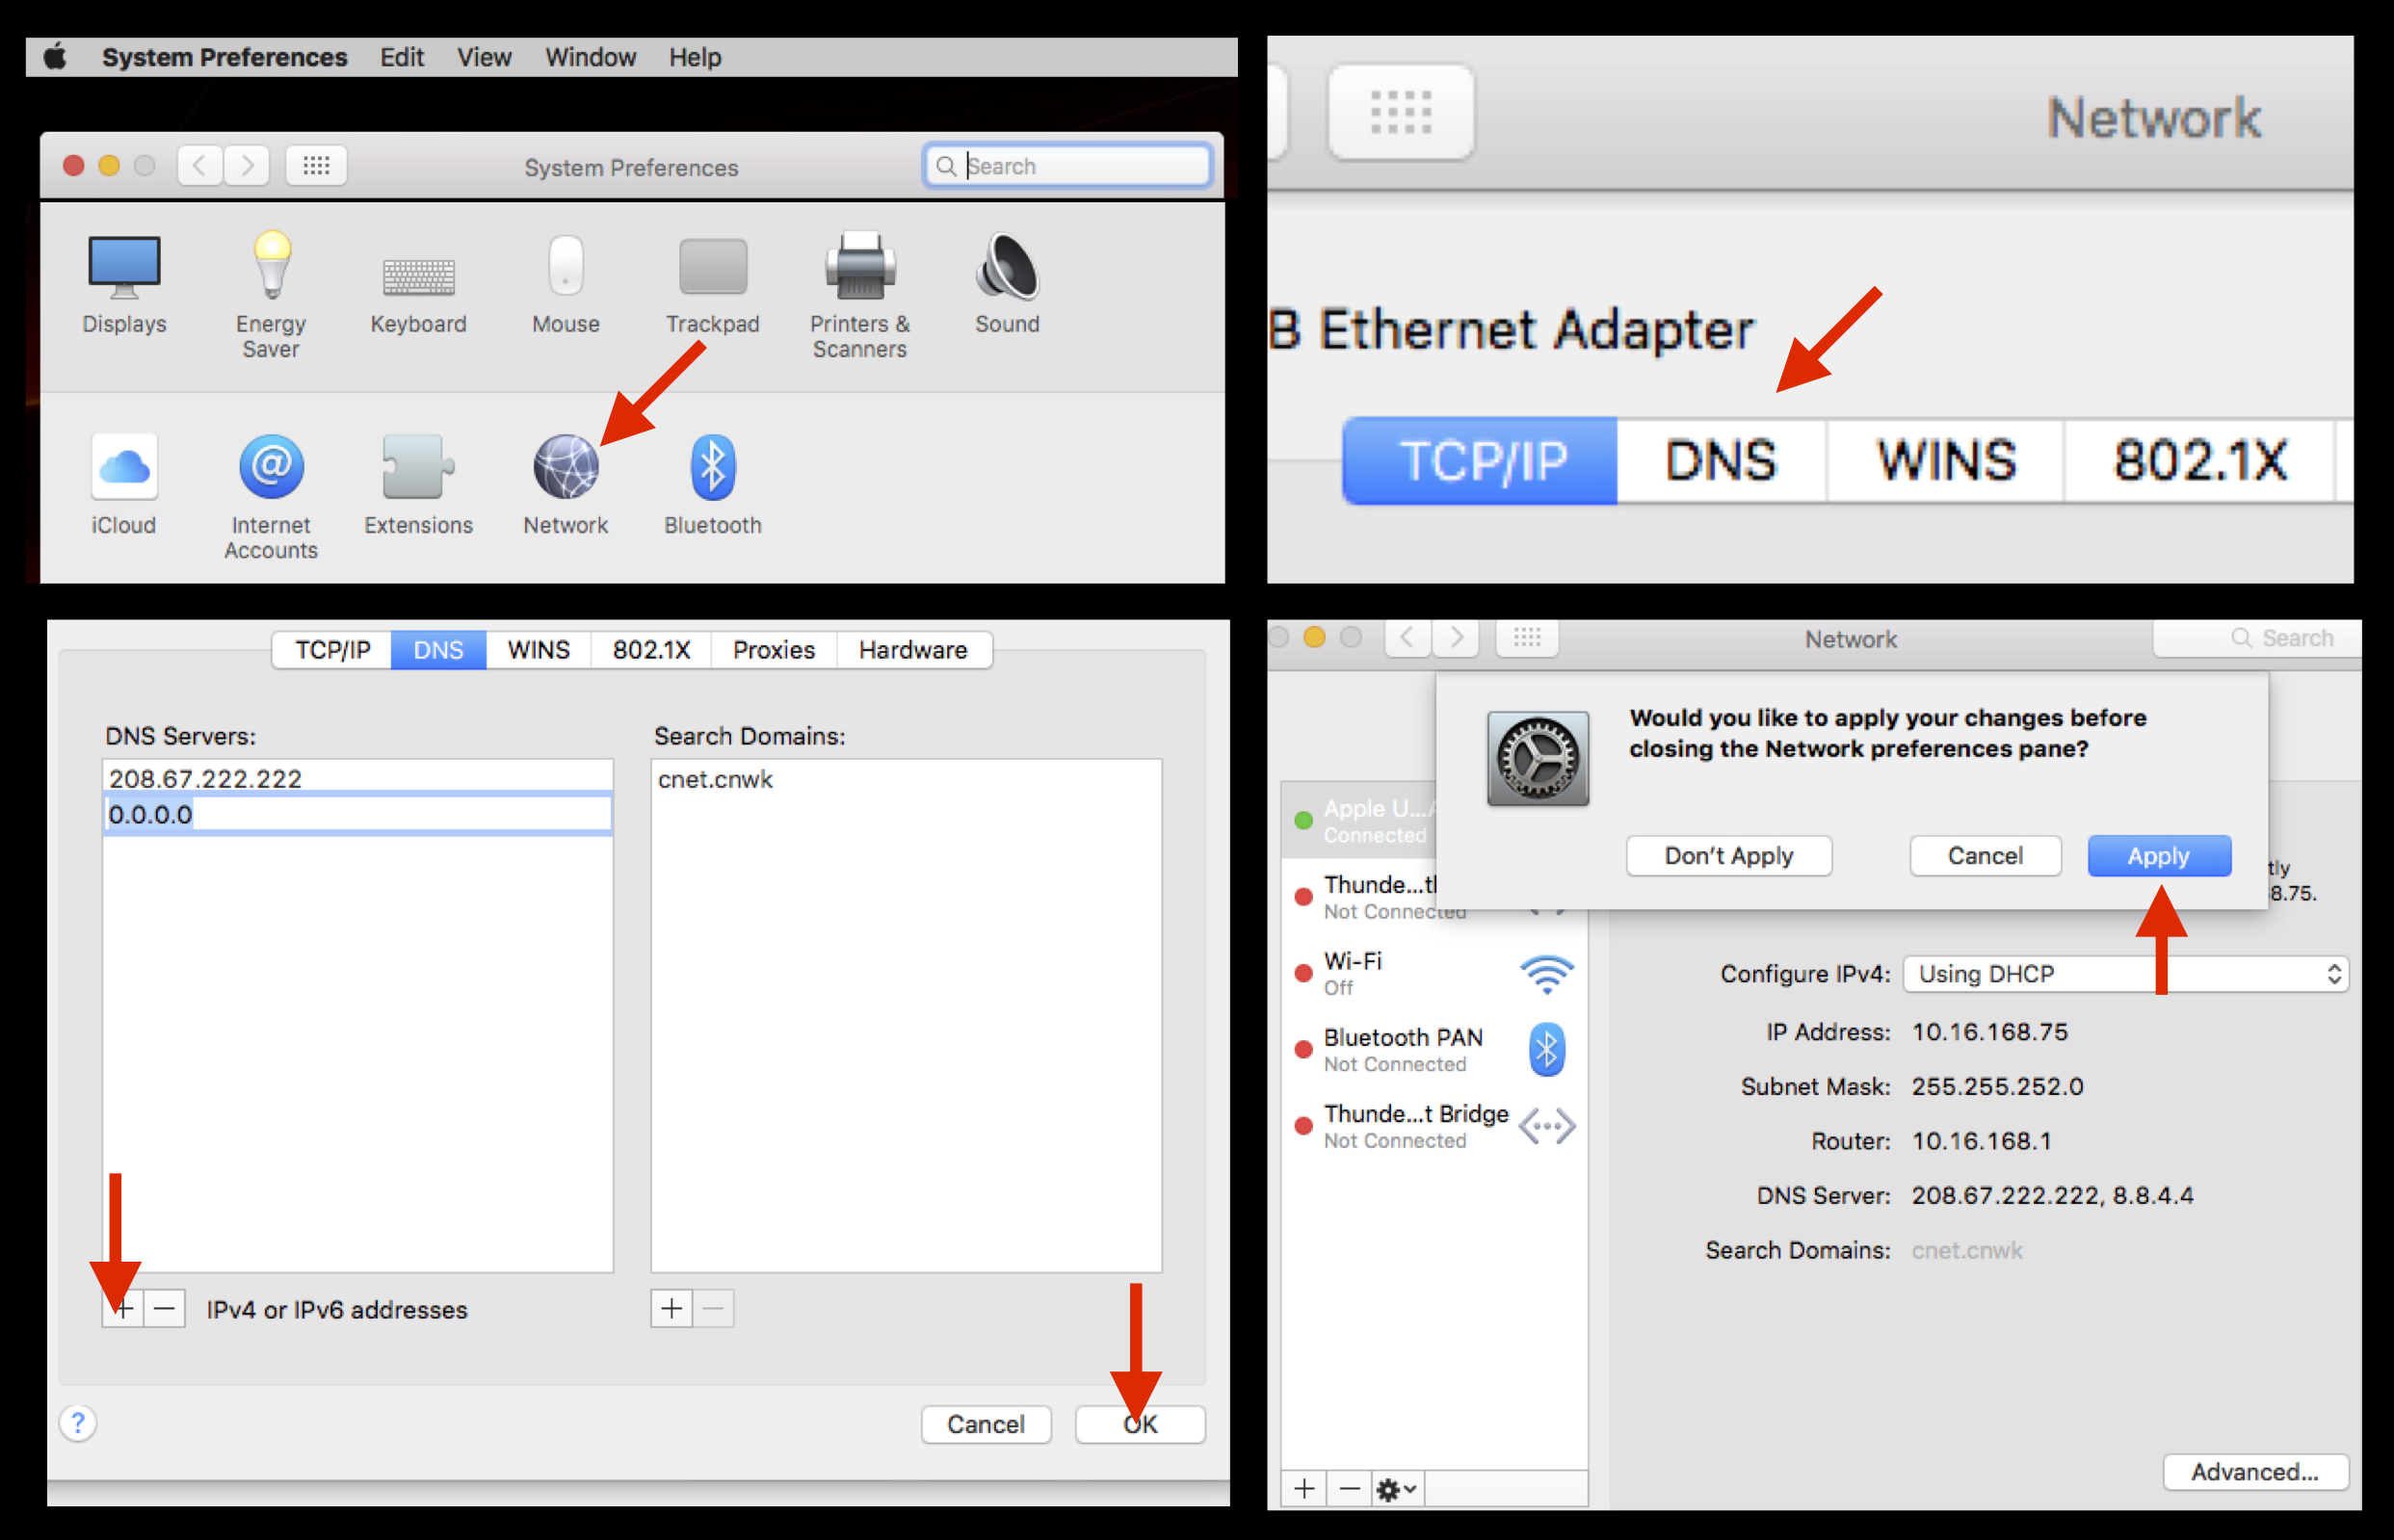
How do I change DNS on Mac?
- System Preferences
- Network
- Click Advanced.
- Click the DNS tab
- Click the little + sign at the lower left to add a new DNS server
- Type in the numbers of a public DNS server (see our suggestions in the Windows section above)
- Click OK
- Click Apply
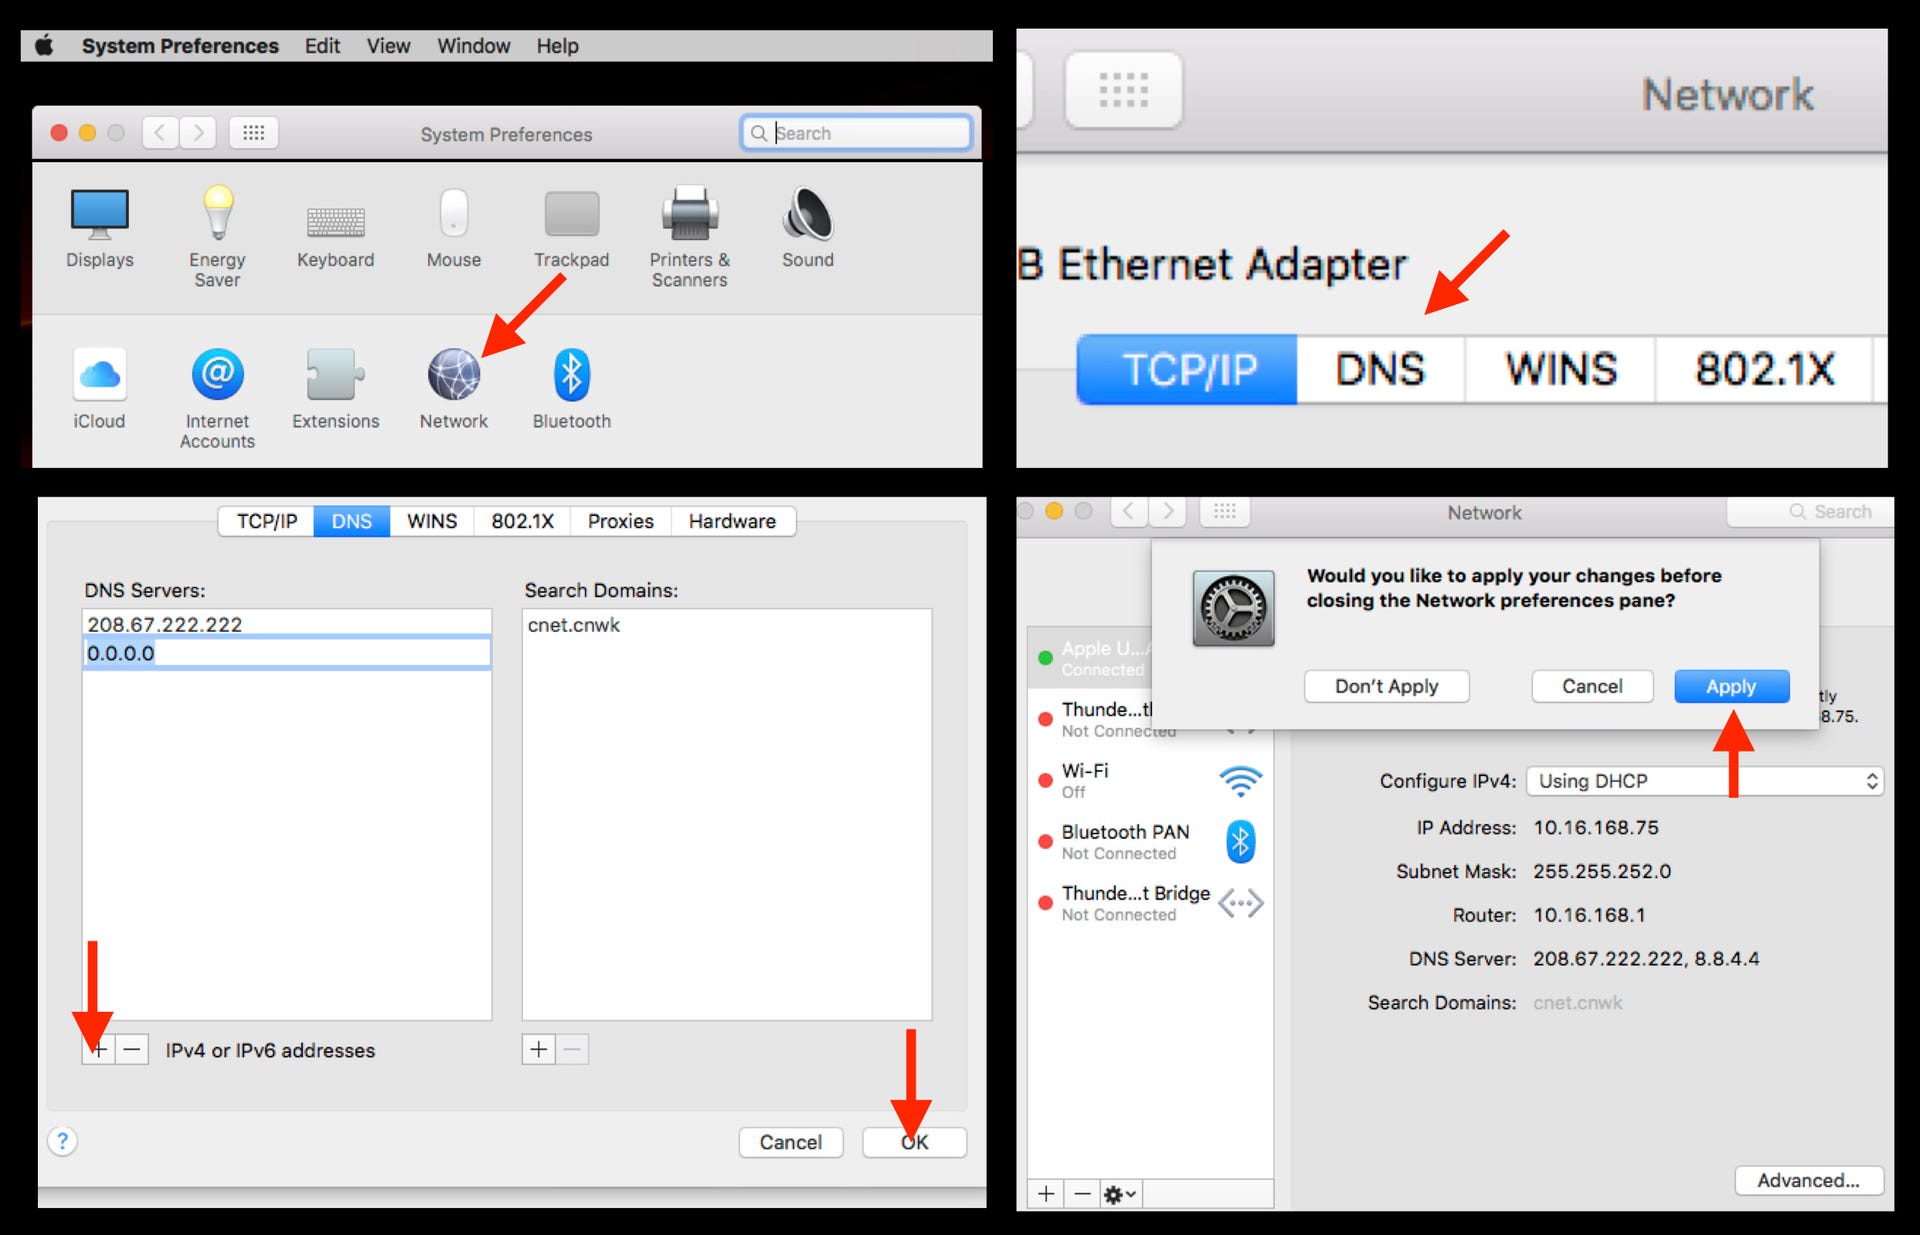
How to change your DNS on a recent Mac OS X machine.