7 hidden tips for iOS Notes
Apple's humble Notes can do more than just take notes.


If you use the Notes app on your iPhone only to type quick notes to yourself, then you aren't using all the features that the app offers. Here are seven tips to help you get more out of iOS Notes.
Sync your Notes
With iCloud, you can sync your notes between iOS devices and your Mac. On iOS, head to Settings > iCloud and tap the toggle switch to turn on iCloud for Notes. On OS X, head to System Preferences > iCloud and check the box for Notes.
To sync Notes, you need to be using iOS 9 and OS X 10.11 El Capitan. You will also need to make sure you are using the same iCloud account on each device.
Secure your Notes
The ability to password protect notes arrived with iOS 9.3, but the button to keep away prying eyes is somewhat hidden. To protect a note with a password, open a note and tap the share button in the upper-right corner. On the share menu you'll see a Lock Note button. The first time you lock a note, you'll need to enter a password, which will be used to unlock all of your notes.
A password-protected note can be either locked or unlocked. Tap the lock icon next to the share button to lock or unlock a note.
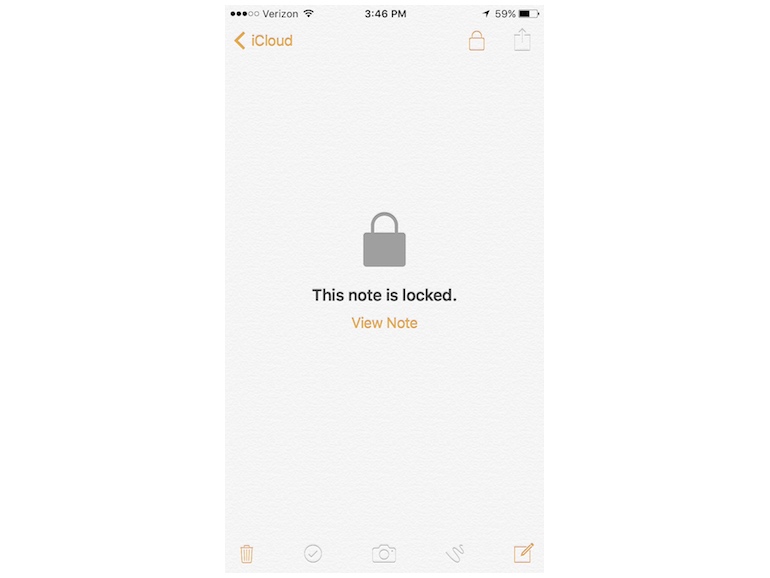
You can also lock all of your password-protected notes by tapping the Lock Now button at the bottom of your screen when viewing the list of all of your notes. But if you lock your notes this way, they will all be unlocked when you unlock any note.
Sketch your Notes
If you have an idea that is better sketched than typed, Notes has drawing tool. To access it, open a note and tap the "+" button above the keyboard to access the app's formatting tools. Tap the squiggly line and you'll have three pens, an eraser and a color picker with which to draw, doodle and sketch. There is also a ruler to help you draw straight lines. You can drag the rule with one finger to move it around and use two fingers to change its angle.
You can have more than one sketch in a single note. Just swipe left with two fingers to begin a new sketch on a new page, and then you can swipe with two fingers to browse your various sketches.
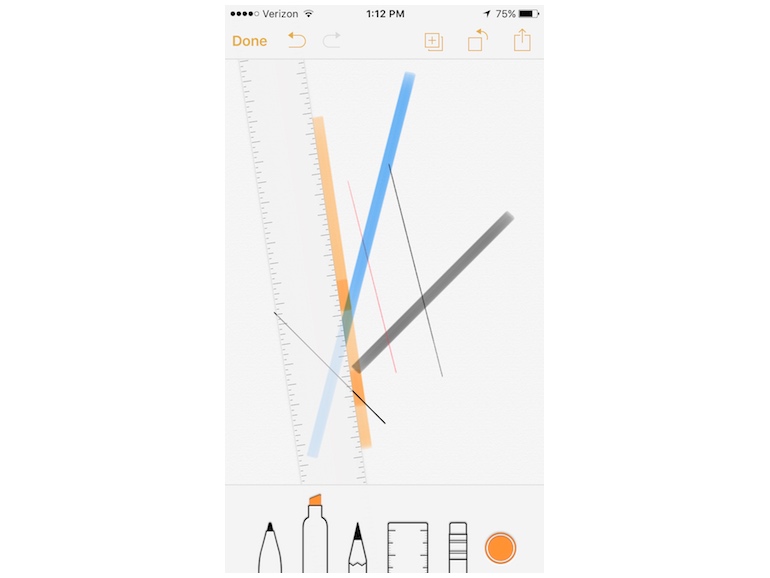
There is a hidden tool with the eraser: tap and hold on the eraser to access an Erase All button if you want to start a sketch again with a clean slate.
The sketching feature is available on the iPhone 5 and later, the iPad Pro, the fourth-generation iPad, all iPad Air models, the iPad Mini 2 and later, and the sixth-generation iPod touch. And iPad Pro users can use the Apple Pencil for greater sketching control and results.
Speak your Notes
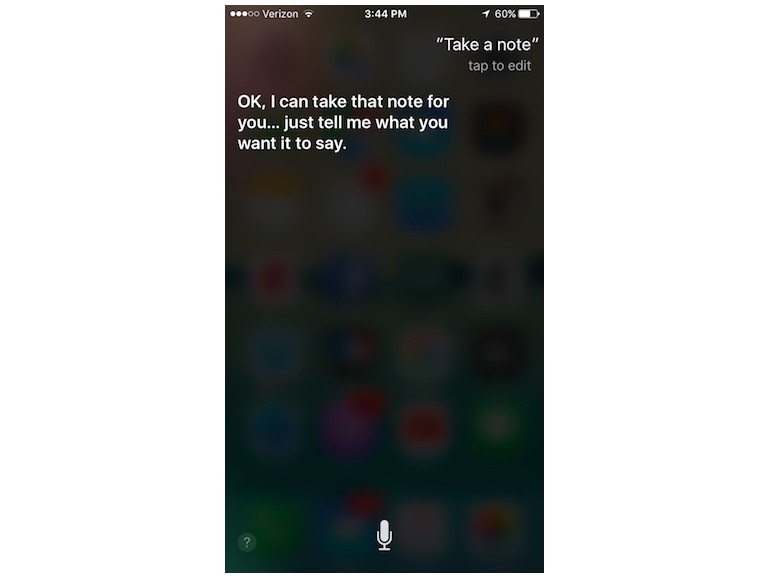
Too tied up to type a quick note? You can ask Siri to take a note for you. Just ask Siri to "add a note" or "take a note" and Siri will then ask you to tell her what you want it to say before creating a note.
Nest your Notes
If you have become an iOS Notes power user, then you may bemoan the iOS app's inability to nest folders. Creating a folder hierarchy can certainly help bring organization to your notes, but if you use the Notes app only on your iPhone or iPad, then your folder hierarchy is flatter than Kansas.
If you sync your notes with the Notes app on your Mac, however, you can nest folders till your heart's content. Just drag a folder on top of another folder to nest it. You'll see a little triangle to expand and collapse any folder that contains nested folders. And this folder hierarchy you created in OS X is carried over to the Notes app in iOS.
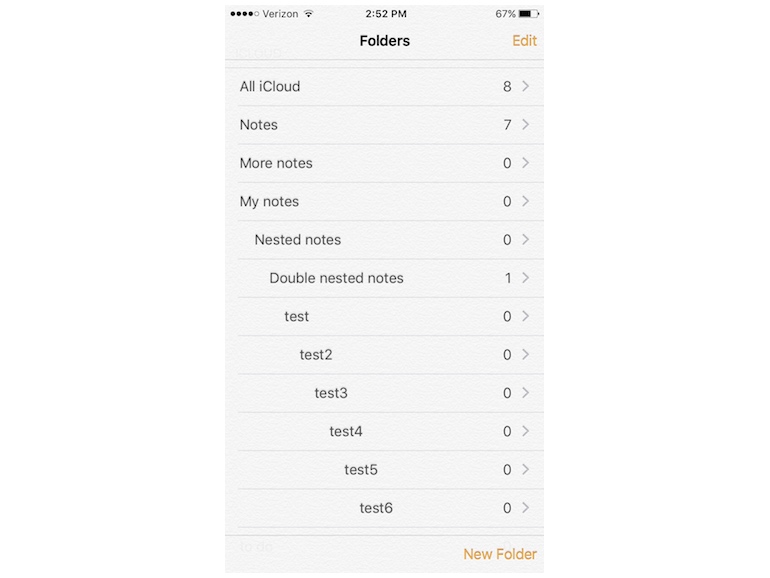
Although nested folders appear on iOS, you can't move or otherwise rearrange them without heading back to your Mac. There are no 3D Touch gestures to move folders, for example. In fact, the only edit tools at your disposal with Notes on iOS is renaming and deleting folder.
If nesting is your jam, you can go pretty deep into nesting levels on your Mac. I created eight levels of hierarchy before giving up with the belief that this degree of folding nesting is more than sufficient for all notetakers.
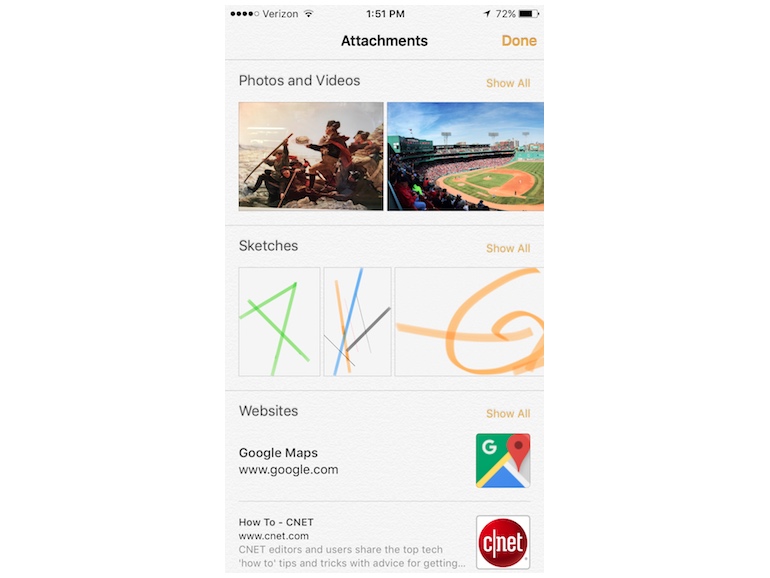
View all attachments
With its added features, the Notes app has some Evernote-like abilities. And like Evernote, it has a way for you to quickly search through all of the attachments you have saved to the app. From the main view of your notes, tap the button in the lower-left corner that has four small squares to view all of the attachments, Web pages and maps you've saved to Notes.
Add to Notes
From Safari, you can add Web pages to notes. When viewing a Web page in Safari you'd like to save to Notes, tap the share button and then the Add to Notes button. If you don't see Add to Notes, swipe left until you get to the More button, which you can then tap to add the Add to Notes button to the share menu. You can add a Web page to a new note or an existing note. You can also share a location from Apple Maps to Notes in the same manner.
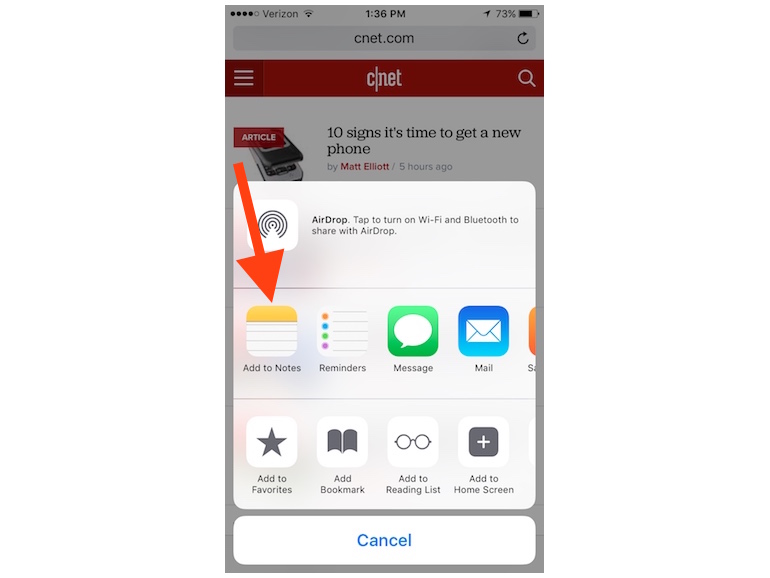
Web pages and maps are saved as thumbnails in Notes. Tap a thumbnail to open a page Safari or a location in Apple Maps. You can't share to Notes from the Google Maps app, but if you open Google Maps in Safari, you can save a location to Notes. Then when you tap the Google Maps thumbnail in Notes, you will open that location not in Safari but the Google Maps app.