DIY: home surveillance with IP network cameras
Are your plans to install web-enabled home-security cameras wasting away in the too-hard basket? We take you through the process of installing these cams, from cabling to monitoring them on your iPhone.
Security cameras are everywhere these days. You pass them walking down the street, at the ATM, in nearly every store you walk into. But when it comes to bringing the technology into your home, the whole idea can easily end up in the too-hard basket.
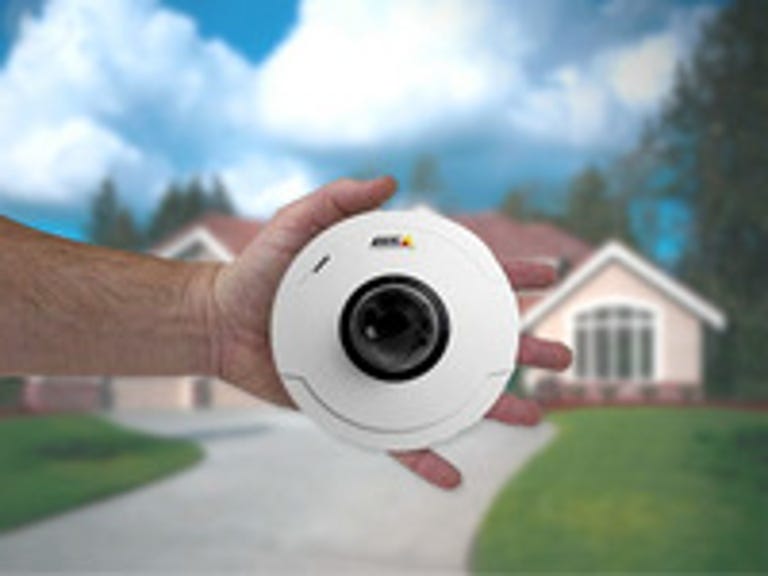
(Credit: Axis/CBSi)
No more. Thanks to a hard push downwards into the consumer market, makers of networked home-security cameras now offer more, and easier, options for watching your house while you're away. For a relatively modest outlay, you can get a basic networkable security camera with all the frills — motion detection, low-light operation — even Wi-Fi connectivity, so you don't have to run cabling around your house.
Pair it with an app on your smartphone, and you can keep tabs on your prize alpaca, look over your stash of gold bullion or make sure the ratty neighbours' kids aren't destroying your camellias again — whether you're on the beach in Thailand or elbowing your way through a Moroccan souq.
But how do you actually get it to work? Techniques for getting devices online tend to work sometimes, but fail spectacularly just as often. But once you start wanting more options, things can get more complicated; you'll need to have a good sense of how to manage IP addresses for your various devices.
While getting ready to go away for a short trip recently, we decided to set up some cameras to keep tabs on the family dog, who was going to have the backyard all to himself for the duration (no need to call the RSCPA — family were going to come by to visit, feed and pamper him). For good measure, we decided to install a camera in front of the house too. Here's how we did it.
Materials
For the purposes of this exercise, we're going to assume that you are connected to the internet using an ADSL or cable modem that also acts as a network router. Routers intelligently direct traffic between devices in your home and the big, bad internet.
If you're keen to set up your cameras in a location that's far from the router providing your fixed connection — for example, in a warehouse where broadband isn't installed — you may want to consider a wireless broadband router, like Netgear's 3G+ Mobile Broadband Wireless-N Router (MBRN3000), which takes a standard mobile-broadband dongle and sets up a wireless hotspot that routes all traffic over your mobile-broadband connection.
Setting up such a device is straightforward, and we'll assume here that whether you have a fixed or mobile-broadband connection, you have a router of some sort that is connected to the internet. Whether by Wi-Fi or using a fixed network cable, this router is going to provide the conduit to link you with your camera or cameras.
Spying anywhere
While cameras vary in terms of resolution, most have a relatively consistent baseline of functionality. They'll include some sort of zooming capability — low-resolution digital zoom on low-end units, and optical zoom on the high-end devices — as well as motion detection, a built-in memory card, the ability to broadcast audio as well as video and the ability to store video on a network-attached storage (NAS) server.
Point your camera at your NAS server to store large volumes of recordings.
High-end models may include pan-tilt-zoom (PTZ) features; complex scripting features to control how stills and video are sent to you when motion is detected; and even support for third-party plug-ins. Nearly all are now designed with web interfaces that can be accessed via the internet, and most vendors also now provide an iPhone or iPad app that lets you quickly check up on your cameras from wherever you happen to be.
One deal breaker relates to the availability of power points. If you have power points but no network ports available where you want to put your camera, consider getting a camera with built-in Wi-Fi support; such units will simply latch on to your home Wi-Fi, recording video either on a local NAS or an on-board SD card. You'll need to plug the unit in to your router for initial set-up, but once it's working, the router will be configured to automatically hone in on your Wi-Fi network whenever it's plugged in.
That offers tantalising possibilities — sit it on a window ledge across the house to watch the birds in your yard; install it outside (under shelter, of course) to see who's at your doorstep; or put it in your roof space to watch the possums snuggle up for a good day's sleep.
We tested the D-Link DCS-942L, a palm-sized Wi-Fi unit that offers a special night mode and can be unobtrusively mounted pretty much wherever you like (the middle of an eave is a pretty good choice, as it provides a great vantage point, but keeps your camera out of the weather).

No, it's not The Blair Witch Project. Night-mode cameras offer 24/7 viewing of your surrounds.
Setting it up
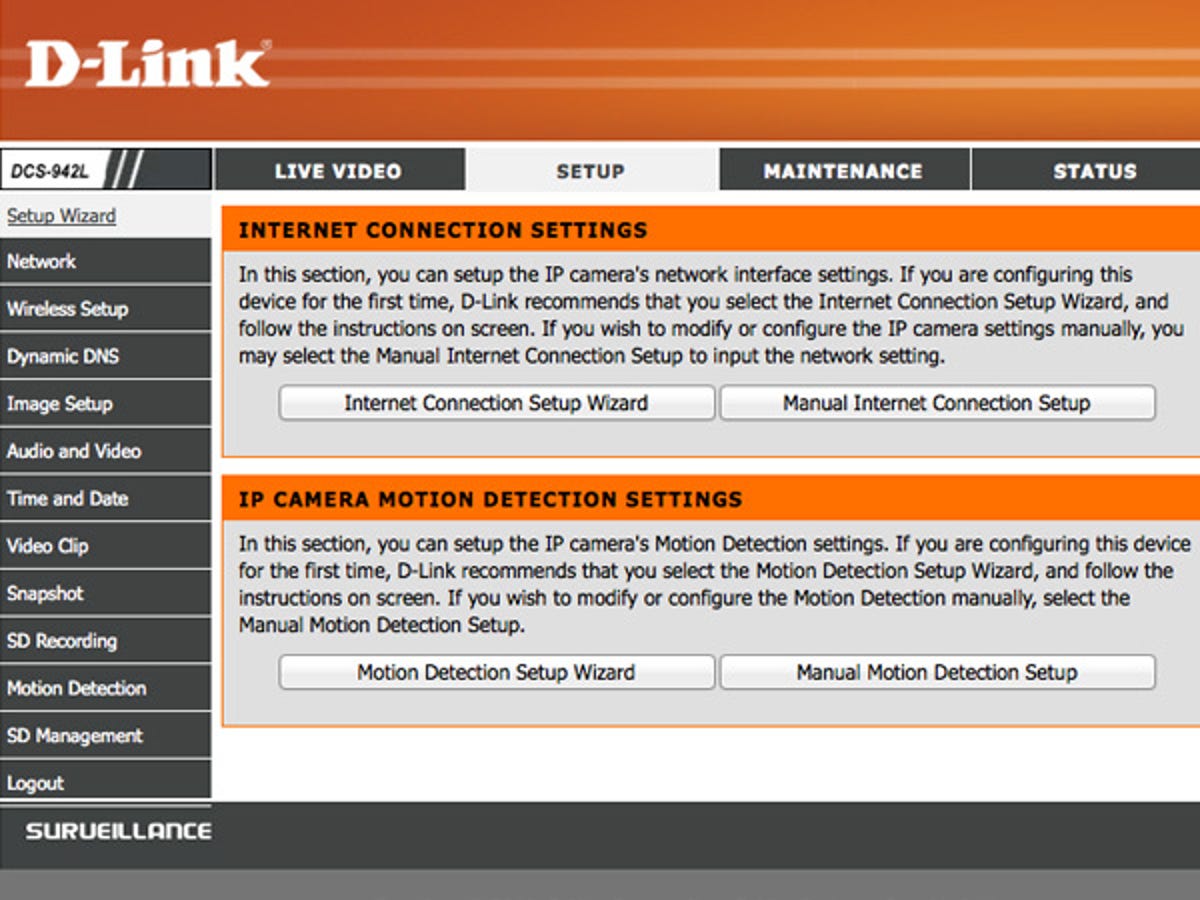
Because Wi-Fi cameras come unconfigured out of the box, you can't just plug them in and start watching. The first step is to use an Ethernet cable to connect your camera to your network, then run the set-up software to set the camera's password and — in D-Link's case — register it with the My D-Link service (www.mydlink.com), which lets you view your camera through the web or from a smartphone or tablet app (free on iPhone, AU$0.99 on iPad or Android).

To infinity and beyond! Today's user-friendly portals make the process of registering and monitoring cameras almost idiot-proof.
Once the password has been set, you can use it to log directly in to the camera over your network by entering its IP address in your web browser — for example, 192.168.0.21 (addresses starting with 192.168.0 or 192.168.1 refer to devices on your home network). Once you've set up the Wi-Fi SSID and password to use, you can unplug the Ethernet cable and move the camera to wherever you want it to be.
You won't need to physically plug the camera in to the network again unless you reset it or need to change settings, in which case you'll repeat the set-up. We had to do this several times, as the position where the camera was installed turned out to have an unreliable Wi-Fi signal that interfered with signal quality; we reconfigured the camera to use our secondary Wi-Fi SSID, which comes from a base station that's much closer.
Logging in to the camera will give you access to a range of options. In this instance, Image Setup let us adjust the brightness, contrast and white balance; switch to black-and-white mode; and mirror or flip the image to compensate if the unit has been hung upside-down from the ceiling.
Web interfaces make it easy to set up your camera's options.
We have contact!
Among the many settings you'll need to consider is what happens when the camera detects motion. You can have the camera record video continuously, or only when it detects something moving (or, in some cases, when it hears sound). Many cameras can automatically email you a picture, a series of pictures or a video clip when motion is detected; you'll need your email server credentials to make this work.
But what happens if your camera is pointed at a tree that moves every time the wind blows? Surely, you don't need a thousand pictures of the trees in ever so slightly different positions. To avoid this, modern cameras have a motion-detection setting that lets you draw a grid over the parts of the image that you want to register as motion.
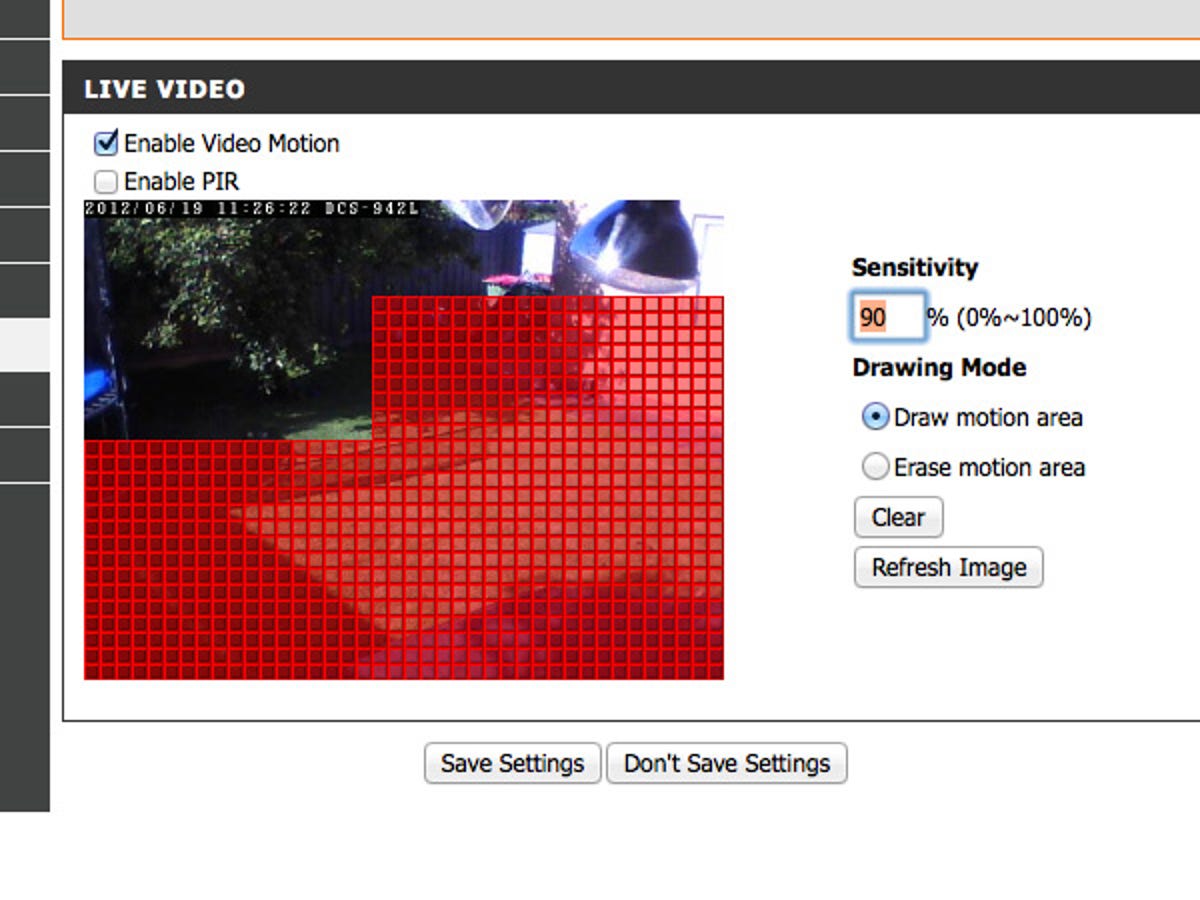
To avoid false positives, use motion-detection configuration to choose only the areas you're interested in monitoring.
Make sure this relates to the area you're watching — your precious sleeping infant, Monaro GT or garden gnomes — and you'll only be alerted if something happens to or around them. This could be invaluable for monitoring the swimming pool, for example; set up the right alerts, and the camera can instantly alert you if one of the children has snuck through the gate and is moving around the pool's edge.
Wi-Fi cameras are a great way to easily keep tabs on parts of your house, and today's models are relatively inexpensive. They're also extremely convenient if you need to move the camera to different parts of the house at different times — just unplug the camera, set it up somewhere else, plug it back in and you're good to go.
One caveat: since Wi-Fi cameras need a power point to plug in to, you'll be limited by proximity to a power point if you're planning on putting your security monitor somewhere that power is in short supply — for example, in the garage or by the pool. Depending on the layout of your house, and the position of your Wi-Fi router, you may also run into connectivity issues if the Wi-Fi signal is being attenuated because of brick walls or excessive amounts of steel in the construction.

Wi-Fi cameras are extremely flexible, but you'll be tethered to a power point — so choose one in a good location that is, if outside, sheltered from the rain.
The wired camera
Wi-Fi cameras generally have one other major problem: they can be disabled simply by being unplugged. If you want to use a Wi-Fi camera for serious surveillance, you'll want to encase the power cord in PVC piping, and put the mains converter somewhere locked.
The desire to have a more professional, polished installation drives many home owners to invest in wired security cameras. These have the advantage of being a more permanent fixture of the house, and are a must-have in situations where you are actually worried about security, rather than just watching with a webcam. They're also mandatory if your home radio-frequency environment is not conducive to good Wi-Fi coverage, or if power points are few and far between in the areas you want to cover.
It may sound like something best done at your local bank — or, at the very least, by your local electrician — but if you're even moderately handy with gadgets, and not afraid to get your hands a bit dirty, you can get a wired installation working with relative ease.
We tested out an Axis Communications M5014 camera, which has a motor-driven mounting underneath a plastic dome. This kind of camera — known as a pan-tilt-zoom (PTZ) camera — provides an added measure of flexibility compared with fixed units, since you can interact directly with the camera to look around the area where it's installed.

Axis-M5014 PTZ cameras let you pan, tilt and zoom to your heart's content.
Such cameras require both data cabling and power, which can get messy and raise the same mains-access issues as Wi-Fi-only cameras. Thankfully, many units support power over Ethernet (PoE), a worldwide standard that's able to power a range of equipment using normal network cabling. In other words, you can set up a camera using just one wire.
We did just that, using a Netgear FS108P ProSafe 8 Port 10/100Mbps switch, which offers four ports supporting PoE. This switch was connected to our existing home-network switch using standard Category 6 Ethernet cable, although we could also have replaced the existing switch with the new unit.
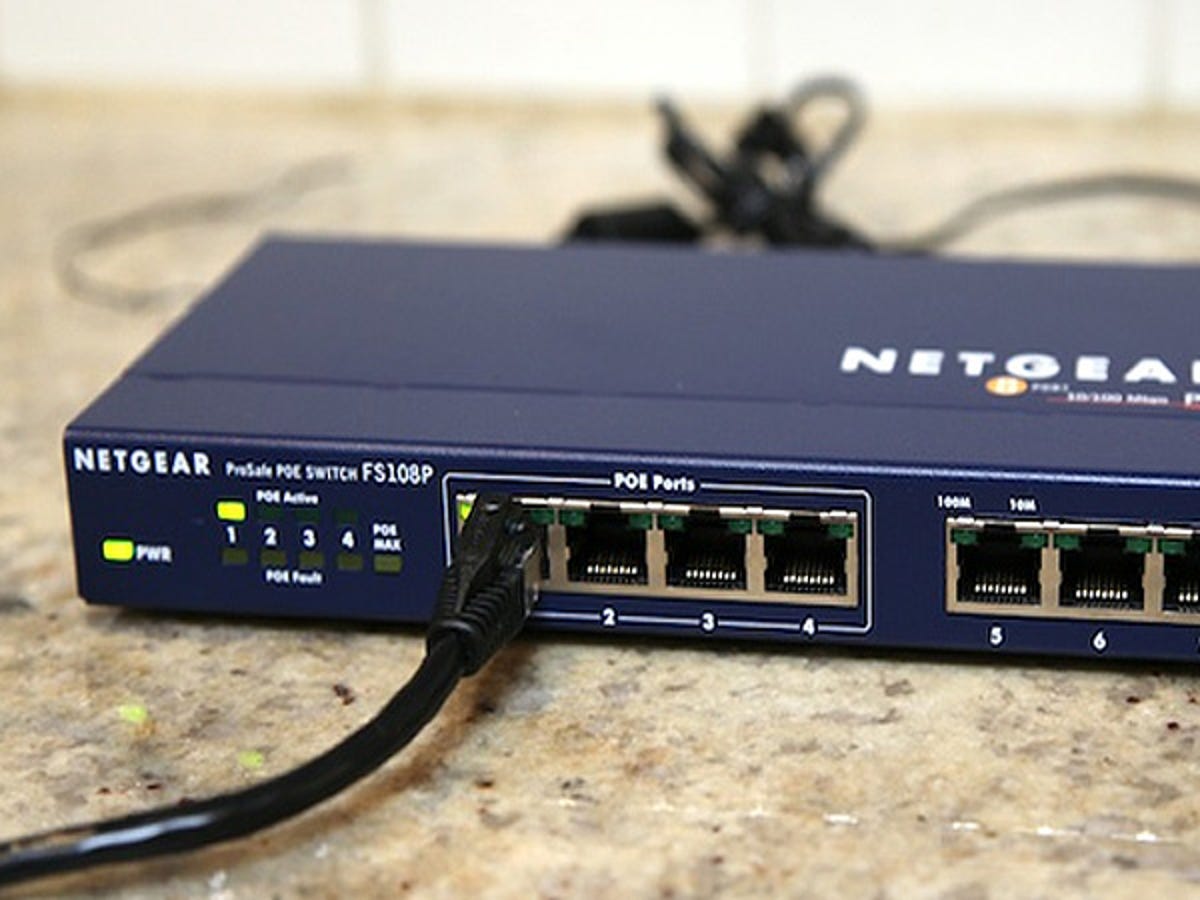
PoE standards not only carry data to and from your camera, but also provide the power they need to run.
Either way, the key to installing a cabled unit is to get enough Category 5 or 6 cable to reach from your home-networking switch to the place where you want to install your camera. If you're using the camera for outside surveillance, this will generally mean drilling a hole in the eaves, then running your cable through the roof space and dropping it down through the hole you drilled.
Depending on the configuration of your home, it may be possible to get premade Ethernet cables long enough to reach between the two key points. If not, buy a box of cabling from your local electrical wholesalers, and get out your crimping tool to terminate the cables with RJ-45 plugs (we've described this process in detail in an earlier article).
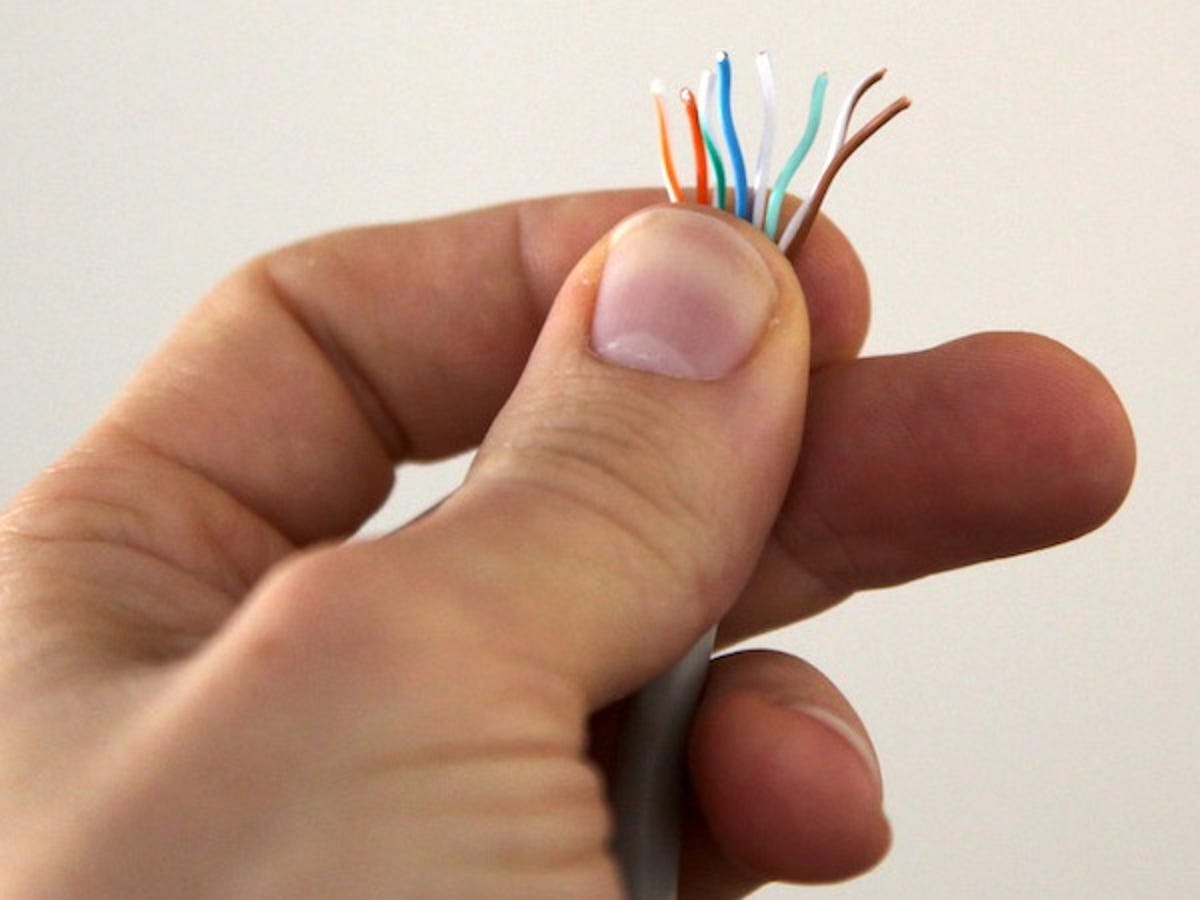
Gentlemen, start your crimpers: long runs of Cat 5 will require RJ-45 cable terminations.
We took this approach with the M5014, pulling the cable through the roof and screwing the camera's mounting bracket around an existing hole in our eaves. The camera includes about a metre of cable with a female RJ-45 jack on the end, so we plugged in the network cable and pushed the whole lot through the hole into the roof space, then screwed the mounting bracket into the eave and clipped the camera in to the bracket clips.
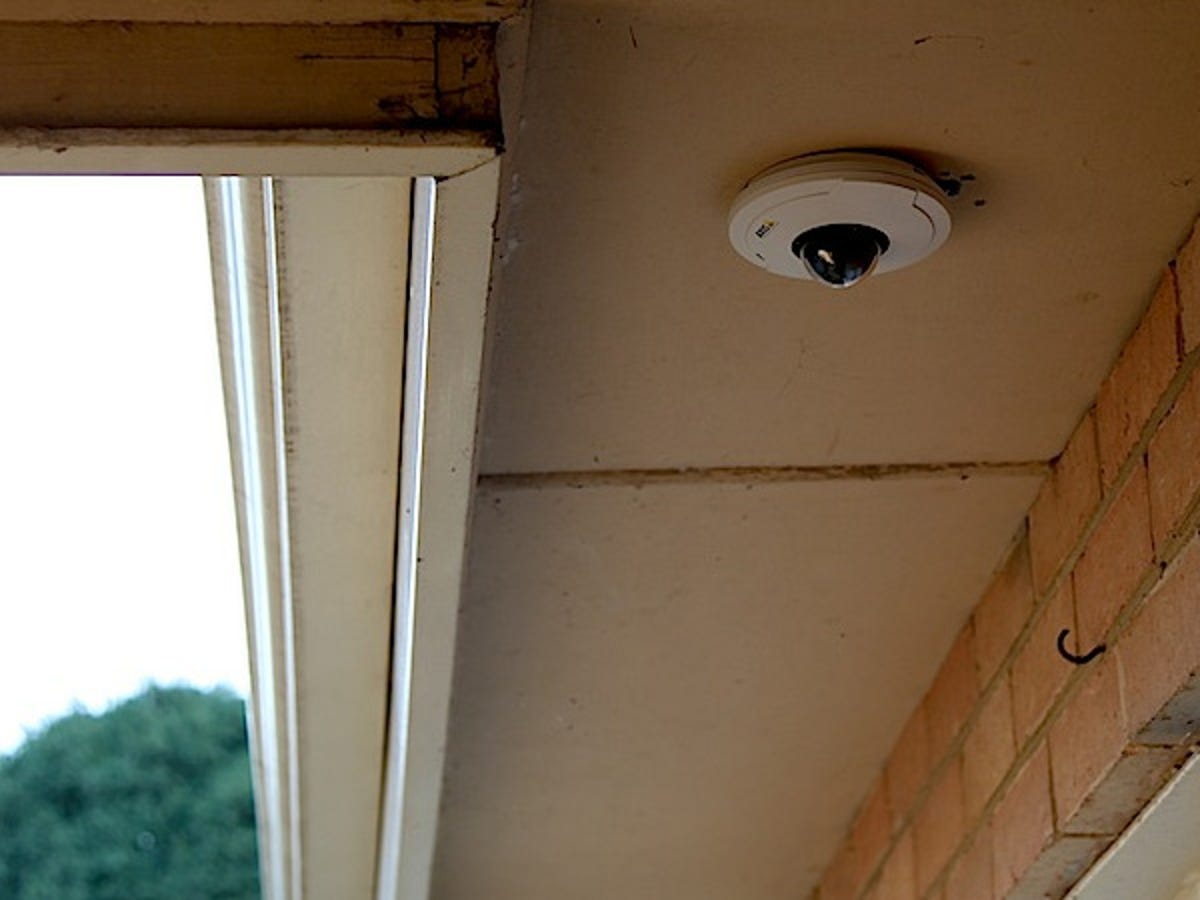
Just like a trip to the casino; just make sure it stays dry! Here, the PoE-connected cable comes from the roof space to the camera through a hole in the eaves.
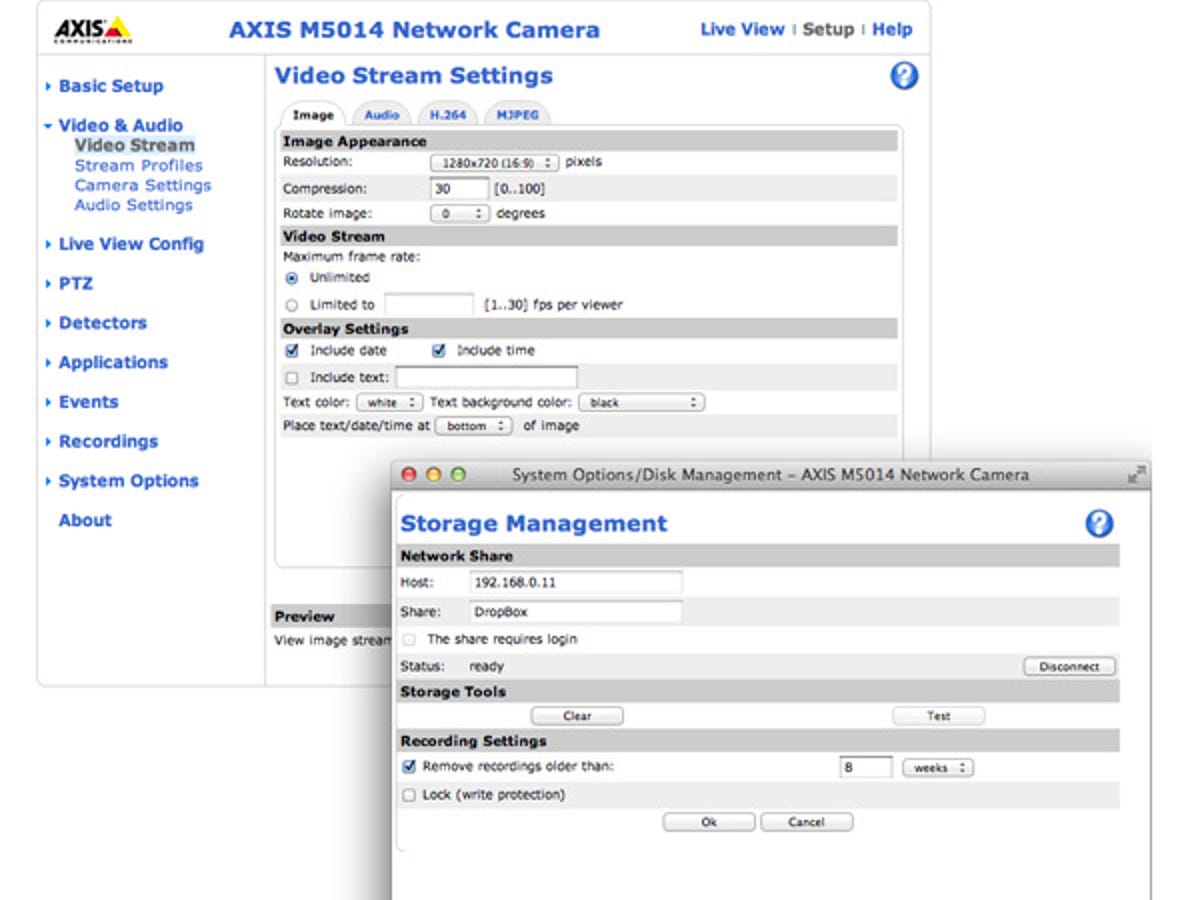
Once everything was connected, we were able to view the camera's output by typing its web address, 192.168.0.12, into our web browser. This brought up the camera view with PTZ sliders around the image, and options to change the quality of the video stream to a number of profiles.
Profiles are important when you're setting up a camera, since the bandwidth available on your local network is much different than that available to your smartphone. Both of the cameras mentioned here let you set up multiple profiles with different names to suit different purposes: the M5014, for example, comes with Quality, Balanced, Bandwidth and Mobile settings, and lets you make your own by specifying resolution, frame rate, video codec and more.

Choose and configure a variety of video settings to suit your bandwidth requirements.
Your needs will probably be met with the default settings, but feel free to change them if you have particular requirements. For example, you might want to slow down the frame rate, but retain the highest possible resolution so as to minimise the consumption of disk space while recording.
The interface also includes an option to adjust camera settings like brightness, sharpness and contrast, with features like backlight compensation designed to lighten up features that are underexposed because of harsh background sunlight.
Because it has PTZ options, the M5014 has extra settings compared to the DCS-942L. These include the ability to set and name preset positions so you can quickly jump between key locations, and to set OSDI (Onscreen Directional Indicators) zones that show labels in camera views.
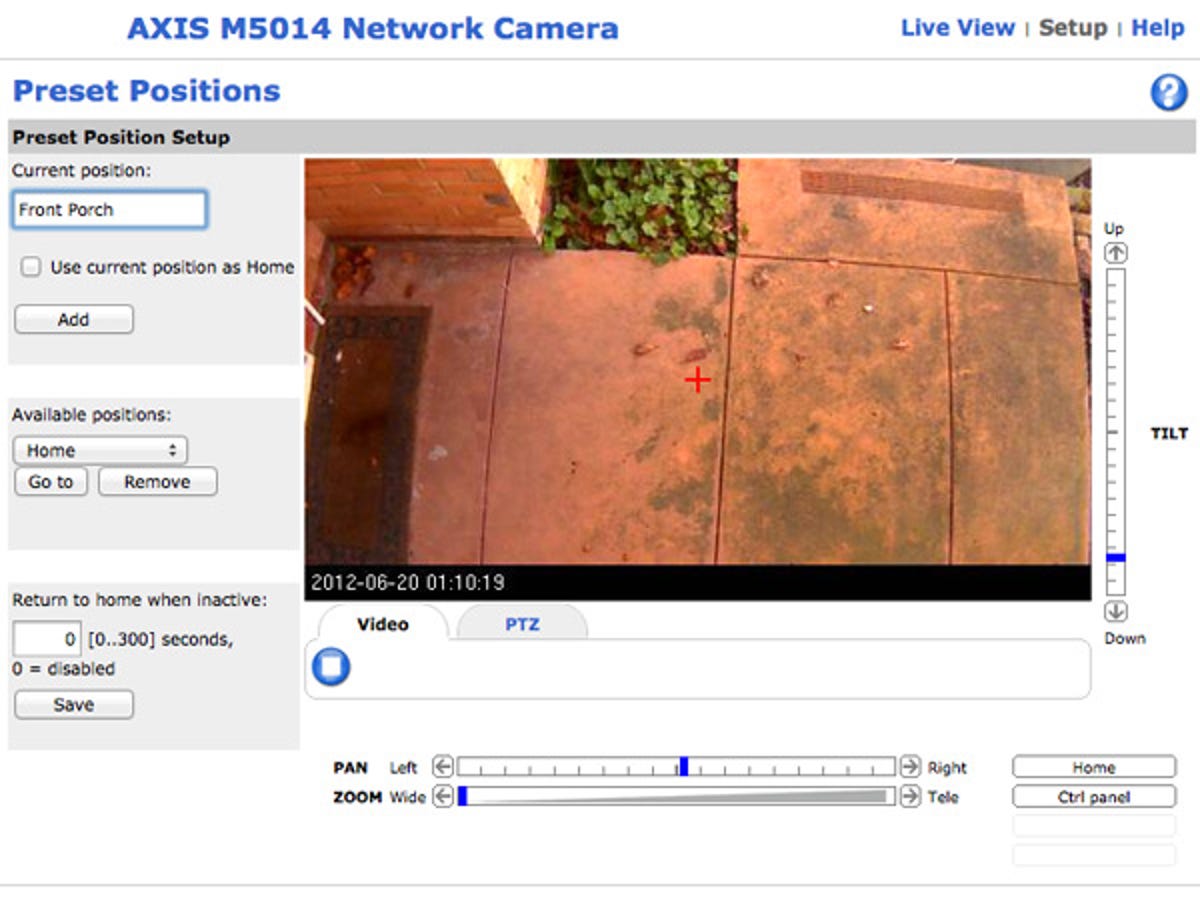
Use presets to easily point your PTZ camera to specific spots.
It's possible to add extra applications, and to set a broad range of event conditions that will, for example, email you when motion is detected, or when a sound above a particular threshold is detected.

The camera will show you the ambient sound level; set your threshold above that, and it will trigger an alarm whenever it's exceeded.
A common alert action is to email you a snapshot from the camera when motion is detected. This can be useful for all sorts of reasons, but you'll want to tweak the sensitivity, because nobody needs their inbox flooded with pictures of the flowers waving.
I like to watch
Getting your cameras recording content is one thing, but the one that will get you the biggest nods at that dinner party is to be able to log in to your camera from wherever you are, and get current surveillance footage from your smartphone. Your friends might think they have cute puppy pictures to show, but what will they say when you can show them live video of your dog tearing through the rubbish bag? On second thought...
Viewing your camera online used to require the use of Dynamic DNS (DDNS), a type of service that automatically maintains a connection with your home-network router, so that you can find your network on the internet. The leading service, DynDNS.org, ran a free service that has been built in to many routers — but was recently turned into a commercial service.
No problem: since web-enabled cameras are a core market for DDNS, some camera makers have stepped in to fill the void. D-Link, for one, operates a free service at www.dlinkddns.com, while Axis offers its own Axis Internet Dynamic DNS Service, which can be configured through the camera's TCP/IP Settings menu. Set up one of these services, and you can log on to your camera using a plain-text URL like puppyvoyeurs.dlinkddns.com.
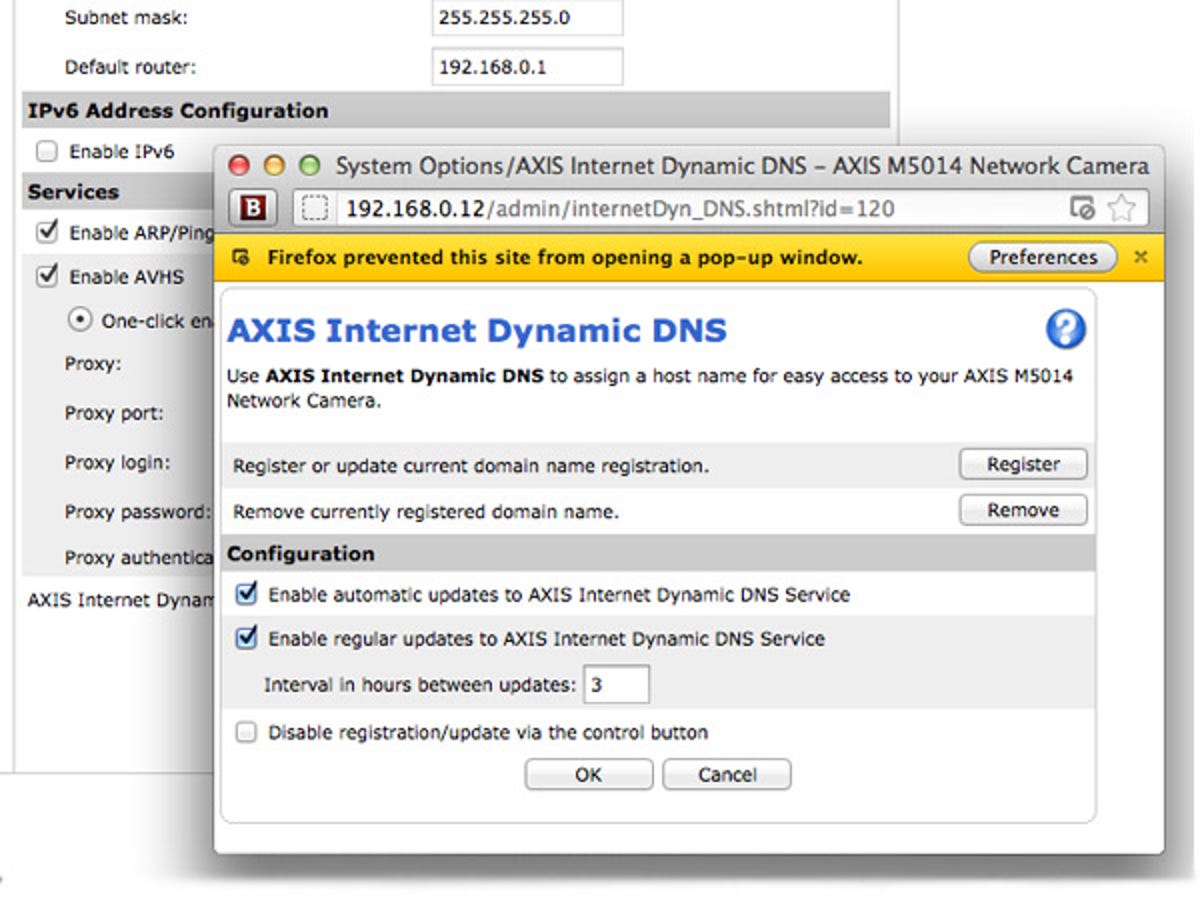
Camera makers offer Dynamic DNS services to help you find your camera from the net or mobile devices.
Once DDNS is set up, your camera will regularly check in with the domain host, which will update its record of the camera's IP address; this keeps them in touch, no matter how often your home IP address changes.
Note that these services operate outside the confines of prettied-up web services like mydlink.com, which performs a similar function, but hides it from view behind the web interface we showed earlier.
Whether you use a DDNS service or a web interface, you'll be able to log in to your camera on your network using your IP address, or via the web using the DDNS sub-domain you registered. If you want a better way to view your cameras on your smartphone or tablet, you can take these credentials to the appropriate app, and it will use the same services to find your camera.
This may all sound like a lot of trouble just to keep an eye on your new cavoodle, but you may be surprised at how useful it can be to have an eye on your house that follows you wherever you are. Once you have the camera in place, the way you use it is only limited by your imagination.