 Why You Can Trust CNET
 DIY Compost Bin Step-by-Step: Build a Worm Farm to Reduce Waste, Create Fertile Soil
This (surprisingly) not-gross project gives you a steady supply of plant food.


- Master's degree in environmental journalism
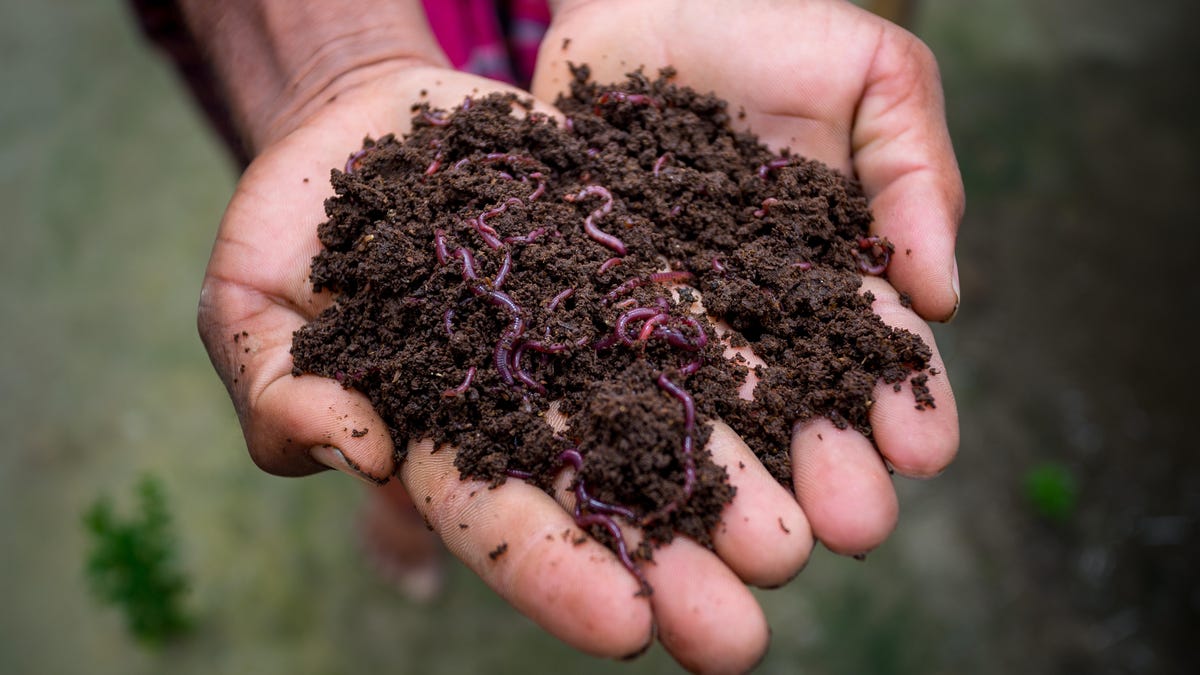
Worm composting can generate great fertilizer for your garden and house plants.
Did the pandemic or rising grocery prices spark a new interest in growing your own food? Are you looking to reduce your food waste? Do you want to grow bigger, more beautiful houseplants? Believe it or not, you can support all these hobbies with one small, low maintenance addition to your home life.
Worms.
While worms seem firmly like outside creatures, building a worm farm can give you an outlet for some of your food scraps while also generating some rich, versatile and free fertilizer for your houseplants or garden. It's not a stinking, rotting mess either. I have a DIY compost bin full of worms under the desk I'm writing at right now.
Read on for the rundown on worm composter construction, common problems and how to address them and what to do with all the fertilizer your worms will leave behind. You can also check out how to grow vegetables without a backyard, and the cheapest fruits and veggies you can buy right now.
Read more: Best Indoor Smart Gardens
Reasons to build a worm farm
In 2018, Americans sent 35.3 million tons of wasted food to landfills. When it gets there, it breaks down and releases methane gas, benefiting no one and warming the planet. Feeding your personal waste to worms instead is, technically, a way to address that problem. While diverting 50 pounds of food scraps to a worm farm isn't really changing the game, it's definitely a more sustainable choice.
In addition to living a bit greener, your worm composting bin will deliver you nutrient-rich, perfectly crumbly fertilizing soil. As the worms eat your cast-off apple cores and banana peels, they create (well, poop out) an excellent fertilizer called worm castings that you can use in your garden. You can also create a liquid fertilizer, delightfully called worm tea, by soaking worm castings in water. Worm tea can give a boost to house plants or a garden. You can buy a gallon for around $30, or you can have if for free from your very own worms.
Building a worm composting bin
At its most basic, a bin for worm composting (also known as vermicomposting) is a container that keeps worms in while letting moisture out and fresh air in. These essentials can be remixed in whatever way works with whatever materials you can find or have on hand. That means DIY vermicomposters can look very different. I'll describe the process I used, which draws heavily from the Environmental Protection Agency's online plans.
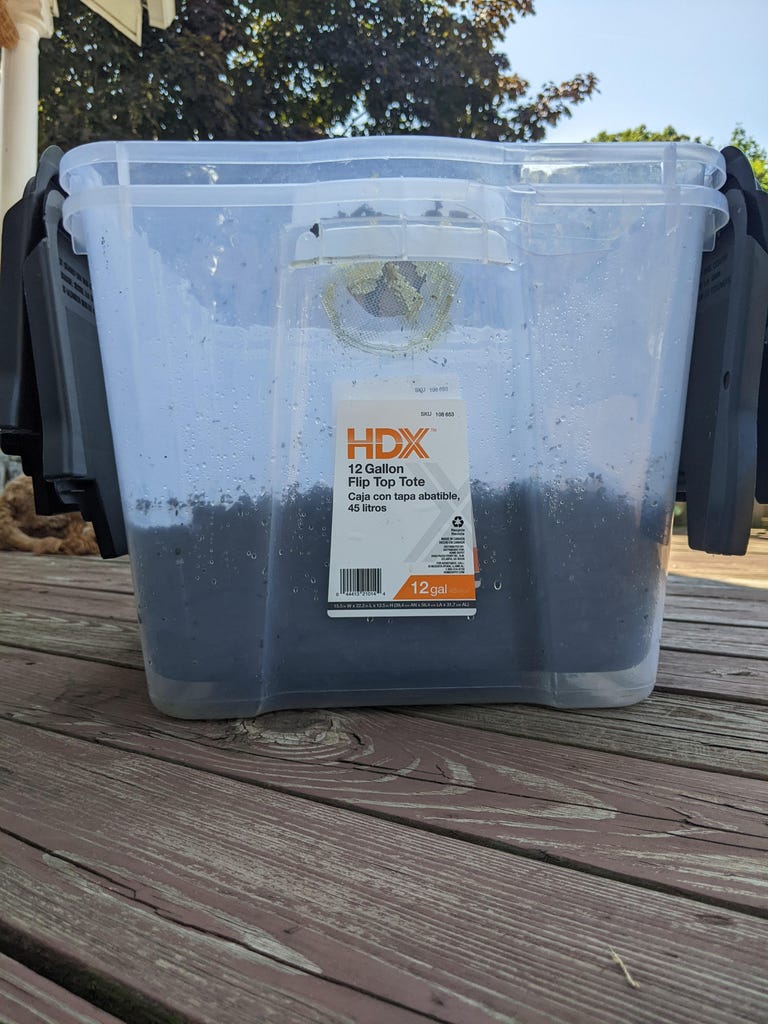
A simple worm farm consists of one tub full of dirt, worms and vegetable scraps draining into another.
Gather your composting materials and tools
Most importantly, you'll need two containers, one of which will nest inside the other. While one can be a bit porous (or will need to be made that way later), the other should be watertight. (I bought two 12 gallon plastic storage bins to make mine.) A lid for the interior bin will keep flies from getting in. Screen door patches and superglue will keep your worms in and bugs out. Make sure that you choose waterproof glue that will bond with your interior bin.
To get the composting started, you'll need some shredded paper and dirt. For paper, opt for something like old, non-glossy newspaper that doesn't use a lot of colored ink. You'll need more of this throughout the life of your bin. Any old dirt will do.
Last, and certainly not least, you'll need some worms. The EPA recommends red wrigglers, which are available online or from a local composting company, usually in half-pound amounts. You might be able to get some from a neighbor's worm farm, too. Just be sure that you're not using an invasive species like the Asian jumping worm, which is sold under a few different names.
Add drainage and ventilation
Worms need fresh air and a home that's not underwater. For the fresh air, drill two holes near the top of the interior bin. They can be any size -- shoot for somewhere between a dime and a nickel. Glue screen patches over the ventilation holes.
Drill four smaller holes in the bottom of your interior bin and glue patches over those too. Make sure you don't accidentally cover these holes with glue.
Prepare the bin for worms
Add a mixture of shredded paper and dirt to the interior bin. Add enough water to make it damp. Release your worms into their new home and let them settle in for a day before feeding them.
Feed the worms
Using a garden trowel, dig a shallow trench. Pour in the food scraps you've collected over the week. Cover them with shredded paper and dirt. Getting all the food covered is essential to avoiding fruit flies. To start, you may need to add more dirt to your bin, but in a few weeks the worms will have turned enough food into dirt that you can just pull dirt from one side of the bin to the other.
Feed your worms vegetable scraps once a week. The amount they eat will vary some, but start with one pound of food for every pound of worms. See how much they eat and adjust accordingly. If they refuse to eat something, just remove it and try something else. The longer your worm farm is around, the more worms you'll have and the more you'll be able to fee them.
You may be able to release some into a garden to improve the soil there, give some to a friend or start a second compost bin.
Common worm farm problems
Worm farming doesn't require a lot of management, but you can run into some problems: too much or not enough moisture, gnats and flies and more. The good news is that your can bring your worm bin back, even from seeming disaster.
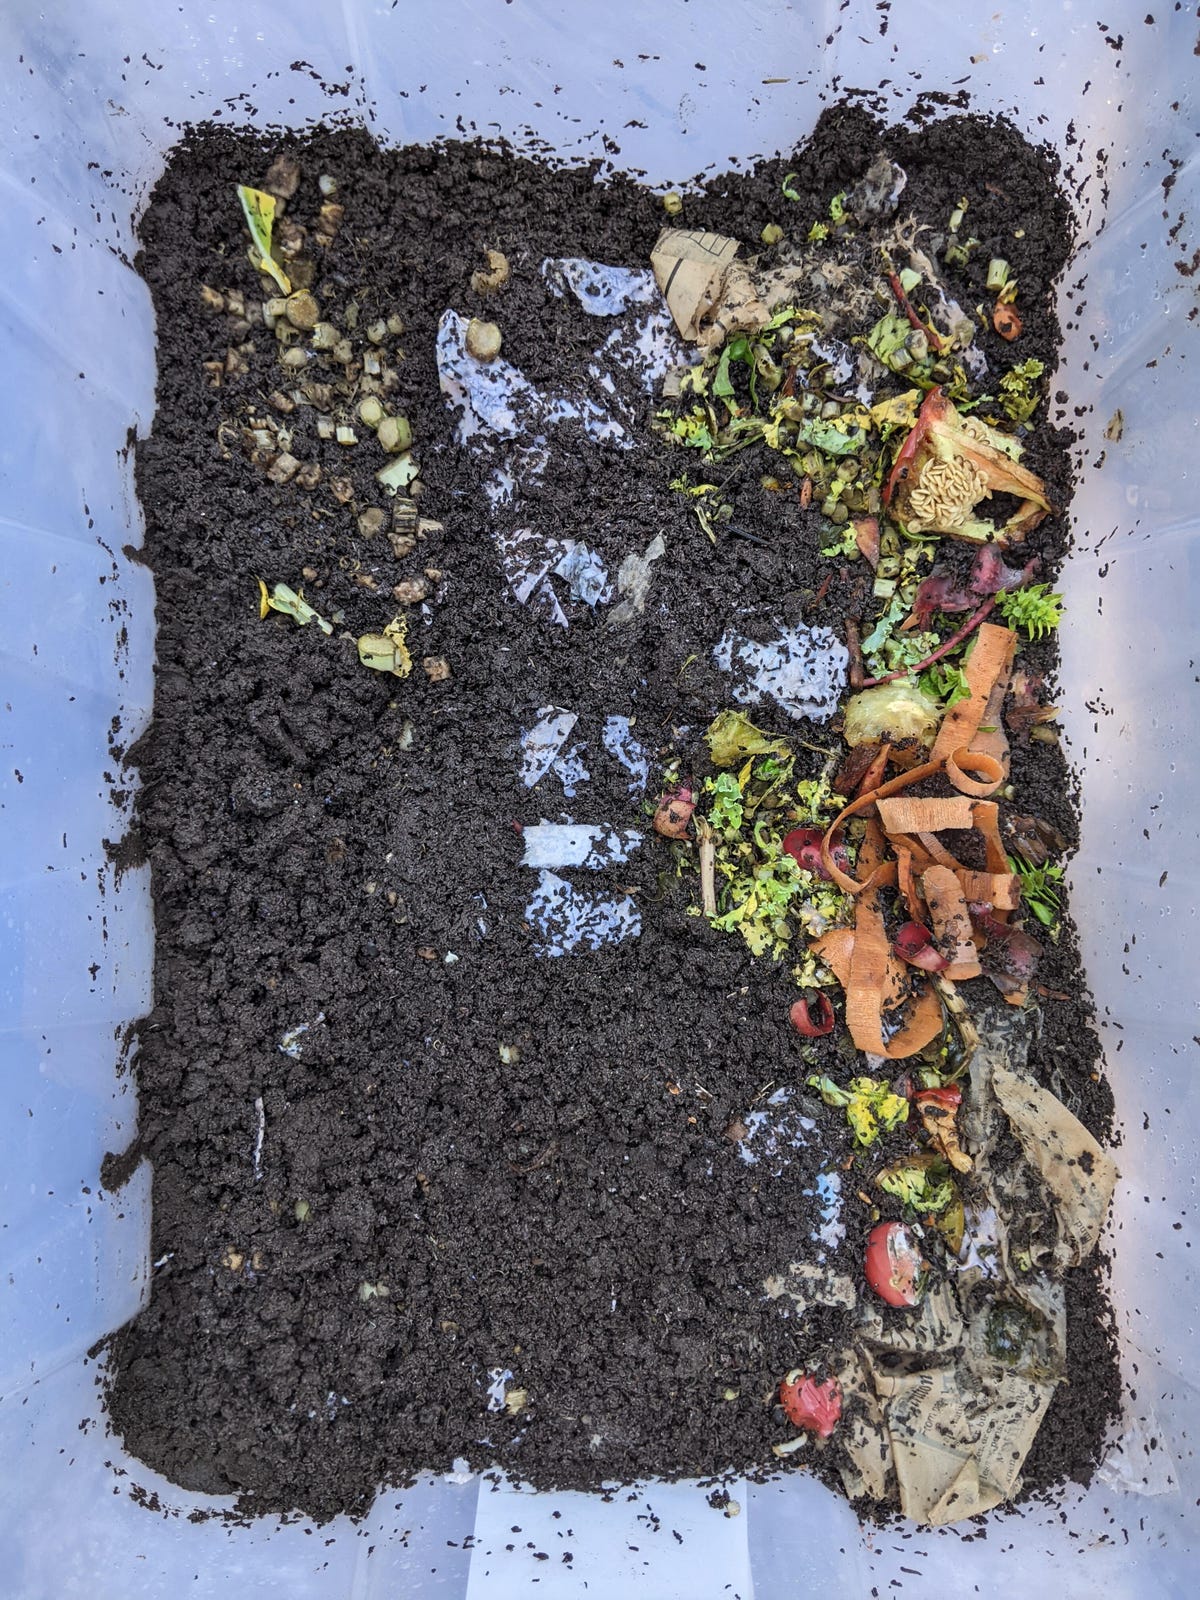
Vegetable scraps, paper and worms are the key ingredients in a worm composter. Covering these scraps with dirt or newspaper will keep fruit flies away.
Worm farm moisture problems
If your worm farm is too dry, use a spray bottle to spritz a little water over the top layer of soil when you feed them. If you find yourself with the opposite (and more likely) problem of too much moisture, make sure that you're adding shredded paper when you feed and that your drainage holes aren't plugged.
When I made my bin, I accidentally glued the drainage holes shut and didn't notice until the bin had filled with water and started to smell. After removing the screens and super glue to unplug the holes, I let the bin drain outside in the open air for a few days. When it had reached a damp-not-dry level of moisture again, I brought it back inside.
I didn't replace the screens over the drainage holes. I've lost a couple of worms that way, but they end up in the garden when I dump any moisture that drains out. I do monitor how many worms are dropping out of the farm, though.
How to get rid of fruit flies
It's not all that hard to avoid fruit flies. Just make sure everything you feed your worms is fully covered with soil and paper. Fruit flies won't congregate around buried food.
If your bin starts to attract flies, work to eliminate their access to the compost. A single sheet of newspaper laid over the compost works well. You'll have add more paper as each sheet gets damp and decomposes.
After you've got your worm farm up and running, up your gardening game by implementing some smart devices, growing plants indoors or finding the compost bin that brings the whole counter top together.