Adjust Google Play to require a password for every purchase
Update your password requirement on Google Play to discontinue the 30-minute grace period for purchases.


By default, the Google Play store requires a password every 30 minutes for purchases. Unfortunately, this may be too much time if you are handing your device off to your kids, or you just want more security if your device becomes misplaced.
As a solution, you can set up Google Play to require a password for every purchase, which makes sure that anything you buy is done so with your consent. Let's get started:
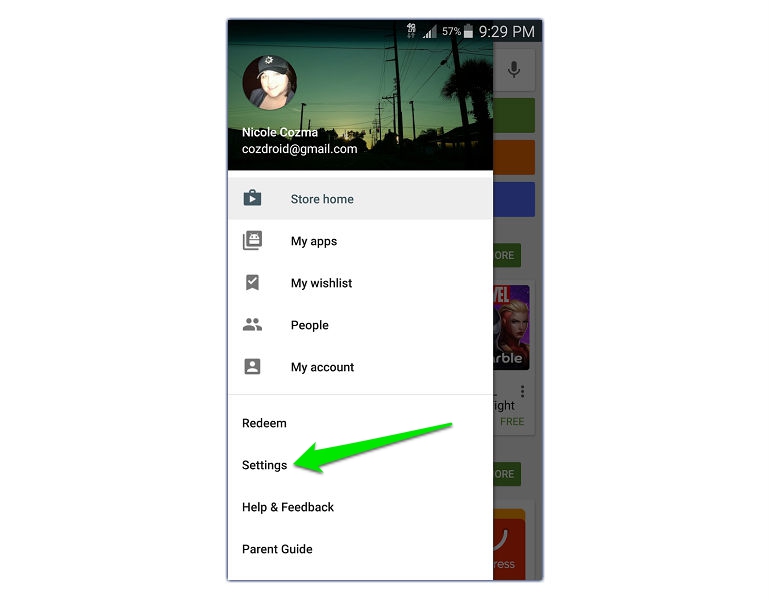

Play store menu.
Step 1: Open the Play store, tap on the left-hand slide out menu, and then choose Settings.

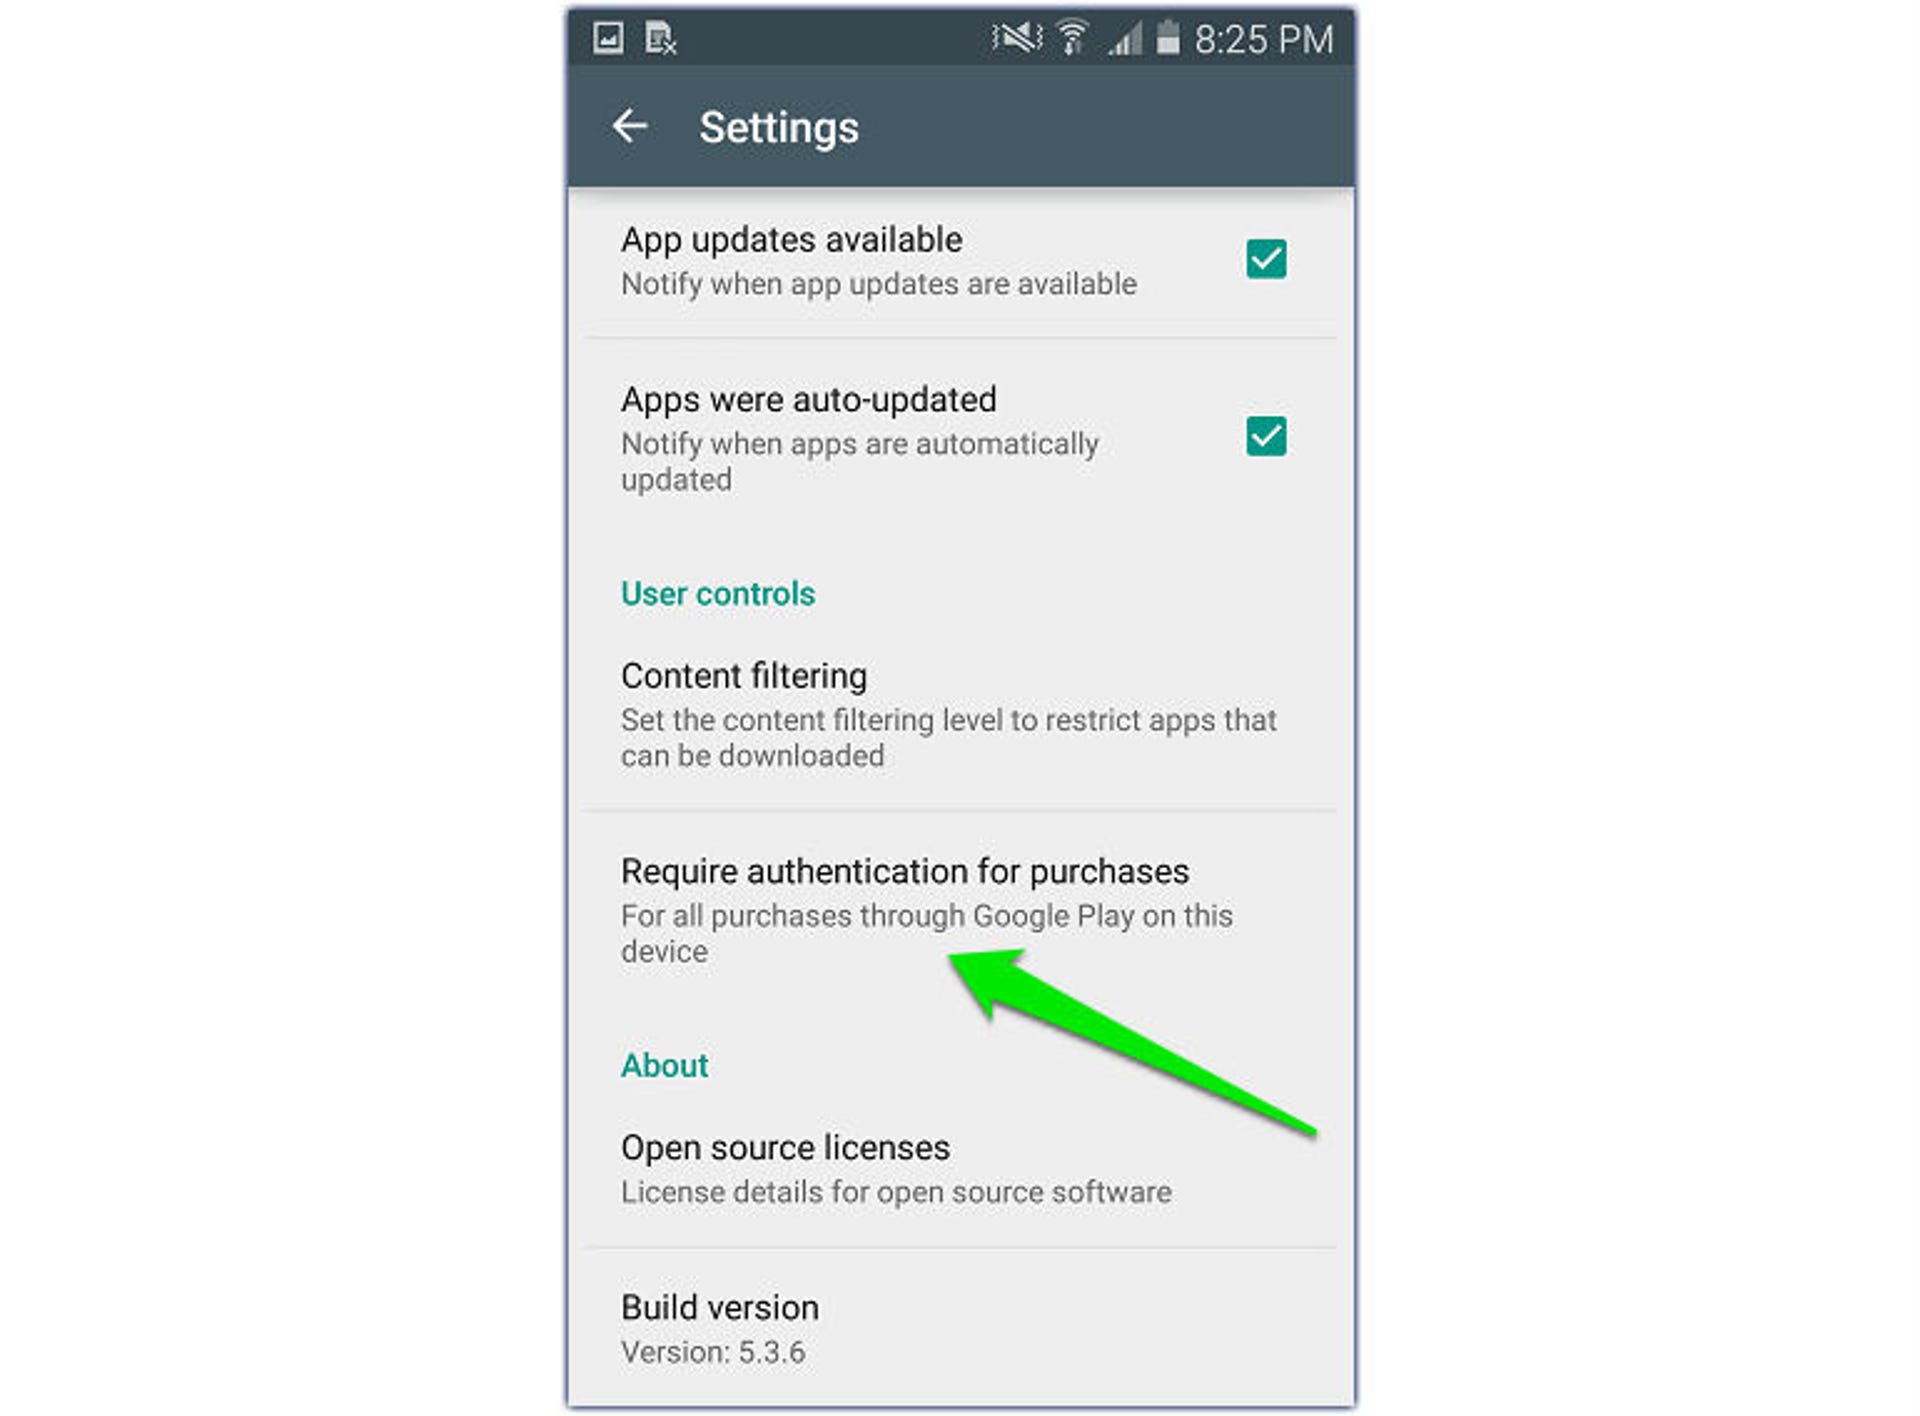
Play store settings.
Step 2: Look for Require password for purchases and tap on it. You'll be asked to input your password.
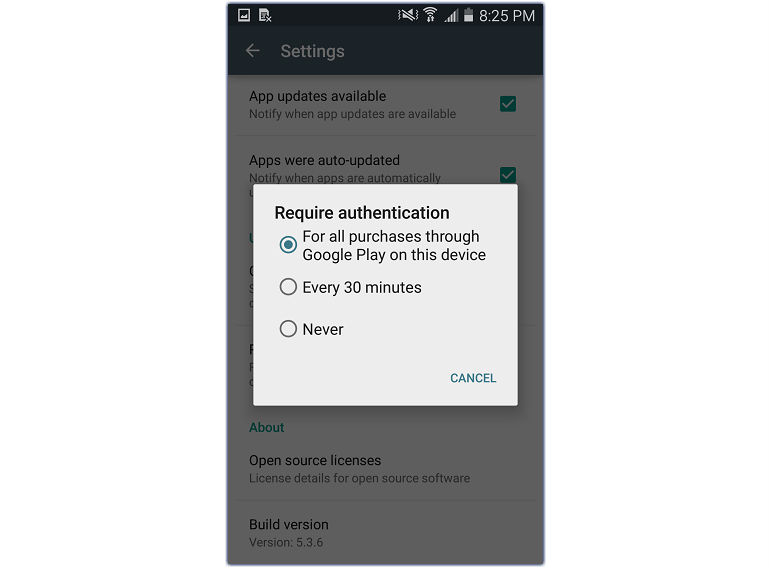

Google Play password settings.
Step 3: Choose the password input frequency that best suits your needs. Recommend setting: "For all purchases through Google Play on this device."
In addition to using this on your own device, it's also a great setup for devices that are used primarily by your children (with one of your Google accounts). You have the option to add a gift card to the account so that any purchases will be made with that balance, but what about content you deem inappropriate for your kids? Setting the Play store to require a password for each purchase will let you become the final decision maker as to whether or not they can use a specific app, or upgrade content inside an app.
(Thanks to AndroidCentral for the important reminder about this setting.)
Editors' note, April 17, 2015: This How To post was originally published on July 31, 2014, and has been updated to include new information.