Access hidden iPhone features without jailbreaking
We uncover the secret and easy way to add panoramic photos and Android-style autocorrect to the iPhone without touching a jailbreak tool.


Clever homebrew hackers have unearthed a couple of hidden iPhone features which were never switched on by Apple.
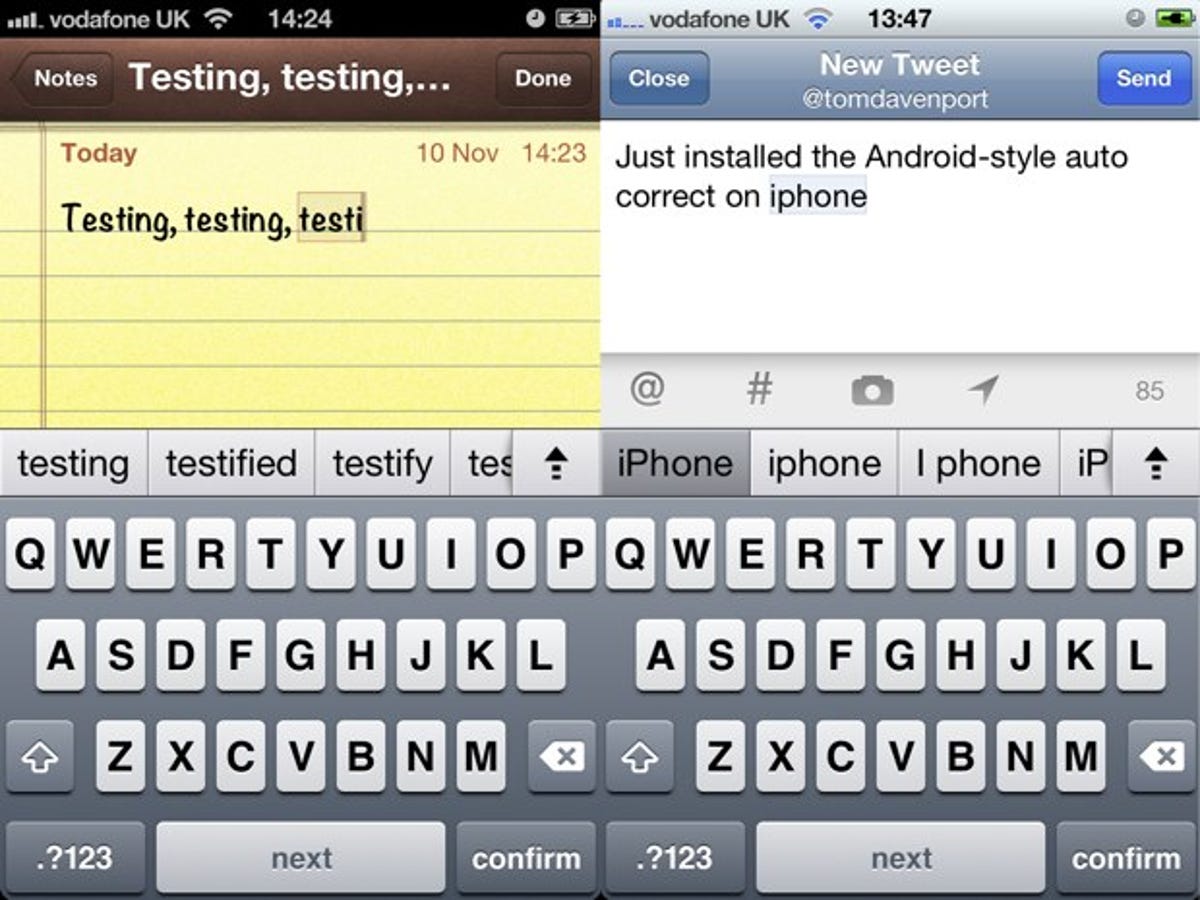
One is an Android-style autocorrect bar which displays word suggestions above the keyboard, and the other turns your iPhone into a sweeping panoramic camera.
Best of all, you needn't go near any risky jailbreak tools to reveal these features. Hit play on the video above or read on and our guide will show you how, but bear in mind Apple left them out for a reason.
The panoramic camera is worth trying, but doesn't quite match the flawless experience seen elsewhere on iOS, and the new autocorrect might interrupt your well-honed typing speed. Of course, you can always switch them off if you change your mind.
Back up your iPhone
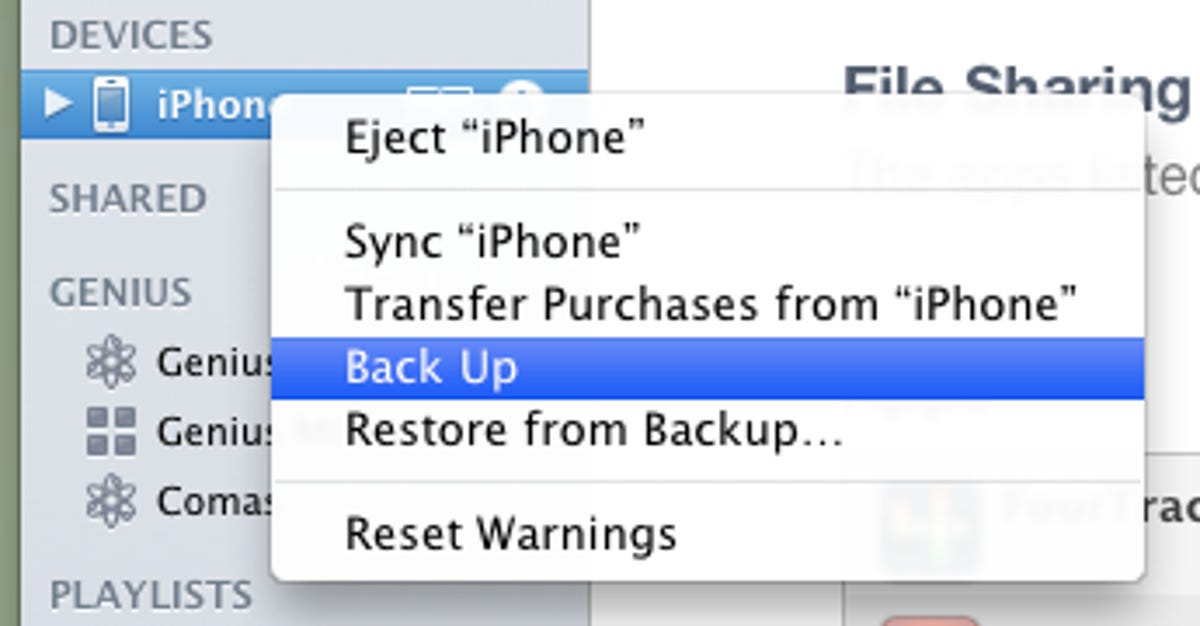
Connect your iPhone to your computer and sync in iTunes as usual, then get a fresh backup by right clicking 'iPhone' on the left.
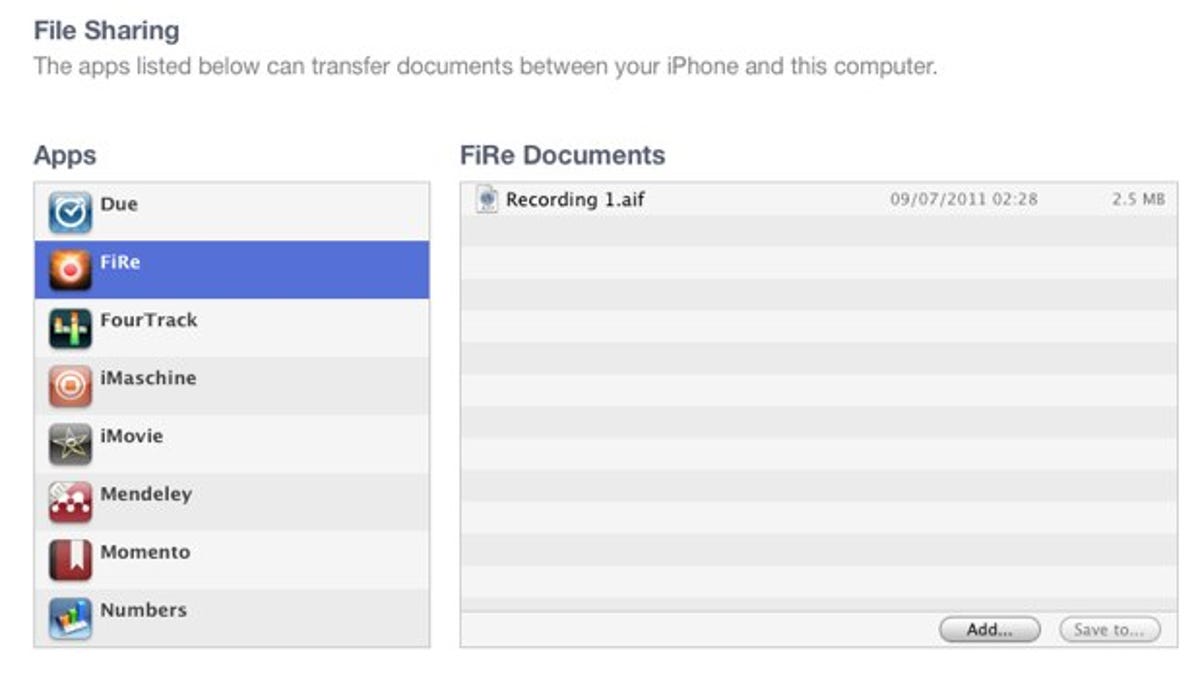
If you want to be extra safe, back up app-specific data by clicking on the Apps tab near the top of iTunes and saving to your mac with the File Sharing tool:

Next, download, install and open the iBackupBot software (there's a free trial version). Ignore the download tab at the top, you need to scroll down the page for the right link.
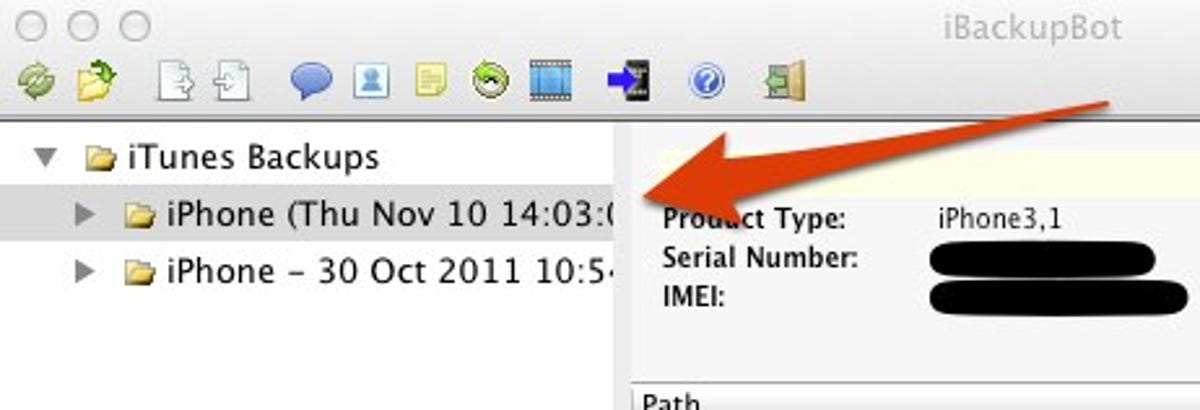
Find your new iPhone backup on the left of iBackupBot, and check the date and time on the file to be sure you're going to work on the right one.
It's up to you which of the two features to unlock before restoring your iPhone:
Android-style autocorrect
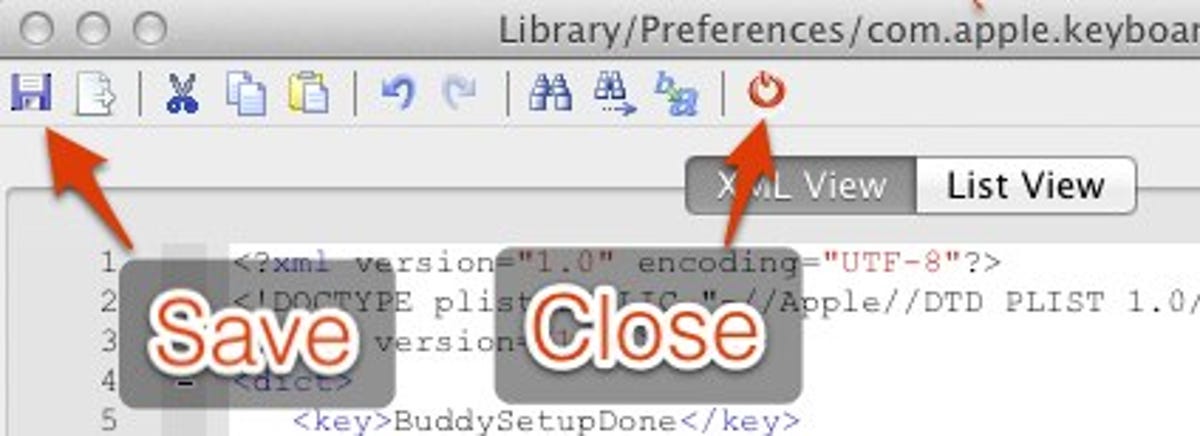
Having clicked on the correct backup in iBackupBot, find the following filename in the main list: Library/Preferences/com.apple.keyboard.plist. If you can't find it, click the Path header near the top to arrange the files alphabetically. Double click on the file.
Copy the following code, then add it to its own line before </dict> near the end:
<key>
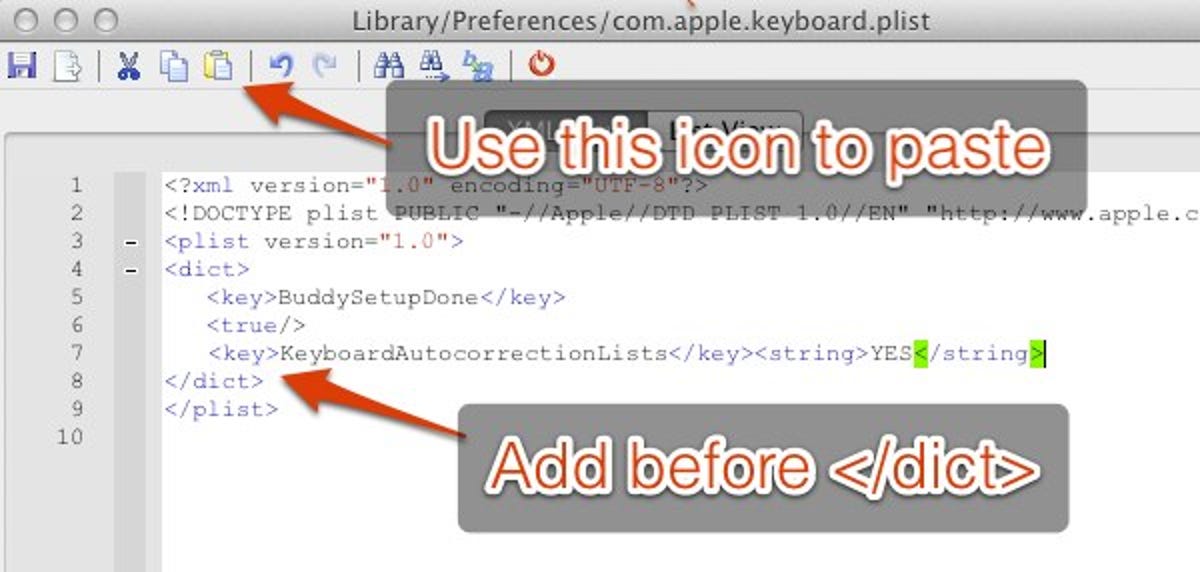
Click the save icon, then the red close icon.
Panoramic camera
Follow the same instructions as above, but now you need this file: Find Library/Preferences/com.apple.mobileslideshow.plist
And to paste this code before </dict>:
<key>EnableFirebreak</key><Save and close, then restore from the main window with this little iPhone icon:
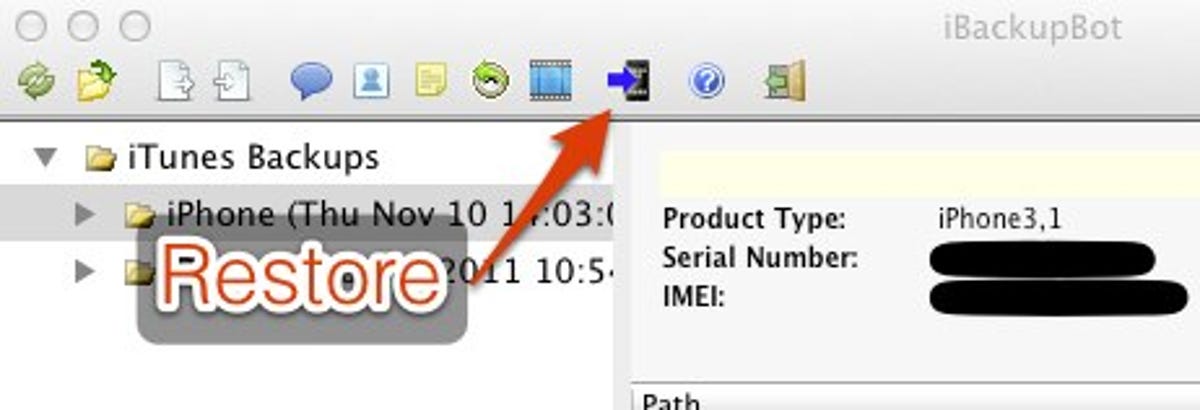
That's it!
If you want to remove the hacks, just repeat the same steps and delete those lines of code you added.
How do you use the new features?
The panoramic camera is available in the camera app under Options. Starting from the left of your scene with your arm fully stretched, slowly draw the iPhone across to the right.
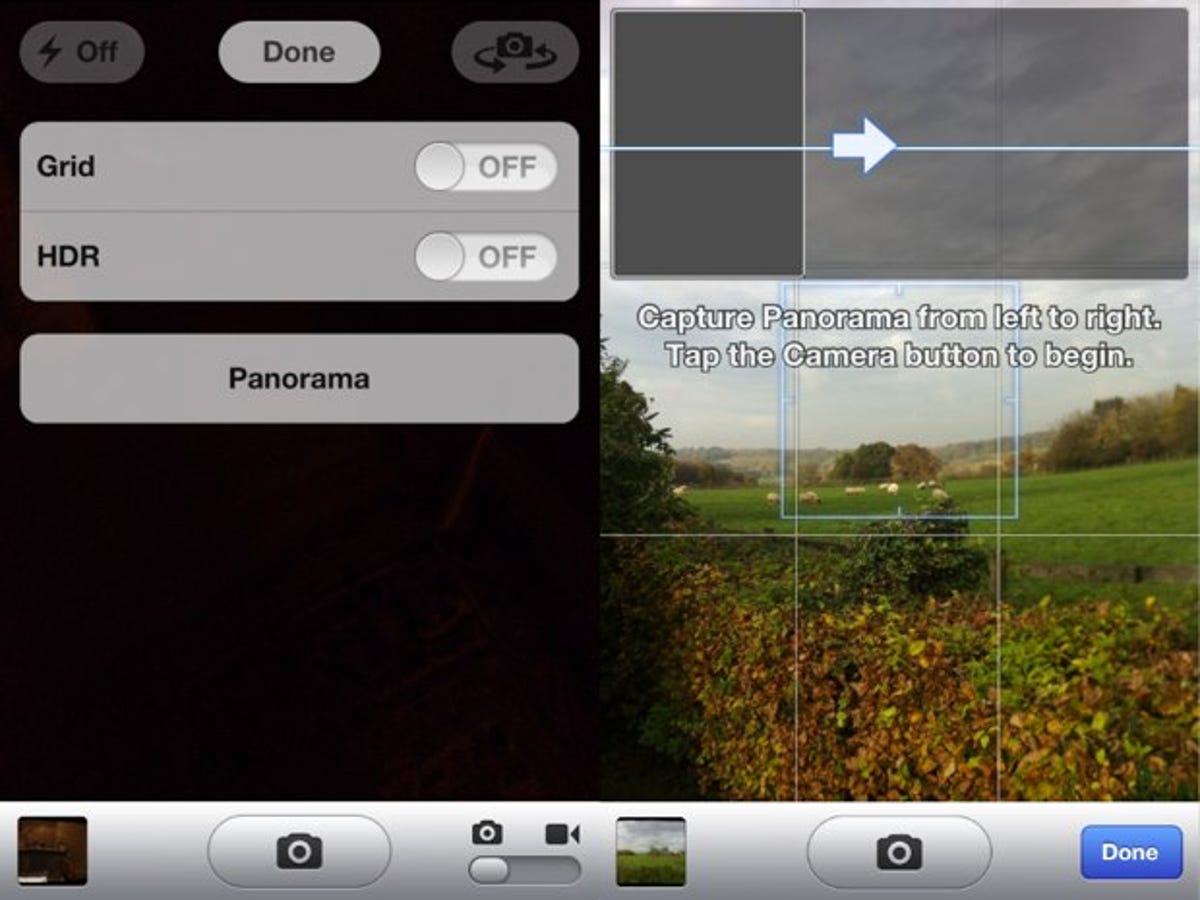
It might take a few turns to take an image that looks smooth, and in our test we found that the camera can lose its focus along the way. Notice how elements like the fence distort and bend too. Click image to enlarge:

It's still more seamless than other panoramic iPhone apps such as You've Gotta See This. If you want to preserve your memory of a wide vista, this is a pain-free and affordable way to take it in at once.
The autocorrect is less forgivable. It takes up a lot of screen space, and you have to hit 'confirm' on every word, rather than the nifty double tap on the spacebar that already works so well. You may get used to it, but you'll have to avoid tapping the up arrow on the right, which seems to cause a guaranteed crash.
What do you think? Will you use these sneaky features, or should they stay buried? Share your experience in the comments below, or over on our Facebook or Google+ pages.