How to wall-mount your Nest Mini
The Nest Mini came with several updates, including a wall mount for hanging it vertically.


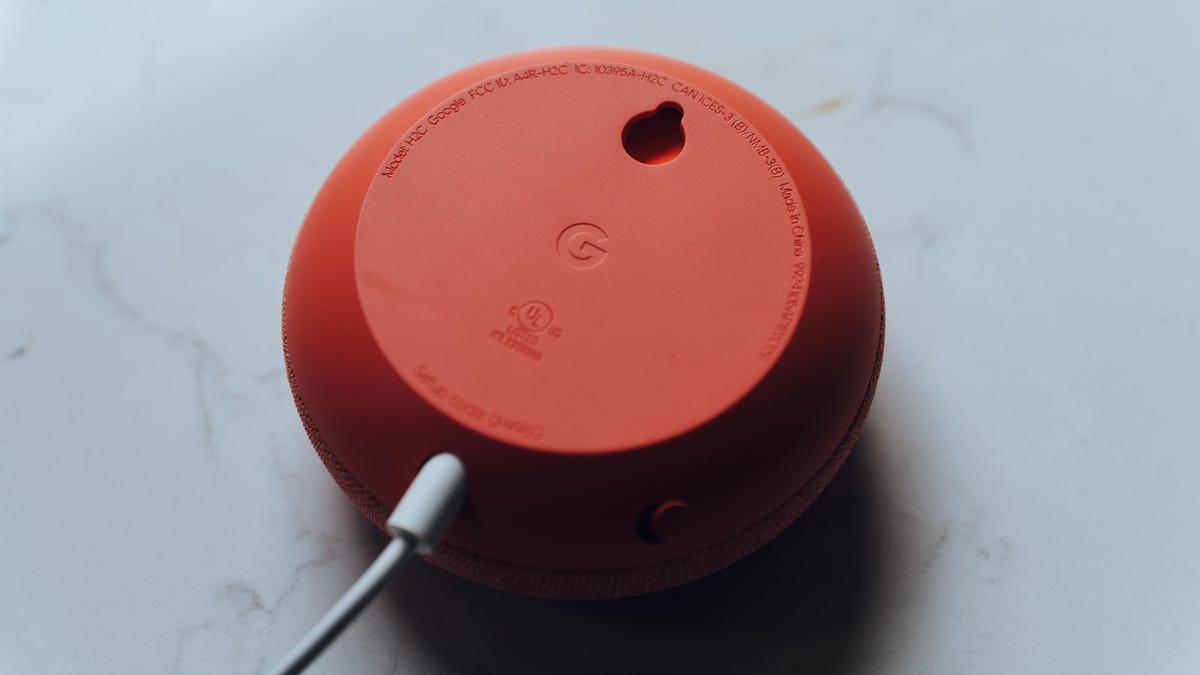
The Nest Mini adds a wall mount on the back of the device that the Home Mini didn't have.
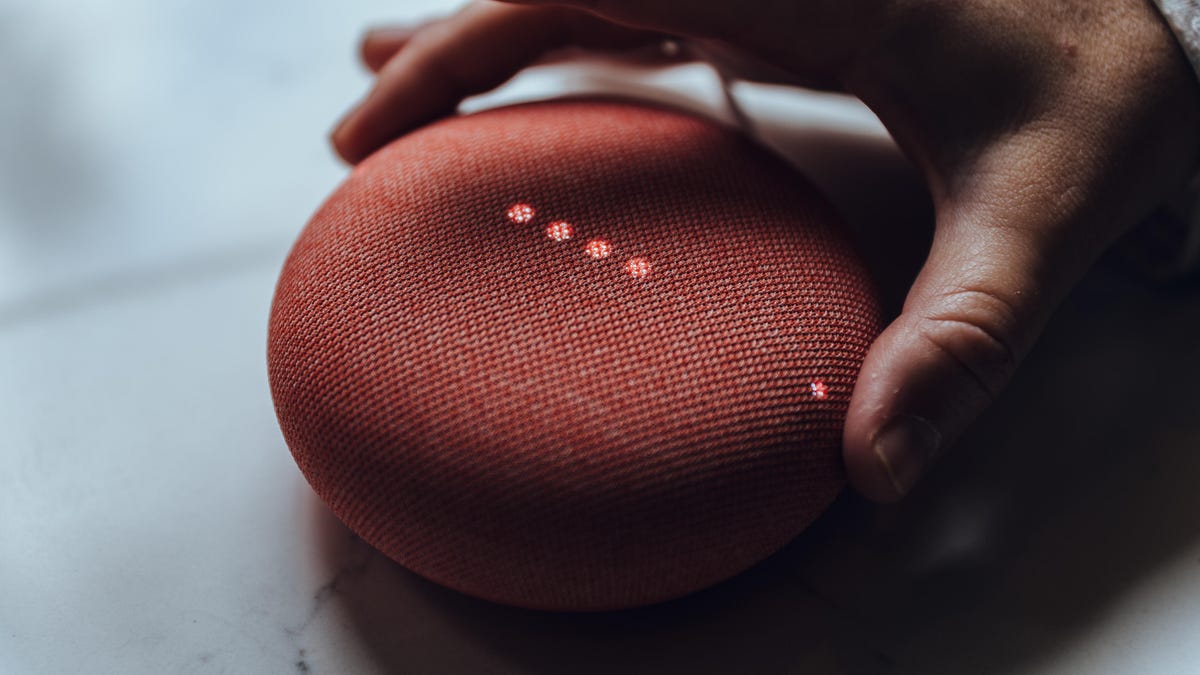
The Nest Mini is Google's second-generation budget smart speaker. It improves upon the Google Home Mini with better sound, helpful LED guides for the onboard volume controls, and machine learning technology. The two look nearly identical except for one new exterior feature. The Nest Mini has a built-in wall mount hole.
More: Read our Nest Mini review | Google Nest Mini vs. Amazon Echo Dot with clock
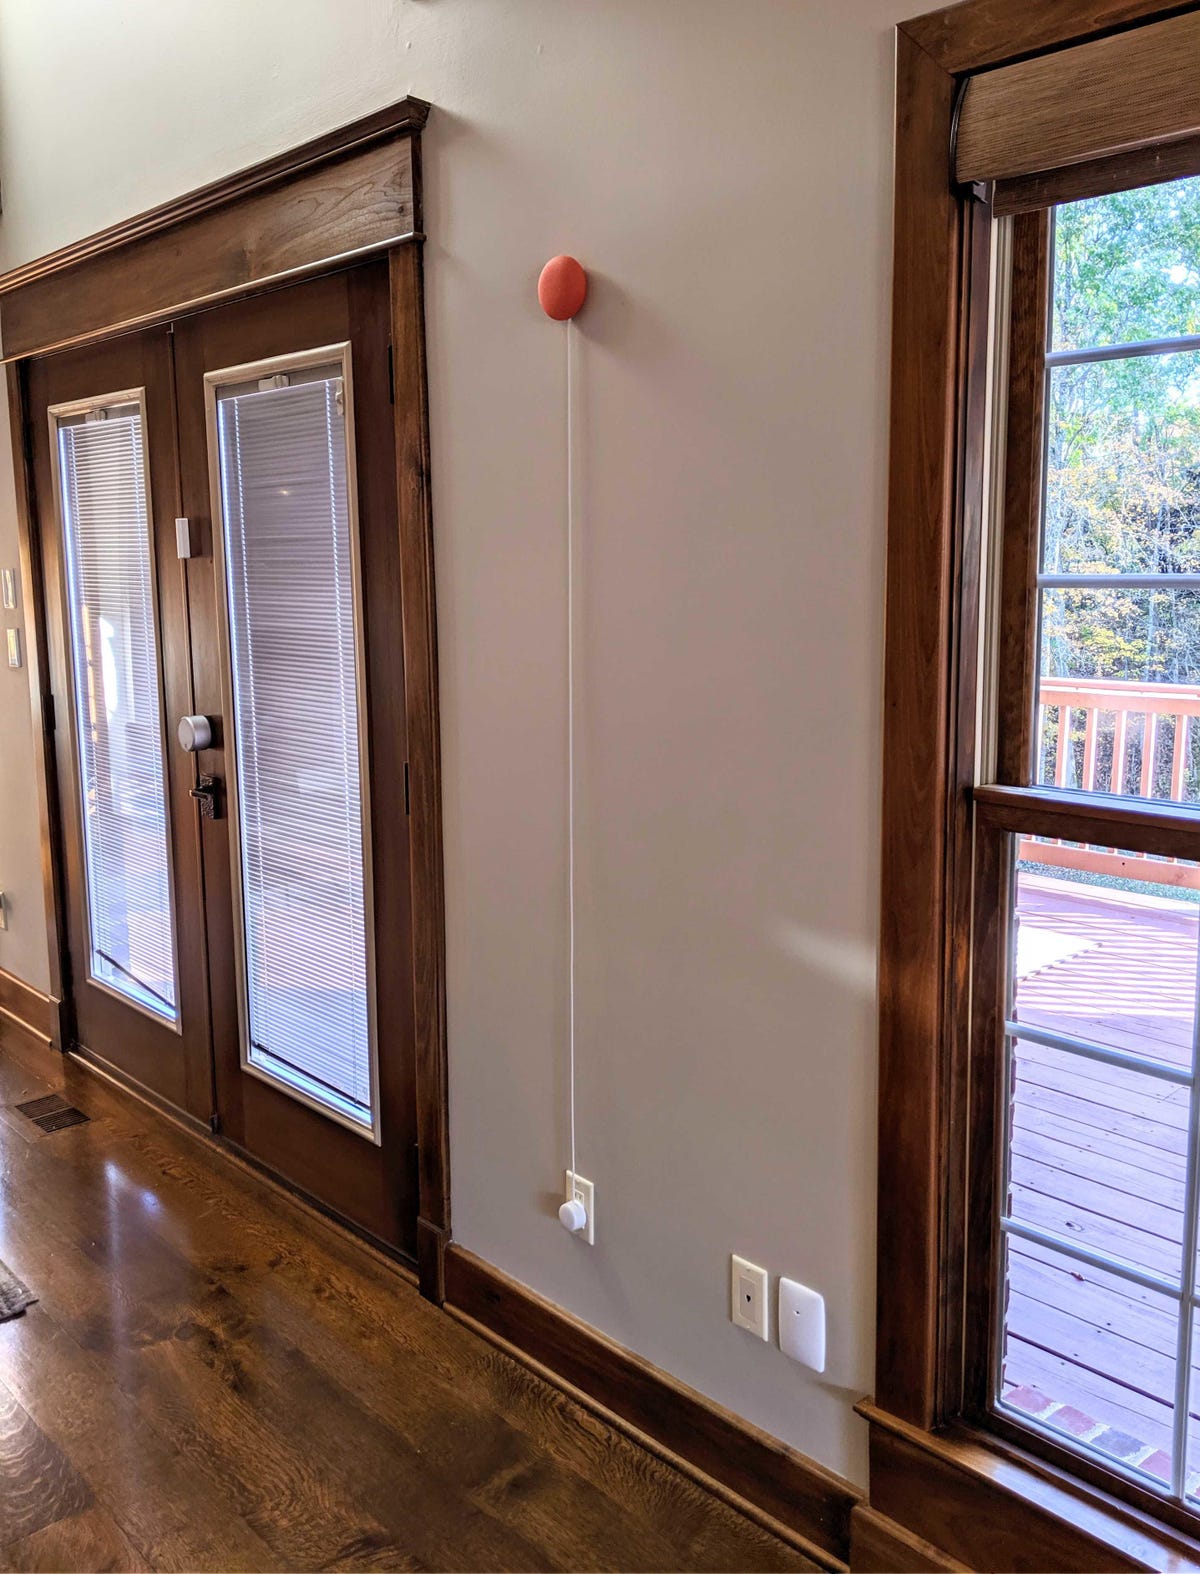
I'm not convinced mounting a Nest Mini on your wall is the most aesthetically pleasing way to display this speaker. The long, white cord is going to be hard to hide, and the speaker is so small that getting it off my counter doesn't save that much space. However, if you're inclined to take your smart speakers vertical, Google has made it easy to do with this second-gen model.
Pick the right spot
Maybe you already know exactly where you'd like to hang your Nest Mini. If not, choose a place near a power outlet and well within your Wi-Fi network's range. Consider pets, roommates, children and anything else that could come into contact with the speaker and its cord.
Set up your Nest Mini
Before you hang your Nest Mini, Google recommends setting it up and testing it out in that space. Get your speaker up and running and test out the features you'll use most, especially if it's going to be mounted somewhere hard to reach.
It's also a good idea to be sure you can see it from the most important spaces in that room or area, and that you like the way it looks.
Once your Nest Mini is set up and you're happy with the placement and performance, it's time to install it.

Measure and install the screw
Just like hanging a picture, it's a good idea to measure where you're going to put the screw in your wall. Try centering it on a wall or between other items for a tidy, symmetrical look.
Google recommends a #8 pan-head screw. If you're screwing into drywall and not the wall stud, you may want to use an anchor. Follow anchor package instructions, so that it is flush against the wall.
Use a screwdriver or power drill to screw the screw into the wall or wall anchor, and leave at least 2mm of the screw protruding for the Nest Mini hang on.
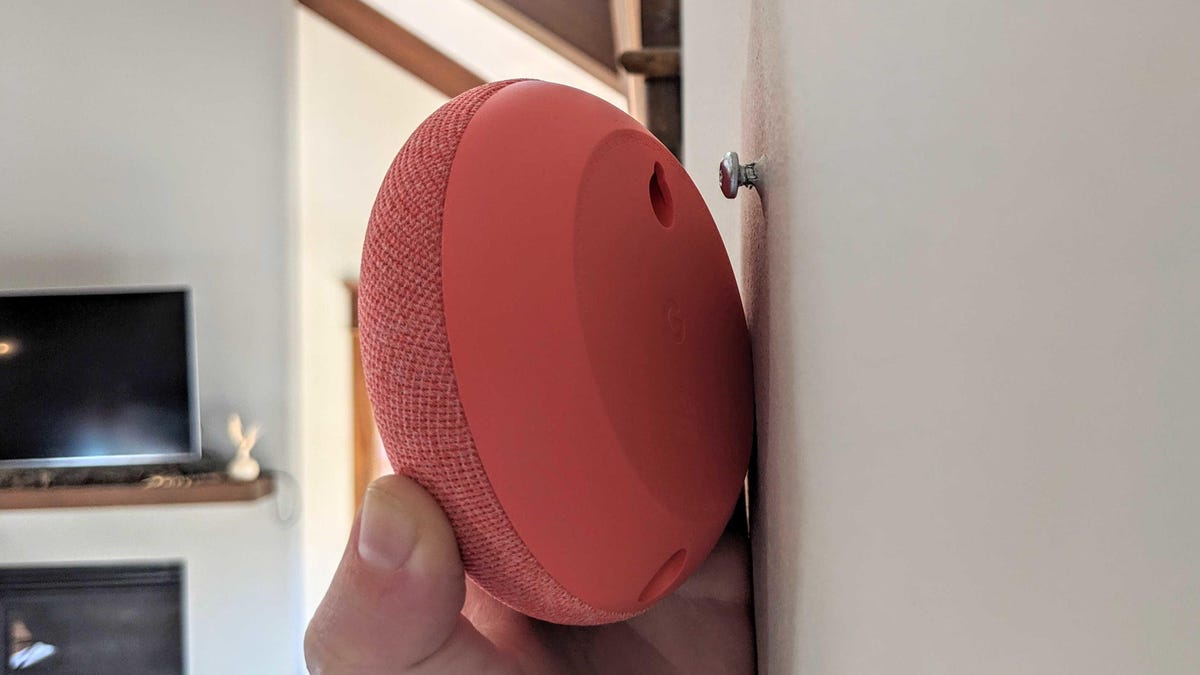
Hang it up
You're now ready to hang your Nest Mini on the wall. Using the screw slot on the back of the speaker, lightly hang the speaker on the screw head and gently secure it into place. I found it was easier to hang the speaker on its own, then reattached the power cord to it.
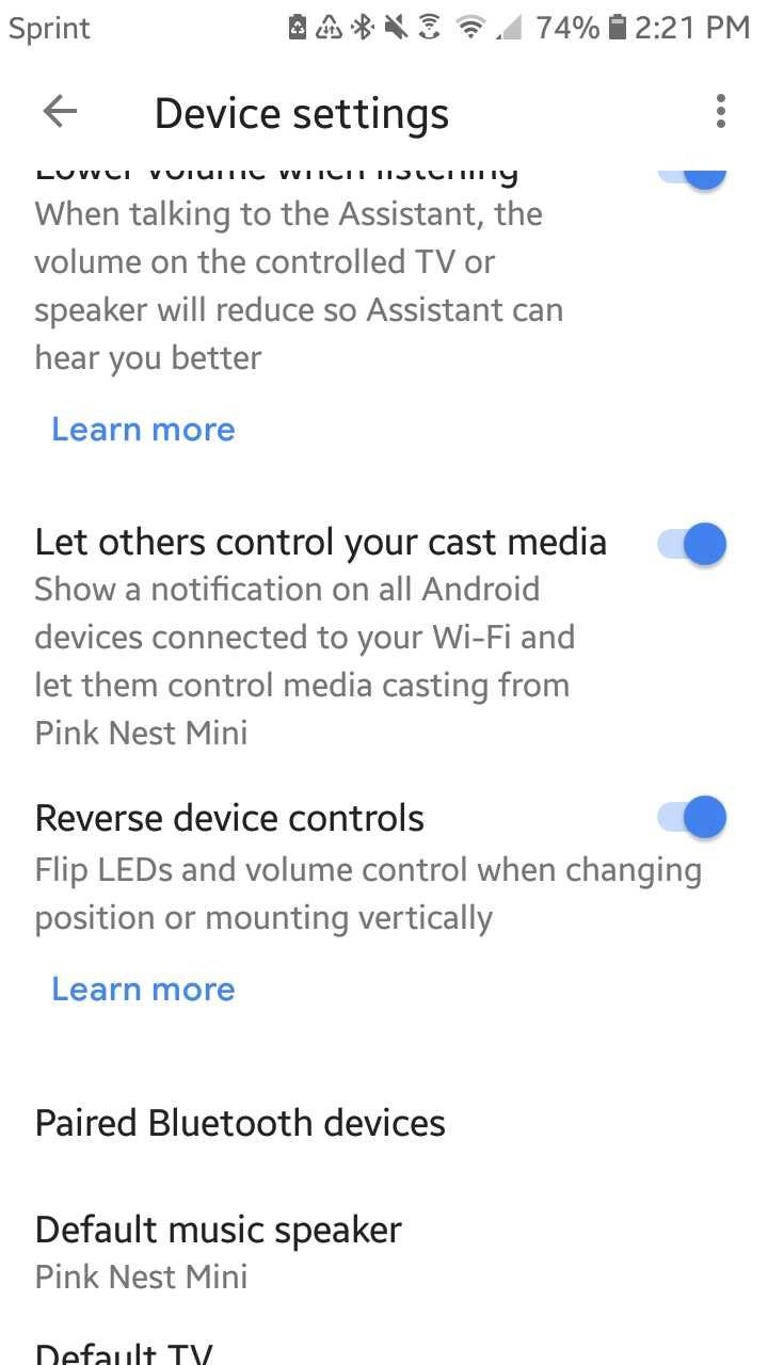
Reverse the device controls
This last step is an important adjustment to touch controls. Once your Nest Mini is on the wall, volume controls will be opposite from the normal horizontal placement.
You can flip the volume controls so that raising the volume is still on the right and lowering the volume is still on the left.
Here's how Google explains the steps for reversing device controls on its site.
1. Make sure your mobile device or tablet is connected to the same Wi-Fi network as Google Nest Mini.
2. Open the Google Home app.
3. In the Home tab, tap the Nest Mini device you would like to adjust.
4. In the top-right corner of the device card, tap Settings.
5. Under "Reverse device controls", tap the checkbox or tap the slider to on.
Now that your Nest Mini is mounted on the wall, you can use it for all the things you'd use your smart speaker for anywhere else. From timers to music and all your general knowledge questions there are plenty of things you can ask your Google Assistant to help you with from across the room.