Wireless networking made easy
Wireless networking doesn't have to be brain-meltingly difficult. This CNET.com.au tutorial will walk you through the steps in setting up a Windows-based network to ensure that it remains robust and secure.


There's a rather persistent myth that computer networking is hard -- that unless you've spent three or more expensive years at university discovering the mysteries of TCP/IP you shouldn't even look at a network, let alone think of setting one up.
Locating local internet providers
Wireless networks are allegedly worse -- insecure creatures that leak out your data and broadband connection to thieves and pirates who lurk behind every passing shrub. The truth of the matter is that wireless networking -- at least at a home/small office level - doesn't have to be brain-meltingly difficult, although it pays to take careful steps in setting up a network to ensure that it remains robust and secure.
Why wireless? Why share?
The amazing growth in broadband services in Australia has enabled more of us to do more online, whether it's downloading large files, using VoIP services or just maintaining a persistent and suitably swift connection.
Locating local internet providers
At the same time, the saturation of computer ownership is more or less complete, and many users now have more than one PC at home - particularly if you're in a household shared among multiple adults or have children with Internet needs and wants of their own. And yet, there's only one actual data pipe into the house.
The solution is to share out your broadband connection to multiple PCs. This is possible across (and between) systems running Windows, Apple OS X and Linux, but for the purposes of this tutorial, we'll cover Windows installation.
What you'll need:
- Two or more Windows PCs
- A broadband Internet connection and modem
- A wireless router and its documentation
- Wireless cards for each PC you wish to share to
You may need:
- A wireless access point or additional antennae
- Your broadband account settings, including user name and password
For the purposes of this tutorial, we'll presume that your broadband connection is already set up and working for one PC in your home, and that all you've got is a broadband modem for either cable or ADSL with an Ethernet plug coming out of one end that normally slots into your PC's network card.
Many wireless routers come with an inbuilt modem for ADSL users -- newer models may support the ADSL2/2+ specification, but unless your ISP supports ADSL2/2+, you won't see any extra speeds just because you've got the newer hardware. If your new router has an inbuilt modem, the configuration is essentially the same, except that you'll be doing all the configuration steps from the one interface, and the phone cable that normally goes into your broadband modem will go into your modem/router instead. Integrated ADSL modem/routers are easier to install and configure, but there's an element of having all your eggs in one basket if something goes wrong, and the advantage of having discrete and removable components for upgrades is lost.
|
Setup
For the sake of the tutorial we're presuming that your broadband connection is already configured and working through your broadband modem, but it's worth at least knowing your ISP-assigned user name and password when setting up your router, if only to cover yourself if something isn't working.
The first step you'll need to undertake is to install your wireless network cards. This is something that should be adequately described by the documentation that comes with most wireless cards, and usually only requires physically inserting the wireless adaptor (be it PC card, PCI or USB) and installing a driver, which should be provided, although it's often worth checking vendor web sites for newer drivers.
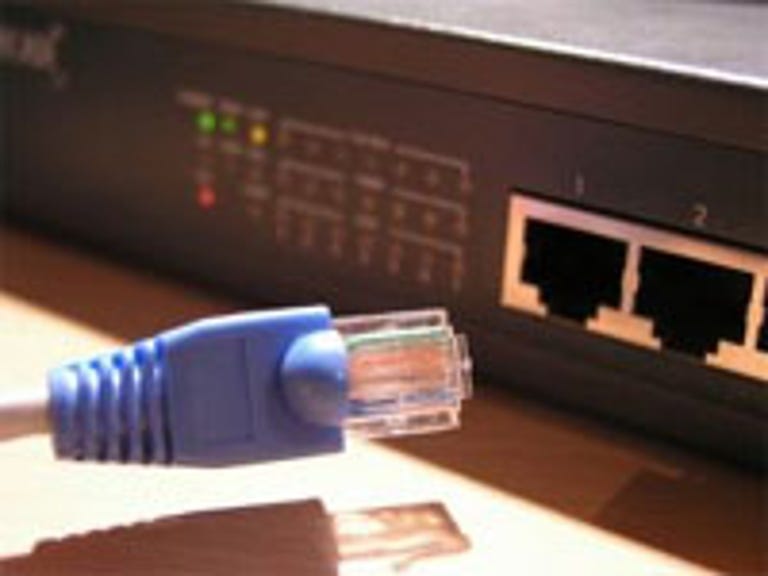
Once all of your wireless adaptors are in place, shut down your PC and switch off your broadband modem. Unplug the Ethernet cable that normally plugs into the back of your PC from the broadband modem. On the router there should be a compatible socket, usually labelled as "Internet" -- this is where you plug in your broadband modem connection. Most routers also usually come with a single length of Ethernet cable. This needs to be connected between the router and your PC. On the back of the router should be a number of sockets -- 4 is usual, but configurations vary -- individually numbered. Plug the Ethernet cable into any of them, and the other end into the network socket on your PC. Power up the broadband modem, then the router, and finally your PC.
When your PC has finished starting up, it may pop up a few new information balloons from the system tray, letting you know that a Local Area Network (LAN) connection is connected. It may warn you that the connection has limited or no Internet connectivity -- don't panic. It may also pop up a help balloon letting you know that one or more wireless networks is nearby. Ignore this for now; while you can connect wirelessly direct to your router now, it's a lot easier to do this step with a wired connection. If for physical reasons you cannot have your PC and router in the same location -- or can't run a length of Ethernet between them, or don't have a network card in your PC -- you can just use the wireless connection, but you'll have to do a lot of re-connecting to the network, and may find the going very hard if things go wrong.
If the connection warnings don't pop up, you can check these details by clicking through Start > Control Panel > Network Connections; you should see entries for a wireless Network connection (not connected) and a Local Area Connection, which should come up as connected.
|

Configuration
Now, you'll need to check the documentation that came with your router to determine the IP address it uses for web configuration. This is a small string of numerical digits separated by periods, in the style of xxx.xxx.x.x. Many of them use the same address range -- 192.168.1.1 is very common, but it varies depending on the model. Find that detail, and enter it into your web browser. You should then be met with a password screen -- and the user name and password should also be provided in the documentation. Change the default user name and password as soon as you can -- the quickest way to an insecure wireless network is to leave any security settings at their default.
Configuration pages for routers can vary quite a bit, but thankfully what shouldn't vary too much are the descriptors used for each function of the router. Firstly, you'll need to set up a connection between your router and modem. For most routers, this will involve setting up a connection under the heading of Wide Area Network. Most ADSL users will need to use PPPoE authentication, utilising the user name and password provided by your ISP. Enter your user name and password here; for the most part you should be able to leave the other settings here alone. Go to the status (or administration) panel of the router interface, and check the WAN connection; if there's a button for "connection" here, click it. Within a minute or two, it should report back as "connected" with a string of numbers underneath it -- this is the IP address assigned to your router by your ISP, indicating that you've successfully connected your router to the Internet. If it doesn't connect, check with your ISP; they may use slightly different settings or have advice on how to revive your connection at the router level.
Now you've got your router talking to the modem, and out to the Internet, and you just need to get your individual PCs (or other wireless-compatible devices) talking to the router. You could just connect up right now, and it would work -- but hold that thought. The first thing you should do is make your newly created wireless network secure, and then connect up your PCs to it. Go back to the router configuration page, and head to the panel for wireless network settings. The first thing to do is ensure that wireless networking is enabled; most routers will by default have this up and running, but it's well worth checking. Under your router's Wireless (or sometimes LAN) heading, ensure that the wireless network option is checked. Next, change the SSID setting. The SSID is the unique "name" used to identify your wireless network, and you should always change it. Wireless network security isn't bullet-proof, but nothing says "attack me" like a default SSID name. You can also opt to hide your SSID by not broadcasting it, although this will make it trickier for you to configure, and doesn't add much of a security layer anyway.
|

WEP/WPA/WPA2 Security
There's an easy way to secure a wired network -- just stop anyone you don't like from plugging a cable into your router. But what do you do when your router is wireless, and the connection point is essentially anywhere that's within range? That's the challenge with wireless networking, and while older wireless security protocols offered about as much protection as a rice paper umbrella, the situation has improved markedly.
The original wireless security offering, called WEP (Wireless Equivalency Protocol), was intended, as the name suggests, to be the equivalent of wired security, but was quickly proven to have a large number of points of attack. If you've got existing wireless equipment you may be stuck with WEP, although it's worth checking if there's an update to your equipment to allow the next generation of wireless security -- WPA and WPA2 (Wi-Fi Protected Access). Any equipment manufactured after November 2003 that bears the Wi-Fi compatible logo must implement WPA security.
Implementing either WEP or WPA security involves the the creation of a passphrase or passkey (your router's documentation may refer to it as either, and confusingly sometimes use both terms interchangeably). WEP uses hexadecimal characters (0-9, A-E), and most routers will either let you work out a character set yourself, or generate one based on a passphrase of your choosing. WPA-PSK (the most common home/small office use of WPA) utilises just a passphrase, although the underlying technology actually makes it harder to crack externally.
For most home/small office applications, WPA/WPA2 should be plenty of security -- it'll solidly stop people either deliberately or inadvertently pinching your broadband connection, and should keep your data relatively safe. If you're more worried, however, you can implement further security measures, such as locking down access only to the MAC addresses of your known wireless adaptors. If you're likely to want to let others use your wireless network from time to time, you'll need to add their MAC addresses as and when the need arises.
With security firmly in place, you can now configure each of your client PCs to connect to the router. Windows has a wireless configuration service -- it's the utility that'll pop up the information balloon to let you know when nearby wireless networks are in range -- but many wireless adaptors come with their own connection utilities which often (quite safely) disable the inbuilt Windows connection service. If you've left your SSID broadcasting, you should be able to "see" the router as soon as your wireless card comes online, at which point it's just a case of choosing to connect to the router and entering the passphrase you created. If your SSID is hidden, you'll need to manually add a connection utilising the hidden SSID in order to gain access to the network.
|

When things go wrong
So, you've followed the tutorial, installed all the necessary hardware, and yet your PC has about as much Internet connectivity as a week-dead ferret. This can be frustrating, but there are several avenues of support open to you.
Firstly, you should check to see if you're able to connect to the wireless router itself -- most routers use a web-browser based approach to configuration, found in the installation manual. If you can connect to that but not the Internet itself, it's an issue with your connection -- check that all your settings are entered correctly.
If you can't connect to the router itself at all and can detect no nearby wireless networks, try moving the PC closer to the router (if practical - easy with notebooks, hernia-inducing for some desktops) to see if you can detect the router. If you can, then you may need to invest in an additional wireless access point or a more powerful wireless antenna to further propagate your signal. If you're in an area with heavy wireless competition, you may need to change the channel you're using to broadcast your signal on -- this can have a profound effect on signal strength.
If for whatever reason you end up with a router that just plain won't talk to anything and you've somehow totally messed up the settings, you can in most cases reset the router back to its factory defaults. On most routers there should be a small pinhole button -- your product manual should direct you where -- for resetting the router. A small press will just reboot, but holding the button down for a good five to ten seconds will normally reset all the router's settings, at which point you can safely start all over again.
|