How to turn on your Facebook Timeline right now
We told you how to sign up for Facebook Timeline earlier today, now we are going to show you how to turn it on today!


If you are impatient and want to experience the new Timeline on Facebook announced earlier today, you can turn it through the developer section of Facebook. The process is simple, takes a few minutes, and will require some patience as Facebook tidies up any lingering issues and bugs. You game? Read on.
As reported on TechCrunch just a bit ago, users can quickly enable the Facebook Timeline on their account in a matter of minutes. Here's how you do it.
1. Visit the Facebook Developer page, and enable it for your account. If you aren't currently logged in, you will be required to do so.
2. The button to create a new app can be found in the top right corner of the Apps page. Make sure to give your app a display name and name space when requested (it doesn't matter what you enter here, no one will see this app, just make something up and continue). Accept the Platform Privacy agreement by checking the box. You will have to have a verified Facebook account, meaning you have either a credit card or phone number on file.
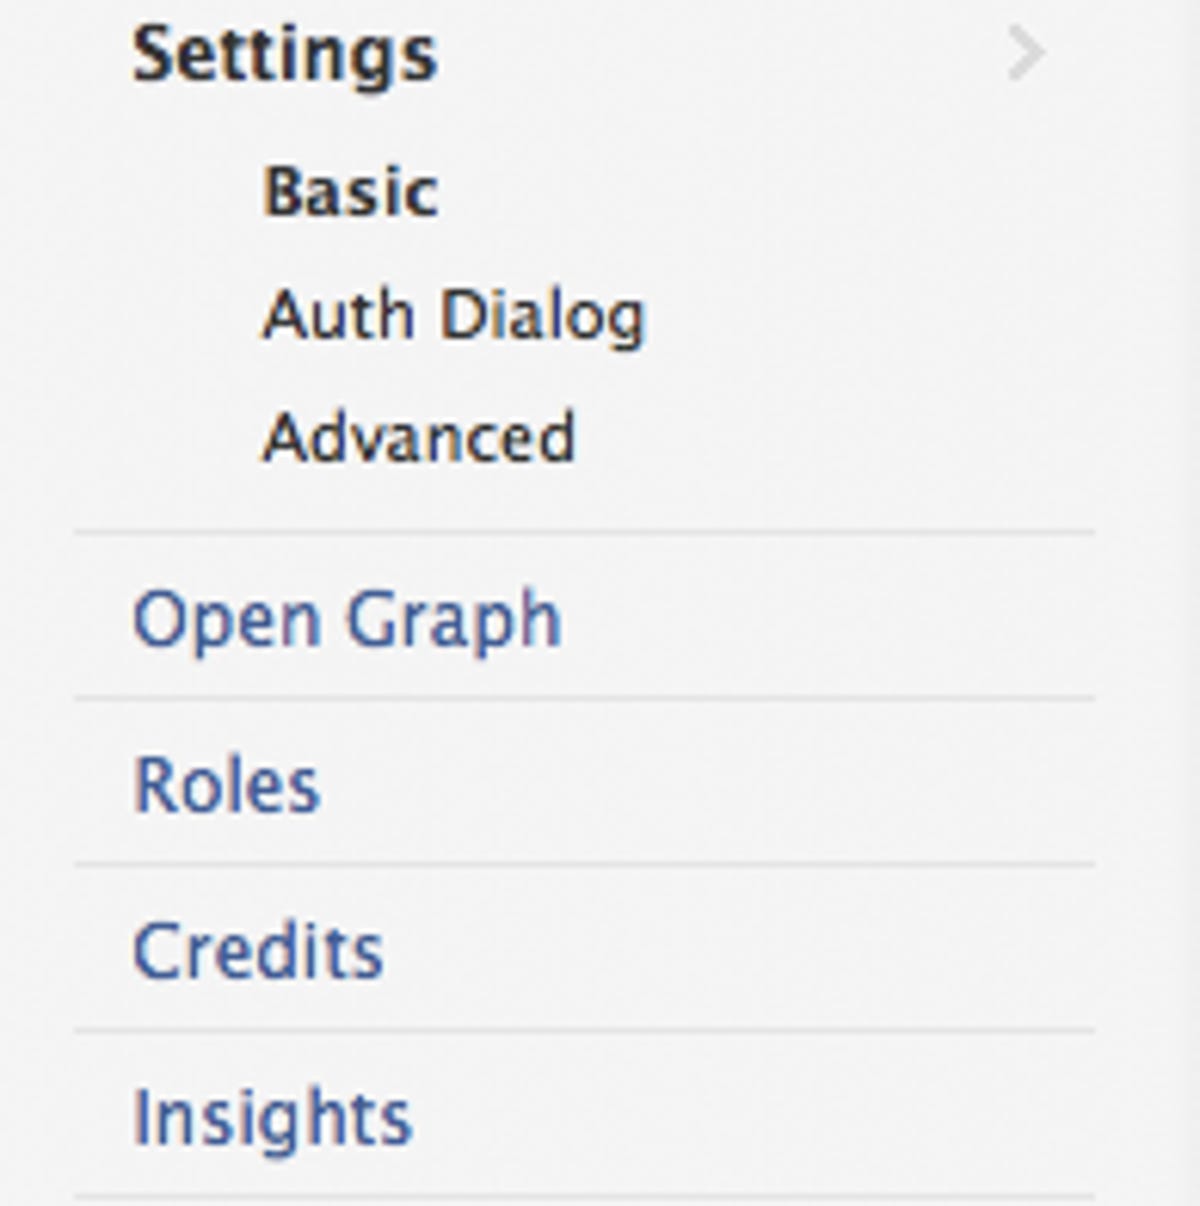
3. After the app has been named and terms accepted, you will then be taken to your shiny new apps' settings screen. You will see an Open Graph option on the left-hand side. Click on it.
4. You will need to define an action for your new app. You can enter whatever you like; no one is going to see this app when all is said and done, so don't fret too much over the details. (We entered "People can 'high five' a 'video'" as our action). Click on Get Started once you have entered your action.
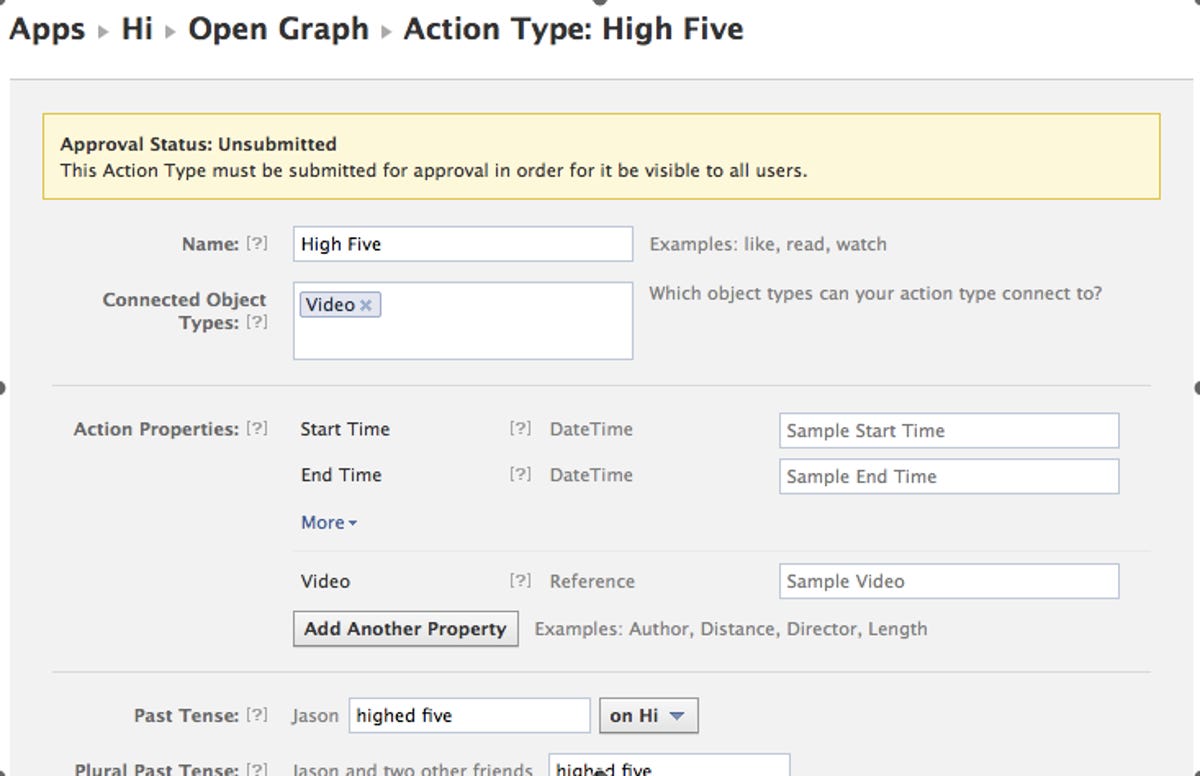
5. Once you are presented with the screen above, you don't actually have to do anything, just scroll to the bottom and select Save Changes. You may have to do this on a couple different screens; just remember to scroll to the bottom and select Save Changes.
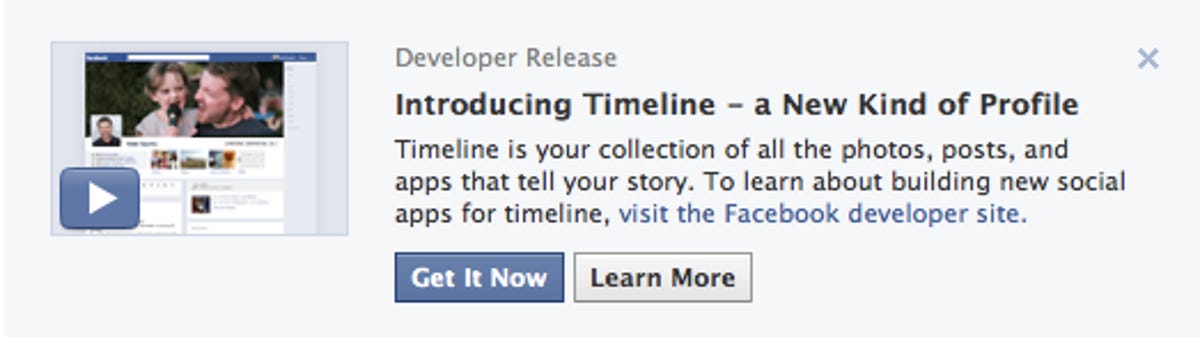
6. After you are taken back to the Dashboard for Open Graph, you have completed the setup process. Give it a few minutes, then go back to your Facebook home page. You should then see a big invite to enable Timeline. If you don't see it right away, give it a few minutes
That's it. Once you click on Get It Now, you will then be redirected to your new Timeline. Your Timeline is private, by default, for the time being. You can either edit it until you are ready to publish it, or you can ride it out and let Facebook publish it for you on September 29.
One more note: if you access your Facebook account from another computer, your Timeline is turned off. To get it back, enter the follow URL into your browser: http:www.facebook.com/[yourusername]?sk=timeline. Make sure to replace [yourusername] with your actual Facebook username.
Of course, if you don't want to go through all of this to get access, you can always sign up following the instructions in this post.