How to take screenshots on the Kindle Fire
The Kindle Fire doesn't support screenshots natively, but you can still take them with a little help from the Android SDK. Here's how.


Screenshots can be a very useful educational and support tool. Android tablets like the Asus Transformer and Samsung Galaxy Tab 10.1, have native screenshot functions, but unfortunately Amazon's Kindle Fire does not.
If you want to take screenshots of the Kindle Fire, you still can. It's a fairly involved process, but once it's set up, taking screenshots is a breeze. You don't even have to root your Kindle Fire to do it. Here's how:
Install JDK and Android SDK
Step 1: Download and install the Java Development Kit (JDK) from Oracle.
Step 2: Download and install the latest Android Software Development Kit.
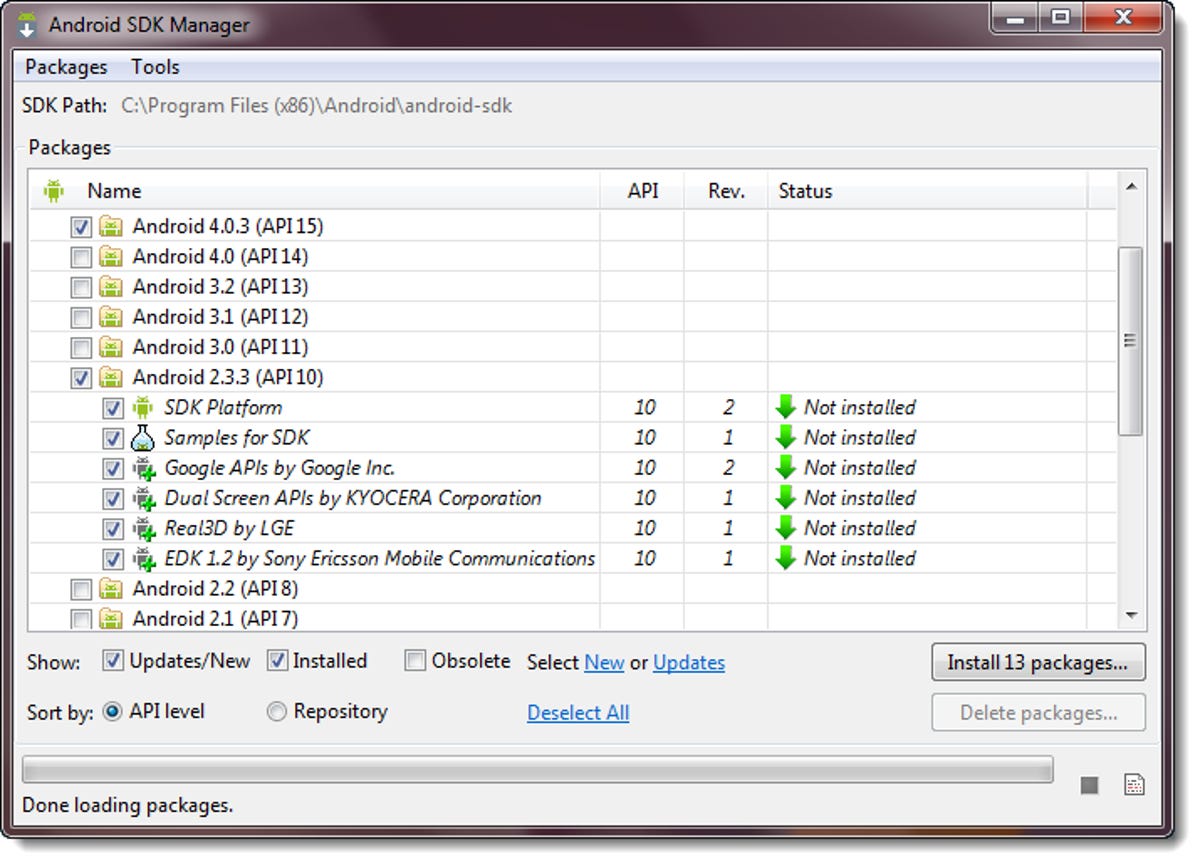
Step 3: At the end of the Android SDK installation, choose to start the SDK Manager.
Step 4: By default, the "Android 4.0.3 (API15)" package is checked for installation. Make sure to select the "Android 2.3.3 (API10)" package as well and that the "Google USB Driver package" is also checked under "Extras." If you're not going to be using the Android SDK with Ice Cream Sandwich, you can elect not to install Android 4.0.3 (API15).
Install USB Driver
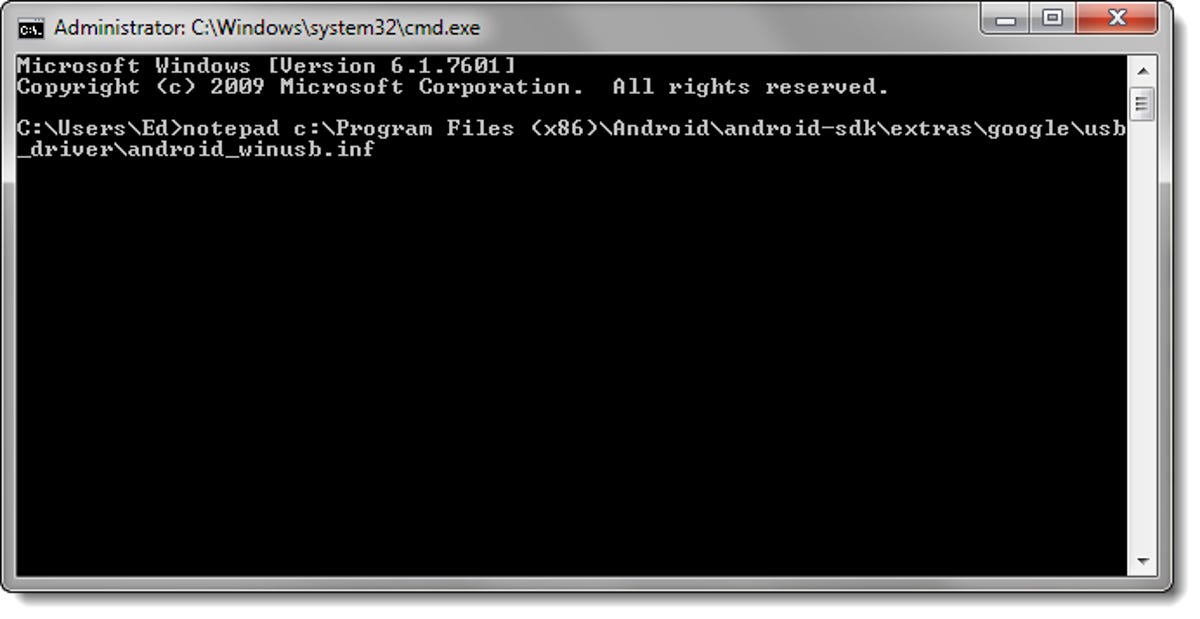
Step 1: Go to Start, then type "cmd" in the search box. Instead of hitting the Enter key, hit, Ctrl+Shift+Enter. This will launch the command prompt with administrative privileges.
Step 2: To add the Kindle Fire to the USB driver file, type:
notepad c:\Program Files (x86)\Android\android-sdk\extras\google\usb_driver\android_winusb.infHint: copy the text above and right-click on the command prompt window and select "paste."
Step 3: At the beginning of the [Google.NTx86] and [Google.NTamd64] sections, add the following lines:
;Kindle FireSave the file.
%SingleAdbInterface% = USB_Install, USB\VID_1949&PID_0006
%CompositeAdbInterface% = USB_Install, USB\VID_1949&PID_0006&MI_01
Step 4: In Notepad, open C:\Users\username\.android\adb_usb.ini, where username is your Windows user name. On a new line, add the following text:
0x1949Save the file and exit Notepad.
Step 5: Plug the Kindle Fire into a USB port on your computer and allow Windows to install drivers. All the drivers but one, should install correctly.
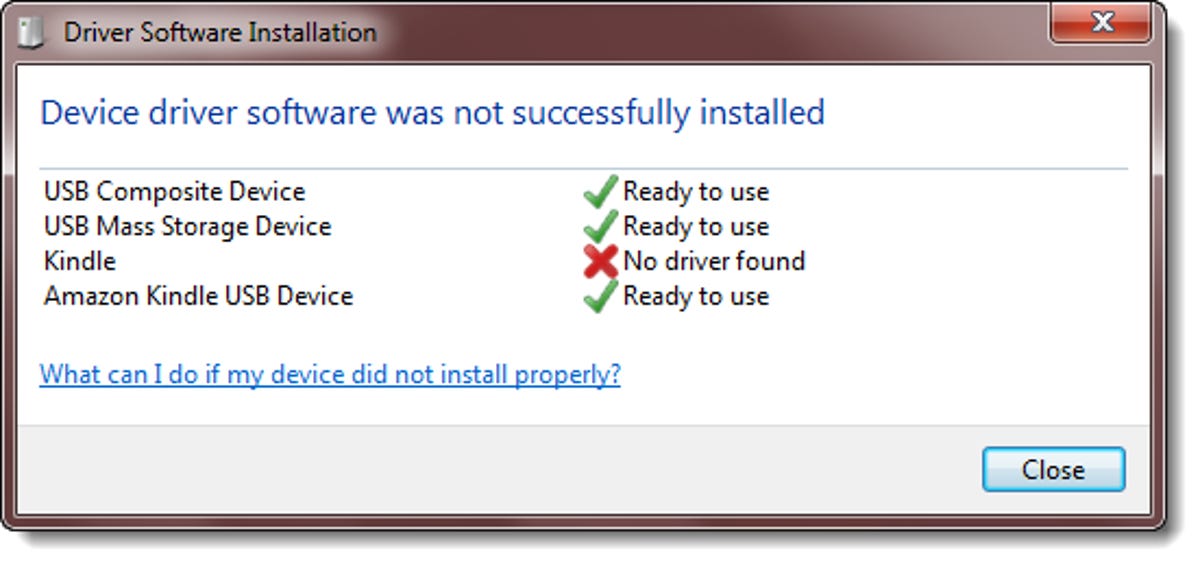
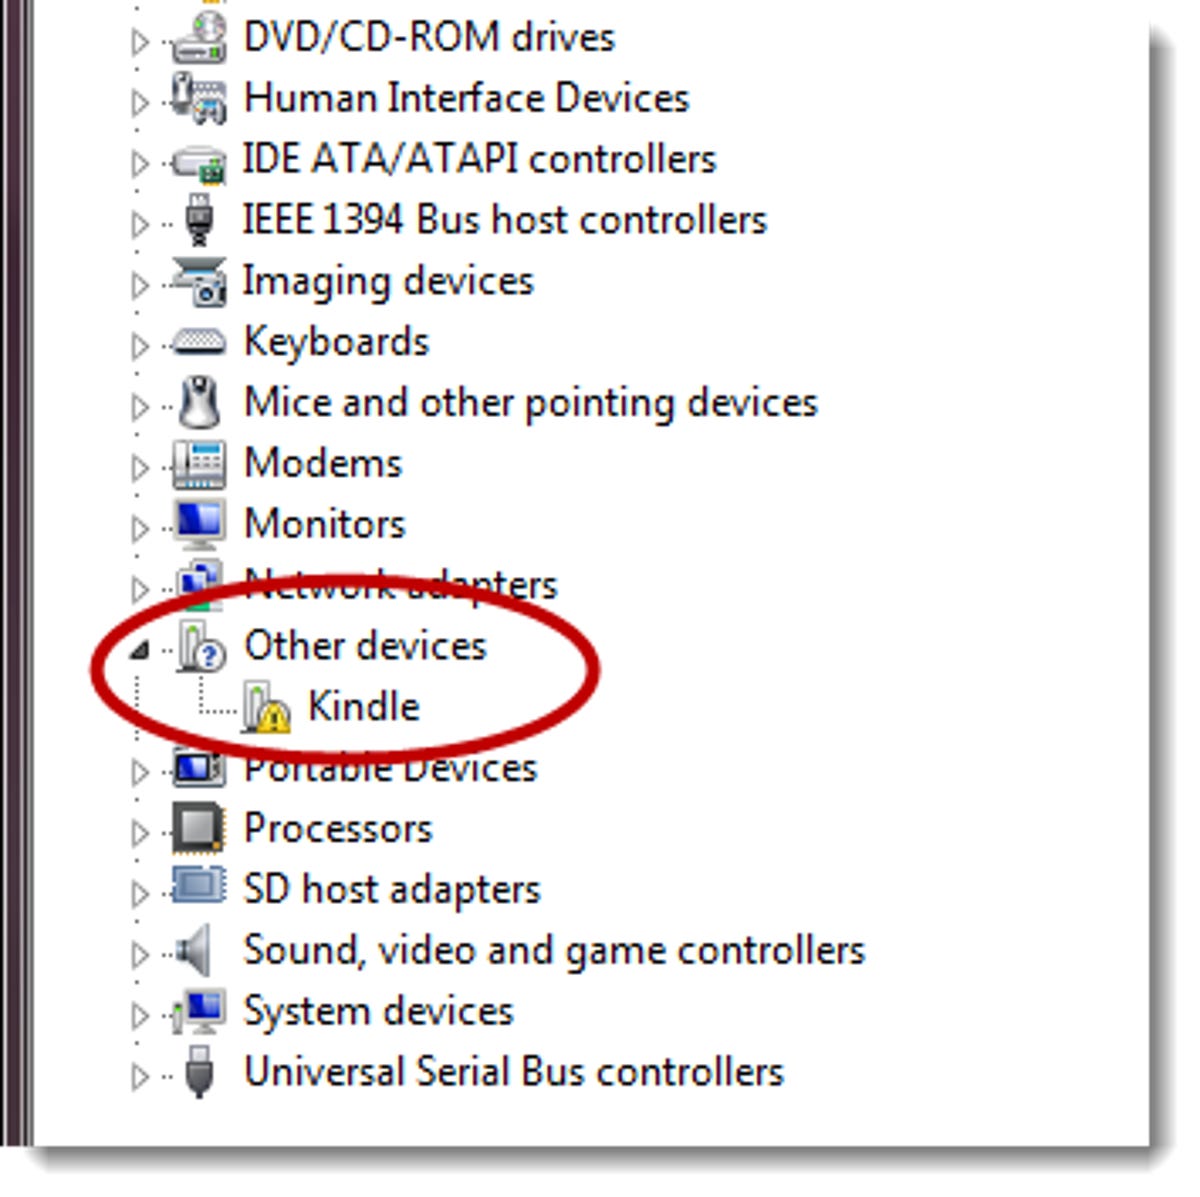
Step 6: Open up Device Manager and you'll see the Kindle listed under Other devices with an exclamation mark inside a yellow triangle. Right-click on it and select Update Driver Software.
Step 7: Choose "Browse my computer for driver software" and browse to C:\Program Files (x86)\Android\android-sdk\extras\google\usb_driver then click "Next."
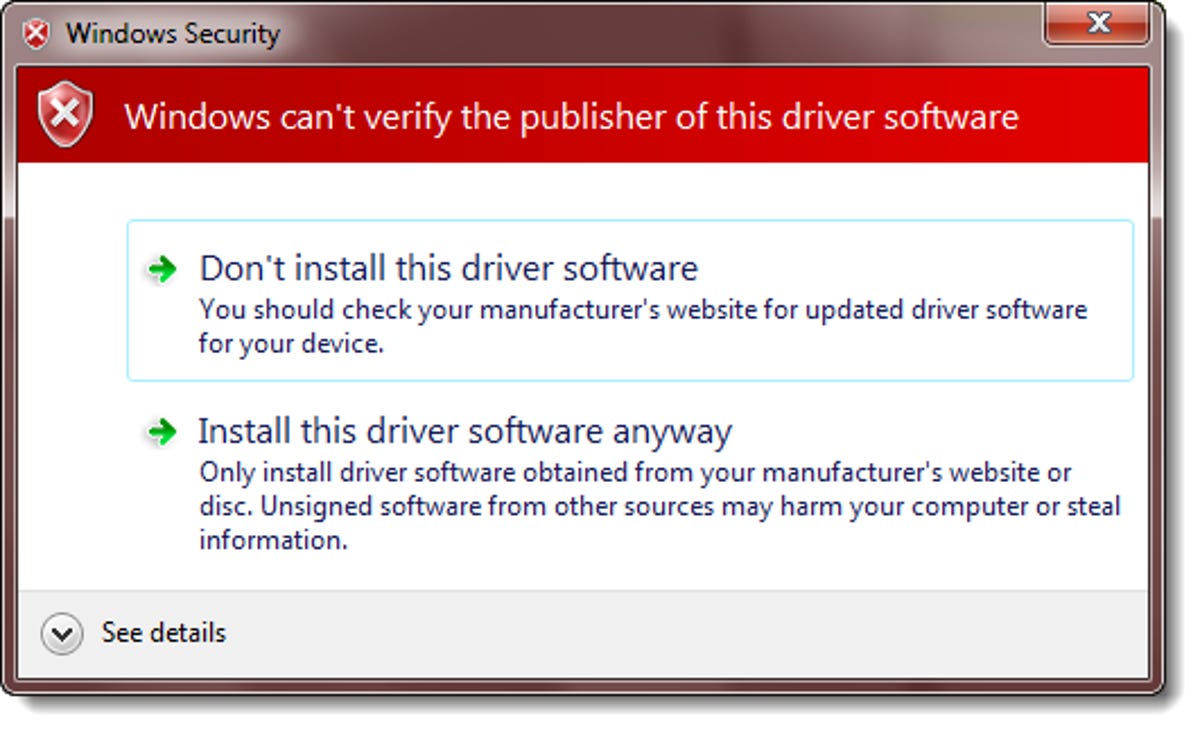
Step 8: At the Windows Security warning prompt, select "Install this driver software anyway." Once finished, you'll get a confirmation screen that shows that the device driver for the "Android Composite ADB Interface" was installed.
Take screenshots
Step 1: On your computer, click Start, then in the search box, type C:\Program Files (x86)\Android\android-sdk\tools\ddms.bat and hit Enter. You can also navigate to it using Windows Explorer and double-click on ddms.bat.
Step 2: When your Kindle Fire appears in the top, left-hand box, click on it to highlight it. If it doesn't appear right away, try resetting adb by going to Actions, then selecting "Reset adb."
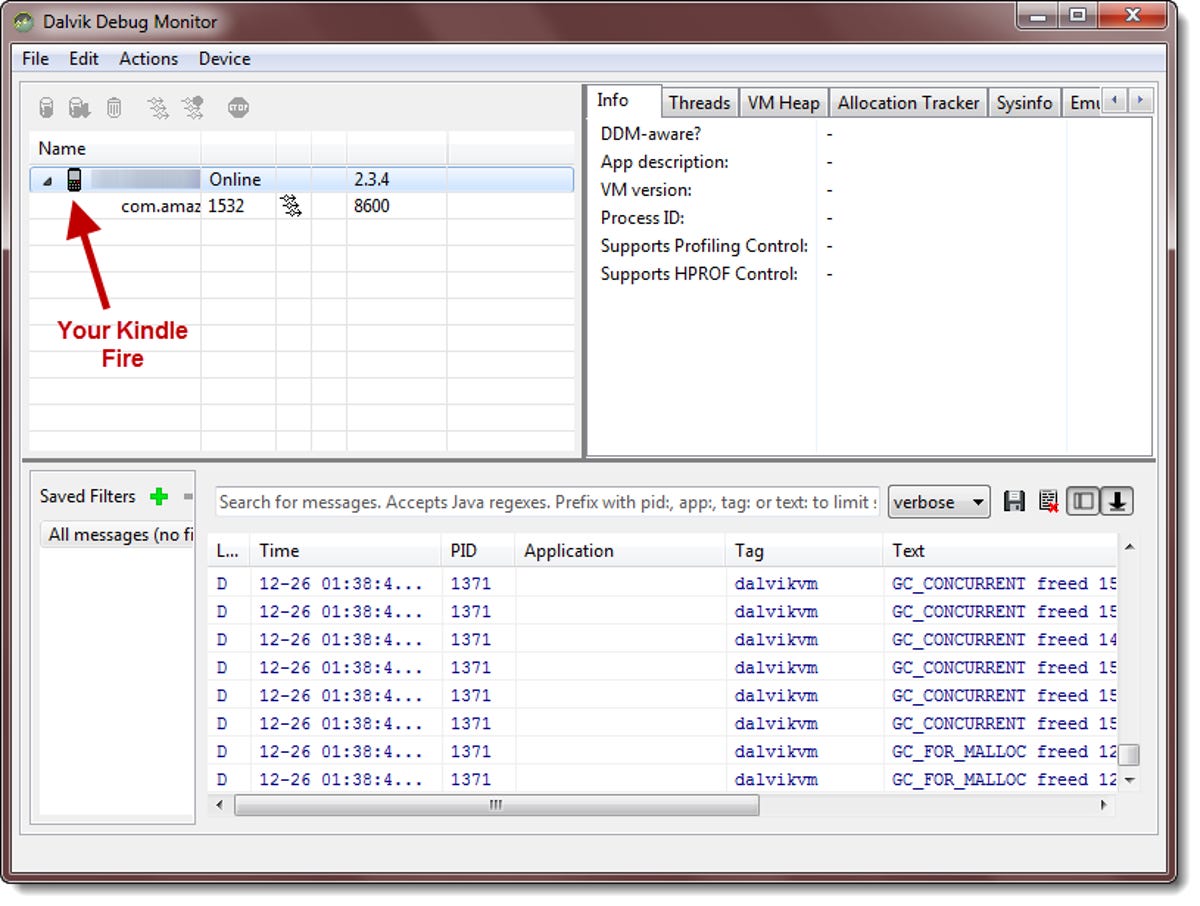
Step 3: Hit Ctrl+S to take a screen capture.
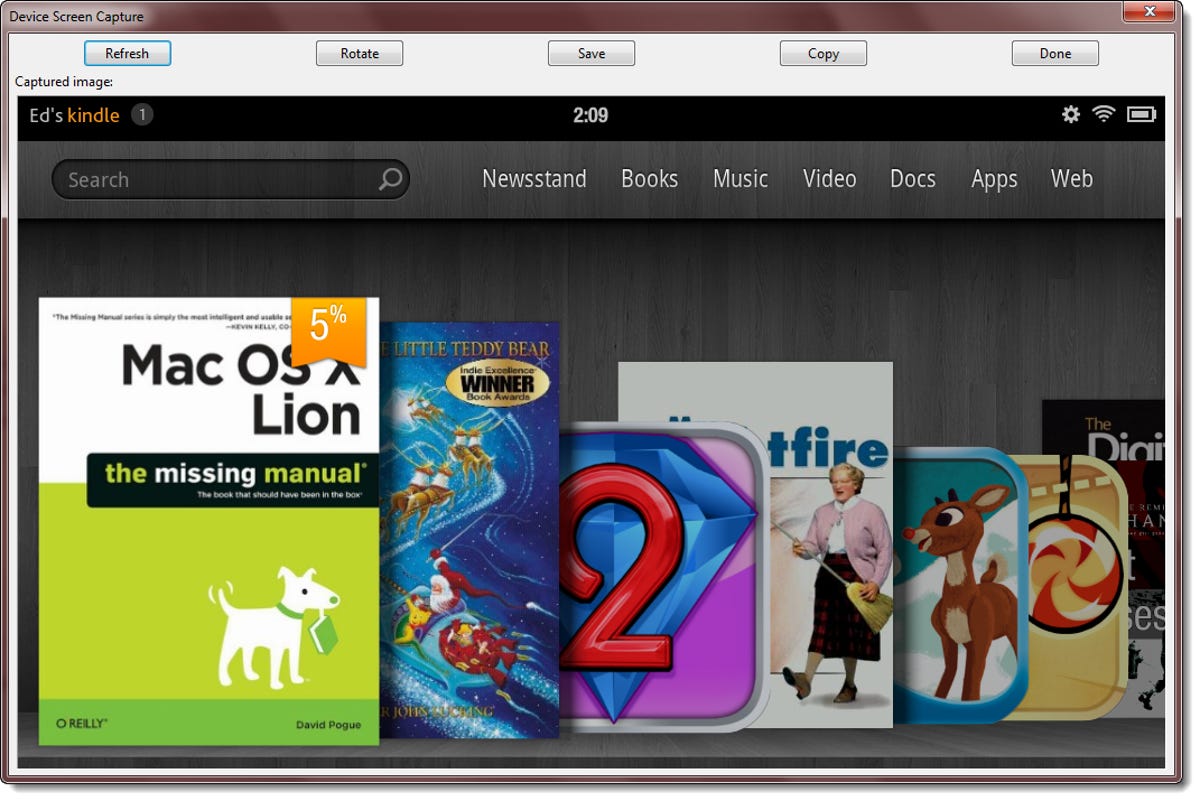
Step 4: The Device Screen Capture window will pop up with your screen capture, allowing you to refresh, rotate, save, or copy it.
That's it. The next time you want to take a screenshot, just launch ddms.bat again. You might also want to create a shortcut for ddms.bat on your desktop or taskbar, so you don't have to go looking for it every time.