How to customize your Facebook Cover photo
The new Facebook Cover photo is the first thing your friends and prospective subscribers will notice upon visiting your profile (Timeline).


- Webby Award ("How To, Explainer, and DIY Video"); Folio Changemaker Award, 2020
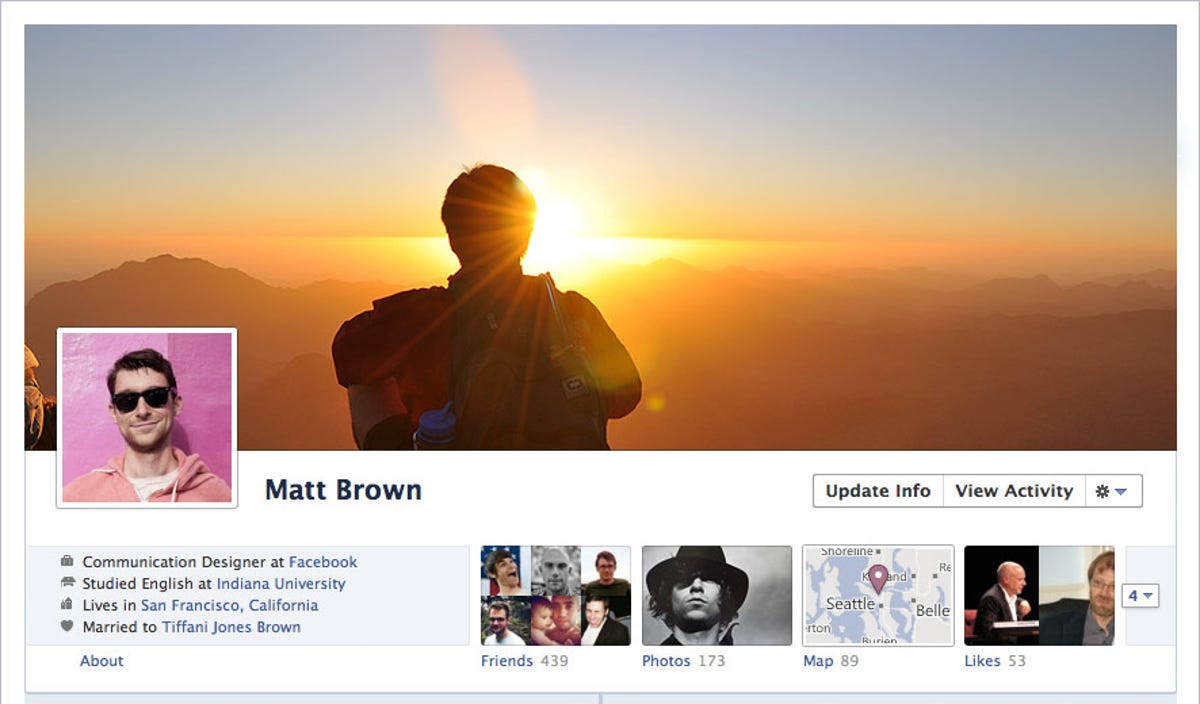
Like the header of a blog or a splash page of a Web site, the Cover photo is the first thing your friends and prospective subscribers will notice upon visiting your profile Timeline. To help you make the best impression upon your visitors, follow these tips for designing the best Cover photo.
Here are the basics:
- The cover photo size is 850x315 pixels. Anything smaller than 850P wide will be stretched and pixelated.
- It's public. Anyone--friend or not--who visits your page can see it.
- It doesn't have to be you. Your cover photo can be a photo of yourself, but it can also be anything that you love or something that represents you.
Now that you've got the basics down, it's time to get creative. Go beyond picking a photo from your Facebook albums and design a cover photo that not only represents who you are, but offers a little extra information about yourself. Here's how:
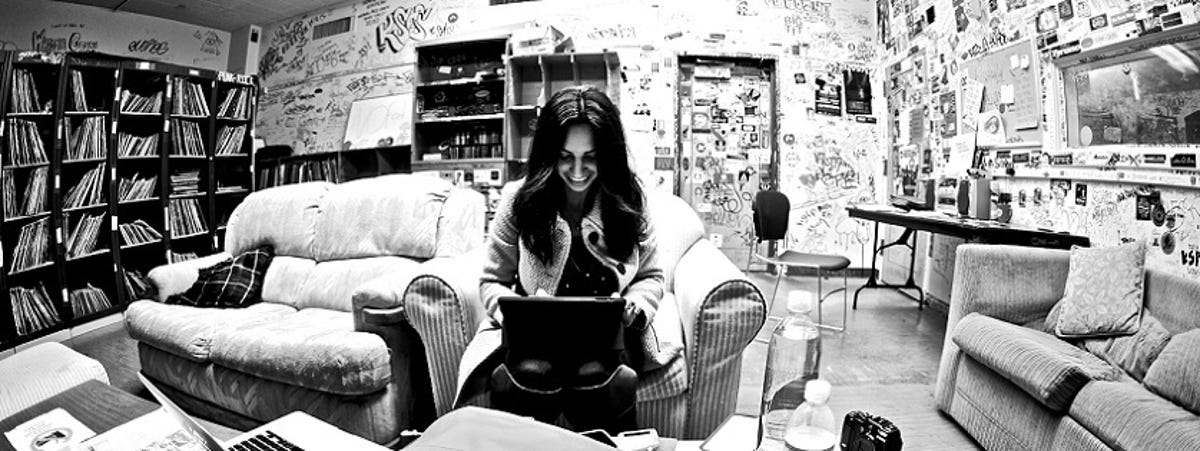
Step 1: Choose a photo
Pick a high-resolution photo of yourself, or head to one of the many photo-sharing sites for inspiration. Flickr, WeHeartIt, Pinterest, and Piccsy are all great starting points. Make sure that the photo you choose is at least 850 pixels wide, and save it to your drive. Note the creator, and credit that source in the "About Me" section of your profile.
Step 2: Add your social networks
If you have other social networking profiles, or a blog, use your Cover photo to tell your visitors where else they can find you. With an image-editing program, like Photoshop or GIMP, you can overlay social networking buttons (like these). They're not clickable, but friends will know to find you there. Alternatively, you can simply overlay textual links.

Step 3: Leave a message
Whether you're going away for vacation or have a big announcement ("We're engaged!"), you can use your cover photo to convey the news. To do so, reduce the opacity of the photo and overlay some text.
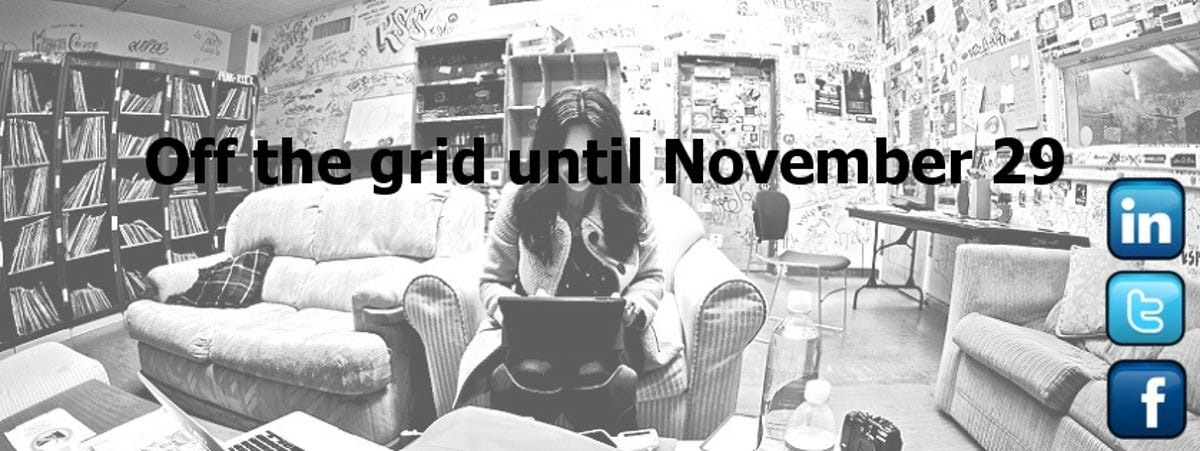
To change the opacity (transparency) of your photo, use Photoshop or GIMP. In Photoshop, right-click the photo layer and select "Blending options" to lower the opacity. In GIMP, the opacity can be lowered by selecting the layer and using the sliding scale in the same window.
The possibilities for your Cover photo are endless. A few services have already sprouted to help you easily create a fun cover photo, like MyFBCovers.com, which lets you pick from a gallery of photos or create a collage of your own.