How to automate Foursquare check-ins with your Android device
Foursquare is a fun social app that lets you log your location and meet up with friends more easily. Checking in at places you visit frequently can turn into a chore, but there's a painless way to tell your Android device to check in automatically. Learn how in this blog post by Rob Lightner.


Foursquare can be fun--but it can also start to feel like work. If you're the Mayor of your favorite coffee shop, holding onto that title can turn into a chore. The hundredth time you drag out your phone, pop open the Foursquare app, wait for it to figure out where you are, and then finally check in, the novelty may have faded a tiny bit. Fortunately, there's a sweet, free Android app called ToothTag that can automatically check you in at your favorite places, as long as they've got Wi-Fi or Bluetooth signals you can recognize. Here's how to use it:
- Install the ToothTag app from the Android Market.
- The next time you visit someplace where you'd like to check in automatically, start up ToothTag and check to see if the venue's signal is listed. If not, click "+" on the upper right to rescan. (Make sure Wi-Fi and Bluetooth are enabled on your device.)
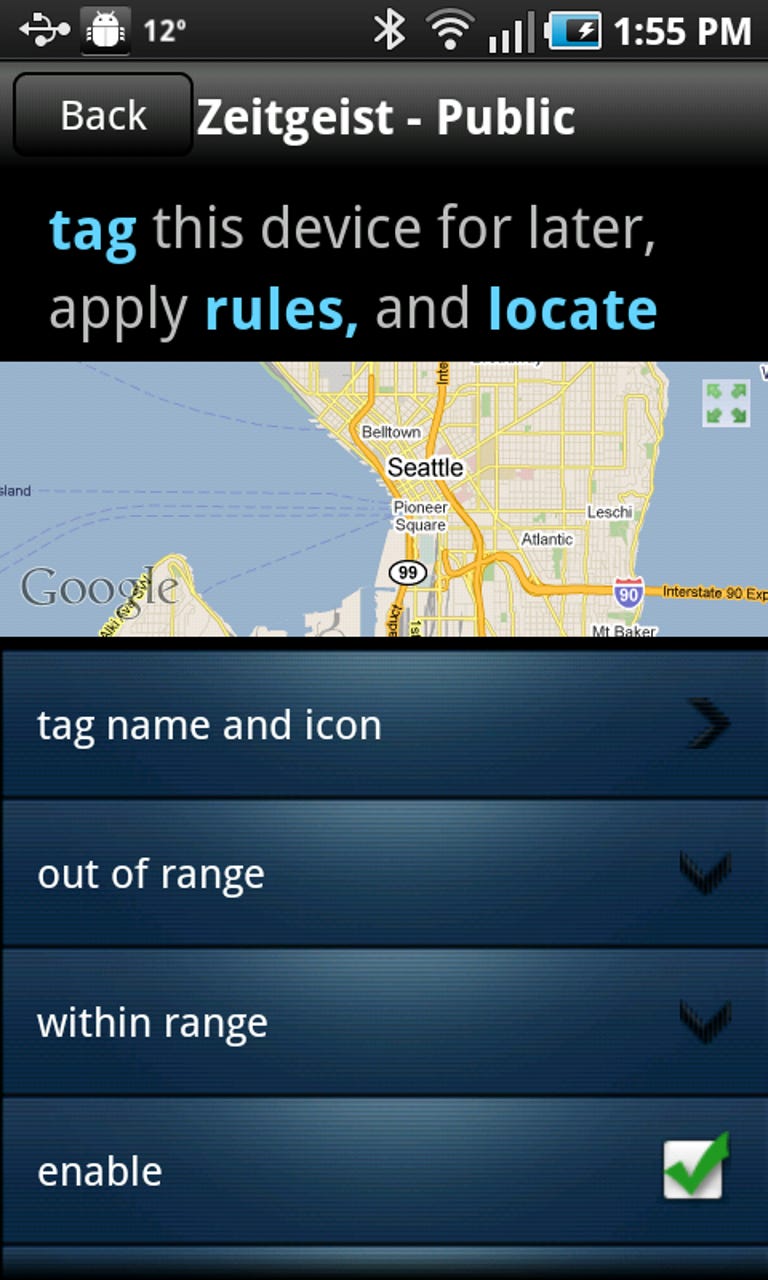
- Select the signal name to bring up rules options. Tap "within range" to tell ToothTag what to do when it detects the signal in the future.
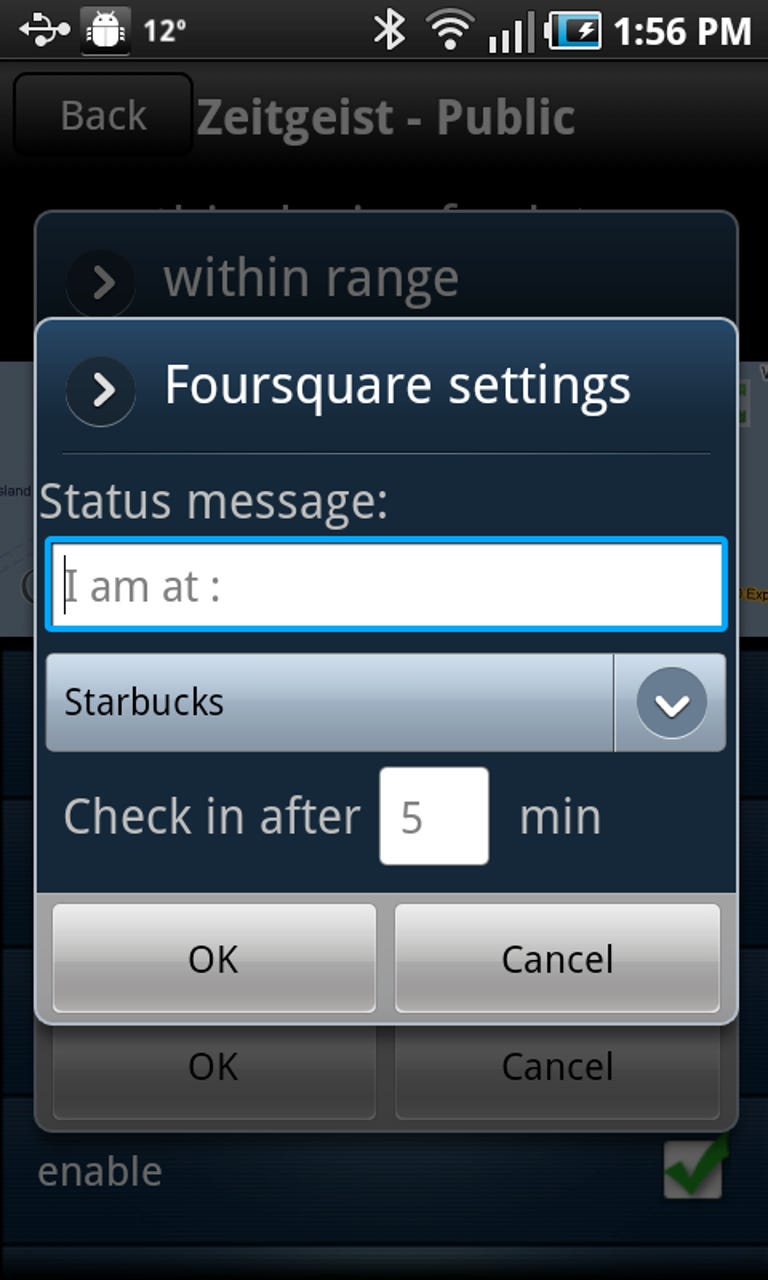
- Select '"foursquare" and then type in your e-mail address to set up an account with NeuAer (ToothTag's publisher). The company will send you an e-mail, and you'll need to choose a password. You only need to register once, of course.
- Once you've registered, select "foursquare" again to bring up a connect page. Select "log in," then enter your username and password, and click "allow" to tell Foursquare to accept pings from ToothTag. Finally, select "Return to NeuAer application." Again, you only need to do this part once.
- Tell ToothTag what to do and when to do it. First, select which Foursquare venue to connect with the signal on the pull-down menu in the middle of the screen. Then you can change the default status message and decide how long the signal needs to be visible before checking in. The default is 5 minutes, so you don't accidentally check in while walking past a place. Click OK and you're all done with manual check-ins at this venue.


ToothTag has a few other tricks up its sleeve, which we'll cover in future posts. For now, get out there and score some Foursquare points!