Get started with iMessage for OS X
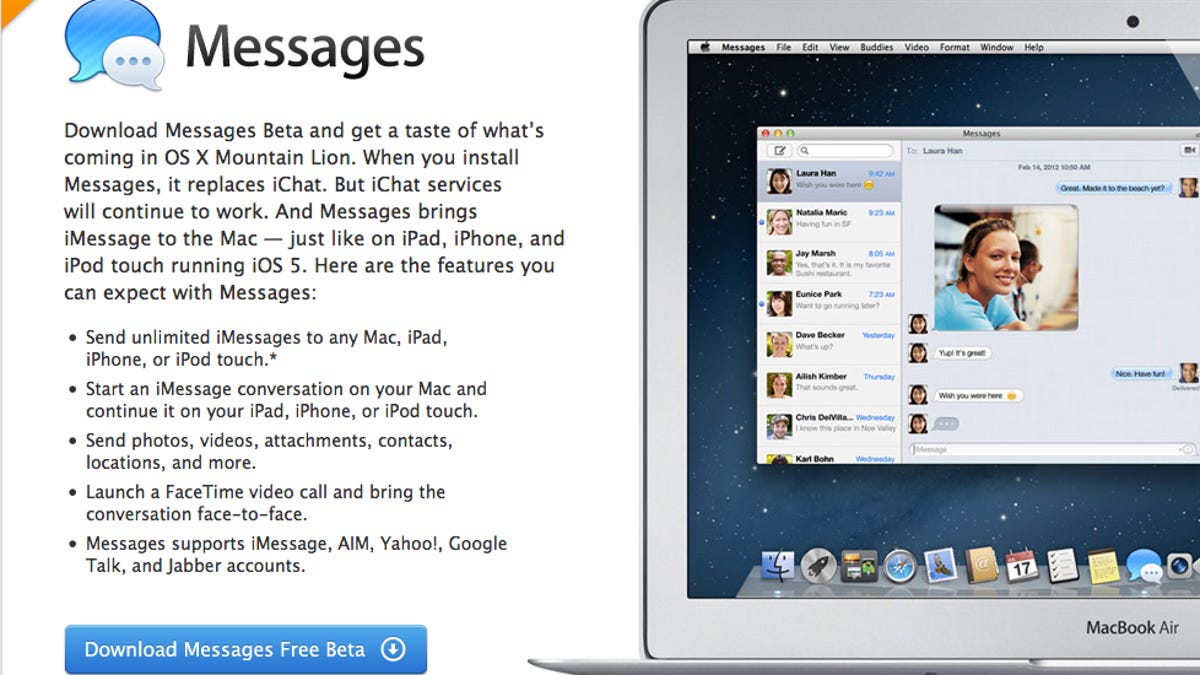
The Messages beta for OS X has been released, bringing along with it iMessage on your Mac.


Apple has let the cat out of the bag; OS X Mountain Lion is available as a developer preview starting today, and planned for release this summer.
But, to give the Mac and iOS faithful a taste of what's to come, a beta preview of the new Messages app has also been made available starting today. What's so special about the Messages beta? It includes iMessage for OS X, meaning you can send and receive iMessages from your Mac, iPad, iPhone, and iPod Touch--seamlessly.
Before I start diving into Messages, we have to point out that it is a beta, which means anything I cover here is subject to change in future updates. If that does happen, I will be sure to update this post to reflect the most current version.
- To get started, you will need to download and install the Messages beta from Apple. You will need to be running OS X 10.7.3 in order for Messages to work. After installing Messages, which replaces iChat on your Mac, you will need to restart your computer.
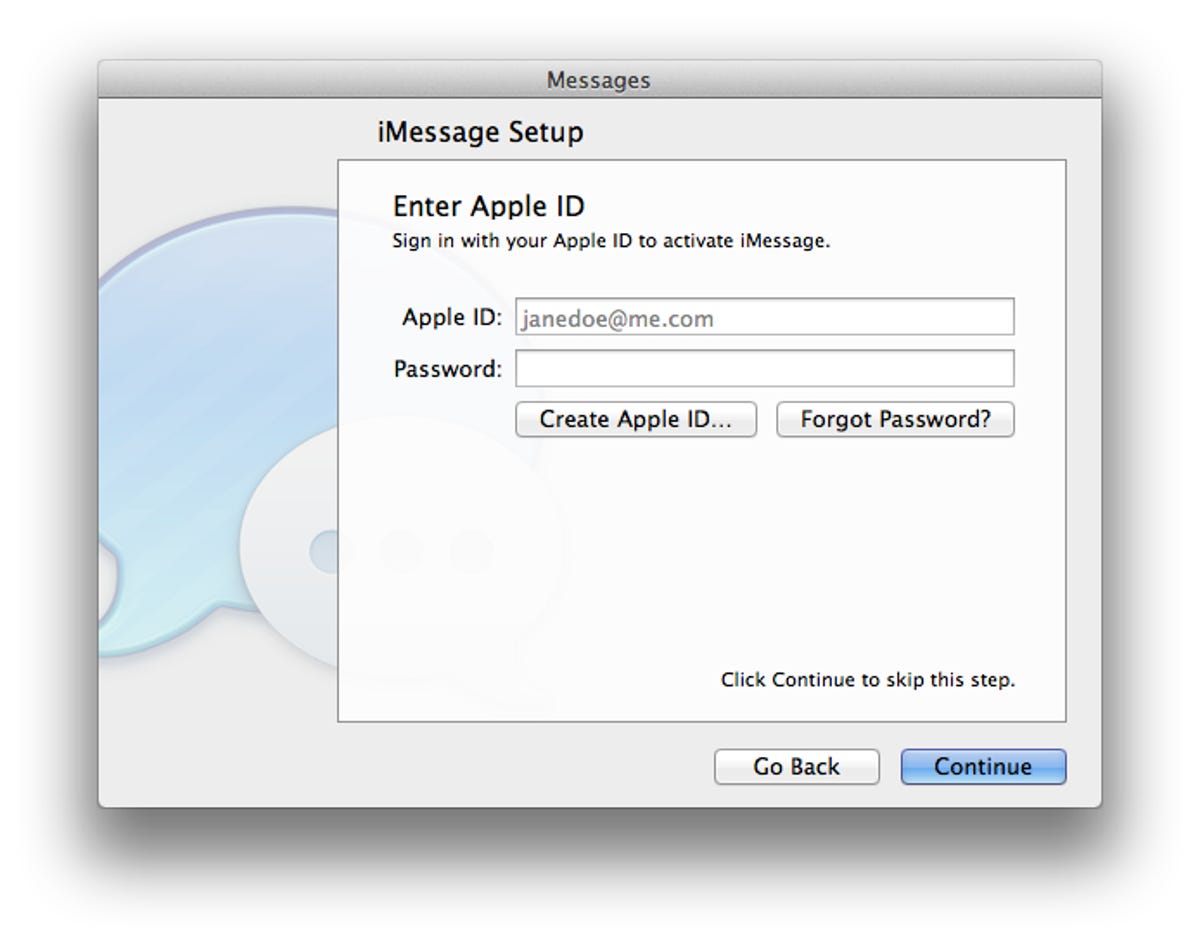
- After restarting your computer and launching Messages for the first time you will be walked through the setup process. Sign in using your Apple ID; it's important to use the same Apple ID you use on your iOS device(s). This is part one of two to ensuring your iMessages are in sync across all of your devices.
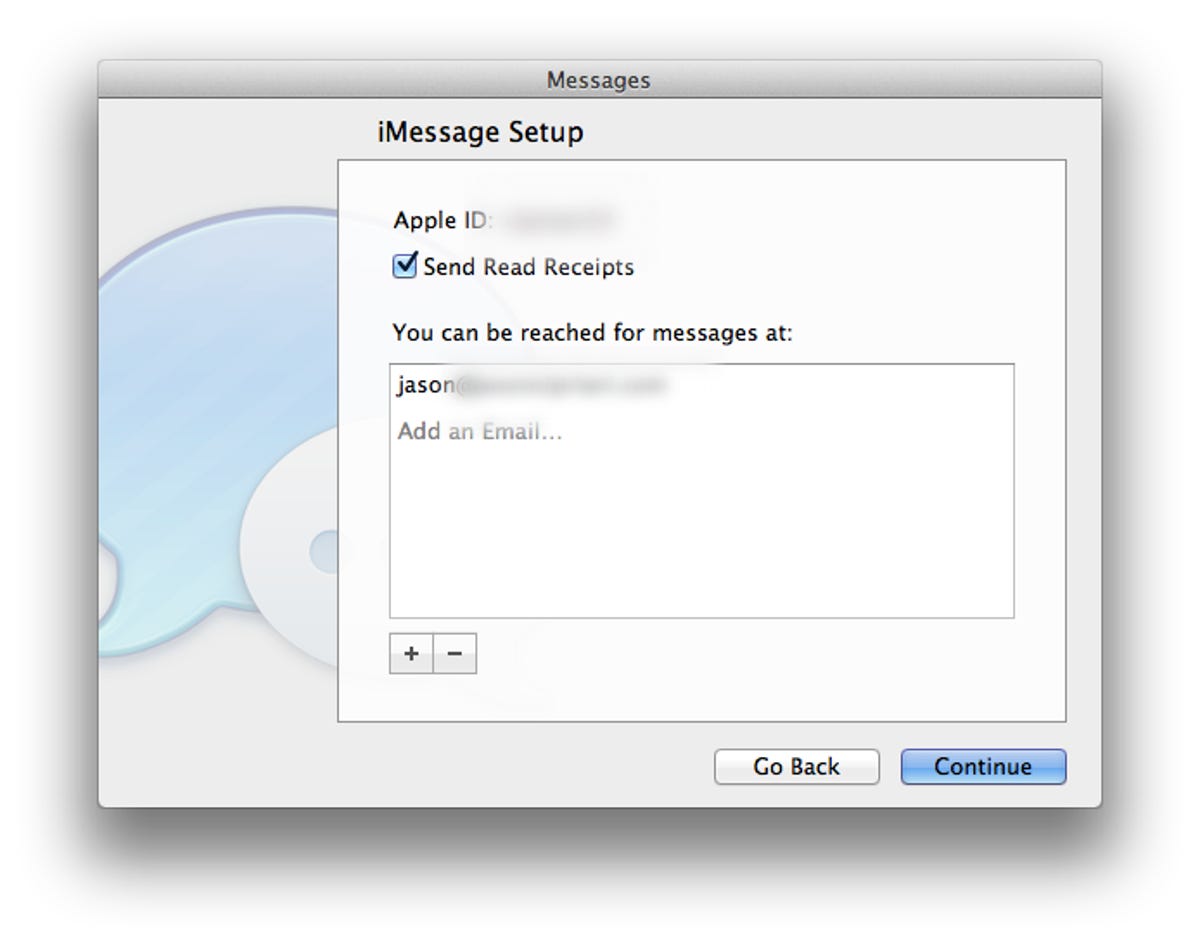
- After signing in, you will be asked to enter an e-mail address to receive iMessages on your Mac. By using the same e-mail address you used in setting up iMessage on iOS, all of your conversations and messages will be in sync across all of your devices (part two of two).
If you add more than one e-mail address, a caller ID option will appear at the bottom of the screen, letting you decide which address your messages will be sent from.
You can also check the "Send Read Receipts" box on this screen if you would like to have read receipts sent to other iMessage users. When you have added your e-mail addresses, set a caller ID, and set the read receipts, click on Continue.
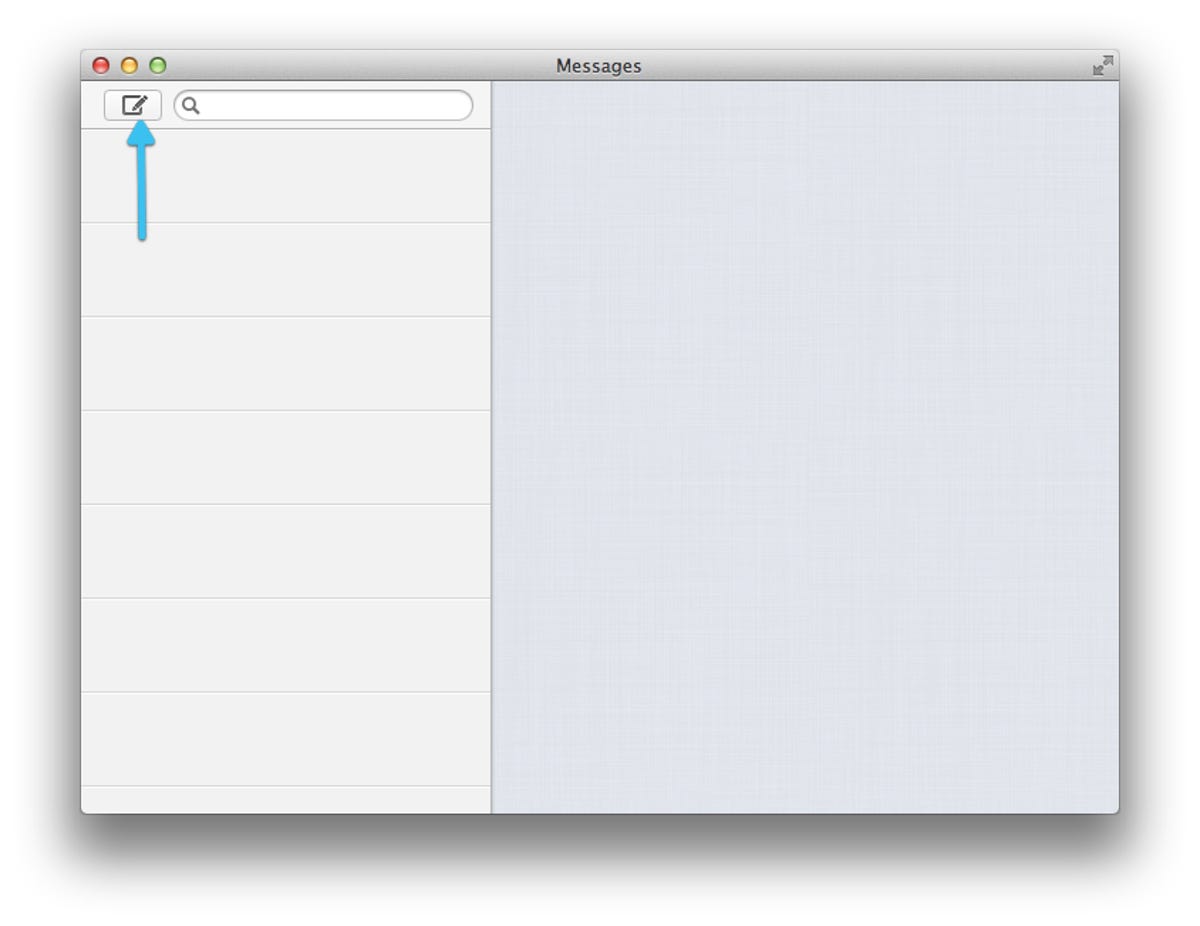
- A blank Messages screen will appear, letting you begin chatting like you always have. Regardless of the type of IM account you are using, this is where all of your messages will appear. To compose a message, across any service, click on the new message icon.
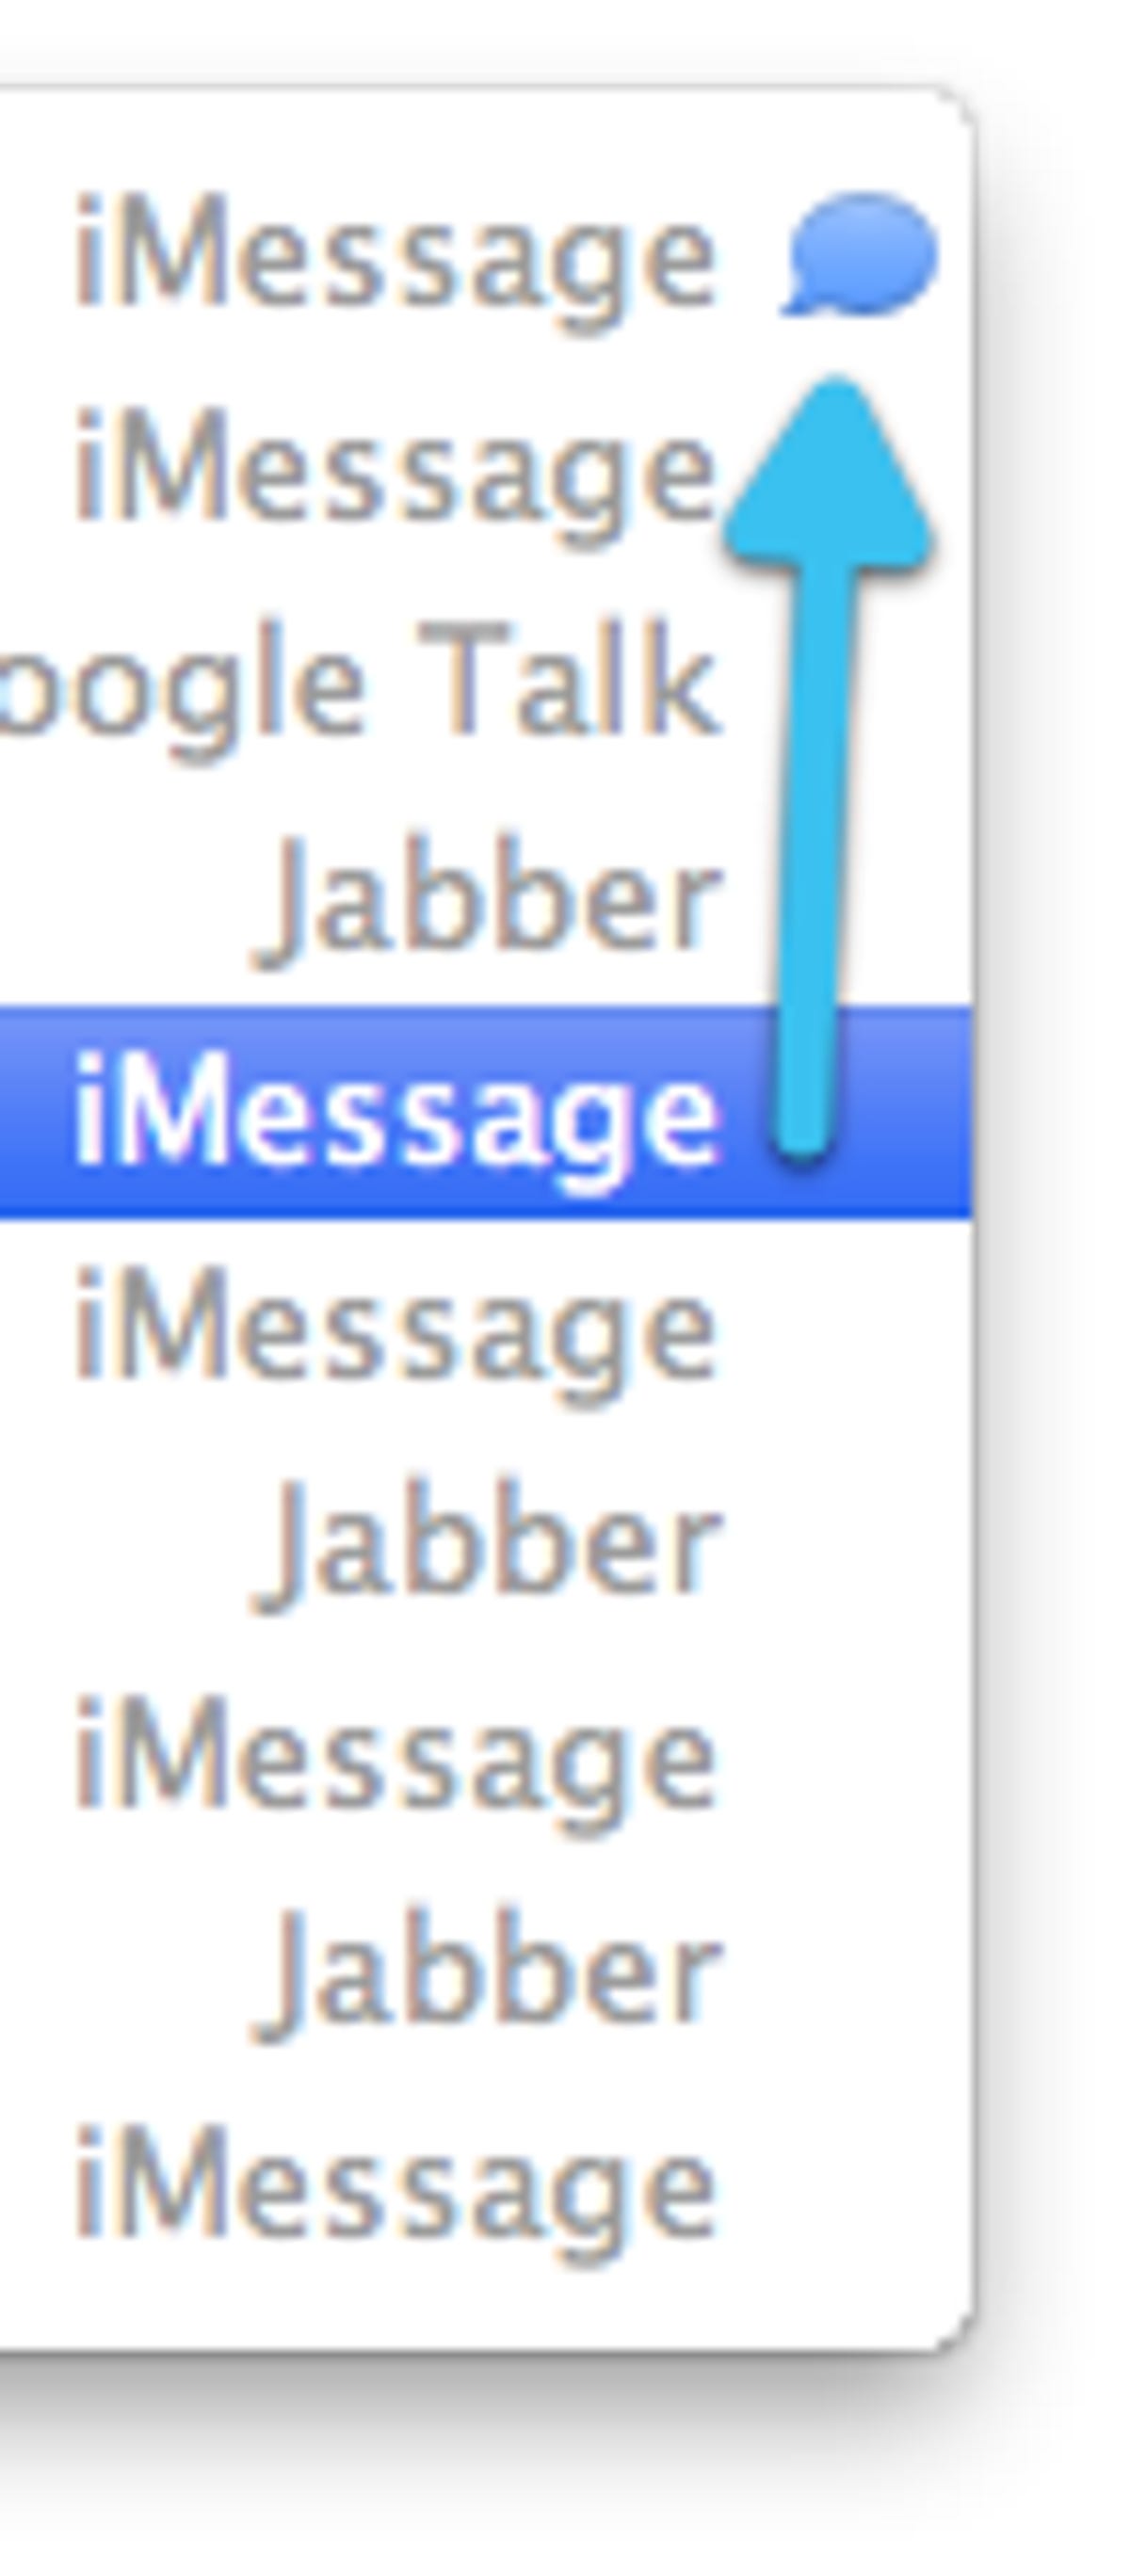
- When you are typing in the name, number, or address of the person you are going to send a message to, you will see the account type listed next to the recipient's information. A blue icon, as seen above, indicates an address you have sent or received iMessages with in the past.
- You can easily switch IM services in the middle of a conversation by clicking on the recipient's name in the To field, and selecting a different address to send messages to.
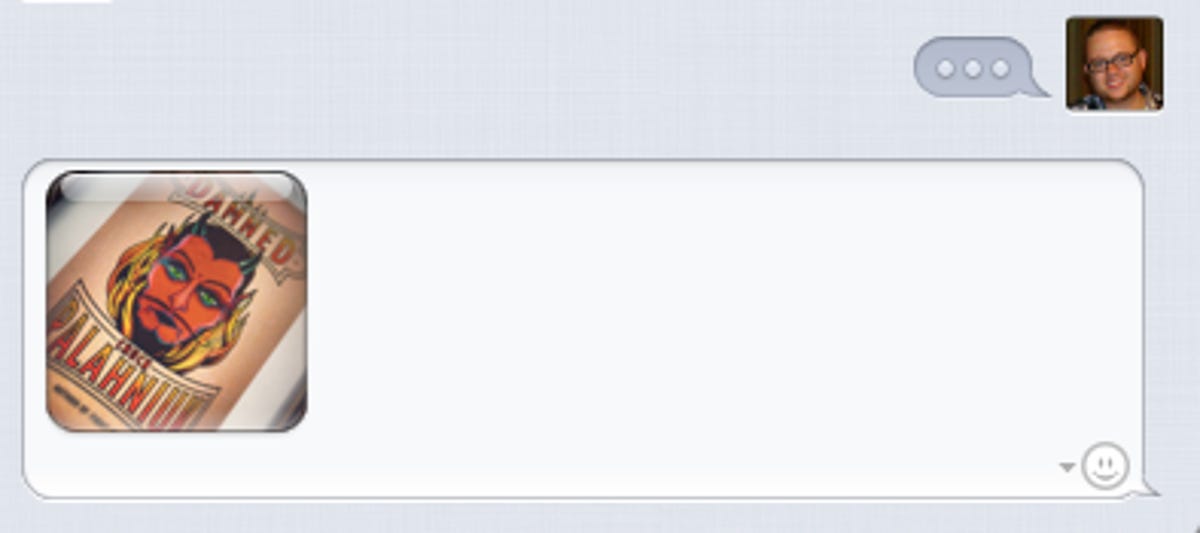
- Sending a picture is as easy as dragging and dropping it into the text field of your message.

At long last, iMessage has arrived on the Mac. One of the biggest issues so far is the fact that any device you have iMessage set up on will beep for every message. Because of this, you may want to use a different e-mail address for iMessage on your Mac.