[MUSIC]
If you need a nudge to finally tackle that photo scanning project you've been putting off, this is it.
Today I've got a few tips.
To help you digitalize your photo collection.
Once your scanner is set up, launch the software it came with.
These programs are actually pretty decent and are packed with features specifically designed for scanning photos.
In this.
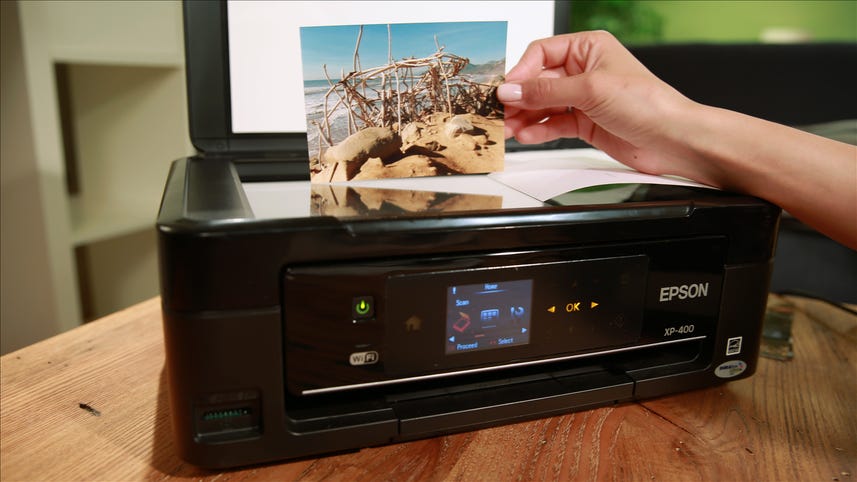
I'm using an Epson scanner and the Epson scanning utility.
First, change the dpi, or the resolution.
If you're only scanning the photos to archive them digitally and share them on Facebook, for.
For example, 300 dpi is just fine.
But if you plan to order enlargements in the future go with 600 dpi.
Scanning will take a little longer but remember you only have to do it once.
Next check to see if your program has an auto crop feature which automatically crops multiple photos from one scan.
This can literally triple the speed of your project so enable it if its there.
And finally the file output settings.
JPEG is usually the default and it's a great option if you need to save.
Storage space, but really you should be using the TIFF file format.
It's uncompressed, which means no quality is lost when the file is saved.
In this same area, you should also be able to adjust the file name.
This is really important because you want to establish a system at the beginning of your project.
So, decide how you wanna organize your.
Photos.
If it's by date and event, choose a file naming system that matches it.
I'll go with the reverse order date, like 2012-11-04, then the event name, and finally.
Finally I'll number the photos starting with one.
Now that you're settings are set, the last thing to do is clean your scanner bed to make sure no flecks of dust will be scanned with your photos.
Give it a quick clean, and you're ready to go.
Now that we're all set up, I can scan a few photos.
So I'll lay down three at a time.
And with that auto crop feature, you want to leave a little space between each photo.
Lay it down.
On this scanner, I'll hit preview.
I can see the thumbnails for each photo, and before I do the spinal scan, I can even rotate them.
To make sure the orientation is right.
I'm right side up, hit scan, confirm my settings, and now it'll do the final scan and save the photos to my computer.
This is going to take a while.
But, if you wanna scan your photos yourself, the time it takes is really the only drawback.
Otherwise, you can outsource the project to a company like ScanMyPhotos.com, which takes care of everything for you.
If you have any questions or tips of your own, hit me up on Twitter and check out howto.cnet.com for more tips like this.
For C Net, I'm Sharon Profis.
[MUSIC]