Ripping audio from concert DVDs: Ask the Editors
CNET Senior Editor Donald Bell answers a reader's question about ripping audio from concert DVDs to an iPod.


Q: I have a collection of live concert performances on DVD that I would like to be able to listen to on my iPod. Is there an easy way to rip just the audio, but not the video, and export the soundtrack to my iPod? -Tom (via e-mail)
A: There are many roads to take on a project like this, but I'm going to show you two that are free and both Mac and PC compatible. One method involves ripping the DVD to a video file using a program like HandBrake, and then passing the file through VLC Media Player to split the audio from the video (a process known as demuxing). In about the same amount of time, you could also try using a audio editor like Audacity to capture your computer's internal audio while playing the DVD in real time. This second method is time consuming if you have a large collection, but it affords you the most control and an opportunity to edit out silences, applauding, and lame songs.
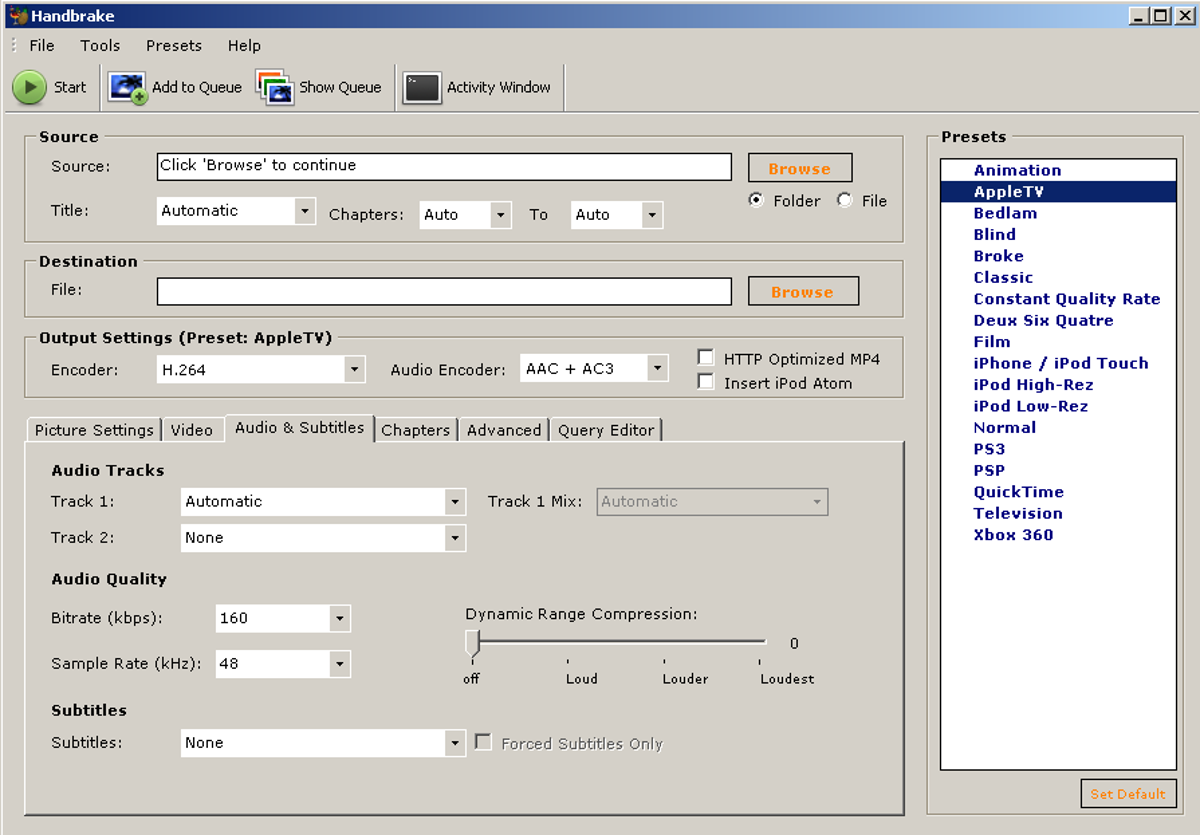
To test out the first method, rip your DVD to a video file on your computer using HandBrake. It doesn't matter what type of video file format you choose to rip to, but if you're going to be picky about audio quality, then you may want to monkey with the settings under the audio tab.
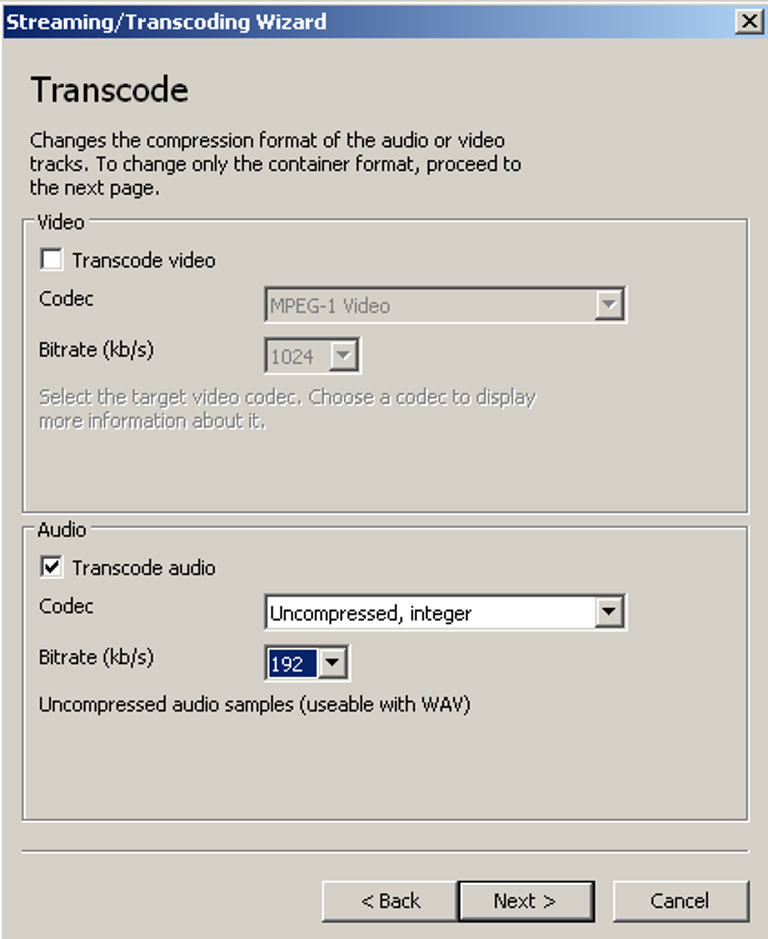
Once you have the DVD successfully ripped to a video file, you now need to split (aka demux) the audio from your video. Launch VLC Media Player and select the Streaming/Exporting Wizard under the File menu. The Wizard will walk you through the process of selecting the video file you want to demux, how you want the audio transcoded (Uncompressed WAV or MP3), and where you want the new file saved.
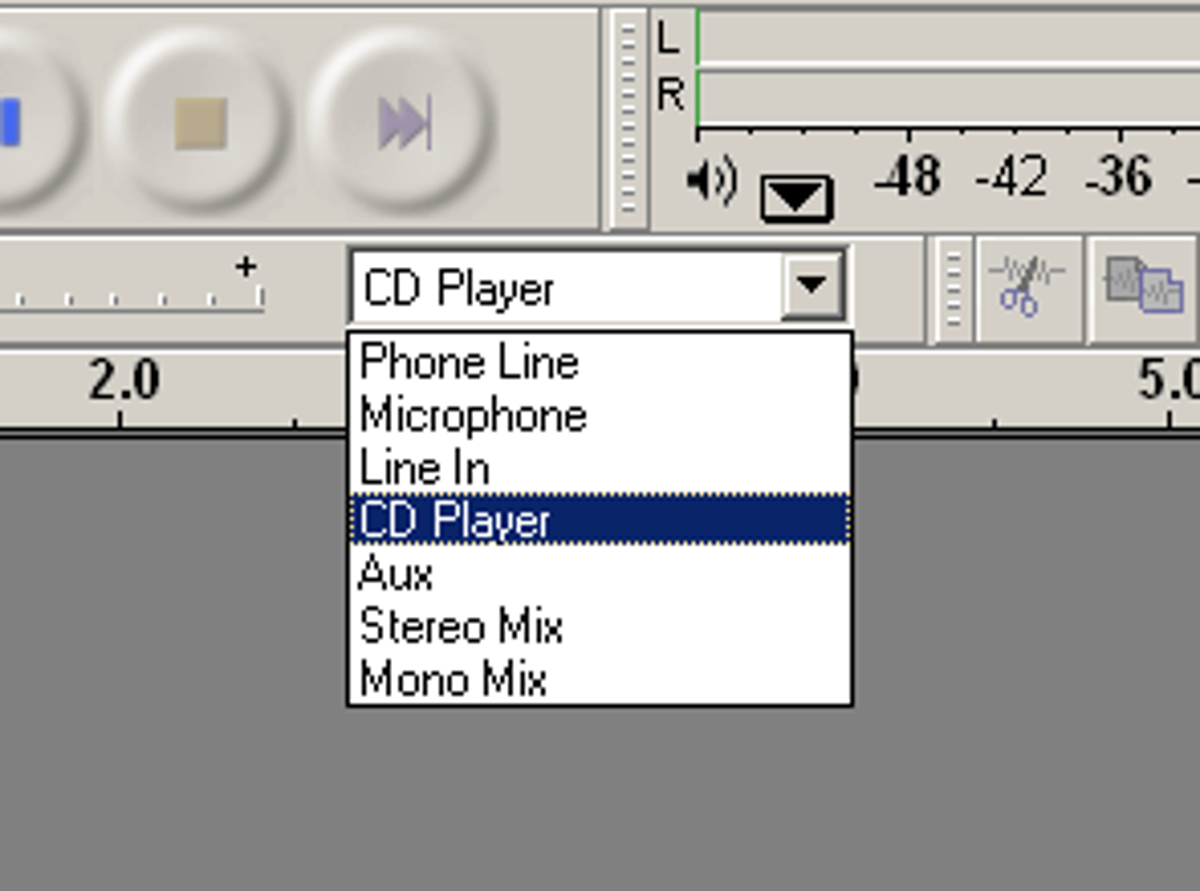
If the first option doesn't work for you or seems too complicated, you can achieve good results by simply playing the DVD on your computer and recording the audio into Audacity in real time. To do this on a PC, pop your DVD into your computer and launch both Audacity (version 1.2.6) and your preferred DVD player application (VLC will work for this too). In the drop-down menu under Audacity's forward skip button, select CD Player as the recording input.
Once selected, you should be able to start your DVD, hit record in Audacity, and see the waveform of your recorded audio begin to unfold. If you're not getting any audio, check Audacity's preferences to make sure your computer's audio card is selected as a recording device and check that your DVD is cued up to a place where you're likely to hear something (sometimes those DVD menu screens are silent).
If you're trying this same technique on a Mac, there's good news and bad news. The good news is that Apple's built-in Core Audio sound card drivers are more stable and consistent than the audio driver hodgepodge faced by PC users. The bad news is that you need to take one extra step and download a useful program called Soundflower that allows you to internally route your Mac's audio between programs. After installing Soundflower, open up your Mac's Audio MIDI Setup under Utilities, select the Audio tab and make "Soundflower (2 ch)" your Default Output and System Output. Next, open up Audacity's preferences and select "Core Audio: Soundflower (2ch)" as the recording device. Start your DVD, hit record in Audacity, and you should see results.
(Note: Setting up your computer to record its own output has many other benefits beyond recording DVD audio. Streaming Webcasts, Internet radio, and save-disabled pro audio software are also fertile ground.)
Whichever technique works best for you, you should end up with an audio file that can be dragged into your iTunes library. To make sure the file is ready for playback on your
For more information on all things iPod, check out CNET's iPod Central page.