Got a New iPhone? Take Your Best Photos Ever With These Pro Tips
You can take incredible images with your phone. These pro tips will help you make the most of those cameras.


- Shortlisted for British Photography Awards 2022, Commended in Landscape Photographer of the Year 2022
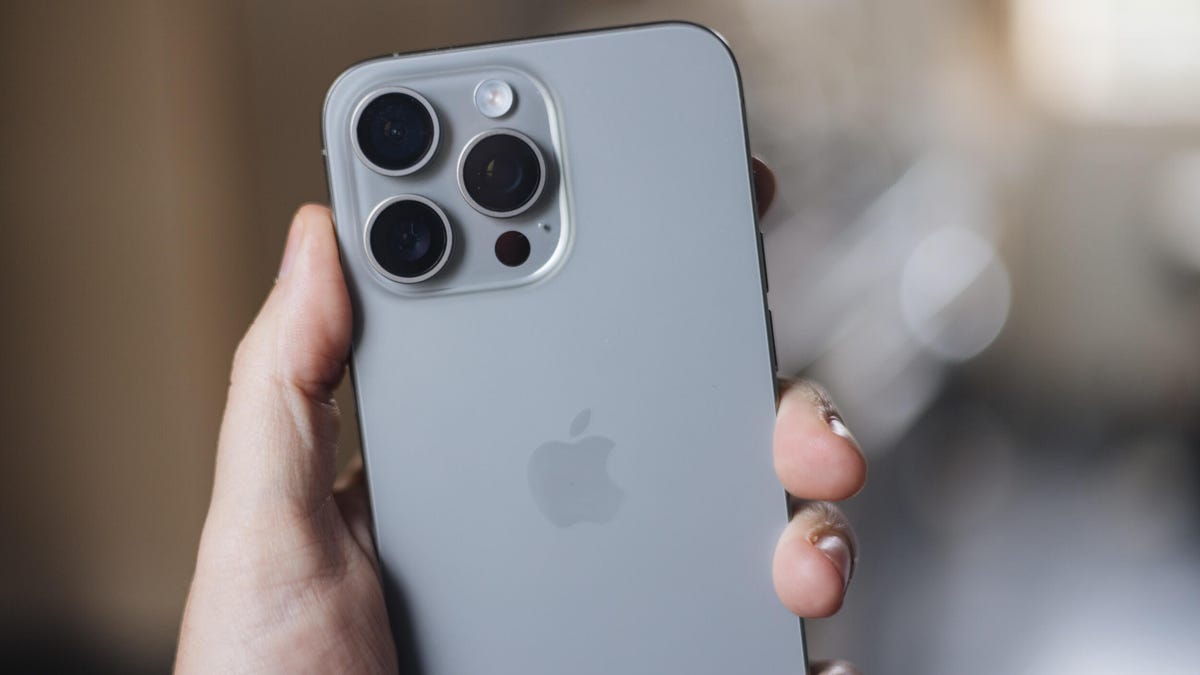
The iPhone 15 Pro and Pro Max are among the best camera phones you can buy right now. The three rear lenses on both phones can take beautiful photos, while the 15 Pro Max's longer 5x optical zoom lets you find even more creative compositions in your surroundings. The iPhone's potent combination of gorgeous image quality, software processing and advanced features, such as Apple's own ProRaw image format, means the iPhone's images can look like they were taken on a professional-level camera.
Then there's the wide array of amazing photo editing apps available on iOS that can help turn even a regular image into an eye-catching piece of digital art.
Read more: Best Camera Phone to Buy in 2023
But simply having a great camera isn't the only thing you need to take award-worthy images. Knowing the tricks of the trade will make the difference between coming home with some fun snaps and coming back with beautiful photos you can't wait to print and frame for your wall.
Here, then, are my top tips for better images, techniques that I use every day as a professional photographer, from working with the light to using more-creative angles to polishing up your shots in editing apps like Snapseed or Adobe Lightroom. Many of these tips will apply on any recent phone you may have, including the base iPhone 15 or older models like the iPhone 14 Pro and iPhone SE and even many Android phones like the Pixel 8 Pro or Samsung Galaxy S23 Ultra.
Know when to use the different lenses

By switching to the iPhone 14 Pro's ultrawide lens, I was able to capture this mooring rope as foreground interest, which ties the scene together.
It's easy to stand in front of a picturesque scene and flick between the normal, super wide and zoomed views on the phone, but it's more difficult to understand exactly why one might be better than the other for a particular composition. To figure it out, you need to take an extra moment to look at what's important in the scene in front of you.
Is there a particular subject -- perhaps a statue or an impressive building -- that's surrounded by lots of other elements like trees, sign posts or street lights? Using the iPhone 15 Pro's 3x telephoto zoom here is a great way of isolating your subject and eliminating all those distractions. You may need to move back a bit and then zoom in to keep it in frame, but simplifying your scene like this will help your subject stand out.

Taken with the iPhone 15 Pro Max's standard lens, this image overlooking some allotments has no real subject or purpose.
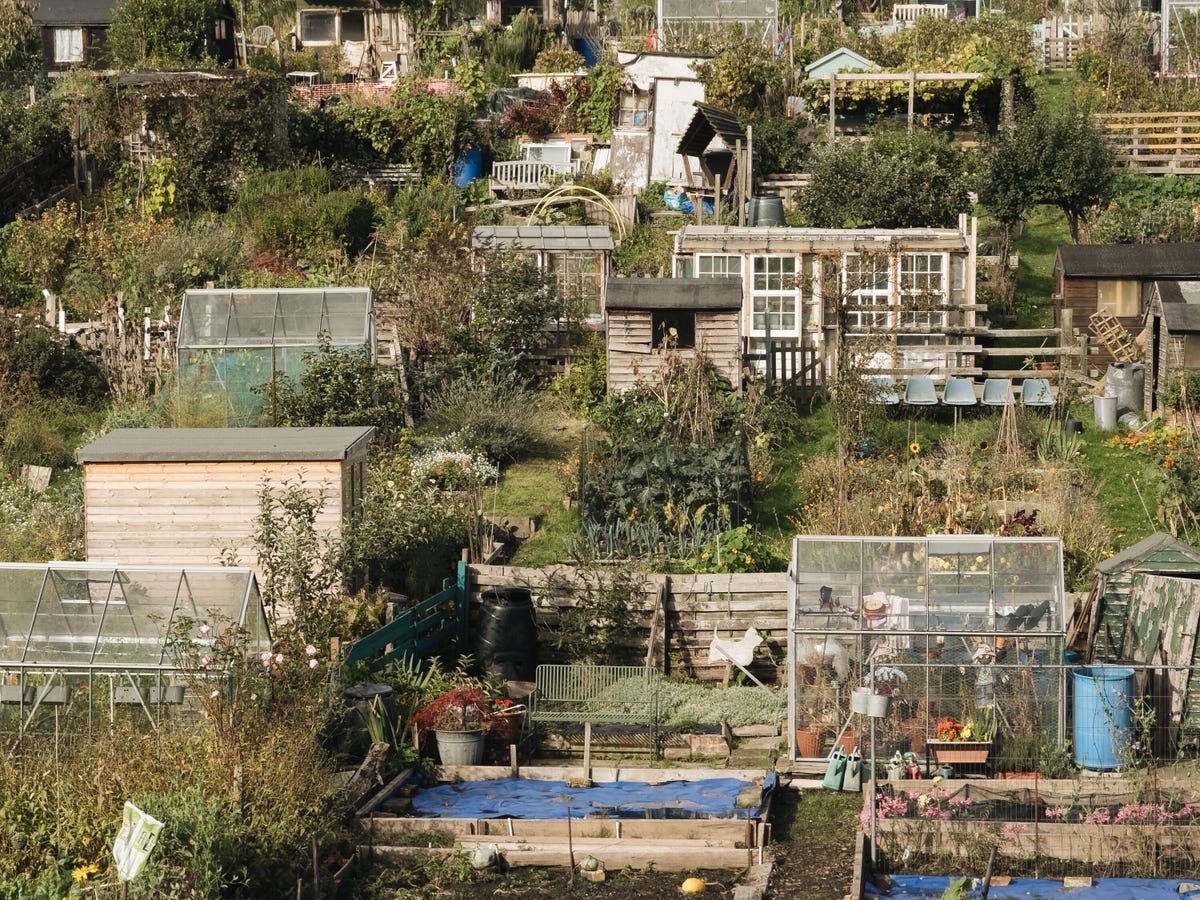
But zooming in using the 5x optical lens allowed me to find much more interesting compositions within the scene, that bring out some of the smaller details that would otherwise be lost.
The iPhone 15 Pro Max takes that zoom even further, offering a 5x optical zoom which can fill the frame with your subject even more. I love a longer zoom for taking candid photos without disturbing someone, or for narrowing your composition in an otherwise cluttered, chaotic scene.
But perhaps it's those extra surrounding elements that really add to the scene and provide context for where you are. In that case, using the standard zoom will allow you to keep those items in the shot. Switching to the super wide view will capture even more of the surroundings. So to avoid your subject getting lost in the frame, you might want to move closer and find interesting foreground objects (a patch of flowers, a cool-looking rock) to add to the composition.
Revisit at different times of day
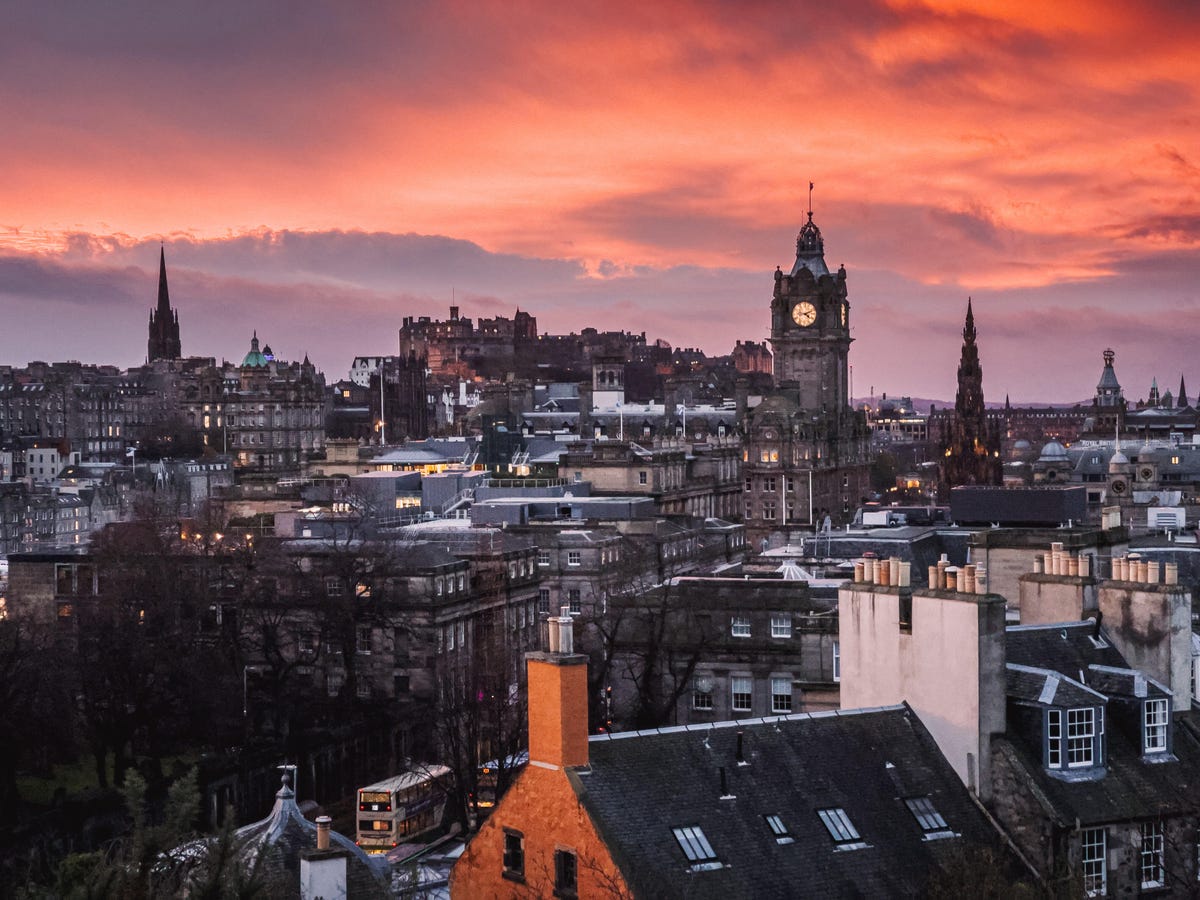
Waiting until the evening for this shot really paid off, with an incredible fiery sunset.
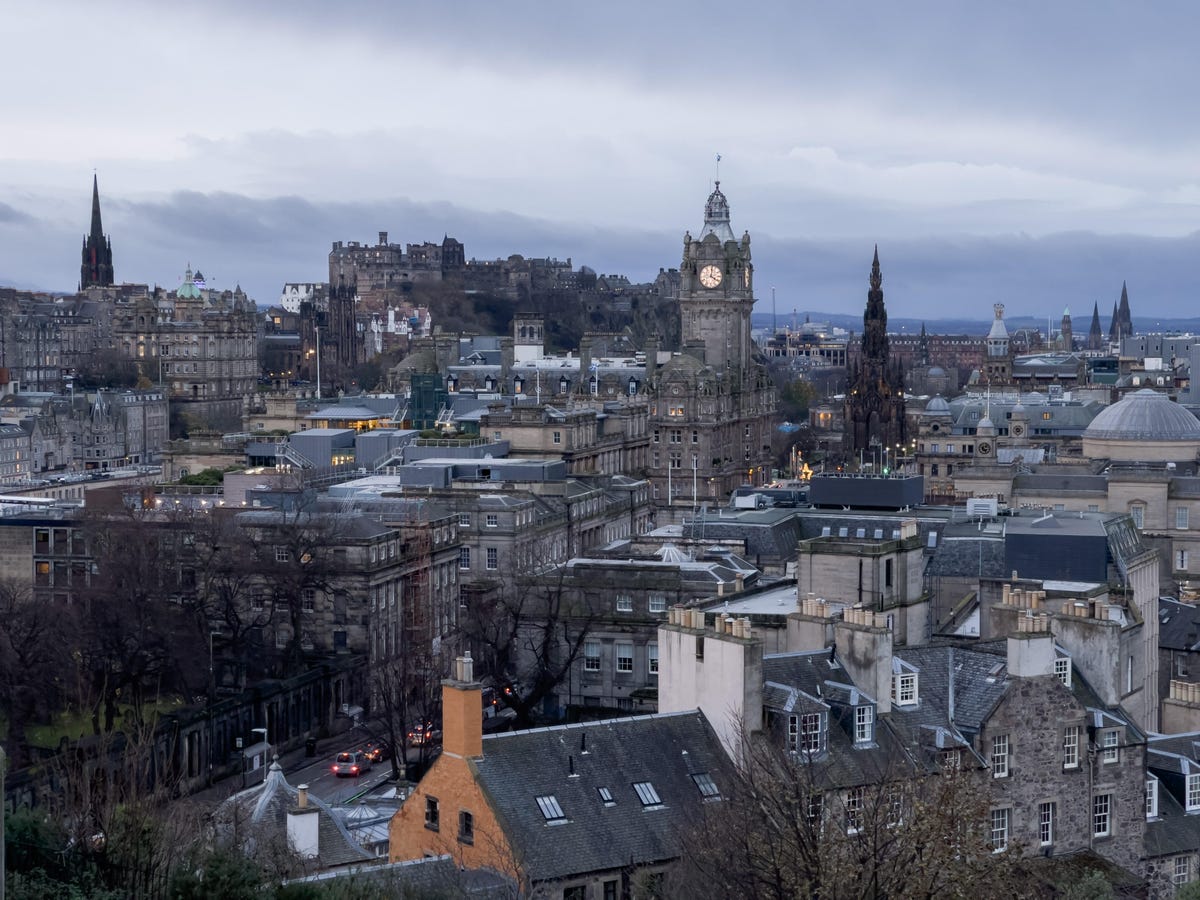
Only 10 minutes earlier, this was the same scene. Fine, but with none of that Edinburgh sunset drama.
The awesome low-light skills of the iPhone 15 Pro mean you're not limited to only taking photos at midday when the sun is at its highest. Sunrises and sunsets will typically be darker, but may reward you with beautiful colors in the sky and great contrast in the light being cast. Landscape photographers know that getting up before dawn can often yield the best results and it's something that's always worth keeping in mind, if you can stomach the early rises.
If you're willing to try a sunrise shoot at least once, visit the spots you've already shot and see how they're transformed by the different light. It's this that will separate your images from the hundreds of others on Instagram who just took a snap after their morning coffee.
Don't be afraid of the dark
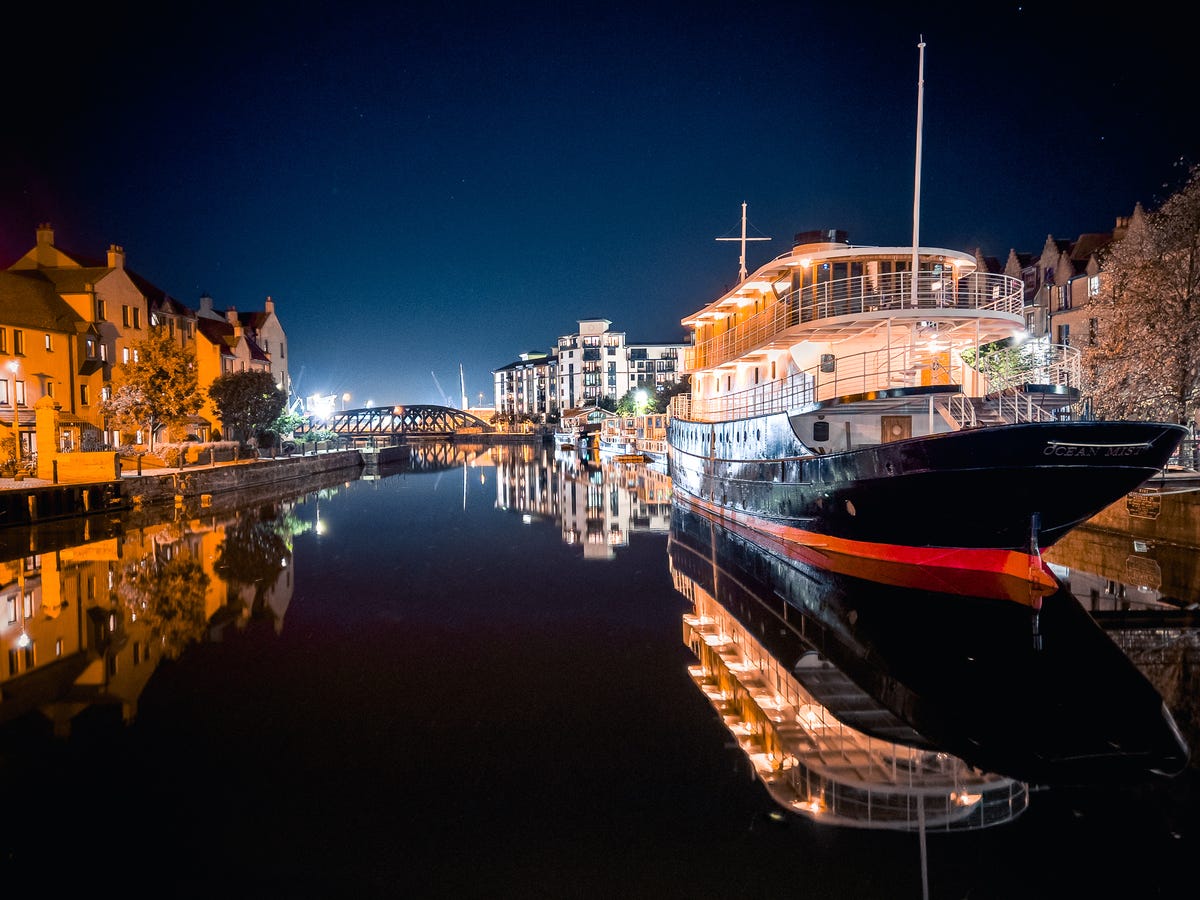
Shot on the iPhone 14 Pro, Night mode allowed me to capture a vibrant and sharp shot here, despite it being the middle of the night.
Don't think that once the light goes altogether you need to stop shooting. The iPhone 15 Pro has one of the best night modes on any phone and can take astonishing night-time photos. City scenes, with car headlights, vibrant shop window displays and even festive holiday decorations can provide superb fodder for night shots. And don't worry if it rains. Those wet streets will now reflect all of those lights, which can look amazing.
Check out our tutorial If you want to get even better results from your night-time phone photography.
Shoot in ProRaw, edit your shots later
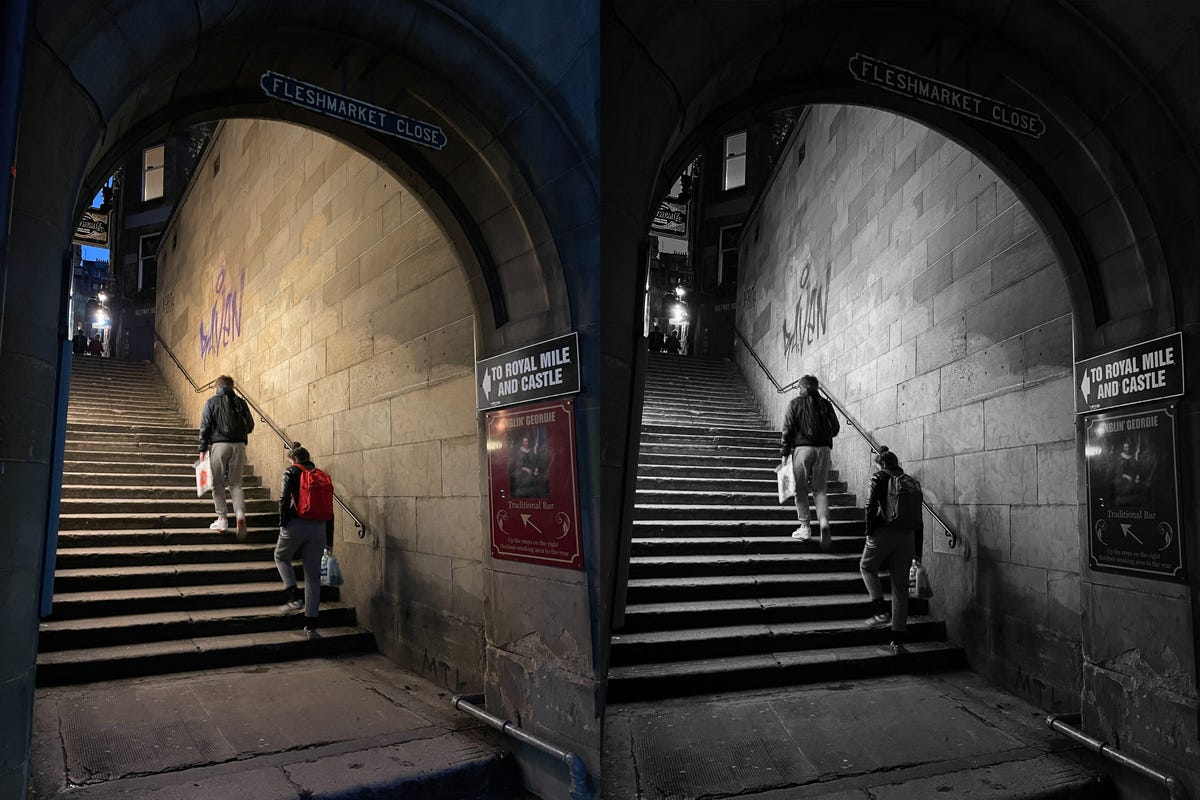
The original image on the left is a fair snap, but with a moody black and white edit it has a lot more atmosphere and works much better as a shot.
A few careful tweaks in editing apps like Adobe Lightroom can make all the difference between an everyday snap and a beautiful piece of art. Thankfully, Apple has made this even better with the introduction of ProRaw.
ProRaw is much the same as shooting in raw on regular DSLRs; it doesn't save all the image data, allowing you to change white balance and alter colors much more accurately after you've taken your shot.
It also captures more detail in the shadows and highlights of your images, giving more scope for rescuing those bright skies with the highlights slider or bringing back a bit more visible detail in the darker shadows. You'll see the raw button in the top corner of your screen when you're in the camera, so make sure it doesn't have a line through it if you're taking an image that you know you'll want to polish up later to look its best. You can edit JPEG images too. I's just that you won't have quite the same level of flexibility.
I use Adobe Lightroom Mobile for most of my phone editing. It's a professional tool and has a lot of granular control over color and exposure, while also syncing my images to the cloud so I can pick up my edits later on my iPad or my desktop computer. If you don't fancy the monthly fees, Google's Snapseed is free and also has a lot of superb features for getting the best from your shots, including a variety of film effects that give some beautiful color toning to your photos.
If you want to get a bit more wild and creative, you should check out apps like Bazaart and PicsArt, which provide a variety of tools and effects for compositing images to turn them from photos into often bizarre pieces of modern art. Take a look at my roundup of image editing apps for more ideas.
Remember that there is no right or wrong way to edit your images, and applying creative effects doesn't mean deleting the original file -- so you can always go back and try again if you don't like the result. My advice is to get a cup of tea, sit back in a comfy chair and spend some time playing with your editing app of choice and seeing what you can create. You may be surprised at what you can come up with, even from images you took some time ago.