Getting started with Photos for Mac's editing tools
Learn what the editing tools the new Photos app for OS X can do, from the one-click Enhance button to finer adjustments.


Not surprisingly, the editing tools in Photos for Mac are similar to what you get with the Photos app for iOS. If you look just below the surface, however, they are greater in number, giving you greater control over your photos on a Mac than you get on an iPhone or iPad.
As with the iOS app, Photos for Mac places the Edit button in the upper-right corner and lays out the editing tools along the right edge when you enter edit mode. From top to bottom, the six editing buttons in Photos for Mac are: Enhance, Rotate, Crop, Filters, Adjust and Retouch. There are more adjustment tools on the Mac app than there are on the iOS app, and the retouch tool isn't offered on iOS. Let's have a look at each.
Enhance
Just as with iOS (and iPhoto before with OS X), the Enhance button offers automatic one-click enhancements of your photos. I find auto-enhance generally does a good job of improving my photos, at least as a jumping off point for additional edits.
Rotate
The Rotate button rotates a photo 90 degrees to the left. Hold down the Option key and you can rotate to the right.
Crop
The Crop tool lets you crop your photo and change its aspect. You can also flip it horizontally to get a mirrored image of it or hold down the Option key to flip vertically. There is a dial to the right of your photo to straighten it.
You can manually crop a photo, and there is also an Auto button that auto-crops your image, but I found it often reverted to my original image. (Perhaps I'm such an ardent follower of photography's rule of thirds that I don't need any auto-cropping.) When manually cropping, you'll need to get used to dragging the photo underneath the fixed border; in iPhoto, your photo remained in place and you dragged the border around to crop it. Move your cursor off of the photo to see how the new cropped image looks.
Filters
It would seem that you can't have a photo app in this day and age without filters. Thus, you'll find the same eight filters from Photos for iOS on the Mac: Mono, Tonal, Noir, Fade, Chrome, Process, Transfer and Instant. Unlike with Instagram and other apps, you cannot adjust the intensity of a filter, though you can select a filter and then make other adjustments.
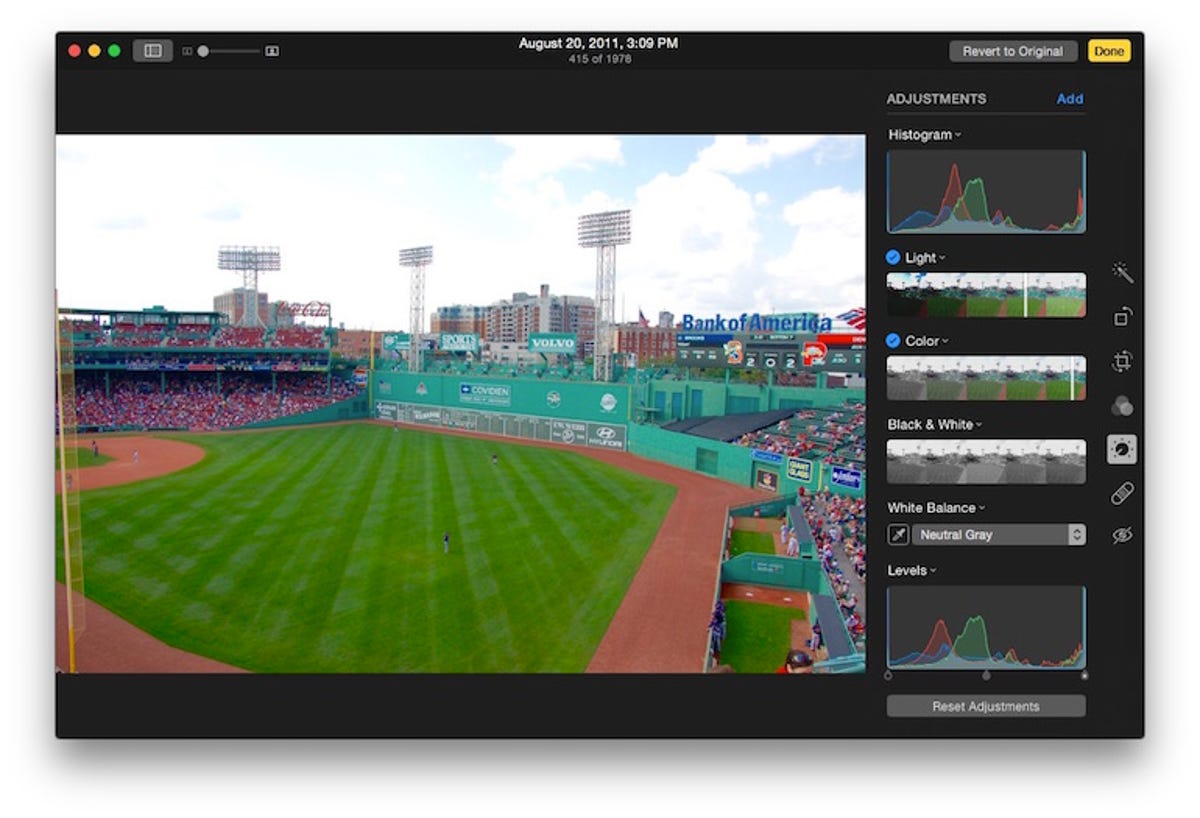
Adjust
Open the Adjust tool and you are greeted with the same three tools that you get with the Adjust tool for iOS: Light, Color and Black & White. There is a slider for each effect as well as an Auto button that lets the Photos app make its best guess. Above these three tools is an Add button, which lets you access seven additional tools that aren't offered on Photos for iOS. They are: Histogram, Sharpen, Definition, Noise Reduction, Vignette, White Balance and Levels.
Retouch
The Retouch tool isn't offered on iOS and lets you remove unwanted elements of your photo. You can adjust the size of the tool and then click-and-drag to blur out blemishes and other undesirable artifacts. Use the slider at the top to zoom in on your photo.
Photos makes non-destructive edits, which means you can always return to an edited photo and revert to its original. When in edit mode, there is a Revert to Original button next to the Done button in the upper-right corner. And while you are editing a photo, you can compare the edit version to the original by mousing over the photo and hitting the M key.
You can also undo your last edit by going to Edit > Undo or by hitting Command-Z. You can undo only your last edit. A more helpful and powerful undo tool would show you a list of your edits for a photo and let you undo anyone from the list instead of just the last edit you made.
For more, join us on our tour as we explore Photos for Mac.