Move your iTunes library to an external hard drive (screenshots)
Has your iTunes library become too big to fit on your computer? CNET's Donald Bell shows you how to move your iTunes media collection to an external hard drive.


Moving iTunes to an external drive
If you're an iTunes user whose appetite for music, movies, and podcasts is outstripping the capacity of your computer, it might be a good time to think about offloading that library to an external hard drive or a separate internal drive. If you do it right, the process is relatively simple, although the transfer time could take an hour or more, depending on the size of your collection.
To walk you through it, here's a step-by-step guide on how to move your iTunes library to an external hard drive. This tutorial is also available as a step-by-step video.
Step 1: Preparation
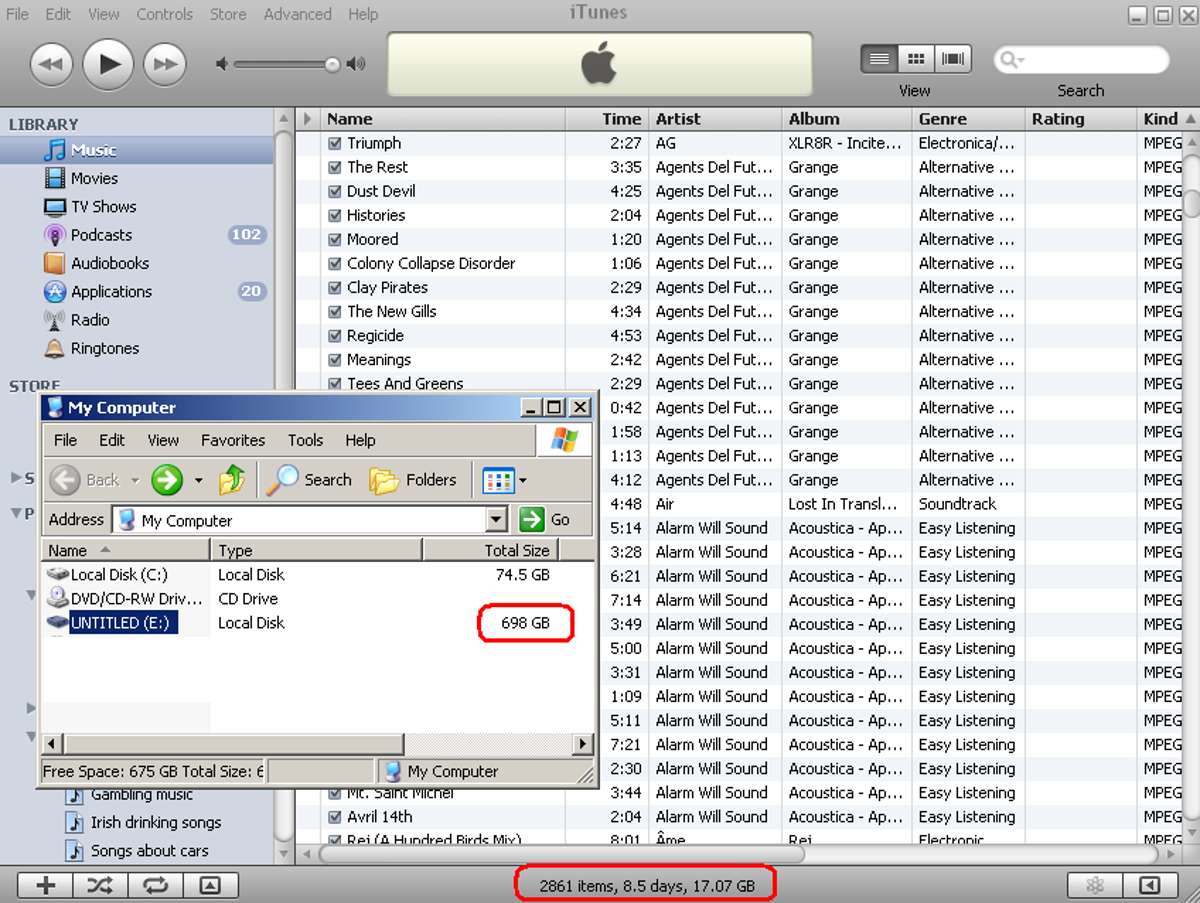
Connect the hard drive that will serve as the new home for your iTunes library. Make sure the drive is recognized by your computer and has enough room to hold your collection. To gauge the size of your media library, open iTunes, select one of your libraries (music, movies, TV shows, podcasts, audiobooks, and so on) from the left pane, and take a look at the numbers written at the bottom-center of the iTunes window. You should see the number of files in that particular library, along with the size of the library, measured in gigabytes. Moving your iTunes library means moving all of your media (audio and video), so be sure to check the size of each of these libraries to get an accurate picture of how much space you'll need.
While you're going through your collection, it's not a bad idea to do some spring cleaning while you're at it. Deleting old podcasts and TV shows you never plan on watching again can shave whole gigabytes from your library and hours from your transfer time.
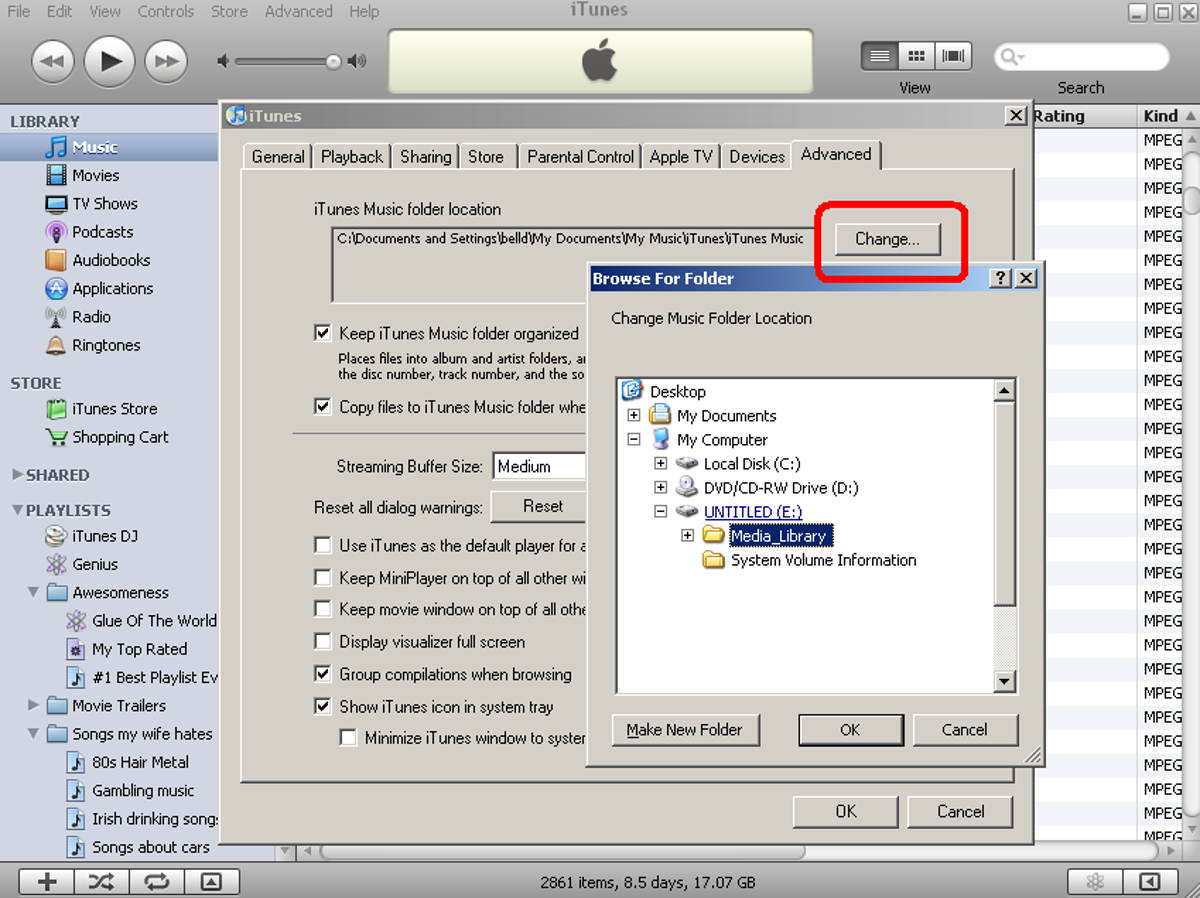
Step 2: Define a new location
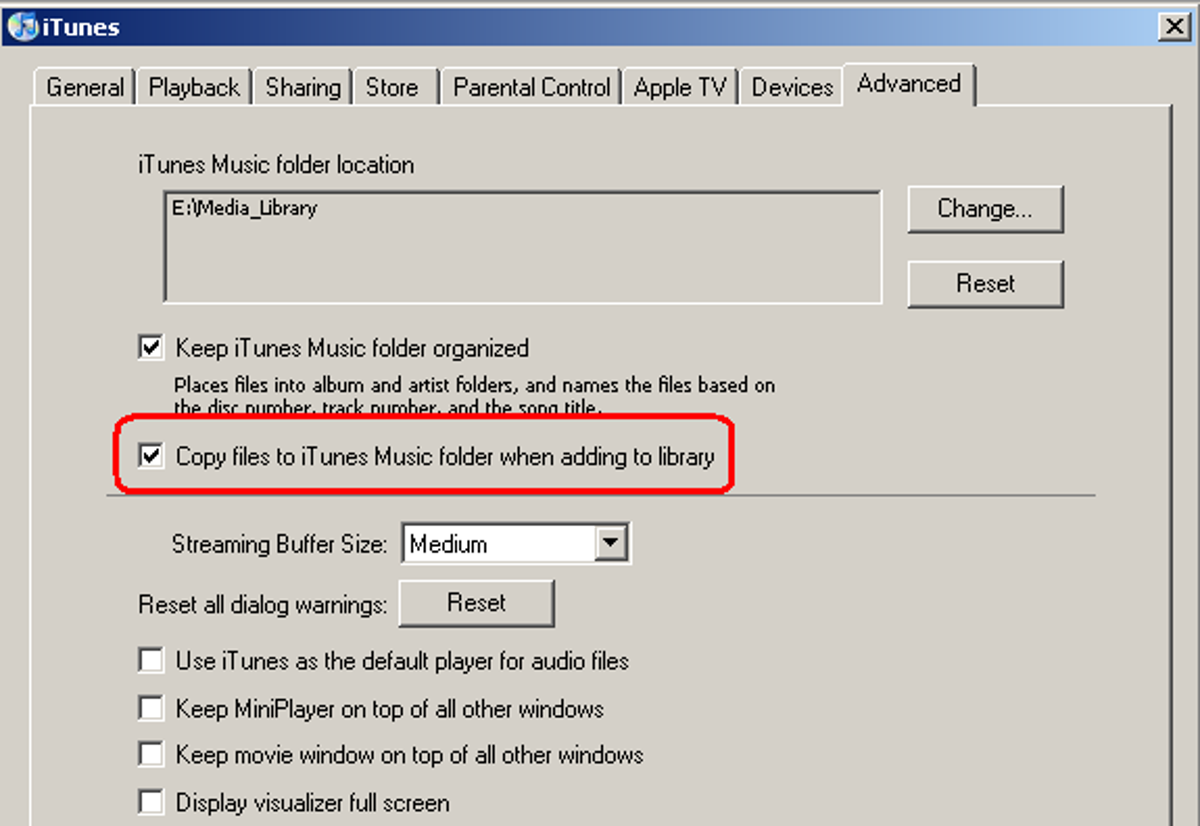
Step 3: Make iTunes copy new files

Step 4: Organize the library
After you change your preferences, iTunes may or may not prompt you on whether you'd like to have your library organized and moved to the new location. If the prompt comes up, hit yes.
You're not done yet, though. When you're ready to make the transfer, click on the iTunes File menu, then go to Library, and select Organize Library.
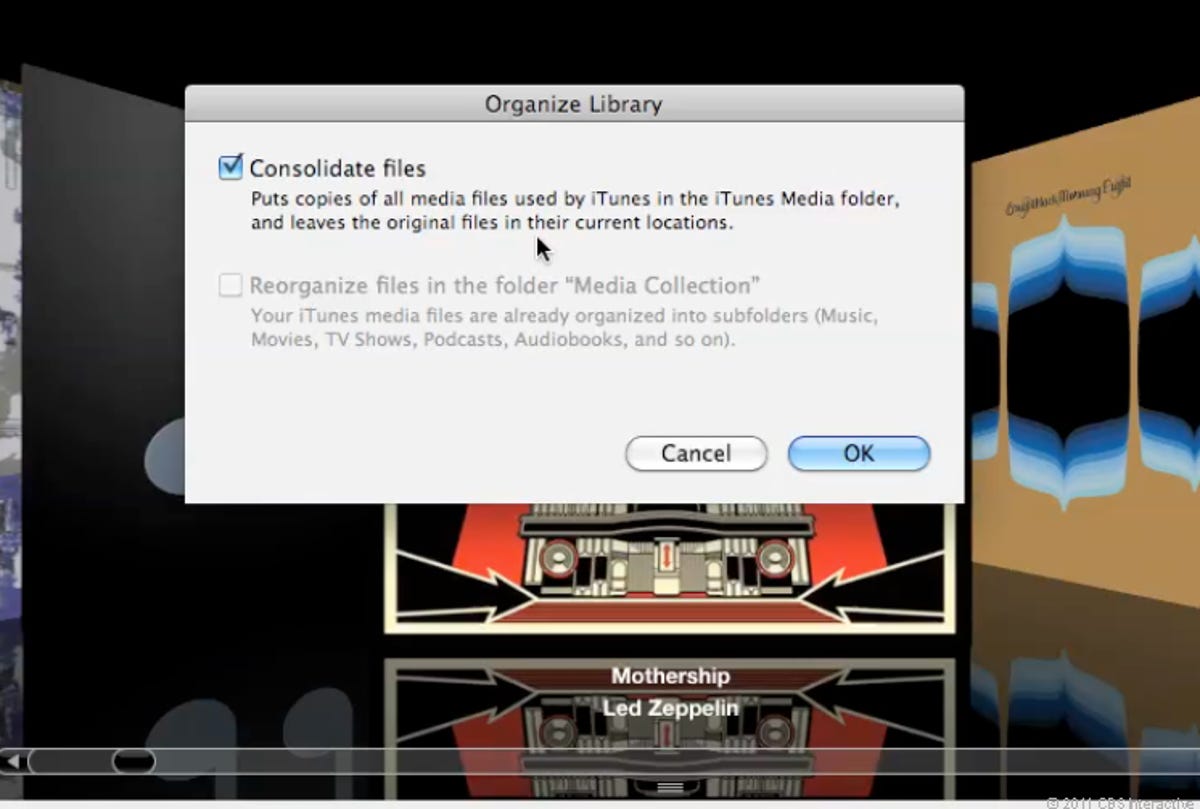
Step 5: Consolidate the library
You'll see a window with options for consolidating and organizing your library. Check them both if you can, but the critical one is the first option: "Consolidate files." This is going to take all the files referenced by iTunes on your computer--your movies, music, audiobooks, podcasts, TV shows--and copy them to the new location on your external drive.
It will take some time, and remember it's not deleting the old files, it's just copying them to a new location.
Step 6: Confirm the transfer
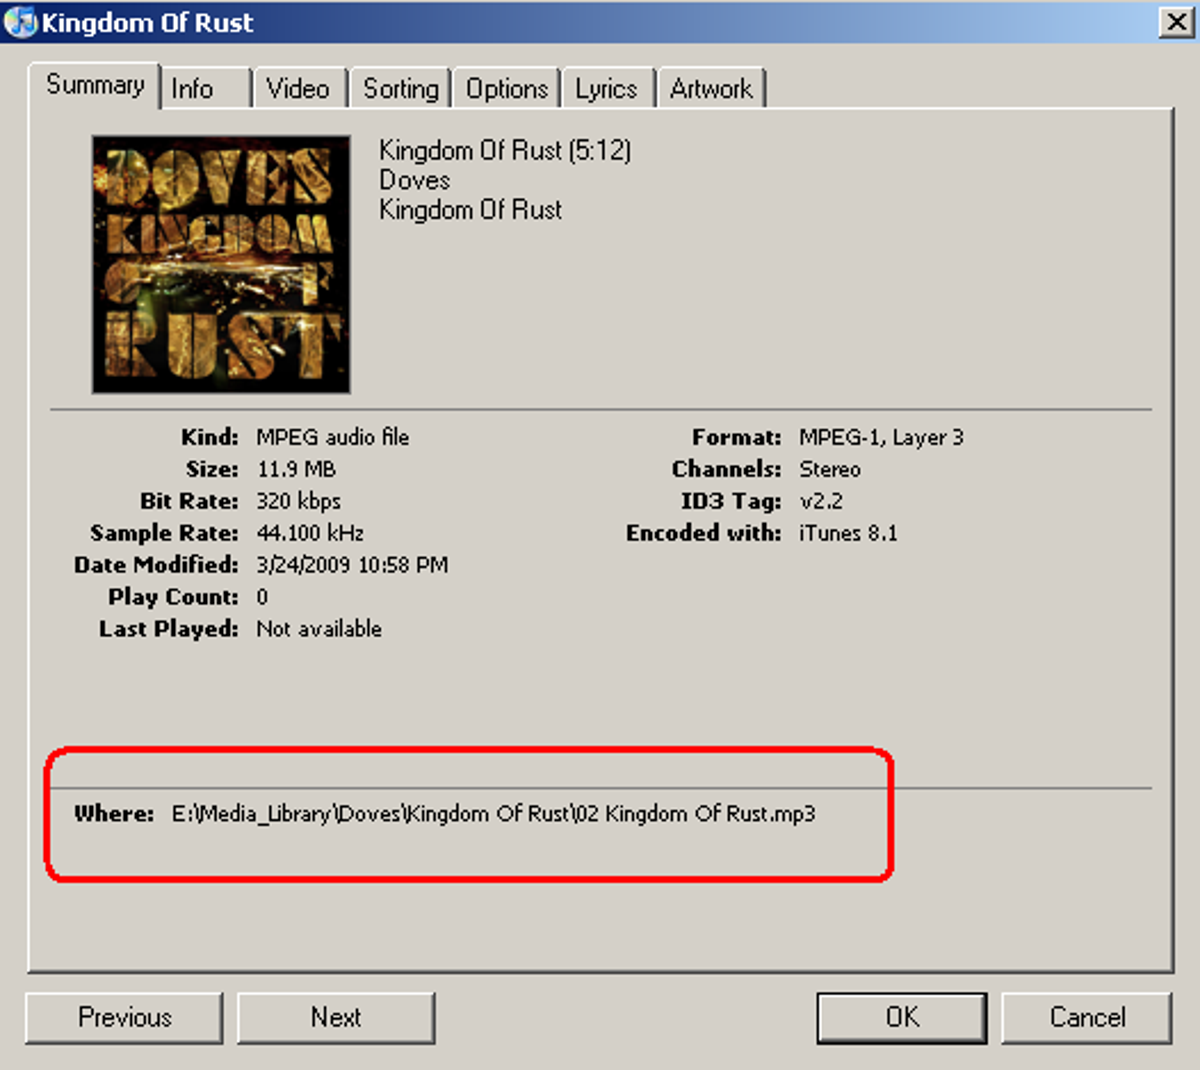
At this point, your iTunes library has migrated to its new location on your external hard drive. To check to see if iTunes is working correctly and pulling your media from the new location, open iTunes, select a song, and select Get Info from the File menu. A window will pop up describing all the attributes of your song file, including the location of the file.
Now remember, iTunes hasn't deleted your old files, it just copied them to a new location. As long as your external hard drive is connected and powered on, iTunes will remember to grab your library from the new location. If your drive isn't connected, iTunes will temporarily default to the original location until your drive is connected again.
This is also a good opportunity to check to make sure your playlists are all intact. Click on a few of your playlists and make sure they're still stocked with music and play correctly. If not, return to Step 2, set your library path to its original location, and restart iTunes.
Step 7: Deleting old files (optional)
Keeping your original iTunes library around as a backup isn't a bad idea, but most people are motivated to move to an external drive for the sake of freeing up space on their computer. If you're feeling confident that your entire iTunes library has been safely copied over to its new location, there's no reason why you can't delete the files in the original folder.
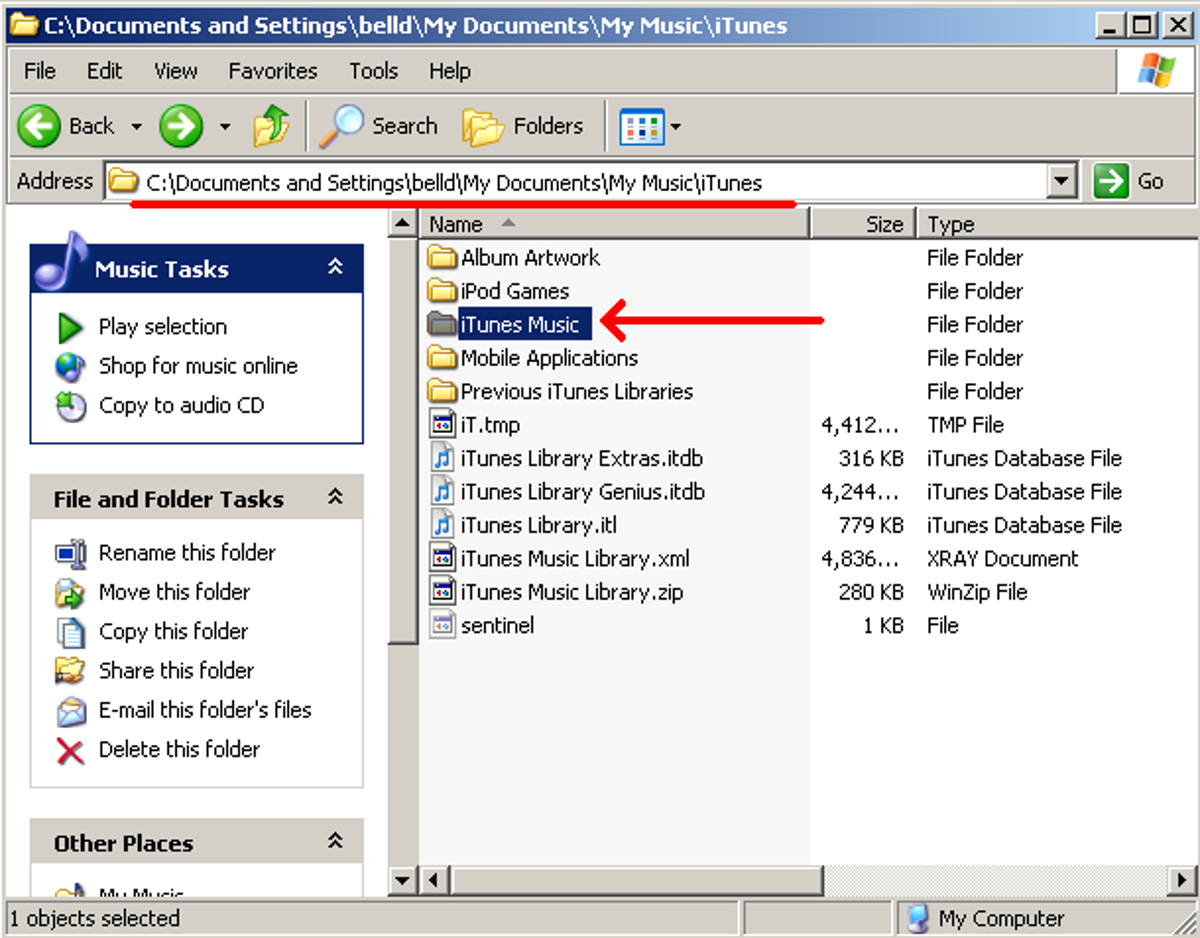
Typically, PC users will find their original iTunes library content in this directory:
C:\Documents and Settings\"USERNAME"\My Documents\My Music\iTunes\iTunes Music
The default iTunes library folder for Mac users is:
/Users/"USERNAME"/Music/iTunes/iTunes Music
Of course, we advise that you be cautious whenever you delete something from your computer. It's never a bad idea to back up your iTunes library using either Time Machine on a Mac or the "Back Up To Disc" feature in the iTunes File menu (located within the Library submenu) on a PC. To be extra cautious, try trashing only a few files at a time from the original location, then launch iTunes and make sure the files you deleted still show up and play properly from their new location.
Be careful not to delete files from within the iTunes application, thinking you're deleting old files. The deleting we're talking about here is from within the Windows or Mac OS file directory. Also, be sure not to delete your "iTunes Library.itl" file if you want to hold on to all the song ratings and playlists you've created over the years.
Bottom line, the only iTunes content you should consider deleting after copying your collection are the files within the iTunes Music, Music, Movies, Audiobooks, Podcasts, or TV Shows folders located on your computer. Other files in the "iTunes" folder surrounding it are all worth holding on to.
Step 8: Dealing with missing data
OK, so you've deleted your old iTunes library and your new library running from the external hard drive is working great. But what happens when you go to run iTunes and your drive isn't connected? Don't panic. iTunes will notice your hard drive isn't connected and look for your library in its old location. Even though your old files are long gone, iTunes will not delete its record of the file simply because it can't be found.
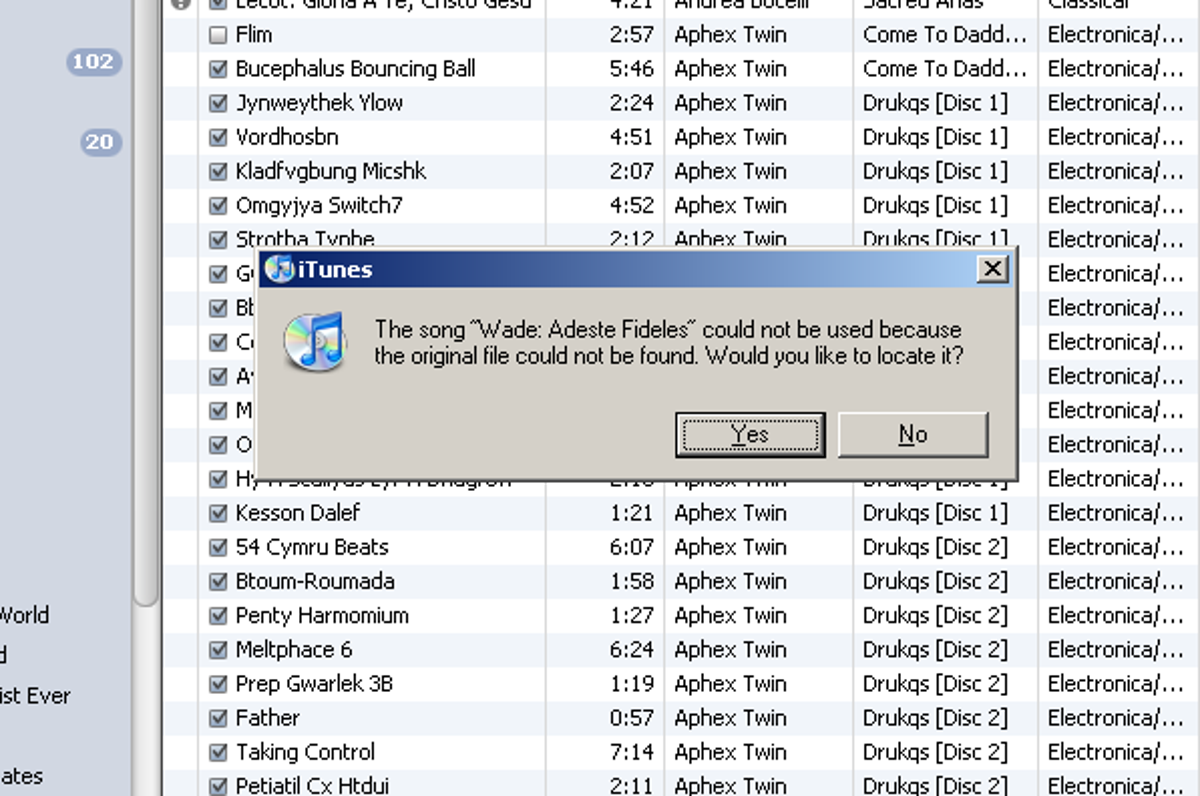
If you try to play one of these missing files in iTunes, you'll get a prompt asking if you'd like to locate the file. Just say no. Once your external drive is connected back to your computer and you've relaunched iTunes, all your files will play just fine.
In the meantime, even with the drive disconnected, you can still use iTunes to stream music, and download new content from the iTunes store. Just remember to use that "Consolidate files" command from Step 5 once you've connected back to your external drive so that any new downloads you made while away from the drive will get copied over to the new location.
More Galleries

My Favorite Shots From the Galaxy S24 Ultra's Camera
20 Photos
Honor's Magic V2 Foldable Is Lighter Than Samsung's Galaxy S24 Ultra
10 Photos
The Samsung Galaxy S24 and S24 Plus Looks Sweet in Aluminum
23 Photos
Samsung's Galaxy S24 Ultra Now Has a Titanium Design
23 Photos
I Took 600+ Photos With the iPhone 15 Pro and Pro Max. Look at My Favorites
34 Photos
