Adobe Photoshop CS5 for photographers
Photoshop CS5 has a number of tools for photographers that help automate what used to be tedious and difficult processes. We've tried out CS5 on a number of photographs of our own to show what the software is capable of.


Pricing
Adobe unveiled its entire Creative Suite 5 yesterday after weeks of teaser videos and screenshots.
For photographers, Photoshop CS5 has a number of tools that help automate what used to be tedious and difficult processes. We've tried out CS5 on a number of photographs of our own to show what the software is capable of.
Editor's note: all examples and tests were conducted using a Beta version of Adobe Photoshop CS5.
Before we delve into some of the new features in CS5, it's worth noting that the software doesn't come cheap for Australian users. Local pricing for Photoshop CS5 is: AU$337 for an upgrade version, or AU$1168 for a full version, a price that's considerably more than what our US counterparts will pay.
Content-Aware fill
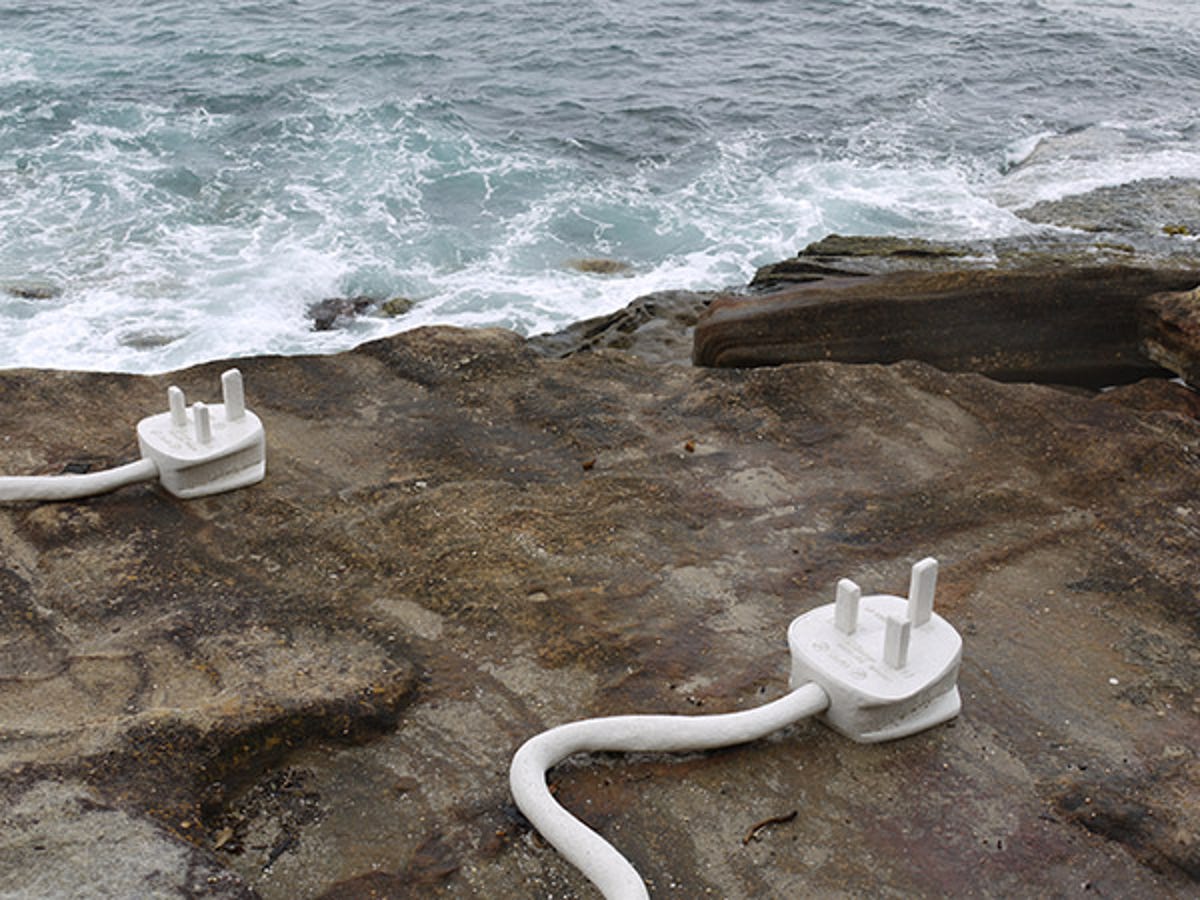
Ever since Adobe's videos went viral a few weeks ago, there's been a lot of awe surrounding this feature. The best way to explain how this feature works is to demonstrate it, as with our photograph above. In this image, we'll try and remove the large sculpture sitting on the rocks by the foreshore.

Content-Aware fill
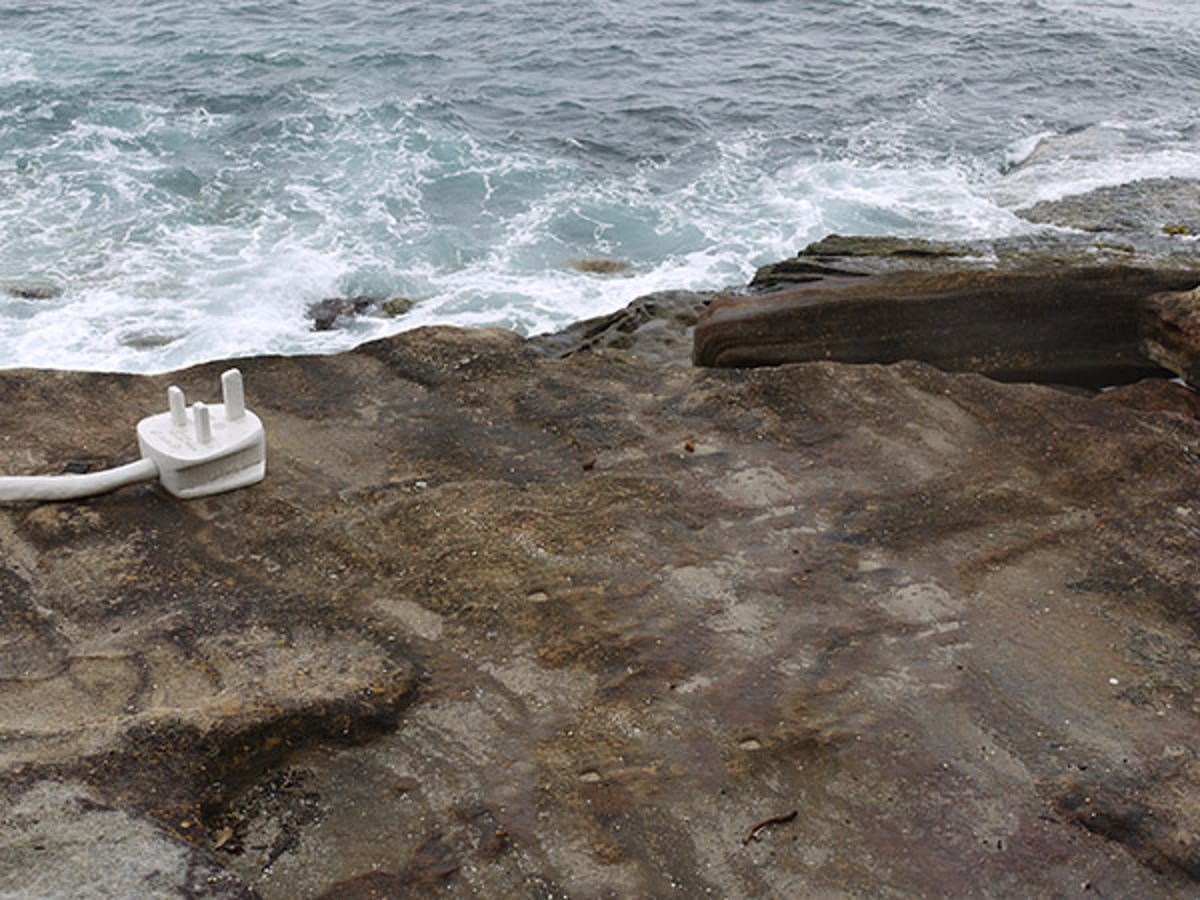
In this example we created a loose selection around the sculpture using the lasso tool and deleted the selection. The fill window opens up, allowing us to choose Content-Aware as the method to fill the gap.
Content-Aware fill
And like magic, Bam! the sculpture is gone. It's not foolproof though, as other examples we tried resulted in odd content fills in the background. It works best with a textured, relatively simple surface in the background.

Lens correction
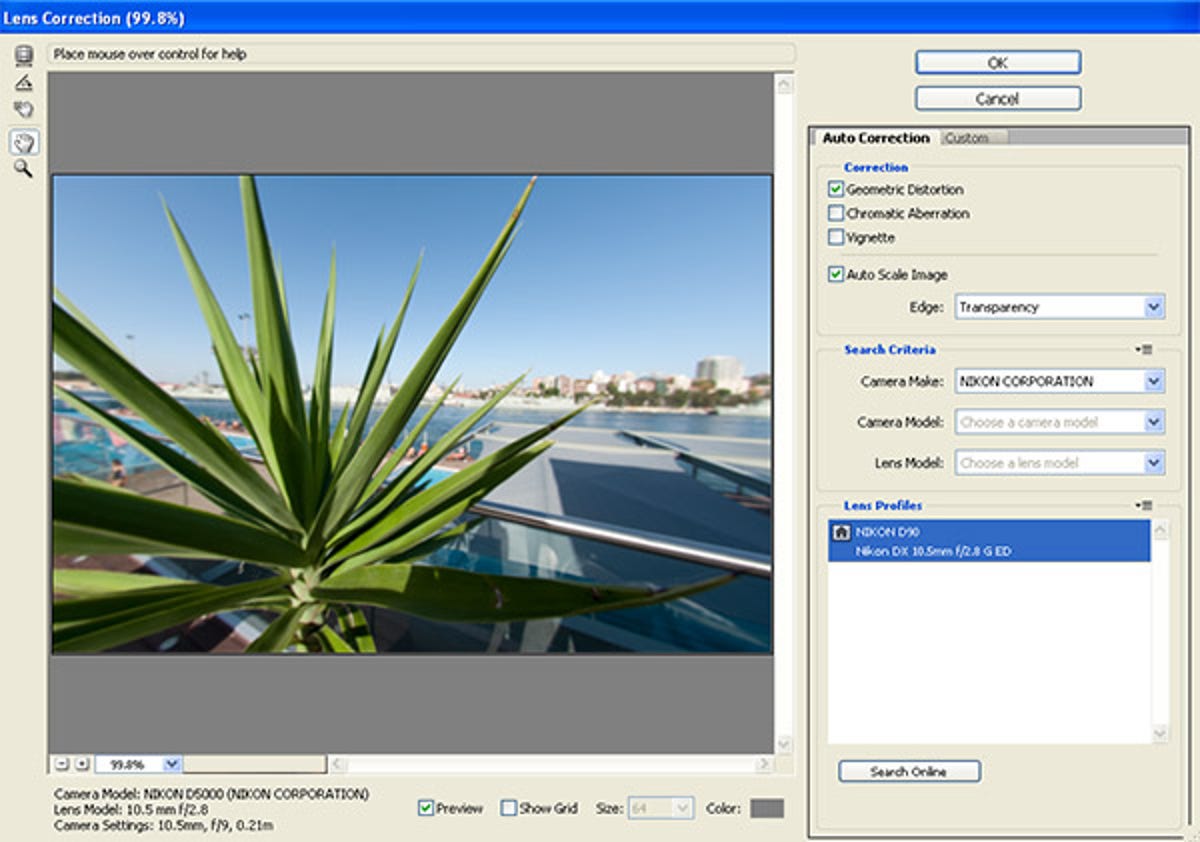
Another feature in CS5 is the ability for the software to correct lens aberrations. In the example above, taken using a fish-eye lens, we'll attempt to use the lens correction feature to straighten things out.
Lens correction
The dialog box shows the information obtained from the photograph's EXIF data, with camera model and lens used. If a profile does not exist for a particular lens or camera combination, users can manually update the software by clicking on the "Search Online" button. A preview of the effect is shown in the pane to the left.

Lens correction
The final image, corrected.
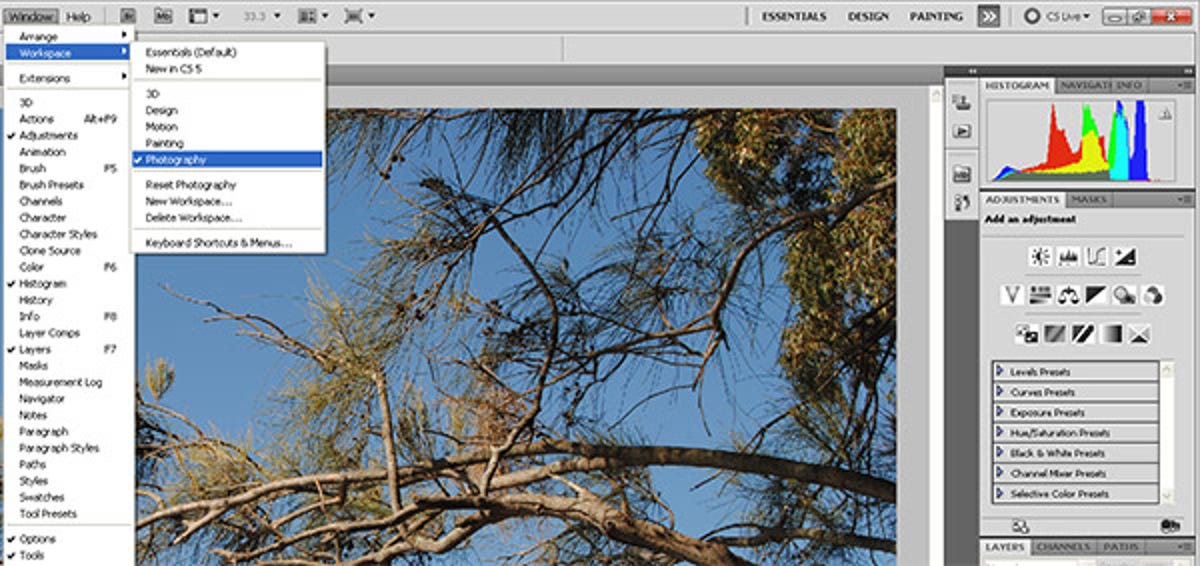
Workspace
Using the preset configurations depending on the task at hand, photographers can switch to the most appropriate layout and display options. The photography option shows the histogram and common editing tools, as above.
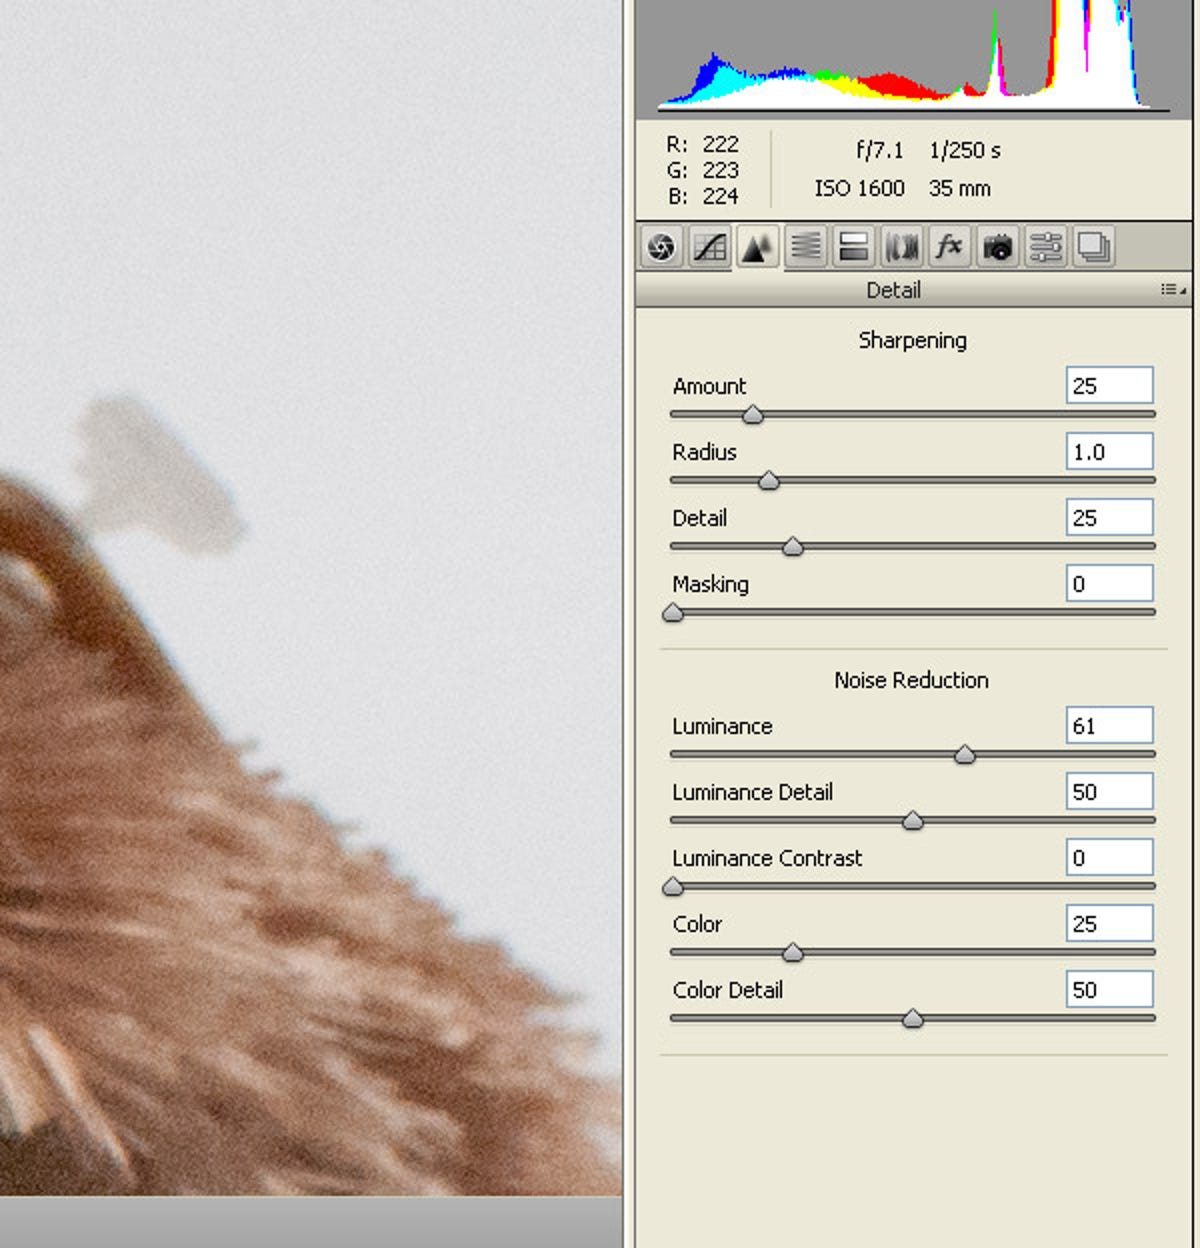
Noise reduction
In Adobe's Camera Raw 6 plug-in, enhanced noise reduction options are in place to address luminance and other forms of digital noise without destroying detail. The shot in the editing window above was taken with a Nikon D3000 at ISO 1600.

Noise reduction
A 100 per cent crop of the previous image, once the noise reduction in Adobe Camera Raw was applied.
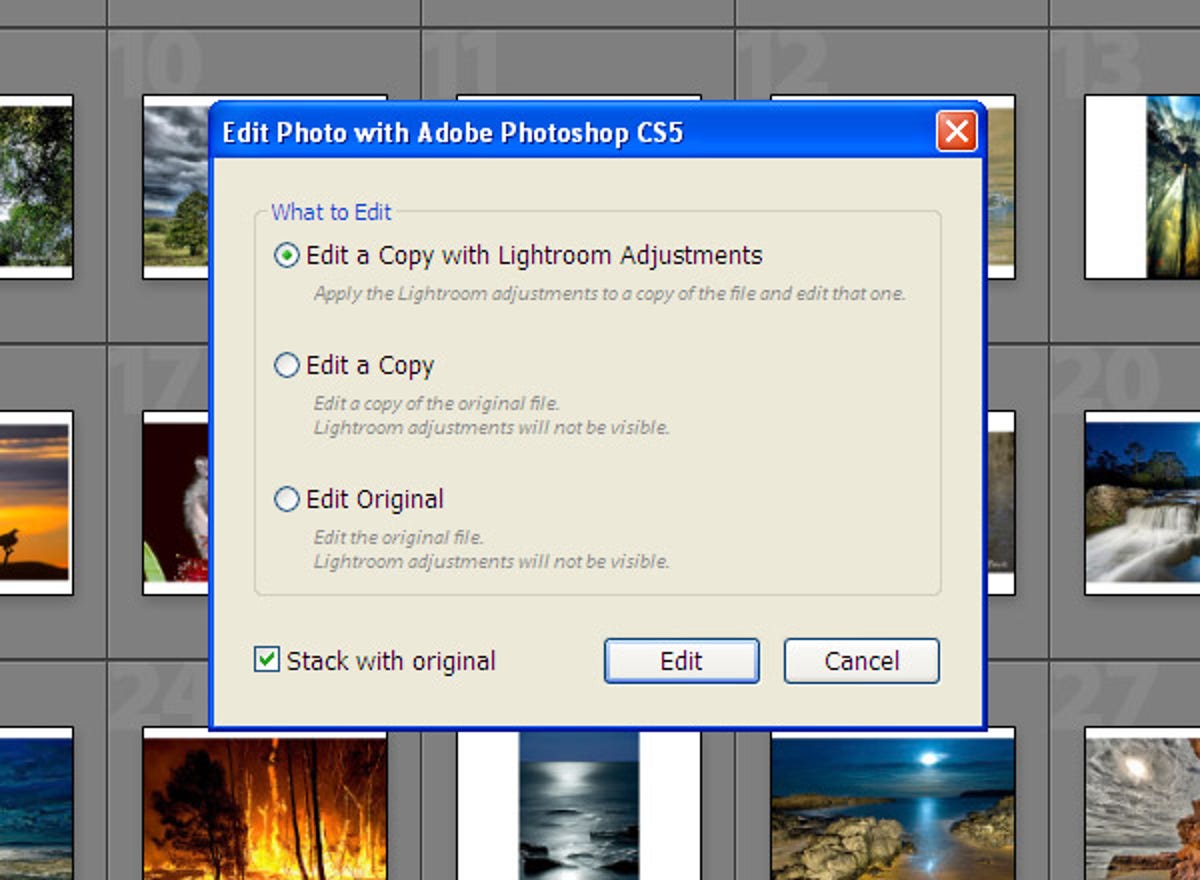
Lightroom
Lots of photographers use Adobe Lightroom to manage their workflow, and CS5 offers tighter integration between the two suites. Images can be edited in Photoshop with the results automatically shown in Lightroom.
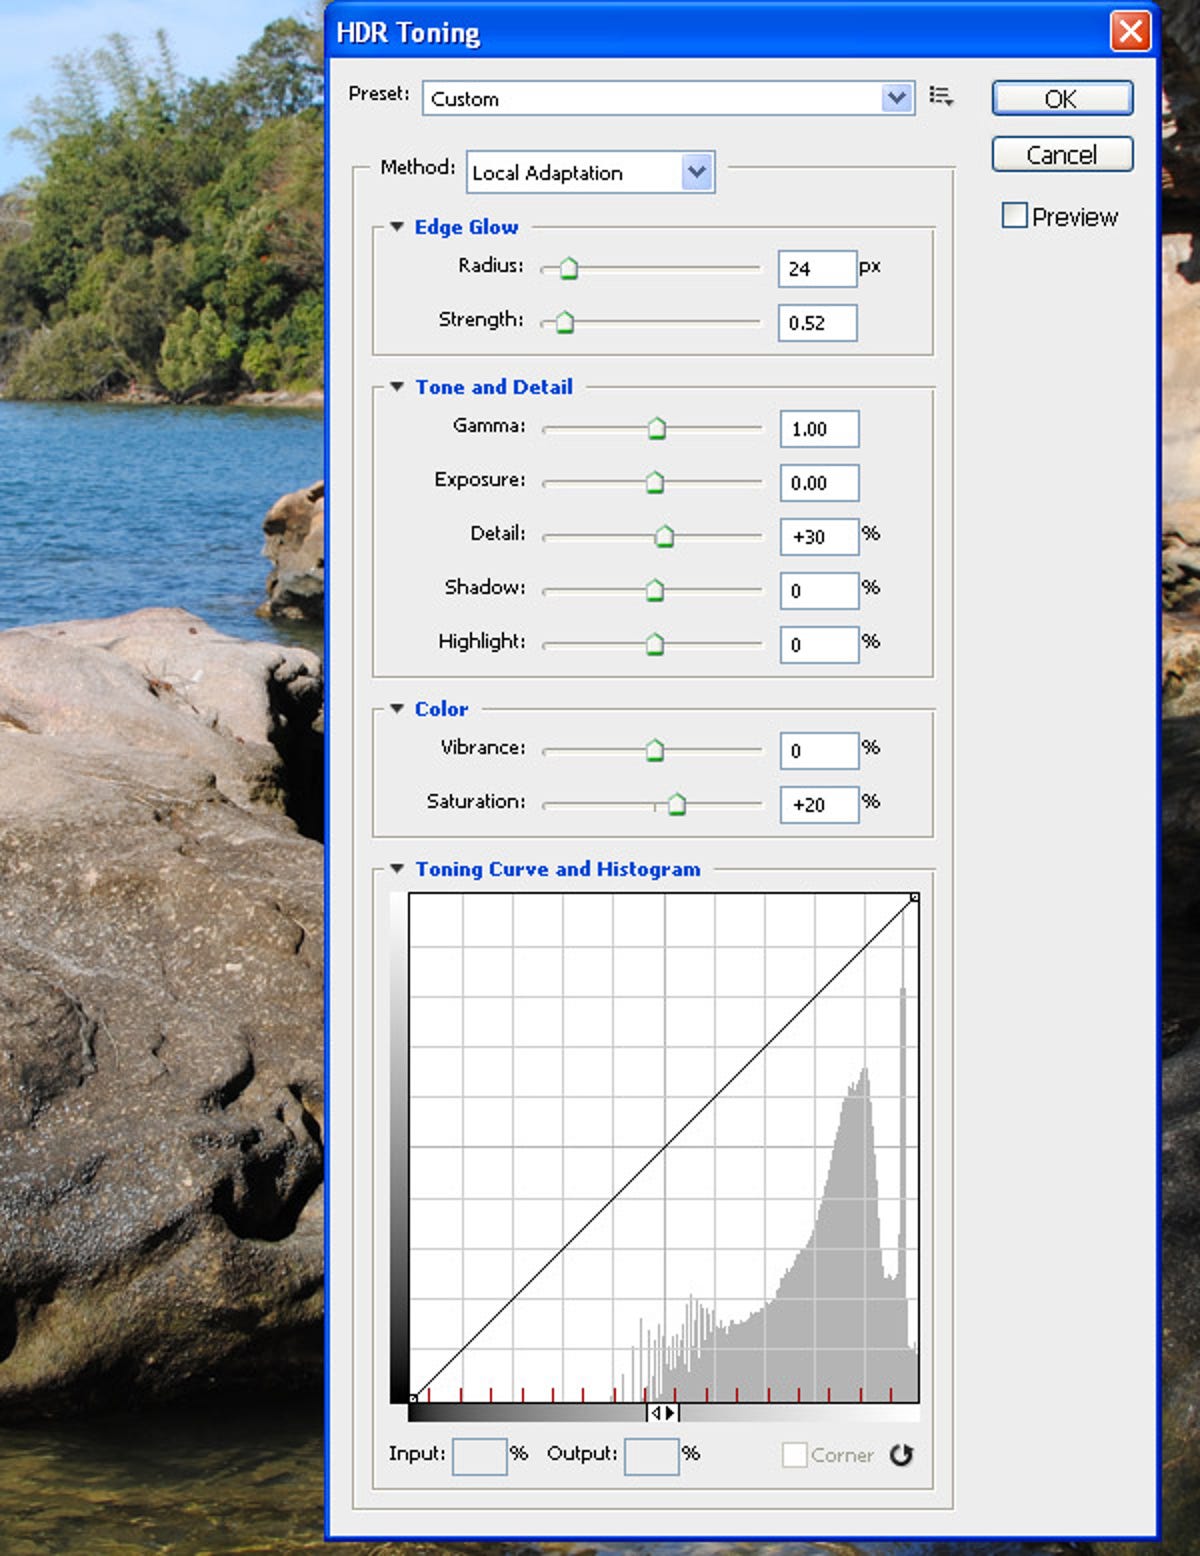
HDR Toning
Photoshop CS5 offers improved HDR tools, including Merge to HDR Pro (for multiple images of the same subject shot with different exposures), and HDR Toning that can be applied to single images (as above). We tried to merge several images together to create a "true" HDR image; however, our test machine (running Windows XP with 2GB RAM) wasn't up to the task.
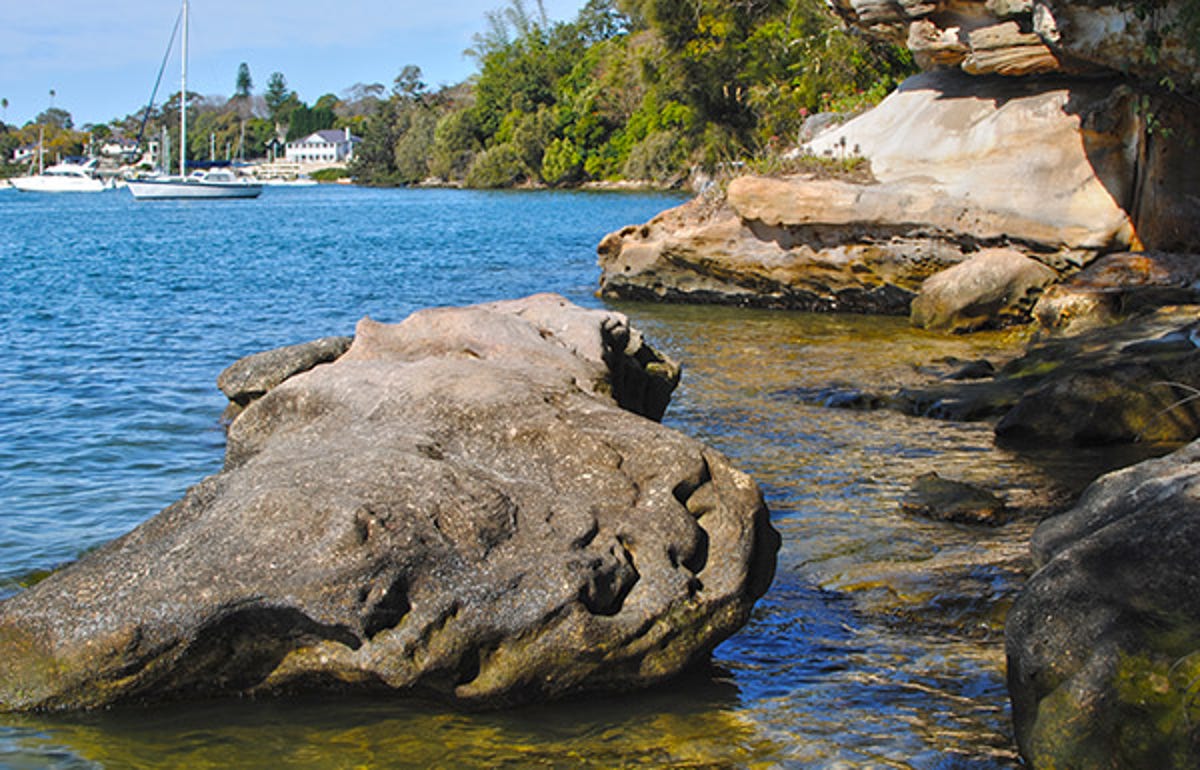
HDR Toning
With the HDR Toning options applied, here's the finished image.
More Galleries

My Favorite Shots From the Galaxy S24 Ultra's Camera
20 Photos
Honor's Magic V2 Foldable Is Lighter Than Samsung's Galaxy S24 Ultra
10 Photos
The Samsung Galaxy S24 and S24 Plus Looks Sweet in Aluminum
23 Photos
Samsung's Galaxy S24 Ultra Now Has a Titanium Design
23 Photos
I Took 600+ Photos With the iPhone 15 Pro and Pro Max. Look at My Favorites
34 Photos
