XP to Vista: How to transfer your data
In this quick guide we'll show you how to transfer your files and settings from an aging Windows XP computer to a new Vista machine.
One of the dreaded tasks of getting a new PC or laptop is updating the shiny new machine with existing contacts, pictures, and files from that old and aging PC running Windows XP. In this quick guide we'll show you how to transfer those files in a snap and prepare your old XP machine for the farm.
If you've purchased a new PC lately then it's more than likely it'll be pre-installed with the relatively new Microsoft Vista operating system. While the new operating system will take a little bit to get used to, users of Windows XP can transfer existing pictures, music, video, business files, email messages and contacts, and internet settings from your older machine to Vista with relative ease.
Unfortunately, applications, fonts and drivers can't be transferred automatically from Windows XP to Vista. Your favourite office suite, games, or accounting software will have to be manually re-installed and probably upgraded to work on the Vista platform. Before forking out any more cash on software applications, check in with the software vendors of your favourite applications as an upgrade may be available for free or a small cost. Enterprise users or power users who really want to keep application settings and need to transfer many desktops at once from XP to Vista are better to investigate the use of Microsoft's User State Migration Tool (USMT).
That aside, there are two options available for regular users to transfer settings; one manual and the other automated. We'll cover both in this article.
The automated way with Windows Easy Transfer
Windows Easy Transfer is a program included for free in Windows Vista which automates the process of moving files from Windows XP to your new computer. While we'll focus on Windows XP in this article it also works for Windows 2000 and transferring files from one Vista computer to another Vista computer.At this point we should note that Windows Easy Transfer shouldn't be mixed up with the "Files and Settings Wizard" which originally shipped with Windows XP. This program worked in the past to upgrade from older operating systems such as Windows 98 to XP but shouldn't be used to upgrade to Vista. Windows Easy Transfer is the upgraded version of the "Files and Settings Wizard".
Before starting you'll need to decide how to migrate your information. Windows Easy Transfer supports the following methods:
- A USB flash drive or external hard disk. This is probably the best option as you should already have one for regular backups. Make sure you have enough spare space before attempting to move your data.
- A networked connection. This is a good option if you have a home network set up via a router already.
- A CD or DVD. This is supported but might be a clumsy option if you have a lot of data.
- A USB cable that can connect two computers. Companies like Belkin sell these for around AU$45.
After you've decided which option is best for you it's time to jump on your new Windows Vista machine. Before starting this process it's best to close all active programs on both machines. On the Vista machine, click the Start icon on the bottom left corner > All Programs > Accessories > System Tools > Windows Easy Transfer.
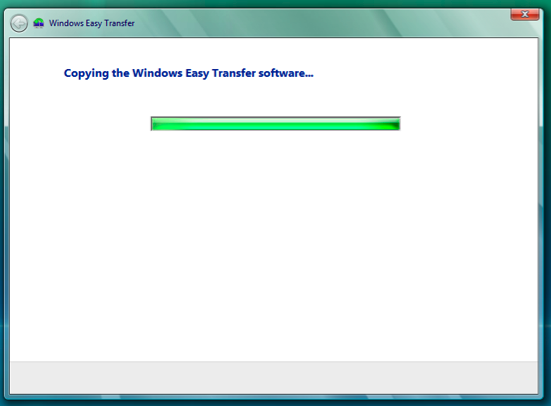
This will open up a new screen where you will be prompted with the following screen:

Click Start new transfer. On the next prompt click "This is my new computer". From there follow the prompts according to which method you have chosen from the list above. Unless you're using a USB crossover cable, the process will involve setting up the Windows Easy Transfer program (file name Migwhiz) on Windows XP, selecting the settings and files to migrate and following the correct prompts. Overall there are too many steps to include in this one article for all of the different options, but a step-by-step guide can be found here.
For the manual way to transfer your data, click on to page two.
Transferring files and settings manually
For some the process of the Windows Easy Transfer program is a bit long and can be done much faster by manual means. This is especially the case if you're looking to move just a few items such as contacts or document folders. To do this you'll need a USB drive or external hard drive with enough spare space on it to move all of your data. Here's a few tips on how to transfer your data from some of the most commonly used programs.Transfer music, video, folders and files manually
With a new computer comes the opportunity to spring clean your digital life. Manually transferring your old files might be a longer task than using an automated program, but it's a good chance to decide what to keep backed up, what to transfer to your new PC, and what to throw away. The easiest way to do this is to use an external storage drive, such as a USB thumb drive or an external drive. Power users who have networked their house with a storage device might want to use that option.
The premise behind manually moving files is the same for whatever option you choose. Simply connect your storage device to the Windows XP PC and copy and paste the folders you want to backup and move to your new Vista machine. As a safe keeper, you may want to keep a formal backup using the Windows XP tools. Click Start > Accessories > System Tools > Backup. Simply follow the user prompts and back-up your data to an external drive of your choice or blank CD.
Transfer Microsoft Outlook settings
- On your Windows XP machine open Microsoft Outlook and click File > Import and Export
- Click Export to File and choose Personal Folder File (.pst)
(Credit: CNET Australia)
- Save the file on your external USB storage device
- Unplug your USB storage device from the Windows XP machine and connect it to the computer running Vista
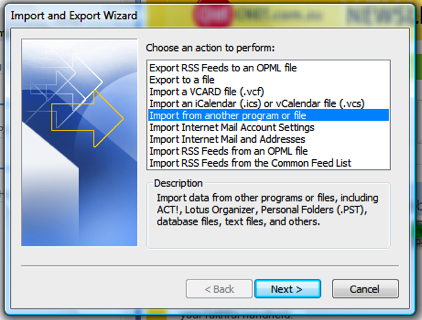
- Open Outlook and click File > Import and Export.
- Click Import from another program or file and select Personal Folder File (.pst)
- Find the .pst file on the USB storage device and click Next
- Select which data you want to import and click Finish to complete the process.
Mozilla Thunderbird and Firefox
The easiest way to transfer your Mozilla Thunderbird email settings and Firefox browser bookmarks is to install and use a utility called MozBackup. In this case, you'll need to install the software on both your old XP machine and new Vista PC. This nifty tool works by backing up your Thunderbird and Firefox profiles into a single file (.pcv) and easily importing them on your new machine.
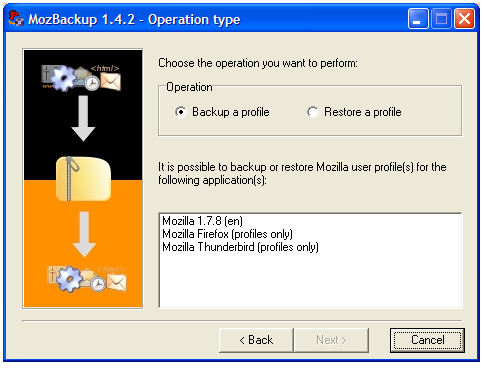
To export your data using MozBackup simply download and install the utility on the Windows XP PC, follow the user prompts, and save the .pcv file to your USB drive. On your new Vista computer, install Thunderbird and launch MozBackup and choose the "Restore" option. Follow the prompts and import the saved .pcv file from your external hard drive. Once the MozBackup has finished, launch Thunderbird and you will find the restored data should be ready to use.
Users of the Firefox browser may want to try a nifty plug-in tool called Foxmarks, which syncs bookmarks across multiple computers automatically. Simply install the browser plug-in on each computer you want to sync your bookmarks to.
Internet Explorer
To save your Internet Explorer bookmarks, or "Favourites" as the browser calls them, takes a few quick steps.
- Open IE on your Windows XP machine and click File > Import and Export
- Select Export Favorites
- Select the favourites you want to export or select all of your favourites and save it to the external USB drive
- Connect your USB storage device to the Windows Vista machine and fire up IE
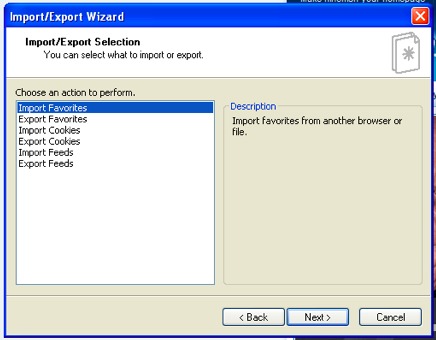
- Click File > Import and Export and select Import Favorites
- Select the folder on your external USB storage device where you saved the bookmarks (by default it is bookmark.htm) and click Finish.
Cleaning up your XP machine
Once you've salvaged the useful information from your old PC don't just throw it to the curb. If it's still usable you may want to give it away to a charitable organisation or sell it on eBay. If it can't be saved then you might want to investigate whether it can be recycled. Many vendors and local councils these days offer services to pick up and recycle used computer equipment.
However, before passing your computer to anyone else you need to delete your personal files. There's a lot of information stored on a computer over its lifespan and there's a very real risk of other users accessing your personal information and using it in a malicious way. The most secure way to prevent data theft from your old computer is to remove the hard drive and physically destroy it. We've found one firm and steady blow with a hammer will do the trick. Multiple blows will obviously decrease the security risk of your data ever being retrieved again. Of course, this will make the computer rather useless to anyone else unless they buy a new hard drive.
If you do trust the recipient of your old computer then it's a good idea to follow these steps:
- Delete all of your personal files and folders with a free tool like SuperShredder which deletes files completely from your hard drive. Don't just put the files in Windows XP's Trash folder.
- To delete everything on the disk including the operating system then use a free utility such as CMRR's free Security Erase Utility. (Follow the instructions in the "read me" file.)
- If you have the original Windows XP CD then re-install the operating system.
That should conclude our short article on upgrading from Windows XP to Vista. Feel free to put your feedback or tips in the comments section below.